FEASTS AND FOTOS

  • Home
  • About
  • Happenings
  • Contact
You are here: Home / Archives for Susan

Peach and Blueberry Crisp

January 2, 2009 by Susan

CrumbleFinalR

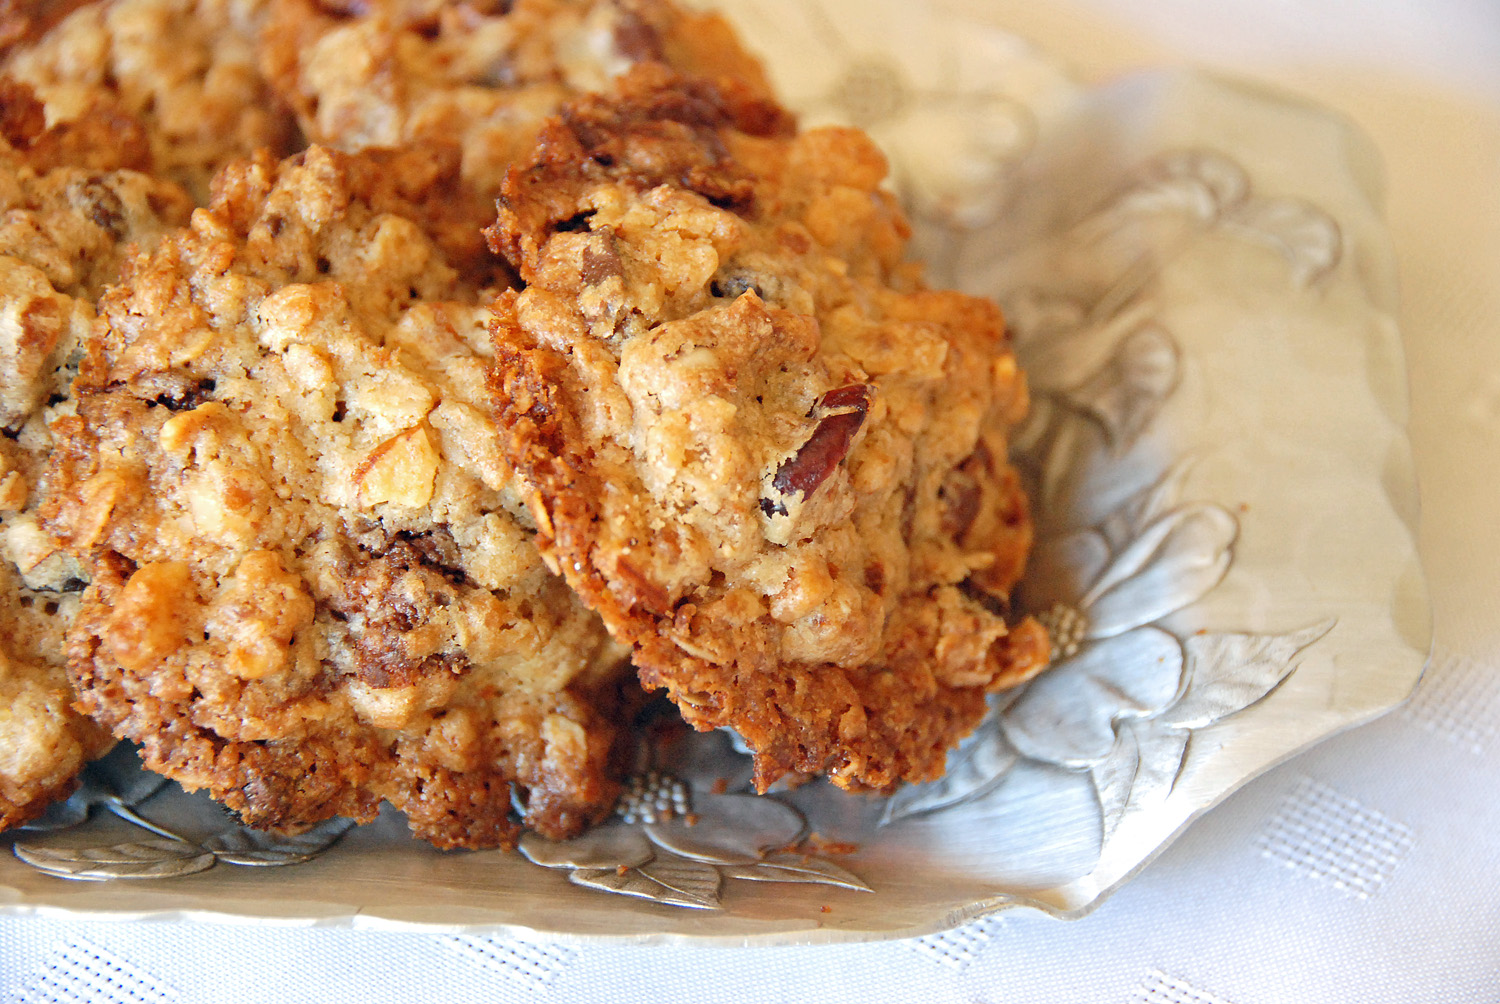
Is it a crisp?  Or is it a crumble?  Never quite understood the exact difference between the two, probably because they are so similar!  Apparently, a crumble has a ‘struesel’ topping whereas the crisp has a butter, sugar and oat topping.  So the inclusion of oats is what makes a crisp a crisp.

I know that it’s winter and not exactly peach and blueberry season, but I just love this combination for a crisp.  A more season appropriate crisp would be apple and pear, which I do make alot and is quite delicious.  Here’s what I love about crisps…you can use any combination of fruit you like.  It’s quite versatile.  And, you can make them ahead and keep them in the fridge, baking off when needed.  Lastly, this dessert is mostly fruit, so you can feel good about eating a second helping!

This recipe is adapted from Anne Burrell.  I like it because it’s not overly sweet and it doesn’t call for a ton of butter.  Also, I particularly like the addition of chopped almonds in the topping.  Anne has her own show now on the Food Network.  She’s a little spunky – and I like it.  I have also been to Centro Vinoteca, where she is the chef, and the food is very yummy.  It’s an open kitchen, so I was able to see her in there, cooking away, which is kinda cool.

This is what you will need to make this crisp, serving 6…

Filling

4-5 peaches, peeled and sliced

1 container blueberries

3 tablespoons all-purpose flour

1/4 cup tightly packed brown sugar

2 tablespoons sugar

1/2 teaspoon vanilla extract

1/2 small lemon, juiced

Pinch kosher salt

Topping

1 1/4 cups all-purpose flour

1/2 cup rolled oats

1/2 cup brown sugar

1/2 cup sugar

1/4 stick cold unsalted butter, cut into pea sized pieces

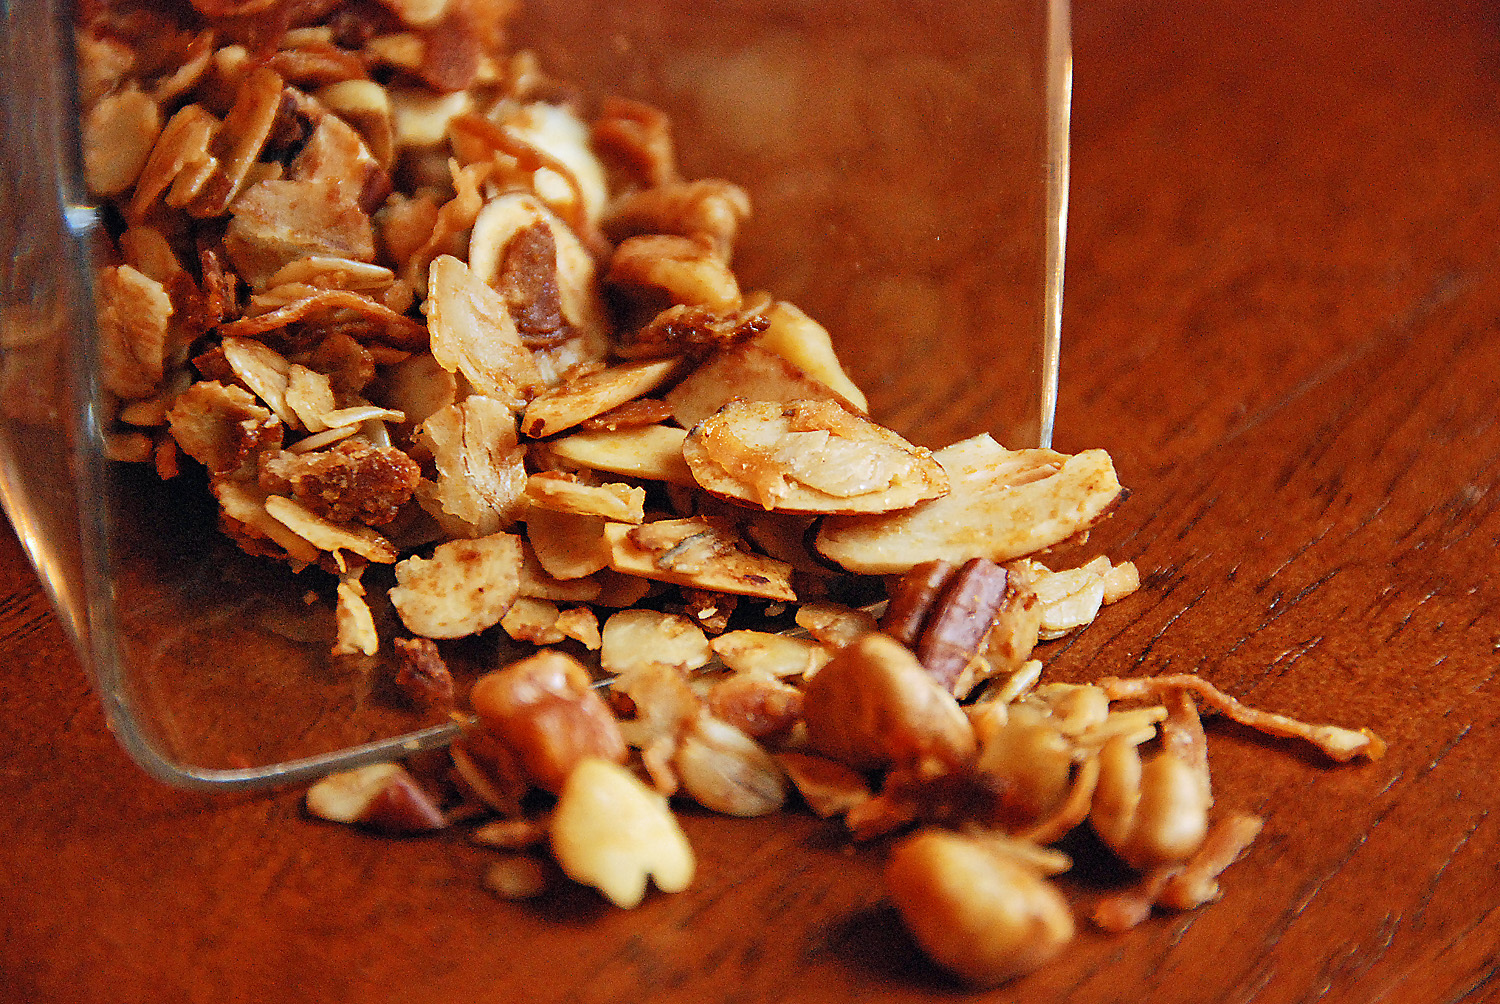
1/2 cup sliced almonds

Pinch kosher salt

1 to 2 tablespoons cold water

Method

Preheat the oven to 350 degrees.

For the filling – toss the peaches and blueberries in a large bowl with the lemon juice. Add the rest of the ingredients and stir to combine. Pour the filling into a baking dish.

For the topping – combine all of the ingredients in a food processor except the water. Pulse until combined, this will take about 30 seconds. Add water, 1 tablespoon at a time until mixture starts to pull together.  You will know it’s ready when you can pinch a small amount of the mixture and it sticks  together.

Loosely sprinkle the topping over the fruit.  Bake for roughly 25-35 minutes, or until hot and bubbly.

Savor every spoonful because before you know it….

CrumbleEmptyPlateFinalR


Peach and Blueberry Crisp
 
Print
Author: Feasts And Fotos
Ingredients
  • 4-5 peaches, peeled and sliced
  • 1 container blueberries
  • 3 tablespoons all-purpose flour
  • ¼ cup tightly packed brown sugar
  • 2 tablespoons sugar
  • ½ teaspoon vanilla extract
  • ½ small lemon, juiced
  • Pinch kosher salt
  • Topping
  • 1¼ cups all-purpose flour
  • ½ cup rolled oats
  • ½ cup brown sugar
  • ½ cup sugar
  • ¼ stick cold unsalted butter, cut into pea sized pieces
  • ½ cup sliced almonds
  • Pinch kosher salt
  • 1 to 2 tablespoons cold water
Method
  1. Preheat the oven to 350 degrees.
  2. For the filling - toss the peaches and blueberries in a large bowl with the lemon juice. Add the rest of the ingredients and stir to combine. Pour the filling into a baking dish.
  3. For the topping - combine all of the ingredients in a food processor except the water. Pulse until combined, this will take about 30 seconds. Add water, 1 tablespoon at a time until mixture starts to pull together. You will know it's ready when you can pinch a small amount of the mixture and it sticks together.
  4. Loosely sprinkle the topping over the fruit. Bake for roughly 25-35 minutes, or until hot and bubbly.
3.2.2802

Filed Under: Uncategorized Tagged With: blueberry, crisp, peach

Spinach and Chickpea Curry

December 26, 2008 by Susan


ChickPeaCurryFixR

When I came across this recipe I immediately thought I had to try it.  I had been thinking about attempting to cook an Indian dish at home for some time and this one seemed so simple and quick I felt comfortable giving it a try – if it didn’t turn out well I would not have invested much time and energy into it.  I hate wasting time and energy!

Not only is this dish super fast to whip up, it’s healthy.  The chickpeas are high in fiber and a great source of protein.  And thanks to Popeye we all know the health benefits of spinach by now!

This dish goes so well with lamb.  I like to buy the small loin lamb chops and broil them in the oven for about 10 minutes.  I serve this curry alongside the lamb – it’s spectacular.  I have also spooned this mixture over a piece of Tilapia and it was very tasty.  This spinach and chickpea curry would also be fantastic as a vegetarian meal all on it’s own served over basmati rice.

This is what you will need to serve as a side dish for 4-6 people…

Recipe

1 cup coarsely chopped onion

1 tablespoon ground ginger

1 teaspoon olive oil

1 teaspoon red curry powder

1/8 teaspoon garam masala

1 19-oz can chick peas, drained and rinsed

1 14-oz can diced tomatoes with juice

4-5 cups spinach leaves

chicken stock (optional)

Method

In a food processor, combine onion and ginger,  pulse until minced.

Heat oil in a large skillet.  Add onion mixture, curry powder and garam masala to the pan and saute 3 minutes.  Add chickpeas and tomatoes to the pan, crushing some of the tomatoes with the back of your spoon.  Simmer for 2-3 minutes.  Stir in spinach and simmer until wilted.

If you would like the mixture to be more liquidy, feel free to add some chicken stock (or vegetable stock).  I prefer mine on the thicker side.

That’s it, really.  So fast.  So simple.  So delicious.


Spinach and Chickpea Curry
 
Print
Author: Feasts And Fotos
Ingredients
  • 1 cup coarsely chopped onion
  • 1 tablespoon ground ginger
  • 1 teaspoon olive oil
  • 1 teaspoon red curry powder
  • ⅛ teaspoon garam masala
  • 1 19-oz can chick peas, drained and rinsed
  • 1 14-oz can diced tomatoes with juice
  • 4-5 cups spinach leaves
  • chicken stock (optional)
Method
  1. In a food processor, combine onion and ginger,  pulse until minced.
  2. Heat oil in a large skillet.  Add onion mixture, curry powder and garam masala to the pan and saute 3 minutes.  Add chickpeas and tomatoes to the pan, crushing some of the tomatoes with the back of your spoon.  Simmer for 2-3 minutes.  Stir in spinach and simmer until wilted.
  3. If you would like the mixture to be more liquidy, feel free to add some chicken stock (or vegetable stock).  I prefer mine on the thicker side.
3.2.2802

Filed Under: Main Dishes, Sides and Sauces Tagged With: chickpea, curry, ginger, spinach

Pumpkin Spice Bread

December 13, 2008 by Susan

PumpkinBreadSliceFinalR

Another loaf!  If you have read some of my past posts on here, you already know that I love making loaves.  I always make this one in the fall and winter.  I am aware that there are so many various recipes for pumpkin bread out there, it is difficult to pick which is the best.  I grew up eating my mom’s pumpkin bread, she bakes it in coffee cans and the final product is quite dense and much darker in color than the one I make.  Both are great, it’s really a personal choice.  I think I might like this pumpkin bread slightly better than the one I grew up eating.  I find this version lighter and more ‘cake’ like.  This pumpkin bread is outstanding served warm right out of the oven.  It is still wonderful if eaten at room temperature.

Here is what you will need to make one loaf…

Recipe

1 and 2/3 cups flour (I usually use 1 cup white flour and 2/3 cup whole wheat flour)

1 teaspoon baking soda

3/4 teaspoon ground cinnamon

1/4 teaspoon ground ginger

1/4 teaspoon ground cloves

1/4  teaspoon salt

1 and 1/3 cups sugar

1/3 cup canola oil

1 cup plus 1 and 1/2 tablespoons canned unsweetened pumpkin

1 large egg

Method

Preheat oven to 350 degrees.  Grease and flour a loaf pan (roughly 8×4).

Mix first six ingredients together in a bowl with a whisk until well combined.

Combine sugar, oil and pumpkin in the bowl of electric mixer.  Beat at medium speed until smooth.  Add egg, beating until well blended.  Gradually add dry ingredients, beating at a low speed until blended.  Transfer batter to loaf pan.

Bake for 1 hour and 5 minutes or until loaf is golden and a wooden pick inserted in the center comes out clean.  Let cool in pan on a wire rack for 15 minutes then remove from pan.

I just love that pumpkiny color!  I hope you enjoy this as much as I do.

This recipe is adapted from Cottage Living.


Pumpkin Spice Bread
 
Print
Author: Feasts And Fotos
Ingredients
  • 1 and ⅔ cups flour (I usually use 1 cup white flour and ⅔ cup whole wheat flour)
  • 1 teaspoon baking soda
  • ¾ teaspoon ground cinnamon
  • ¼ teaspoon ground ginger
  • ¼ teaspoon ground cloves
  • ¼  teaspoon salt
  • 1 and ⅓ cups sugar
  • ⅓ cup canola oil
  • 1 cup plus 1 and ½ tablespoons canned unsweetened pumpkin
  • 1 large egg
Method
  1. Preheat oven to 350 degrees.  Grease and flour a loaf pan (roughly 8x4).
  2. Mix first six ingredients together in a bowl with a whisk until well combined.
  3. Combine sugar, oil and pumpkin in the bowl of electric mixer.  Beat at medium speed until smooth.  Add egg, beating until well blended.  Gradually add dry ingredients, beating at a low speed until blended.  Transfer batter to loaf pan.
  4. Bake for 1 hour and 5 minutes or until loaf is golden and a wooden pick inserted in the center comes out clean.  Let cool in pan on a wire rack for 15 minutes then remove from pan.
3.2.2802

Filed Under: Breakfast, Sweets Tagged With: bread, breakfast, loaf, pumpkin, spice, sweets

Pasta With Lentils

December 6, 2008 by Susan

PastaLentilsFinalR

The Italian name for this deliciousness is Pasta e Lenticchie.  The way I see it, this dish should really be called Lentils with Pasta.  It is mostly lentils with some pasta thrown in, not the other way around.  It is an Italian dish that I grew up eating, my mom cooked this for us all the time.  It is traditionally from the Campania region of Italy, specifically the Naples area, which is where my family is from.

I can’t quite decide if this is more of a stew or a soup.  I think it is a mixture of both.  A stoup!  It is quite hearty and as most of you  might already know, lentils are super healthy.  They are loaded with folate, fiber and potassium and are an excellent source of protein.

I put my own slight spin on this recipe, it is not the exact same one my mother makes.  However, it’s very close.  I saute my vegetables first in some olive oil (she doesn’t) and I thought to add the bay leaves and thyme.  Basically, you make a big pot of the lentils and you store it in the fridge.  When you want to eat it, you boil up some pasta and then add the lentils to the pasta.  If you add all the pasta into the lentils and store it that way, the pasta tends to get mushy.  About the pasta – you can use any small shape you like.  Normally, this is made with spaghetti broken into 1 inch pieces, or the little elbows that I used in the photo above.  Both are fantastic.  I usually get the whole wheat or multi grain pasta.

Once the pot of lentils is made, this is a very quick and easy meal that you can enjoy all week long for lunch, dinner or a comforting snack on a cold day.

Here is what you will need to serve 4-6…

Recipe 

2 cups lentils (picked through and rinsed)

3 cups water

3 cups chicken stock (or vegetable stock)

2 medium carrots, diced

3 stalks celery, diced

1 large onion, diced

2 cloves garlic, minced

1 teaspoon pepperoncino

2 bay leaves

1 tsp thyme

4 whole peeled tomatoes, chopped with their juice

chopped parsley

short/small pasta (shape of your choice)

parmigiano reggiano or pecorino romano cheese

Method 

Coat the bottom of a dutch oven with olive oil and saute onions, carrots and celery for about 5 minutes or until they begin to soften.  Add garlic and pepperoncino and saute for one minute.  Add lentils and stir one minute.  Add water, stock, tomatoes, bay leaves and thyme and stir to combine.  Bring to a boil, reduce heat to a simmer , cover and cook for approximately 70-90 minutes or until the lentils are tender.  Lentils are done!

For reheating/serving:  boil water and cook the pasta until just about done (one minute shy of the directed cooking time).  Drain pasta, reserving some of the pasta water.  This is important!  The lentils thicken up and you most likely will have to add some pasta water to the mixture to loosen it up a bit.  Add some lentils to the pasta, as much as you like and depending on how many people you are serving.  Stir and cook together for one minute.  Turn off heat and add a handful of fresh parsley.  I love alot of parsley in this, it really give a nice, fresh flavor.  Top with a spoonful of cheese and enjoy!


Pasta With Lentils
 
Print
Author: Feasts And Fotos
Ingredients
  • 2 cups lentils (picked through and rinsed)
  • 3 cups water
  • 3 cups chicken stock (or vegetable stock)
  • 2 medium carrots, diced
  • 3 stalks celery, diced
  • 1 large onion, diced
  • 2 cloves garlic, minced
  • 1 teaspoon pepperoncino
  • 2 bay leaves
  • 1 tsp thyme
  • 4 whole peeled tomatoes, chopped with their juice
  • chopped parsley
  • short/small pasta (shape of your choice)
  • parmigiano reggiano or pecorino romano cheese
Method
  1. Coat the bottom of a dutch oven with olive oil and saute onions, carrots and celery for about 5 minutes or until they begin to soften.  Add garlic and pepperoncino and saute for one minute.  Add lentils and stir one minute.  Add water, stock, tomatoes, bay leaves and thyme and stir to combine.  Bring to a boil, reduce heat to a simmer , cover and cook for approximately 70-90 minutes or until the lentils are tender.  Lentils are done!
  2. For reheating/serving:  boil water and cook the pasta until just about done (one minute shy of the directed cooking time).  Drain pasta, reserving some of the pasta water.  This is important!  The lentils thicken up and you most likely will have to add some pasta water to the mixture to loosen it up a bit.  Add some lentils to the pasta, as much as you like and depending on how many people you are serving.  Stir and cook together for one minute.  Turn off heat and add a handful of fresh parsley.  I love alot of parsley in this, it really give a nice, fresh flavor.  Top with a spoonful of cheese and enjoy!
3.2.2802

Filed Under: Main Dishes, Pasta Tagged With: dinner, healthy, lentils, lunch, pasta, soup, stew

Cauliflower Mashed Potatoes

December 1, 2008 by Susan

CauliflowerMashedFinalR

I love eating mashed potatoes as much as anyone.  They are a perfect side dish to just about any meal.  However, sometimes mashed potatoes can be…well…a little heavy.  This recipe is a terrific, lighter alternative to the traditional mashed potatoes.  The major ingredient is cauliflower, but no one would even know just by looking at this.  I like my mashed potatoes to still have some texture to it, as opposed to being whipped/pureed.  You can add more milk and butter if you want a creamier version.

Here’s what you will need to serve 4…

Recipe

1 cauliflower head, cut into pieces

3 potatoes, yukon gold or idaho, peeled & cut into medium chunks

1/4 cup  – 1/2 cup nonfat milk, warm (use more if you want it to be more creamy)

1-2 tablespoon butter

fresh parsley, chopped

salt & pepper

Method

Steam cauliflower for about 15 minutes, until tender.  In a medium sized pot, bring potatoes to a boil.  Boil for about 10 minutes, or until soft.  Drain potatoes and return them to the pot.  Mash potatoes and cauliflower together.  Add milk and butter and continue mashing until it reaches your desired consistency.  Add salt & pepper to taste.  Sprinkle in parsley and gently mix to combine.


Cauliflower Mashed Potatoes
 
Print
Author: Feasts And Fotos
Ingredients
  • 1 cauliflower head, cut into pieces
  • 3 potatoes, yukon gold or idaho, peeled & cut into medium chunks
  • ¼ cup  - ½ cup nonfat milk, warm (use more if you want it to be more creamy)
  • 1-2 tablespoon butter
  • fresh parsley, chopped
  • salt & pepper
Method
  1. Steam cauliflower for about 15 minutes, until tender.  In a medium sized pot, bring potatoes to a boil.  Boil for about 10 minutes, or until soft.  Drain potatoes and return them to the pot.  Mash potatoes and cauliflower together.  Add milk and butter and continue mashing until it reaches your desired consistency.  Add salt & pepper to taste.  Sprinkle in parsley and gently mix to combine.
3.2.2802

Filed Under: Sides and Sauces, Uncategorized Tagged With: cauliflower, mashed, potatoes

Brussel Sprouts and Bacon Hash

November 20, 2008 by Susan

brusselsproutsrawresize

When I was growing up brussels sprouts got such a bad rap.  Hated by many.  To be honest my mother never really made them so my only experience eating them was outside the home.  And from what I remember, I didn’t like them.  Flash forward to today and I’m making them!  And I love them.  Why on earth do so many people despise brussels sprouts?  I’ve come to realize it’s most likely because they were prepared poorly and with a complete lack of creativity.  Most people probably just boiled them and threw them in a bowl.

I do like to eat healthy and maintain a healthy lifestyle, so it seems logical I would one day incorporate brussels sprouts into my cooking.  These adorable mini cabbages are loaded with vitamins, potassium, calcium and are very high in fiber, so they help to fill you up.  And as luck would have it, they are low in fat and calories.  November is prime time for brussels sprouts, so the markets are filled with them.  You can see from the above photo that I took at the Union Square Farmer’s Market how they look before they are picked and presented to you in the grocery store.  Quite dramatic, right?

Tyler Florence was the one that inspired me to make this dish.  Last month my cousin and I got tickets to the NYC Food & Wine Festival and saw Tyler at a cooking demonstration.  I love his shows and recipes and let’s face it, the guy’s adorable.  We just loved him in person, he has such a great personality and is quite funny.  Here’s a picture of him cooking away…

tylercuttingresize

One of the recipes he prepared that day (and what he’s actually preparing in this photo) was this brussels sprouts and bacon hash number.  It sounded interesting so I tried it at home and have to say it was really good.  Actually, it was great.  Yes, a brussels sprouts dish was great.  I kid you not.

In this recipe the sprouts are actually sliced, which is a fantastic idea.  I bet if you didn’t tell people this was a brussels sprouts dish they might not even notice!  And there’s bacon in here – you can never go wrong with bacon.  I did make one substitution, his recipe calls for pearl onions, I used shallots instead.  That’s the only ingredient change I made.

Here is what you will need to make my version of this dish…

Recipe

5-6 slices of bacon (I use low sodium bacon), cut in a medium dice

1 pint of brussels sprouts

2 springs fresh thyme

6-8 fingerling potatoes (or small white potatoes), cut in half and then in half again

2 large shallots

1/2 cup low sodium chicken stock

1 tbsp balsamic vinegar

1-2 tbsp flat leaf parsley, chopped

Method

Saute bacon in a large pan until just starting to crisp.  Remove from pan and discard 1/2 of the fat renderings.  To the renderings add the brussels sprouts, shallots, potatoes and thyme and stir.  Season with pepper and a little bit of salt (the bacon is salty so be careful).  Cook until slightly browned.  Add chicken stock and steam for 5- 10 minutes, until veggies are tender and most of the liquid has evaporated.  I put the lid on the pot for part of this time.  Add balsamic vinegar and toss to coat.  Add the bacon back to the pan and stir all ingredients together to combine.  Sprinkle with parsley and serve.  And now for the final product…

brusselsprouthashresize

If you have any leftovers do yourself a favor and put a fried egg over this hash in the morning.  You’ll thank me.

Tyler’s original recipe can be found here http://www.foodnetwork.com/recipes/tyler-florence/bacon-and-brussels-sprout-hash-recipe/index.html


Brussel Sprouts and Bacon Hash
 
Print
Author: Feasts And Fotos
Ingredients
  • 5-6 slices of bacon (I use low sodium bacon), cut in a medium dice
  • 1 pint of brussels sprouts
  • 2 springs fresh thyme
  • 6-8 fingerling potatoes (or small white potatoes), cut in half and then in half again
  • 2 large shallots
  • ½ cup low sodium chicken stock
  • 1 tbsp balsamic vinegar
  • 1-2 tbsp flat leaf parsley, chopped
Method
  1. Saute bacon in a large pan until just starting to crisp.  Remove from pan and discard ½ of the fat renderings.  To the renderings add the brussels sprouts, shallots, potatoes and thyme and stir.  Season with pepper and a little bit of salt (the bacon is salty so be careful).  Cook until slightly browned.  Add chicken stock and steam for 5- 10 minutes, until veggies are tender and most of the liquid has evaporated.  I put the lid on the pot for part of this time.  Add balsamic vinegar and toss to coat.  Add the bacon back to the pan and stir all ingredients together to combine.  Sprinkle with parsley and serve.
3.2.2802

Filed Under: Sides and Sauces Tagged With: bacon, brussels sprouts, hash, potatoes

Orange Cranberry Muffins

November 16, 2008 by Susan

OrangeCranberryMuffinFinalR

There is something so heartwarming about baking your own muffins in the morning.  I just love how the whole house smells while these babies are cooking in the oven.

These particular muffins are very easy to make.  They do not require any special equipment, nothing that needs to be plugged into an outlet.  You only need some bowls, a whisk and a spoon.  Can’t get much easier than that!

The orange definitely gives a nice zing to these muffins and I am glad I tried them.  Now, if you are one of those people that love a very spongy muffin, this one might not be for you.  It’s a touch on the more crumbly side, just a touch.  Personally, I don’t mind that.   I also love a muffin to have a slightly crunchy top.  I find the crunch of the top combined with the softer interior is a lovely combination.

I believe it is the healthy wheat germ that makes these muffins crumbly.  When you hear all the impressive health benefits of wheat germ you will feel happy these muffins include some.  Wheat germ is not a ‘germ’ (ha!) it is the kernel of wheat and is a rich source of protien, fiber, unsaturated fat, folic acid and most especially vitamin E.  Wheat germ also contains vitamin B complex which helps in coping with stress.  And we can ALL use some help with that these days!

I make a cranberry butter to slather over these slightly crumbly muffins.  It really takes them over the top.  And the cranberry butter couldn’t be easier to make.  I’ve detailed how to make it at the end of this post.

Here’s the recipe for 12 muffins, adapted from Cooking Light…

Recipe

1 1/2 cups flour (I used 1 cup white flour, 1/2 cup whole wheat flour)

1/2 cup wheat germ

1/2 cup dried cranberries

1 tsp baking powder

1/2 tsp baking soda

1/2 tsp ground cinnamon

1/4 tsp salt

1/8 tsp ground nutmeg

3/4 cup packed brown sugar

1/4 cup canola oil

1 tsp grated orange zest

1/2 cup fresh orange juice

2 large eggs

Method

Preheat oven to 375 degrees.

Combine flour and next 7 ingredients (through nutmeg) in a large bowl, stir with a whisk.  Make a well in the center of the mixture.

Combine brown sugar, oil, zest, juice and eggs, stir with a whisk.  Pour egg mixture into the well in the dry mixture, stirring until just combined.  Spoon batter into muffin cups.

Cranberry Butter:

Combine 1/2 stick of room temperature butter with roughly 4 tablespoons of cranberry preserves.  Mix until well combined.  If you prefer the cranberry butter to have a more cranberry flavor, then feel free to add more preserves.  Alternatively, use less if you choose.  Enjoy!


Orange Cranberry Muffins
 
Print
Author: Feasts And Fotos
Ingredients
  • 1½ cups flour (I used 1 cup white flour, ½ cup whole wheat flour)
  • ½ cup wheat germ
  • ½ cup dried cranberries
  • 1 tsp baking powder
  • ½ tsp baking soda
  • ½ tsp ground cinnamon
  • ¼ tsp salt
  • ⅛ tsp ground nutmeg
  • ¾ cup packed brown sugar
  • ¼ cup canola oil
  • 1 tsp grated orange zest
  • ½ cup fresh orange juice
  • 2 large eggs
Method
  1. Preheat oven to 375 degrees.
  2. Combine flour and next 7 ingredients (through nutmeg) in a large bowl, stir with a whisk.  Make a well in the center of the mixture.
  3. Combine brown sugar, oil, zest, juice and eggs, stir with a whisk.  Pour egg mixture into the well in the dry mixture, stirring until just combined.  Spoon batter into muffin cups.
  4. Cranberry Butter:
  5. Combine ½ stick of room temperature butter with roughly 4 tablespoons of cranberry preserves.  Mix until well combined.  If you prefer the cranberry butter to have a more cranberry flavor, then feel free to add more preserves.  Alternatively, use less if you choose.
3.2.2802

Filed Under: Breakfast Tagged With: cranberry, muffin, orange, wheat germ

Granola Grabbers

November 11, 2008 by Susan

TrayofGranolaGrabbersFinalR

Who can resist a healthy cookie?  Not me!  Sure, these have the traditional butter and flour, however, the main ingredient is granola.  I make my own, so that makes these cookies even more healthy.  My prior post details my granola recipe,  you can find it in the right hand column under Recent Posts.

This recipe is adapted from Dorie Greenspan’s Granola Grabbers.  I have made several changes to the recipe.  First, I make my own granola instead of using store bought.  In my granola I already have almonds and coconut, so they did not need to be added.  I use other nuts in my granola, so now these cookies have walnuts and pecans in them.  I omitted the peanuts and added chocolate and cranberries.  In my opinion, a cookie should not be without chocolate!  Particularly one with this many ingredients in it.  Also, I cut back slightly on the butter using 13 tablespoons instead of 14.  I noticed zero difference from the first time I made these using all 14 tablespoons.  Next time I make them I will try it with 12, any less than that I think could be a problem.

These cookies came out delicious.  I was apprehensive about bringing them to my parents house for everyone to try, thinking they would be adverse to a ‘healthy cookie’ and not like the oatmeal/granola taste.  Oh, how wrong I was!  They LOVED them.  Even my ever-critical brother (that doesn’t even cook!)…he had six of them.   My co-workers also loved them, they were a big hit.

Here’s my version of this healthy cookie…

Recipe

3 cups granola without fruit

1/2 cup dried cranberries

1/2 cup raisins

1/2 cup semi sweet chocolate, cut into chunks

1/3 cup wheat germ

13 tablespoons butter, room temperature

3/4 cup packed light brown sugar

1/4 sugar

1 large egg

1/4 tsp salt

1 cup flour

Method

Make homemade granola (see recipe in right hand column under Recent Posts).  Allow granola to cool.  Put it in a large bowl and add the cranberries, raisins and wheat germ.  Mix together.

Beat the butter at medium speed until smooth, about 2 minutes.  Add the sugars and beat for another 3 minutes or until creamy. Add the egg and salt and beat until well blended.  Reduce speed to low and add the flour in three additions (not all at once).  Mix until just incorporated, then steadily add most of the granola mixture. Once that is just blended turn off the mixer and add the remaining granola and all the chocolate, mixing by hand with a sturdy spatula.

Scoop out rounded tablespoons of dough.  I use an ice-cream scoop.  Pack the scoops between your palms and arrange the mounds on the baking sheet, lined with parchment paper.  Flatten the mounds slightly with your fingers.

Bake for 12 minutes, rotating the sheets from top to bottom and front to back midway.  Cookies should be golden brown, but not firm.  Allow to rest for 2 minutes before transferring them to a cooling rack.


Granola Grabbers
 
Print
Author: Feasts And Fotos
Ingredients
  • 3 cups granola without fruit
  • ½ cup dried cranberries
  • ½ cup raisins
  • ½ cup semi sweet chocolate, cut into chunks
  • ⅓ cup wheat germ
  • 13 tablespoons butter, room temperature
  • ¾ cup packed light brown sugar
  • ¼ sugar
  • 1 large egg
  • ¼ tsp salt
  • 1 cup flour
Method
  1. Make homemade granola (see recipe in right hand column under Recent Posts).  Allow granola to cool.  Put it in a large bowl and add the cranberries, raisins and wheat germ.  Mix together.
  2. Beat the butter at medium speed until smooth, about 2 minutes.  Add the sugars and beat for another 3 minutes or until creamy. Add the egg and salt and beat until well blended.  Reduce speed to low and add the flour in three additions (not all at once).  Mix until just incorporated, then steadily add most of the granola mixture. Once that is just blended turn off the mixer and add the remaining granola and all the chocolate, mixing by hand with a sturdy spatula.
  3. Scoop out rounded tablespoons of dough.  I use an ice-cream scoop.  Pack the scoops between your palms and arrange the mounds on the baking sheet, lined with parchment paper.  Flatten the mounds slightly with your fingers.
  4. Bake for 12 minutes, rotating the sheets from top to bottom and front to back midway.  Cookies should be golden brown, but not firm.  Allow to rest for 2 minutes before transferring them to a cooling rack.
3.2.2802

Filed Under: Sweets Tagged With: cookies, granola

Homemade Granola

November 4, 2008 by Susan

GranolaGlass

You have to watch out with some store bought granola, they can be quite fattening.  When someone wants to be healthy and they think that eating granola is a step in the right direction, it can be frustrating to learn how fattening some of them could be!  Granola is usually associated with health and goodness.  It should be heart-healthy and surely not something that will make us fat.  We’ve got chocolate cupcakes with peanut butter frosting to do that!

Granola is usually filled with nuts and yes, nuts can be fattening, but they are the good kind of fat.  I think where the store bought versions get us is with the oils.  They really go overboard cooking it in alot of oil…the more the granola is sticking together in clumps, the more oil and sugar they used to cook it.  I use a very small amount of vegetable oil or canola oil, a heart-healthy oil.

I make my own granola and quite frankly will never again buy it from the store.  There is simply no reason to.  It’s beyond simple to make and I know exactly what I’m putting into it.  Not to mention the store bought ones can be quite pricey!  Also, I really love my granola to have a nice crunch to it and I’ve noticed some store bought ones just don’t measure up.

My favorite way to eat this granola is in low fat vanilla yogurt.  Dear lord, it’s delicious.  Not sure about you, but I like a little crunch in my yogurt.  I add about 2 tablespoons of granola to the little cup of yogurt and mix it all up. So simple!  I have this for breakfast often.

I usually make a large batch, it keeps well in an air-tight container for several weeks.  I would say I make a batch every 2-3 weeks or so.  I get a wave of panic over me when I see my stash is getting very low.  I like to have it on hand all the time.

Here’s what you will need…

Recipe

2 cups old fashioned rolled oats

1 cup sweetened shredded coconut

1 cup sliced almonds

1/2 cup chopped walnuts

1/2 cup chopped pecans

1/4 cup canola oil or vegetable oil (i usually use just a touch less than a 1/4 cup)

1/4 cup agave nectar (or any good honey)

1/4 tsp cinnamon (optional)

1/4 tsp vanilla extract (optional)

Method

Preheat the oven to 275 degrees.

Toss the oats, coconut, almonds, walnuts, pecans and cinnamon together in a large bowl.  In a small bowl whisk together the oil, honey and vanilla extract (if you choose to include it).  Pour the liquid mixture over the oat and nut mixture and mix well.  You do not want the mixture to be soaked.  You just want it coated and slightly moist.  Most of the time I don’t even use all this oil/honey mixture if it starts looking too wet and clumpy.  Use your judgement.

Pour into a large sheet pan (with a rim).

granola-step-one-fix-resize

Bake until everything turns a nice golden brown color, roughly 20-25 minutes, stirring once or twice during cooking.  You really must watch it, it goes from cooked just right to burnt VERY quickly.  The color change is amazing, right?

granola-final-fix-resize

And look, not one clump.  Not one to be found.

Allow to cool completely before storing.  I like to keep the granola in this ‘plain’ state, as opposed to adding in dried fruit.  Once you add the fruit the shelf life decreases dramatically.  However, it is a nice touch (change) to add some dried fruit to a small portion of the granola to eat immediately.  I like adding dried cranberries and/or dried chopped apricots.


Homemade Granola
 
Print
Author: Feasts And Fotos
Ingredients
  • 2 cups old fashioned rolled oats
  • 1 cup sweetened shredded coconut
  • 1 cup sliced almonds
  • ½ cup chopped walnuts
  • ½ cup chopped pecans
  • ¼ cup canola oil or vegetable oil (i usually use just a touch less than a ¼ cup)
  • ¼ cup agave nectar (or any good honey)
  • ¼ tsp cinnamon (optional)
  • ¼ tsp vanilla extract (optional)
Method
  1. Preheat the oven to 275 degrees.
  2. Toss the oats, coconut, almonds, walnuts, pecans and cinnamon together in a large bowl.  In a small bowl whisk together the oil, honey and vanilla extract (if you choose to include it).  Pour the liquid mixture over the oat and nut mixture and mix well.  You do not want the mixture to be soaked.  You just want it coated and slightly moist.  Most of the time I don't even use all this oil/honey mixture if it starts looking too wet and clumpy.  Use your judgement.
  3. Pour into a large sheet pan (with a rim).
  4. Bake until everything turns a nice golden brown color, roughly 20-25 minutes, stirring once or twice during cooking.  You really must watch it, it goes from cooked just right to burnt VERY quickly.
  5. Allow to cool completely before storing.  I like to keep the granola in this 'plain' state, as opposed to adding in dried fruit.  Once you add the fruit the shelf life decreases dramatically.  However, it is a nice touch (change) to add some dried fruit to a small portion of the granola to eat immediately.  I like adding dried cranberries and/or dried chopped apricots.
3.2.2802

Filed Under: Sweets Tagged With: granola, healthy, nuts, oats

Tuscan Baked Eggs

October 31, 2008 by Susan

TuscanEggsFinalR

I love going out for breakfast.  Since I live in NYC there are so many breakfast/brunch places to try.  And I mean SO many.  It’s endless.  One is better than the next.  Awhile back I met some friends for brunch in the West Village (my favorite area of the city) at a restaurant called August.  What a charming little place!  Very rustic, which is right up my alley.  Anyway, I ordered their baked eggs dish and loved it.  It was that dish that inspired this, and now I can have a little taste of rustic Tuscany at home anytime I choose.  There aren’t really any exact measurements for this, it’s pretty loose.  If you want more herbs, add them.  If you like alot of cheese, then indulge.  This is a great way to use up leftover tomato sauce.  I had some arrabiata sauce in the fridge that I used.

Here’s what you’ll need to serve one…

Recipe

eggs (2 per person)

tomato sauce (any kind you have on hand)

1/2 tsp chopped rosemary

1/2 tsp chopped thyme

shredded mozzarella cheese

parmigiano reggiano cheese

salt & pepper

rustic bread, toasted

*gratin dish

Method

Lightly butter the bottom of a gratin dish.  Spoon a few tablespoons of tomato sauce into the dish, covering the entire bottom with a layer of sauce.  With a spoon, make two small wells in the sauce for the eggs.  Gently crack the two eggs into those wells.  Add some salt & pepper.  Sprinkle the rosemary and thyme over the eggs and sauce, then the parmigiano reggiano, then lastly the shredded mozzarella.

Bake at 400 degrees for roughly 25-30 minutes, or until the eggs reach the consistency you prefer and the sauce and cheese are bubbling.  I like my eggs to still be a bit runny, this way when you break into them with the bread the yolks run into and mix with the sauce.  Like this…

TuscanEggswithBreadFinalR

Tuscan Baked Eggs
 
Print
Author: Feasts And Fotos
Ingredients
  • eggs (2 per person)
  • tomato sauce (any kind you have on hand)
  • ½ tsp chopped rosemary
  • ½ tsp chopped thyme
  • shredded mozzarella cheese
  • parmigiano reggiano cheese
  • salt & pepper
  • rustic bread, toasted
  • *gratin dish
Method
  1. Lightly butter the bottom of a gratin dish.  Spoon a few tablespoons of tomato sauce into the dish, covering the entire bottom with a layer of sauce.  With a spoon, make two small wells in the sauce for the eggs.  Gently crack the two eggs into those wells.  Add some salt & pepper.  Sprinkle the rosemary and thyme over the eggs and sauce, then the parmigiano reggiano, then lastly the shredded mozzarella.
  2. Bake at 400 degrees for roughly 25-30 minutes, or until the eggs reach the consistency you prefer and the sauce and cheese are bubbling.  I like my eggs to still be a bit runny, this way when you break into them with the bread the yolks run into and mix with the sauce.
3.2.2802

Filed Under: Breakfast Tagged With: baked, eggs

  • « Previous Page
  • 1
  • …
  • 7
  • 8
  • 9
  • 10
  • Next Page »
Hello and welcome to Feasts and Fotos!

Archives

Categories

Copyright © 2025 · Foodie Pro Theme by Shay Bocks · Built on the Genesis Framework · Powered by WordPress