FEASTS AND FOTOS

  • Home
  • About
  • Happenings
  • Contact
You are here: Home / Archives for lunch

Curried Egg Salad

June 1, 2009 by Susan

EggSaladBowl

I have become a big fan of hard boiled eggs of late.  I was never much into them, aside from eating a few on Easter.  I have recently discovered they are wonderful as a little snack to get me through until my next meal.

This new found interest of mine started me thinking…how about egg salad??  Again, never much of a fan.  If you’ve read my other post on chicken salad you will know I do not like super gloppy mayo mixtures – and that’s unfortunately how they come at most delis.  Also, egg salad is usually a bit on the boring side, right?

So, I set out to create a non-boring one.  I originally was leaning towards using paprika as the main spice, but I switched to curry – much more interesting.  The curry goes perfectly with the toasted almonds, a delicious combination.  I list 1/8 tsp of curry powder in the recipe.  This amount provides a nice curry flavor but if you are not afraid of curry feel free to use 1/4 tsp.  I usually find myself adding another pinch or so after the 1/8 tsp.

Of course this mixture needed a fresh green herb, I chose chives to provide another hint of onion flavor along with the shallots, as well as a shot of color.

This egg salad makes a great sandwich.  I use organic whole grain bread, toasted.  I like the contrast of the toasty bread with the smooth, soft egg salad.  Then, throw down a layer of baby spinach leaves, pile the eggs salad high on top and finish off with another piece of bread.  Another option…slather some on a toasted bagel in the morning for breakfast.  Terrific, either way.

Here’s what you will need to make 2–3 medium sized sandwiches…

Recipe

5 eggs

1 medium shallot, finely chopped

1/4 cup sliced almonds, toasted and cooled, roughly chopped

4 tsp chives

3 tbsp mayo

1 tsp mustard

1 tsp coarse mustard

1/8 tsp curry powder

whole grain bread, toasted

spinach leaves (optional)

salt & pepper to taste

Method

First task – hard boil your eggs.  This is a very important step!  Place the eggs in a sauce pan and cover with water by one inch.  Set over medium heat and bring to a slow, soft boil.  Turn off heat, cover and let sit for exactly 12 minutes.  Set your timer!  After the 12 minutes, drain the hot water, then run the eggs under cold water a few times, finally leaving cold water in the pot and allowing the eggs to sit for roughly 10-15 minutes.  Peel eggs.  Cut in half lenthwise and seperate whites from yolks.

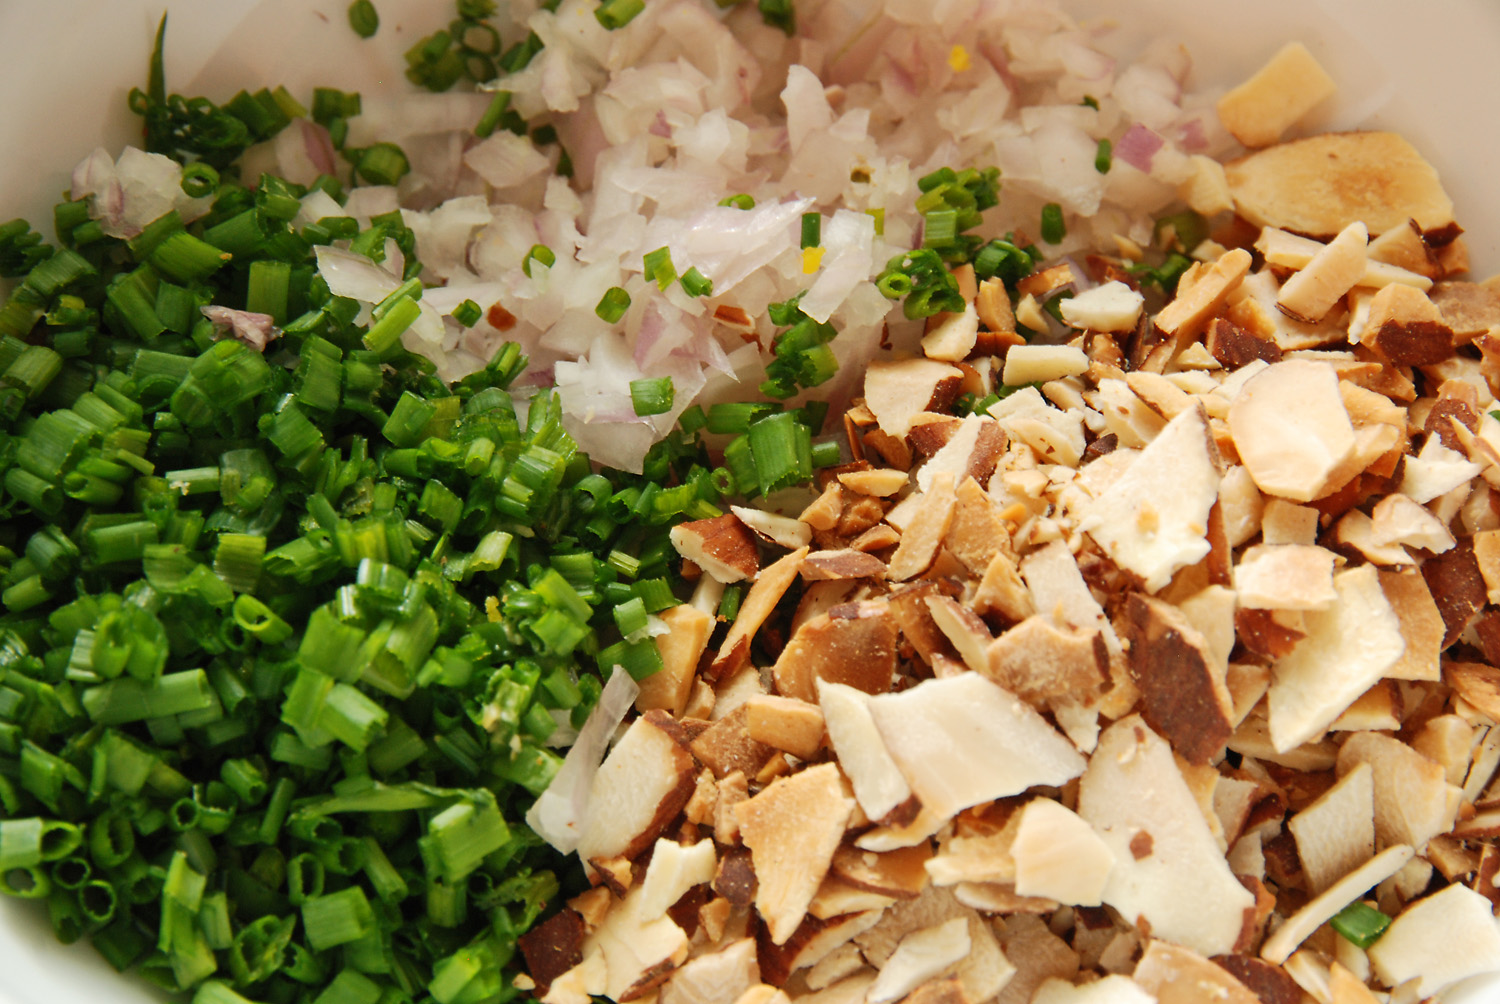
Put yolks in a bowl and mash with the back of a fork.  To the bowl add the mayo, both mustards, curry powder, shallots, chives and almonds.  Mix to combine well.

EggSaladIngredientsEggSaladIngredient2

Take the whites from two of the eggs and chop them with a knife.  I cut them into a small dice.  Then, with the back of a fork, gently mash the remaining egg whites, adding them to the bowl.  Mix everything together, adding salt & pepper to taste.   Assemble your sandwich and get eating!

Curried Egg Salad
 
Print
Author: Feasts And Fotos
Ingredients
  • 5 eggs
  • 1 medium shallot, finely chopped
  • ¼ cup sliced almonds, toasted and cooled, roughly chopped
  • 4 tsp chives
  • 3 tbsp mayo
  • 1 tsp mustard
  • 1 tsp coarse mustard
  • ⅛ tsp curry powder
  • whole grain bread, toasted
  • spinach leaves (optional)
  • salt & pepper to taste
Method
  1. First task - hard boil your eggs. This is a very important step! Place the eggs in a sauce pan and cover with water by one inch. Set over medium heat and bring to a slow, soft boil. Turn off heat, cover and let sit for exactly 12 minutes. Set your timer! After the 12 minutes, drain the hot water, then run the eggs under cold water a few times, finally leaving cold water in the pot and allowing the eggs to sit for roughly 10-15 minutes. Peel eggs. Cut in half lenthwise and seperate whites from yolks.
  2. Put yolks in a bowl and mash with the back of a fork. To the bowl add the mayo, both mustards, curry powder, shallots, chives and almonds. Mix to combine well.
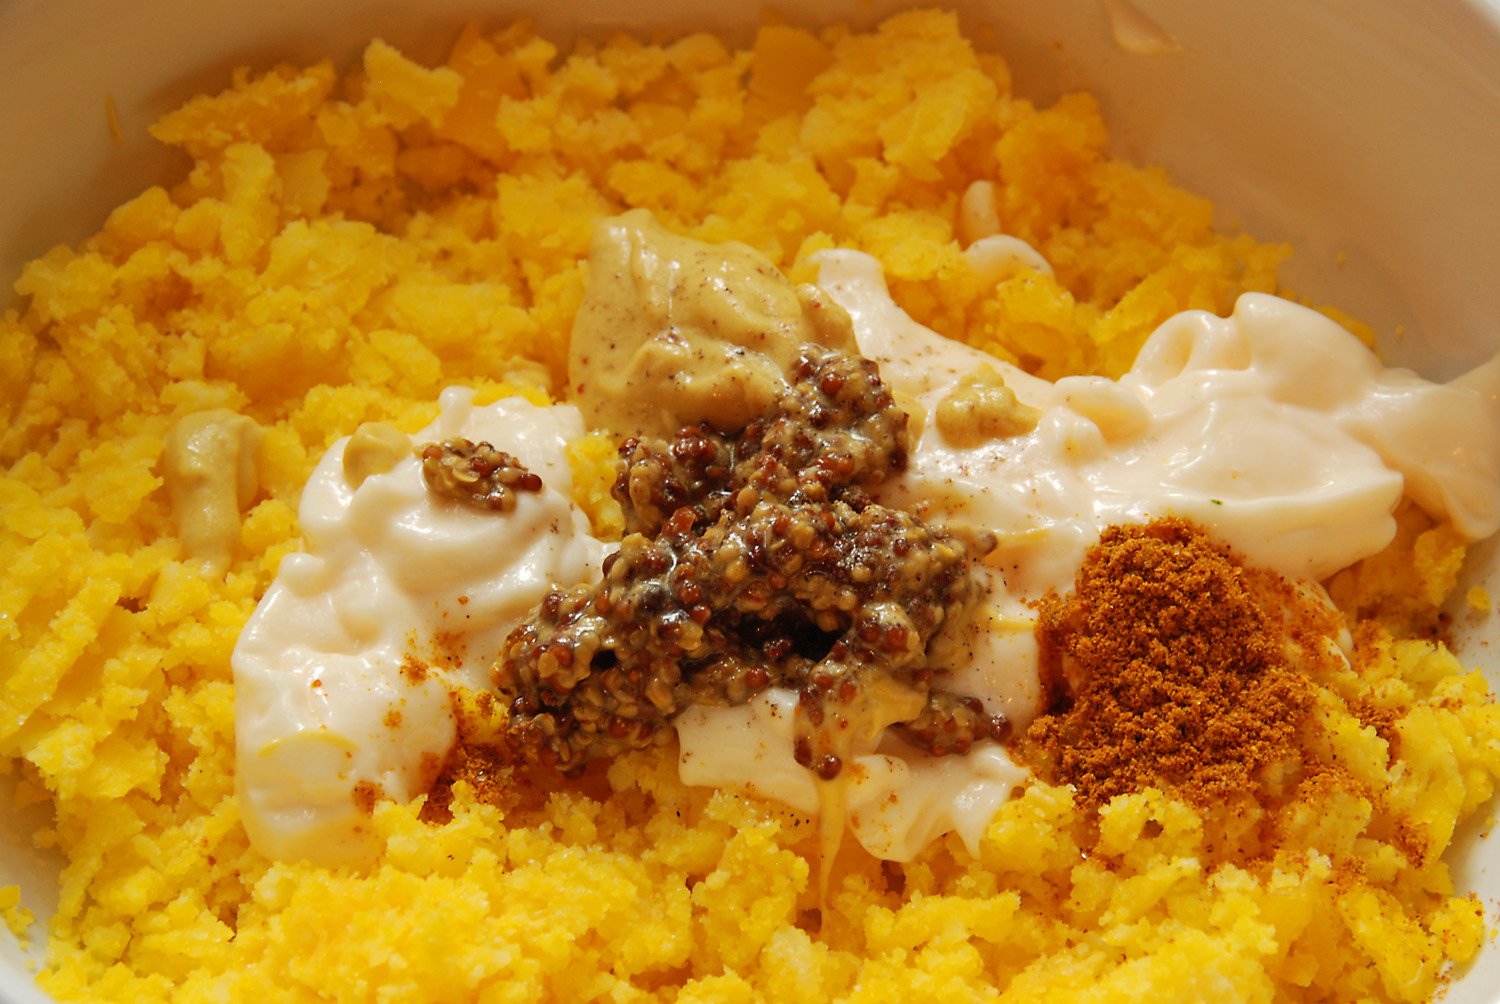
  3. Take the whites from two of the eggs and chop them with a knife. I cut them into a small dice. Then, with the back of a fork, gently mash the remaining egg whites, adding them to the bowl. Mix everything together, adding salt & pepper to taste.
3.2.2802

Filed Under: Main Dishes, Salads Tagged With: almonds, chives, curry, egg, lunch, salad, sandwich

Chicken Salad

May 13, 2009 by Susan

ChickSaladFinalR

It’s always a challenge for me to figure out what to make for lunch.  Usually I’m having some type of leftover from the night before but when I have no leftovers in the fridge I’m stumped.

I was always turned off by tuna salads and chicken salads growing up for one main reason…excessive mayonnaise.  Can’t stand it.  I see the container of the stuff in the deli, want to give it another try, take the plunge and then end up hating it.  Thick gloppy mayo, ugh.  I’ve had luck in creating my favorite tuna fish sandwich ever, so I ventured out to try to create a chicken salad.

I love chicken.  Whenever possible I buy organic chicken and 9 times out of 10 I get the split chicken breasts on the bone with the skins on and bake them in the oven.  Perfection every single time.  Succulent.  Not exactly sure if the reason is because the chicken is organic or because of the way I’m baking it (or a combination of both).  Whatever the reason, I’m happy about it.

With all that said, I knew that would be how I would actually cook the chicken.  Then I set out to decide on the other ingredients, keeping flavor, texture and color in mind.  I finally decided on shredded carrots and chopped celery.  I always love the crunch and flavor of a nut, so I chose walnuts for this chicken salad.  And the herb….knew it had to be dill.  I love dill.

Now the serious stuff – the glue that holds it all together.  The component that will make or break the chicken salad.  I knew I could not tolerate thick mayo, so I tested out a few combinations of yogurt and mayo combined and finally arrived at a perfect combination.  You can use regular yogurt, but I prefer the consistency of Greek yogurt.

You might be thinking it is a bit strange to add yogurt to a chicken salad, but I’ll tell you, it works.  It is light and provides a great tang to the sandwich, pairing  wonderfully with the dill.   This yogurt mixture would also be great as a dip for cut up veggies.

I love this chicken salad so much, I find I’m making it once a week.  I make extra and keep it in the fridge (it lasts for a few days).  It’s delicious in between two slices of hearty, whole grain bread…equally delicious eaten by the spoonful right out of the container.

Here’s what you will need to make approximately 3 medium sandwiches…

Recipe

2 large split chicken breasts, bone in, skin on

2 tsp chopped dill

1/2 cup chopped celery

1 medium carrot, shredded (1/2 cup)

1/3 cup chopped walnuts, toasted

1/3 cup plain Greek yogurt

1 tbsp mayo

2 tbsp chopped dill

small squeeze of lemon juice

salt & pepper

olive oil

your favorite bread

Method

Preheat oven to 350 degrees.  Put chicken breasts in a baking dish, sprinkle with olive oil, salt & pepper and bake in the oven for 35-45 minutes or until skin is lightly browned and juices run clear.  Allow to cool.

Meanwhile, add the shredded carrot and chopped celery to a large bowl with 2 tsp of dill and the toasted walnuts.  Mix well.  Set aside.

In a small bowl combine the Greek yogurt, mayo, 2 tbsp chopped dill and lemon juice.  Mix well.  Add salt & pepper to taste.

Once the chicken has cooled enough to handle, remove the skin and pull all the meat off the bone.  Cut into medium sized cubes and place into a separate bowl.  Allow chicken to sit for a few minutes to cool off completely.  Drain any excess chicken juice from bowl.  (Draining the juice is an important step, this will eliminate the yogurt dressing from getting too watery).

Add cubed chicken into the bowl with the carrot and celery mixture.  Mix well.  Add the yogurt mixture to the chicken until it reaches the desired consistency.  I usually add half the mixture first, then mix.  I add the remaining yogurt a spoonful at a time so it doesn’t get too creamy.

Place a few mounds in between slices of your favorite bread and enjoy!


Chicken Salad
 
Print
Author: Feasts And Fotos
Ingredients
  • 2 large split chicken breasts, bone in, skin on
  • 2 tsp chopped dill
  • ½ cup chopped celery
  • 1 medium carrot, shredded (1/2 cup)
  • ⅓ cup chopped walnuts, toasted
  • ⅓ cup plain Greek yogurt
  • 1 tbsp mayo
  • 2 tbsp chopped dill
  • small squeeze of lemon juice
  • salt & pepper
  • olive oil
  • your favorite bread
Method
  1. Preheat oven to 350 degrees.  Put chicken breasts in a baking dish, sprinkle with olive oil, salt & pepper and bake in the oven for 35-45 minutes or until skin is lightly browned and juices run clear.  Allow to cool.
  2. Meanwhile, add the shredded carrot and chopped celery to a large bowl with 2 tsp of dill and the toasted walnuts.  Mix well.  Set aside.
  3. In a small bowl combine the Greek yogurt, mayo, 2 tbsp chopped dill and lemon juice.  Mix well.  Add salt & pepper to taste.
3.2.2802

Filed Under: Salads, Uncategorized Tagged With: carrot, celery, chicken, dill, lunch, salad, walnut, yogurt

Pasta With Lentils

December 6, 2008 by Susan

PastaLentilsFinalR

The Italian name for this deliciousness is Pasta e Lenticchie.  The way I see it, this dish should really be called Lentils with Pasta.  It is mostly lentils with some pasta thrown in, not the other way around.  It is an Italian dish that I grew up eating, my mom cooked this for us all the time.  It is traditionally from the Campania region of Italy, specifically the Naples area, which is where my family is from.

I can’t quite decide if this is more of a stew or a soup.  I think it is a mixture of both.  A stoup!  It is quite hearty and as most of you  might already know, lentils are super healthy.  They are loaded with folate, fiber and potassium and are an excellent source of protein.

I put my own slight spin on this recipe, it is not the exact same one my mother makes.  However, it’s very close.  I saute my vegetables first in some olive oil (she doesn’t) and I thought to add the bay leaves and thyme.  Basically, you make a big pot of the lentils and you store it in the fridge.  When you want to eat it, you boil up some pasta and then add the lentils to the pasta.  If you add all the pasta into the lentils and store it that way, the pasta tends to get mushy.  About the pasta – you can use any small shape you like.  Normally, this is made with spaghetti broken into 1 inch pieces, or the little elbows that I used in the photo above.  Both are fantastic.  I usually get the whole wheat or multi grain pasta.

Once the pot of lentils is made, this is a very quick and easy meal that you can enjoy all week long for lunch, dinner or a comforting snack on a cold day.

Here is what you will need to serve 4-6…

Recipe 

2 cups lentils (picked through and rinsed)

3 cups water

3 cups chicken stock (or vegetable stock)

2 medium carrots, diced

3 stalks celery, diced

1 large onion, diced

2 cloves garlic, minced

1 teaspoon pepperoncino

2 bay leaves

1 tsp thyme

4 whole peeled tomatoes, chopped with their juice

chopped parsley

short/small pasta (shape of your choice)

parmigiano reggiano or pecorino romano cheese

Method 

Coat the bottom of a dutch oven with olive oil and saute onions, carrots and celery for about 5 minutes or until they begin to soften.  Add garlic and pepperoncino and saute for one minute.  Add lentils and stir one minute.  Add water, stock, tomatoes, bay leaves and thyme and stir to combine.  Bring to a boil, reduce heat to a simmer , cover and cook for approximately 70-90 minutes or until the lentils are tender.  Lentils are done!

For reheating/serving:  boil water and cook the pasta until just about done (one minute shy of the directed cooking time).  Drain pasta, reserving some of the pasta water.  This is important!  The lentils thicken up and you most likely will have to add some pasta water to the mixture to loosen it up a bit.  Add some lentils to the pasta, as much as you like and depending on how many people you are serving.  Stir and cook together for one minute.  Turn off heat and add a handful of fresh parsley.  I love alot of parsley in this, it really give a nice, fresh flavor.  Top with a spoonful of cheese and enjoy!


Pasta With Lentils
 
Print
Author: Feasts And Fotos
Ingredients
  • 2 cups lentils (picked through and rinsed)
  • 3 cups water
  • 3 cups chicken stock (or vegetable stock)
  • 2 medium carrots, diced
  • 3 stalks celery, diced
  • 1 large onion, diced
  • 2 cloves garlic, minced
  • 1 teaspoon pepperoncino
  • 2 bay leaves
  • 1 tsp thyme
  • 4 whole peeled tomatoes, chopped with their juice
  • chopped parsley
  • short/small pasta (shape of your choice)
  • parmigiano reggiano or pecorino romano cheese
Method
  1. Coat the bottom of a dutch oven with olive oil and saute onions, carrots and celery for about 5 minutes or until they begin to soften.  Add garlic and pepperoncino and saute for one minute.  Add lentils and stir one minute.  Add water, stock, tomatoes, bay leaves and thyme and stir to combine.  Bring to a boil, reduce heat to a simmer , cover and cook for approximately 70-90 minutes or until the lentils are tender.  Lentils are done!
  2. For reheating/serving:  boil water and cook the pasta until just about done (one minute shy of the directed cooking time).  Drain pasta, reserving some of the pasta water.  This is important!  The lentils thicken up and you most likely will have to add some pasta water to the mixture to loosen it up a bit.  Add some lentils to the pasta, as much as you like and depending on how many people you are serving.  Stir and cook together for one minute.  Turn off heat and add a handful of fresh parsley.  I love alot of parsley in this, it really give a nice, fresh flavor.  Top with a spoonful of cheese and enjoy!
3.2.2802

Filed Under: Main Dishes, Pasta Tagged With: dinner, healthy, lentils, lunch, pasta, soup, stew

Vegetable Stuffed Peppers

October 15, 2008 by Susan

DoublePeppersFinalR

I had no idea how nutritious red peppers are!  They are an excellent source of vitamins C and A and they contain lycopene, a powerful antioxidant that helps neutralize free radicals (bad things) that cause some types of cancers and heart disease.  Surprisingly, red peppers contain almost three times the amount of vitamin C as green peppers.   Poor green peppers, they just aren’t up to snuff.

Traditionally, stuffed peppers are made with chop meat.  I do make the meat version at times, however, I like to keep things on the healthy side over here, so I try to make it with mostly veggies now, or sometimes I will add some ground turkey.  All versions are delicious.  I like to bring a stuffed pepper with me to work for lunch, and since I make 4 or 5 of them I eat one a day, everyday for lunch that week.  And NO, I don’t get sick of it!  They are so delicious, healthy and filling.  A complete meal stuffed inside a nutritionally packed red pepper.  What more could I ask for?

Here’s what you will need to make approximately 6 peppers…

Recipe

4 large red peppers

1 cup brown rice, cooked

1 large zucchini, small dice

1 large yellow squash, small dice

1 large onion

1 small container crimini mushrooms, small dice

1 can whole peeled tomatoes, mashed up

1/2 cup chopped baby spinach

2 cloves garlic, grated

1/4 cup chopped parsley

2 tbsp grated parmigiano reggiano cheese

pinch dried oregano

pinch pepperoncino

olive oil

Method

In a skillet over medium heat coat pan with some olive oil.  Saute the zucchini, squash, onion and mushrooms until slightly softened, roughly 5 minutes.  Add grated garlic, spinach, oregano and pepperoncino and some salt & pepper.  Cook for additional 2-3 minutes.

Add tomatoes and bring to a boil.  Reduce to a simmer and cook for about 15-20 minutes.

While the filling is simmering away, carefully cut out the tops of the peppers and remove the seeds and ribs from the inside of the pepper.  It helps to have small hands!  I usually discard the tops, but once or twice I did keep them and put them back on top of the peppers for decoration, like little hats.  Up to you.

Once the filling mixture has cooked for awhile, add all the brown rice and parsley and stir well.  Turn off the heat and add the cheese.  Mix well again.  I’ll tell you, this sauce (minus the rice) would be perfect over some pasta!  Here’s how things should be looking at this point.

PepperRiceMixtureFinalR

Now for the fun part…stuffing!  I love stuffing these guys.  I use a teaspoon for this.  Basically just stuff the filling mixture into each pepper, pressing the filling down into the bottom of the pepper.  Fill them way up to the top.  Just like this…

DoublePeppersFinalR

In the bottom of a baking dish, I put some water and oil (and some tomato sauce if I have some left over) to keep things moist.  Arrange the now stuffed peppers in the baking dish and sprinkle the tops of the peppers with some olive oil.  Bake at 375 degrees for about 45 – 60 minutes, or until the peppers have become slightly wrinkly and soft.  I prefer my peppers to still have a slight bite to them.  Some people like to cook them alot until they are very mushy, again – up to you.  As I said, I like mine with a bite, not too mushy.

Get stuffing people!


Vegetable Stuffed Peppers
 
Print
Author: Feasts And Fotos
Ingredients
  • 4 large red peppers
  • 1 cup brown rice, cooked
  • 1 large zucchini, small dice
  • 1 large yellow squash, small dice
  • 1 large onion
  • 1 small container crimini mushrooms, small dice
  • 1 can whole peeled tomatoes, mashed up
  • ½ cup chopped baby spinach
  • 2 cloves garlic, grated
  • ¼ cup chopped parsley
  • 2 tbsp grated parmigiano reggiano cheese
  • pinch dried oregano
  • pinch pepperoncino
  • olive oil
Method
  1. In a skillet over medium heat coat pan with some olive oil. Saute the zucchini, squash, onion and mushrooms until slightly softened, roughly 5 minutes. Add grated garlic, spinach, oregano and pepperoncino and some salt & pepper. Cook for additional 2-3 minutes.
  2. Add tomatoes and bring to a boil. Reduce to a simmer and cook for about 15-20 minutes.
  3. While the filling is simmering away, carefully cut out the tops of the peppers and remove the seeds and ribs from the inside of the pepper. It helps to have small hands! I usually discard the tops, but once or twice I did keep them and put them back on top of the peppers for decoration, like little hats. Up to you.
  4. Once the filling mixture has cooked for awhile, add all the brown rice and parsley and stir well. Turn off the heat and add the cheese. Mix well again.
  5. Once the filling mixture has cooked for awhile, add all the brown rice and parsley and stir well. Turn off the heat and add the cheese. Mix well again.
  6. Now for the fun part...stuffing! I use a teaspoon for this. Basically just stuff the filling mixture into each pepper, pressing the filling down into the bottom of the pepper. Fill them way up to the top.
  7. In the bottom of a baking dish, I put some water and oil (and some tomato sauce if I have some left over) to keep things moist. Arrange the now stuffed peppers in the baking dish and sprinkle the tops of the peppers with some olive oil. Bake at 375 degrees for about 45 - 60 minutes, or until the peppers have become slightly wrinkly and soft.
3.2.2802

Filed Under: Main Dishes, Sides and Sauces Tagged With: brown rice, dinner, healthy, lunch, red peppers, stuffed, vegetables

Roasted Pepper And Goat Cheese Sandwich

October 9, 2008 by Susan

PepperSandwichFinalR

This is one of my go-to sandwiches on the weekends.  After the gym I’m usually ravenous and want to eat something immediately and this sandwich is so quick to make, provided you already have the roasted peppers on hand.  I highly recommend roasting the red peppers yourself instead of using the jar kind.  It’s so easy, basically all you do is pop them in the oven.  The only tedious part is after they are cooked when you have to peel the skins off and get the seeds out.  In my opinion, the payoff is worth it.  If you roast 4 or 5 peppers at a time, you will have a nice supply in the fridge for up to a week.  Well, that’s if you live alone, like I do.  Although this sandwich is easy to make it feels sorta…gourmet.  And after sweating it up at the gym this simple, gourmet sandwich is a treat I can feel good about eating.  This recipe is adapted from Ina Garten.

Here’s what you will need to make 2 sandwiches…

Recipe

4-5 large red bell peppers

2 tablespoons olive oil

1 teaspoon balsamic vinegar

2-3 cloves garlic, smashed

1 tablespoon capers

1 teaspoon chopped parsley

1 teaspoon chopped basil

5-6 large basil leaves, whole

goat cheese

good bread

red onion, sliced paper thin (optional)

Method

The Peppers:

Preheat oven to 475 degrees.  Place the whole peppers on a sheet pan and place in the oven for 40-50 minutes, until the skins are wrinkled and charred.  Turn once or twice during cooking.  Remove from oven and immediately cover tightly with aluminum foil and set aside for at least 30 minutes.  You don’t want to burn your little fingers.  Once they are cool enough to handle peel all the skins off each pepper and remove the seeds and stem.  Rip the flesh of the peppers into thick strips and put them in a bowl with their juices.

To the bowl add the olive oil, balsamic, smashed garlic, capers, chopped parsley, chopped basil and some salt & pepper to taste.  Voila, the peppers are done!  I like to let this mixture blend for a few hours or even a day before preparing the sandwich, so the smashed garlic has a chance to flavor the peppers and oil.  I prefer to add the whole garlic cloves smashed instead of chopping the garlic, eliminating the risk of eating a raw piece of garlic in the sandwich.  It could be potent sometimes.  These peppers will stay in the fridge covered for up to one week (if they last that long).

The Sandwich:

For one sandwich: Toast bread.  Spread each half with goat cheese.  If you love goat cheese (as I do) spread liberally.  On top of the goat cheese on one half of the bread lay as many basil leaves in a single layer as will fit on your bread slice.  On top of the basil leaves lay the red pepper slices.  If you decide to include the red onion in this sandwich now is the time to place those slices on top of the peppers.  I don’t always add the red onion as I find they have a tendency to linger long after the sandwich is gone.  However, if you are careful to slice them super thin, it’s not so bad.  If you love red onion, then feel free to slice to your desired thickness and glob them on.  Cover with the other slice of bread and enjoy!


Roasted Pepper And Goat Cheese Sandwich
 
Print
Author: Feasts And Fotos
Ingredients
  • 4-5 large red bell peppers
  • 2 tablespoons olive oil
  • 1 teaspoon balsamic vinegar
  • 2-3 cloves garlic, smashed
  • 1 tablespoon capers
  • 1 teaspoon chopped parsley
  • 1 teaspoon chopped basil
  • 5-6 large basil leaves, whole
  • goat cheese
  • good bread
  • red onion, sliced paper thin (optional)
Method
  1. The Peppers:
  2. Preheat oven to 475 degrees.  Place the whole peppers on a sheet pan and place in the oven for 40-50 minutes, until the skins are wrinkled and charred.  Turn once or twice during cooking.  Remove from oven and immediately cover tightly with aluminum foil and set aside for at least 30 minutes.  You don't want to burn your little fingers.  Once they are cool enough to handle peel all the skins off each pepper and remove the seeds and stem.  Rip the flesh of the peppers into thick strips and put them in a bowl with their juices.
  3. To the bowl add the olive oil, balsamic, smashed garlic, capers, chopped parsley, chopped basil and some salt & pepper to taste.  Voila, the peppers are done!  I like to let this mixture blend for a few hours or even a day before preparing the sandwich, so the smashed garlic has a chance to flavor the peppers and oil.  I prefer to add the whole garlic cloves smashed instead of chopping the garlic, eliminating the risk of eating a raw piece of garlic in the sandwich.
  4. The Sandwich:
  5. For one sandwich: Toast bread.  Spread each half with goat cheese.  If you love goat cheese (as I do) spread liberally.  On top of the goat cheese on one half of the bread lay as many basil leaves in a single layer as will fit on your bread slice.  On top of the basil leaves lay the red pepper slices.  If you decide to include the red onion in this sandwich now is the time to place those slices on top of the peppers.  I don't always add the red onion as I find they have a tendency to linger long after the sandwich is gone.  However, if you are careful to slice them super thin, it's not so bad.  If you love red onion, then feel free to slice to your desired thickness and glob them on.  Cover with the other slice of bread and enjoy!
3.2.2802

Filed Under: Main Dishes Tagged With: basil, goat cheese, lunch, red peppers, roasted, sandwich

  • « Previous Page
  • 1
  • 2
Hello and welcome to Feasts and Fotos!

Archives

Categories

Copyright © 2025 · Foodie Pro Theme by Shay Bocks · Built on the Genesis Framework · Powered by WordPress