FEASTS AND FOTOS

  • Home
  • About
  • Happenings
  • Contact
You are here: Home / Archives for lunch

Crock Pot Mexican Shredded Chicken

March 24, 2015 by Susan

MexicanShreddedChicken2R

My crock pot has been in a box, in my storage room, for years.  More years than I care to admit, really.  My issue with crock pots is this: if I have to pre-cook, or brown, meat prior to putting it into the crock pot then I might as well just cook the meal on the stove top or in the oven.  After all, I’ve already dirtied a pot.  For me, the only way I can get excited about using the crock pot is if there is zero ‘cooking’ prior.

It was this recipe that got me to unearth my crock pot and get on the bandwagon.  No prepping the meat at all beforehand, simply dump all the ingredients into the pot, turn it on and walk away.  It was great!  I absolutely loved having dinner cooking while I was busy doing other things all day long.  I suppose that’s the beauty of using a slow cooker, right?

I made quite a bit of changes to the original recipe from Skinnytaste.  I liked the idea of the recipe, and I did like the original recipe, but for me it was lacking a little something.  A few ideas immediately came to mind the first time I made it, and over the next few times I prepared this meal I perfected each change.  It is now exactly how we like it. The main changes I made are overall more spices, the addition of the poblano pepper and adding the frozen peas and corn at the very end, giving just enough time for them to thaw out.  I like my frozen veggies to still have their bright colors and a bit of a snap to them.  I always serve this dish over white long-grain rice, it really soaks up all the liquid nicely.  But I’m sure it would be perfect with brown rice too.

Other than the flavor, my favorite thing about this meal is the amount of leftovers.  This recipe makes a large amount and holds well in the fridge for at least 3-4 days.  When I make this, we usually eat it again for dinner once during the week, but also several times for lunch.  Sometimes, after I shred the chicken but before I add it back to the pot, I set some dry shredded chicken aside and use it in wraps the following day.  Delicious!

If your crock pot is in storage maybe this recipe will encourage you to dig it out. I really like crock pot cooking now and look forward to trying another recipe soon. Suggestions are welcome!

Here’s what you will need to serve 8-10….

Recipe

4 medium chicken breasts, boneless, skinless

1 large poblano pepper, diced (or one green pepper & one jalapeño, seeds and ribs mostly removed)

2-10 oz cans diced tomatoes with mild green chilies

15 oz can black beans, drained and rinsed

20 oz low sodium chicken stock

1 bunch scallions, chopped and divided in half

1 tsp garlic powder

1 tsp onion powder

1 tsp cumin (plus some more for sprinkling)

1 tsp coriander (plus some more for sprinkling)

1 tsp chili powder (plus some more for sprinkling)

1 tsp cayenne pepper

1 cup frozen corn

1 cup frozen peas

1/2 lime, juiced

1/2 bunch of cilantro

salt & pepper to taste

your favorite rice, cooked

Method

Lay chicken breasts in a shallow baking dish.  Sprinkle both sides with some cumin, coriander, chili powder, salt & pepper.  Set aside.

To the bowl of a crock pot combine chicken stock,  black beans, diced tomatoes, 1/2 the chopped scallions, poblano pepper, garlic & onion powder, cumin, coriander, chili and cayenne.  Stir to combine.  Lay chicken breasts on top of mixture, cover and turn the crock pot on for 6 hours.

Once the crock pot turns off (or just before), remove all the chicken breasts and shred (use 2 forks).  Return all the shredded chicken back to the pot, add in the remaining scallions, frozen corn & peas and most of the cilantro.  Stir to combine.  Put the cover back on and allow to sit for about 15 minutes.  Just before serving add the juice of 1/2 lime, stir and portion into bowls, on top of rice.  Sprinkle with cilantro and serve.

Original recipe: http://www.skinnytaste.com/2009/02/crock-pot-santa-fe-chicken-425-pts.html 


Mexican Shredded Chicken
 
Print
Author: Feasts And Fotos
Ingredients
  • 4 medium chicken breasts, boneless, skinless
  • 1 large poblano pepper, diced (or one green pepper & one jalapeño, seeds and ribs mostly removed)
  • 2-10 oz cans diced tomatoes with mild green chilies
  • 15 oz can black beans, drained and rinsed
  • 20 oz low sodium chicken stock
  • 1 bunch scallions, chopped and divided in half
  • 1 tsp garlic powder
  • 1 tsp onion powder
  • 1 tsp cumin (plus some more for sprinkling)
  • 1 tsp coriander (plus some more for sprinkling)
  • 1 tsp chili powder (plus some more for sprinkling)
  • 1 tsp cayenne pepper
  • 1 cup frozen corn
  • 1 cup frozen peas
  • ½ lime, juiced
  • ½ bunch of cilantro
  • salt & pepper to taste
  • your favorite rice, cooked
Method
  1. Lay chicken breasts in a shallow baking dish. Sprinkle both sides with some cumin, coriander, chili powder, salt & pepper. Set aside.
  2. To the bowl of a crock pot combine black beans, diced tomatoes, ½ the chopped scallions, poblano pepper, garlic & onion powder, cumin, coriander, chili and cayenne. Stir to combine. Lay chicken breasts on top of mixture, cover and turn the crock pot on for 6 hours.
  3. Once the crock pot turns off (or just before), remove all the chicken breasts and shred (use 2 forks). Return all the shredded chicken back to the pot, add in the remaining scallions, frozen corn & peas and most of the cilantro. Stir to combine. Put the cover back on and allow to sit for about 15 minutes. Just before serving add the juice of ½ lime, stir and portion into bowls, on top of rice. Sprinkle with cilantro and serve.
3.2.2929

Filed Under: Main Dishes, Uncategorized Tagged With: black beans, chicken, chili, cumin, dinner, healthy, lunch, mexican, poblano, shredded

Chicken Tenders with Honey Mustard Sauce

January 28, 2015 by Susan

ChickenTenders3R

The big game is this weekend and that means we get to eat things this Sunday that we normally would not.  Right?  Cheesy dips. Sticky, gooey chicken wings. Let’s do it!

Ok, so if you are not willing to let this Sunday be a huge ‘cheat day’ from your regular eating pattern you can make these chicken tenders.  You might think they would be bad for you, but they are not.  There is no egg and flour or frying involved.  Just some buttermilk, breadcrumbs and cheese.  And they are baked! Even though they are not fried, they still are slightly crunchy on the outside and tender and juicy on the inside.

These chicken tenders would make a wonderful appetizer but, truthfully, we often eat these as a meal. The preparation is quick and easy and if you pair it with a cup or bowl of soup (which we do) you will be satisfied.  Depending on the size of the tenders, of course.  Most of the time the tenders are quite large so eating 4-5 each is usually enough.  I love honey mustard sauce for these (a little more honey tasting than mustard), however, feel free to use your favorite sauce.  We sometimes use BBQ sauce.

Although I am not a huge follower of football during the season, I do love watching the Superbowl.  Mostly for the commercials and the half-time entertainment.  This year I don’t think I’m going to go crazy with all the fried food and cheesy goodness. Instead, I am going to make these.  I’ll feel better about things and I won’t have to log in extra time on the elliptical machine.  And that is always a good thing!

Here’s what you will need to make approximately 15 tenders…

Recipe

1-2 packages chicken tenders

buttermilk

1/2 cup panko, mounded

1/2 cup Italian Seasoned Breadcrumbs, mounded

1/3 cup grated Parmigiano-Reggiano cheese

salt & pepper to taste

Honey Mustard Sauce

3 Tbsp honey

2 Tbsp mustard

1/2 tsp mayo

lemon juice (about 10 drops)

salt & pepper to taste

Method

In a medium bowl add the chicken tenders and enough buttermilk to cover all the chicken.  Allow to marinate in the refrigerator for at least one hour, preferably 4-5 hours.

Preheat oven to 500 degrees.

In a flat, rimmed pan add the panko, seasoned breadcrumbs, cheese, salt & pepper.  Mix with your fingers until ingredients are fully incorporated.

Line a large baking sheet with parchment paper.  Spray parchment paper with cooking spray.

Once the chicken is done marinating, remove from refrigerator.  Take one tender at a time, drain off some of the buttermilk and dredge it in the bread crumb mixture.  I use tongs for this and I usually pat down the breadcrumbs on each side.  Lift out of the breadcrumb mixture and gently shake off any excess. Lay on the baking sheet.  Continue with all the tenders.

Once you have all the tenders lined up drizzle a touch of olive oil over each one. Place in the oven for approximately 15-17 minutes total, flipping over when the bottoms are starting to turn golden (after about 8-10 minutes or so).  I usually don’t cook the 2nd side for as long as the first side.

Meanwhile, prepare the honey mustard sauce by simply adding all ingredients to a small bowl and mixing well.  Set aside.

Allow tenders to cool slightly (they will be piping hot!) and serve with the honey mustard sauce for dipping.

Recipe adapted from Giada De Laurentiis


Chicken Tenders with Honey Mustard Sauce
 
Print
Author: Feasts And Fotos
Ingredients
  • 1-2 packages chicken tenders
  • buttermilk
  • ½ cup panko, mounded
  • ½ cup Italian Seasoned Breadcrumbs, mounded
  • ⅓ cup grated Parmigiano-Reggiano cheese
  • salt & pepper to taste
  • Honey Mustard Sauce
  • 3 Tbsp honey
  • 2 Tbsp mustard
  • ½ tsp mayo
  • lemon juice (about 10 drops)
  • salt & pepper to taste
Method
  1. In a medium bowl add the chicken tenders and enough buttermilk to cover all the chicken. Allow to marinate in the refrigerator for at least one hour, preferably 4-5 hours.
  2. Preheat oven to 500 degrees.
  3. In a flat, rimmed pan add the panko, seasoned breadcrumbs, cheese, salt & pepper. Mix with your fingers until ingredients are fully incorporated.
  4. Line a large baking sheet with parchment paper. Spray parchment paper with cooking spray.
  5. Once the chicken is done marinating, remove from refrigerator. Take one tender at a time, drain off some of the buttermilk and dredge it in the bread crumb mixture. I use tongs for this and I usually pat down the breadcrumbs on each side. Lift out of the breadcrumb mixture and gently shake off any excess. Lay on the baking sheet. Continue with all the tenders.
  6. Once you have all the tenders lined up drizzle a touch of olive oil over each one. Place in the oven for approximately 15-17 minutes total, flipping over when the bottoms are starting to turn golden (after about 8-10 minutes or so). I usually don't cook the 2nd side for as long as the first side.
  7. Meanwhile, prepare the honey mustard sauce by simply adding all ingredients to a small bowl and mixing well. Set aside.
3.2.2802

Filed Under: Appetizers, Main Dishes Tagged With: appetizer, baked, breadcrumbs, chicken, dinner, honey, lunch, mustard, panko, sauce, tenders

Roasted Vegetable Soup

January 12, 2015 by Susan

RoastedVegetableSoupR

Most soups I make are prepared using the same method; sauteing onions, garlic and veggies in a pot on the stove and then adding stock and simmering away.  This soup turns that method upside down!  I loved the concept and it sounded so easy.  Naturally, I thought, could it actually be good?

Oh yeah!  So good.  I am already a huge fan of oven roasting vegetables to eat as a side dish. Favorites are broccoli, cauliflower and carrots.  I feel roasting the vegetables really brings out their flavor, so much more than, let’s say, steaming.

The other element that I love about this soup is that it includes eggplant. Eggplant!  I haven’t come across many soup recipes with eggplant in them, have you?  To be honest, you would be hard pressed to detect the eggplant in here.  All the flavors of the vegetables blend well and are so delicious.  Even the sage, it’s there in the background, not overpowering at all.  The sage I used to make this particular pot of soup came from my garden, still going strong in December!  It is a hearty herb, that sage.

I am happy to report that this soup recipe is quite forgiving.  I think if you stick to the base vegetables (eggplant, carrots, potatoes) you can add some others (celery, parsnips) and it would be just as great.  Making this recipe would be a great way to clear out your fridge of any root veggies that might be slightly past their prime.  You can also comfortably make some substitutions. Don’t have shallots?  Add an onion instead.  Want this soup to be vegetarian?  Use vegetable stock instead of chicken stock. Prefer it to be a touch thinner?  Add more stock.  Forgiving is good.

This roasted vegetable soup is very delicious and super comforting on a cold, snowy day (we’ve already had quite a few in the NY area).  It is very thick, so it is filling and perfect on its own for a lunch or light dinner.  And thick enough that my 3-year-old can feed herself this soup, which she loves.

Add a slice of toasted rustic bread to dip and you will be in heaven.

Here’s what you will need to serve 6-8…

Recipe

3-4 tbsp olive oil

1 large eggplant, peeled and chopped into 2 inch cubes

3 carrots, sliced into 1 inch pieces

3 large shallots, quartered

6 cloves garlic, whole

2 large Idaho potatoes, peeled and chopped into 1 inch chunks

6 cups chicken stock (or vegetable stock)

3 large sage leaves

sea salt & pepper, to taste

Method

Preheat oven to 375 degrees.

Oil the bottom of a large, rimmed sheet pan with 1 tbsp of oil (rub it around with your fingers to coat) and add everything except the sage leaves.  Add 2-3 tbsp of olive oil, salt & pepper and toss to coat.  Arrange in a single layer.

Roast for 45 minutes, flipping vegetables once or twice, ensuring they brown slightly but do not burn.  Remove pan from oven, add sage leaves on top of veggies on one side of the pan, and then pile the remaining veggies on top of the sage leaves.  The heat from the veggies will wilt the sage.  Allow to cool slightly.

In a high powered blender, add vegetables and broth in manageable batches.  Pour into a large pot, heat slightly and serve or store in the fridge for up to 4-5 days.

Recipe adapted from Clean Eating Magazine


Roasted Vegetable Soup
 
Print
Author: Feasts And Fotos
Ingredients
  • 3-4 tbsp olive oil
  • 1 large eggplant, peeled and chopped into 2 inch cubes
  • 3 carrots, sliced into 1 inch pieces
  • 3 large shallots, quartered
  • 6 cloves garlic, whole
  • 2 large Idaho potatoes, peeled and chopped into 1 inch chuncks
  • 6 cups chicken stock (or vegetable stock)
  • 3 large sage leaves
  • sea salt & pepper, to taste
Method
  1. Preheat oven to 375 degrees.
  2. Oil the bottom of a large, rimmed sheet pan with 1 tbsp of oil (rub it around with your fingers to coat) and add everything except the sage leaves. Add 2-3 tbsp of olive oil, salt & pepper and toss to coat. Arrange in a single layer.
  3. Roast for 45 minutes, flipping vegetables once or twice, ensuring they brown slightly but do not burn. Remove pan from oven, add sage leaves on top of veggies on one side of the pan, and then pile the remaining veggies on top of the sage leaves. The heat from the veggies will wilt the sage. Allow to cool slightly.
  4. In a high powered blender, add vegetables and broth in manageable batches. Pour into a large pot, heat slightly and serve or store in the fridge for up to 4-5 days.
3.2.2802

Filed Under: Soup Tagged With: carrots, comfort food, dinner, eggplant, healthy, lunch, potatoes, roasted, sage, soup, vegetable

Santa Fe Quinoa

July 13, 2012 by Susan

SouthWestern QuinoaR

Apartment living has its advantages for sure.  No landscaping in the spring.  No shovelling snow in the winter.  The downside is we don’t have a grill, and who doesn’t love grilling in the summer?  Luckily my parents live in suburbia and have a large yard…with a grill!  Every time we visit we buy a big pack of chicken breasts, marinate them and grill them up.  But we don’t eat them there…we bring them home!  And we have cooked chicken in the fridge for the whole week to use in paninis, salads and quinoa dishes.

Last week’s marinade had a southwestern flavor and that is what inspired me to create this quinoa dish.  To be honest, it is great even without chicken, but certainly adding the chicken makes it more hearty and filling and a perfect meal on its own.  In the time it takes you to cook the quinoa you can have all the other ingredients cooked and ready to add.  Super quick, very easy and healthy for you.  Oh, and you won’t believe how delicious it is.

Here’s what you will need to serve 4 (as a side dish)

Recipe

1  1/2 cups quinoa, uncooked

3 cups chicken stock (or a combo of stock and water)

2 medium shallots, small dice

1 red pepper, small dice

1 jalapeno (most of seeds and ribs removed), small dice

2 cloves garlic, minced

1 can black beans, rinsed and drained

1/4 cup frozen corn

1/2 cup fresh cilantro, chopped

salt & pepper

grilled chicken, diced (optional)

Dressing

1 lime, zested and juiced

pinch of cayenne pepper

1/3 cup olive oil

salt & pepper

Method

Prepare quinoa according to directions, using chicken stock as your liquid.  Set aside.

Meanwhile, in a large skillet saute shallots, red pepper, jalapeno and a pinch of salt and pepper in some olive oil over medium heat until they start to soften, about 5 minutes.  Add garlic and saute another minute.  Add frozen corn, again cook for one minute.  Add beans, cooked quinoa and cilantro.  Mix well.  If you are adding grilled chicken add it to the skillet now.

In a bowl combine the lime zest and juice, cayenne and olive oil with a pinch of salt and pepper.  Pour over quinoa mixture and stir well to combine.


Santa Fe Quinoa
 
Print
Author: Feasts And Fotos
Ingredients
  • 1½ cups quinoa, uncooked
  • 3 cups chicken stock (or a combo of stock and water)
  • 2 medium shallots, small dice
  • 1 red pepper, small dice
  • 1 jalapeno (most of seeds and ribs removed), small dice
  • 2 cloves garlic, minced
  • 1 can black beans, rinsed and drained
  • ¼ cup frozen corn
  • ½ cup fresh cilantro, chopped
  • salt & pepper
  • grilled chicken, diced (optional)
  • Dressing
  • 1 lime, zested and juiced
  • pinch of cayenne pepper
  • ⅓ cup olive oil
  • salt & pepper
Method
  1. Prepare quinoa according to directions, using chicken stock as your liquid. Set aside.
  2. Meanwhile, in a large skillet saute shallots, red pepper, jalapeno and a pinch of salt and pepper in some olive oil over medium heat until they start to soften, about 5 minutes. Add garlic and saute another minute. Add frozen corn, again cook for one minute. Add beans, cooked quinoa and cilantro. Mix well. If you are adding grilled chicken add it to the skillet now.
  3. In a bowl combine the lime zest and juice, cayenne and olive oil with a pinch of salt and pepper. Pour over quinoa mixture and stir well to combine.
3.2.2802

Filed Under: Rice and Grains Tagged With: gluten free, healthy, lunch, Quinoa, side dish

Quinoa with Chicken and Zucchini

September 28, 2011 by Susan


A few years back I posted a recipe for chicken and vegetable couscous.  After making the dish a few times I substituted the couscous with quinoa and have been making it that way ever since.  Quinoa is a super food, afterall, so I try to incorporate it whenever I can.  And it’s just so easy to cook!

Over the past few months I have made one more adjustment, substituting the olives with mushrooms.  I just can’t seem to stomach olives during this pregnancy.  And you know what – the dish is just as great!  I give this quinoa dish to my husband for lunch alot and he loves mushrooms, so I’ve gotten zero complaints from him.  It is quick to make and hearty to eat, an all around winner.

Here’s what you will need to serve 4…
2 tbsp olive oil

2 large thin, boneless chicken breasts, cubed

1 large onion

2 zucchini, cubed or cut into 1/2 moons

2 cloves garlic, minced

2 tsp grated lemon zest

Juice of one lemon

1/2 tsp crushed red pepper

1-2 pinches of cinnamon

8-10 crimini mushrooms, sliced (not too thin)

1 1/2 cup quinoa

3 cups chicken stock, low sodium

1/4 cup parsley, finely chopped

1/4 cup mint leaves, finely chopped

Salt & pepper
Add quinoa and chicken stock in a pot, bring to a boil, reduce to simmer and cook for approximately 15 minutes.  Fluff with a fork.

Meanwhile, heat olive oil in a large skillet.   Add the chicken cubes and cook until lightly browned on both sides, 3-5 minutes.  Push the chicken to one side of the pan and add the onion, zucchini and mushrooms.  Cook for 4-5 minutes.  Add the garlic, lemon zest, red pepper and cinnamon.  Season with salt & pepper.  Cook for 3 more minutes.

Add the cooked quinoa to the chicken mixture and stir to combine.  Turn off heat and add the parsley, mint and lemon juice.  Mix well.
Recipe originally adapted from Rachael Ray

Filed Under: Rice and Grains Tagged With: chicken, dinner, gluten free, healthy, lunch, mushrooms, Quinoa, zucchini

Curry Yogurt Chicken

July 29, 2011 by Susan


Every time I make this dish the two of us can’t stop exclaiming how much we love it.  I now try to make it once a week, regardless of what season it is or what the temperature is outside.  Hot out?  Don’t care, still going to make it.  We love it that much.

As my husband was quick to point out to me, this dish has just about everything anyone could want in a meal.  The chicken and rice help to fill you up, the curry, ginger and chili give it just the right amount of tingle (be sure to de-seed the chili pepper if you don’t want the fire!) and the yogurt gives the sauce just the right amount of velvety goodness.  Yet, it’s not too heavy.

Another thing I love about this meal…you can eat it in a bowl sitting in front of the TV.  Casual and comforting.  And the leftovers – amazing.

Here’s what you will need to serve 4-5 people…

Recipe

1/4 cup canola oil

2 pounds thin chicken cutlets, cubed

whole wheat flour, for dusting

2 tbsp finely chopped fresh ginger

1.5 tbsp curry powder

1 large garlic clove, minced

1 red chili pepper, sliced thin (seeds and ribs removed if you don’t want it spicy)

1 large red bell pepper, cored, seeded and cut into large dice

6-7 large vine ripened tomatoes, cut into large chunks

1/2 cup frozen corn kernels

1/3 cup frozen peas

7 oz container Greek yogurt, plain

1/2 – 2/3 cup water

1/3 cup chopped cilantro leaves, for garnish

salt & pepper

basmati rice

Method

In a large, deep skillet heat the oil.   Season the chicken cubes with salt and pepper then dust lightly with flour, coating all sides.  Tap off the excess flour and add chicken to hot oil in batches (don’t overload the skillet).  Cook chicken until lightly browned.  Transfer chicken to a plate.

In the same skillet add the ginger, red pepper, chile pepper and garlic and cook, stirring occasionally, until peppers are slightly softened, about 2 minutes.  Add the curry powder and cook for one minute longer.  Add the chopped tomatoes, corn, peas and water.  Bring to a soft boil.  Next add most of the yogurt.  Stir until smooth.

Add the chicken and any juices to the skillet.  Bring to a boil, reduce heat to low, cover and simmer for approximately 20 – 25 minutes stirring occasionally.  Turn off heat, add the remaining yogurt, stir until smooth and sprinkle with cilantro.  Serve over basmati rice.

Recipe adapted from Food & Wine Magazine

Curry Yogurt Chicken
 
Print
Author: Feasts And Fotos
Ingredients
  • ¼ cup canola oil
  • 2 pounds thin chicken cutlets, cubed
  • whole wheat flour, for dusting
  • 2 tbsp finely chopped fresh ginger
  • 1.5 tbsp curry powder
  • 1 large garlic clove, minced
  • 1 red chili pepper, sliced thin (seeds and ribs removed if you don't want it spicy)
  • 1 large red bell pepper, cored, seeded and cut into large dice
  • 6-7 large vine ripened tomatoes, cut into large chunks
  • ½ cup frozen corn kernels
  • ⅓ cup frozen peas
  • 7 oz container Greek yogurt, plain
  • ½ - ⅔ cup water
  • ⅓ cup chopped cilantro leaves, for garnish
  • salt & pepper
  • basmati rice
Method
  1. In a large, deep skillet heat the oil.   Season the chicken cubes with salt and pepper then dust lightly with flour, coating all sides.  Tap off the excess flour and add chicken to hot oil in batches (don't overload the skillet).  Cook chicken until lightly browned.  Transfer chicken to a plate.
  2. In the same skillet add the ginger, red pepper, chile pepper and garlic and cook, stirring occasionally, until peppers are slightly softened, about 2 minutes.  Add the curry powder and cook for one minute longer.  Add the chopped tomatoes, corn, peas and water.  Bring to a soft boil.  Next add most of the yogurt.  Stir until smooth.
  3. Add the chicken and any juices to the skillet.  Bring to a boil, reduce heat to low, cover and simmer for approximately 20 - 25 minutes stirring occasionally.  Turn off heat, add the remaining yogurt, stir until smooth and sprinkle with cilantro.  Serve over basmati rice.
3.2.2802

Filed Under: Main Dishes Tagged With: chicken, curry, dinner, lunch, yogurt

Chicken and Orzo Frittata

July 13, 2011 by Susan


I am finally back in the kitchen!  Let me just say that morning sickness is no joke.  Or shall I say all day sickness.  Yes, that’s more accurate.  All.  Day.  Sickness.

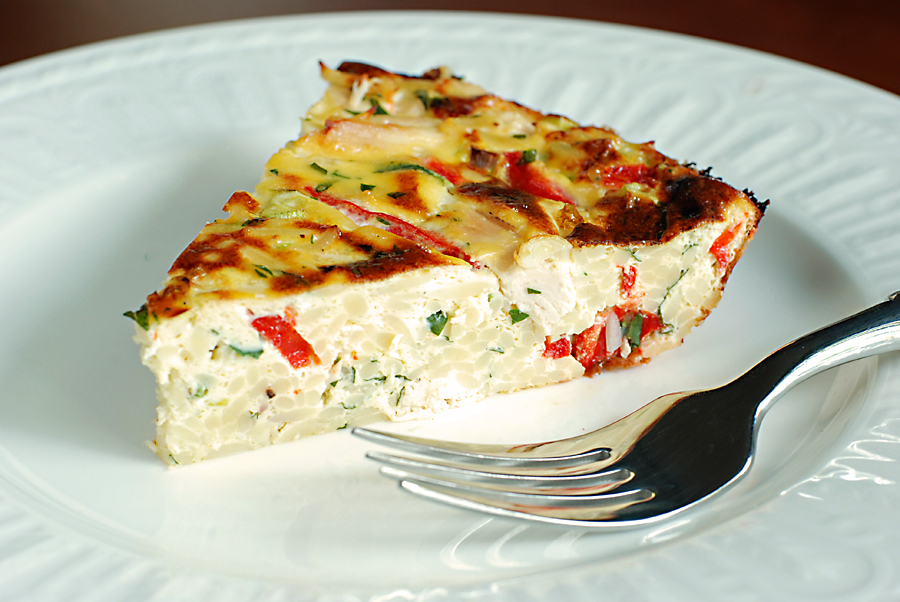
But that phase seems to be mostly over and I can now stand up long enough to prepare some food!  Yay!  Since I took a few months off I decided to ease my way back into the kitchen by preparing some yummy things that could be eaten any time of day, since I now eat all day long.  This frittata is perfect, it can be eaten for breakfast, lunch, a light dinner with a side salad, a snack, heated or at room temperature.  And it’s a very substantial frittata with the inclusion of chicken and pasta.  It is filling and satisfying…and delicious.

Here’s what you need to make one frittata…


Recipe

3/4 cup orzo pasta

6 eggs

1/3 cup whole milk ricotta

1/4 cup creme fraiche (optional)

2 cooked chicken breasts, cubed (about 2 cups)

4 scallions, chopped

1/4 cup chopped Italian flat-leaf parsley

1/3 cup (heaping) diced roasted red bell peppers

1 teaspoon salt

1/4 teaspoon freshly ground black pepper


Method

Preheat the oven to 375 degrees F.

Bring a small pot of salted water to a boil over high heat. Add the orzo and cook until tender but still firm to the bite, stirring occasionally, about 8 – 10 minutes. Drain pasta.

In a large bowl combine the eggs, ricotta, and creme fraiche (if using) and stir until the eggs are beaten and the ingredients are combined. Add the cooked orzo, chicken, scallions, parsley, red bell peppers, salt, and pepper. Stir to combine.

Pour the mixture into a 1 1/2-quart baking dish. Bake for 25 – 30 minutes or until firm to the touch and the center is no longer soft. Turn on the broiler. Place the pan under the broiler until golden on top, about 5 minutes. It is best to not leave the stove while doing this, things have a way of burning quickly under the broiler.  Remove from the oven and let set for 5-10 minutes.  Cut into wedges and serve.

Recipe courtesy Giada DeLaurentiis

Chicken and Orzo Frittata
 
Print
Author: Feasts And Fotos
Ingredients
  • ¾ cup orzo pasta
  • 6 eggs
  • ⅓ cup whole milk ricotta
  • ¼ cup creme fraiche (optional)
  • 2 cooked chicken breasts, cubed (about 2 cups)
  • 4 scallions, chopped
  • ¼ cup chopped Italian flat-leaf parsley
  • ⅓ cup (heaping) diced roasted red bell peppers
  • 1 teaspoon salt
  • ¼ teaspoon freshly ground black pepper
Method
  1. Preheat the oven to 375 degrees F.
  2. Bring a small pot of salted water to a boil over high heat. Add the orzo and cook until tender but still firm to the bite, stirring occasionally, about 8 - 10 minutes. Drain pasta.
  3. In a large bowl combine the eggs, ricotta, and creme fraiche (if using) and stir until the eggs are beaten and the ingredients are combined. Add the cooked orzo, chicken, scallions, parsley, red bell peppers, salt, and pepper. Stir to combine.
  4. Pour the mixture into a 1½-quart baking dish. Bake for 25 - 30 minutes or until firm to the touch and the center is no longer soft. Turn on the broiler. Place the pan under the broiler until golden on top, about 5 minutes. It is best to not leave the stove while doing this, things have a way of burning quickly under the broiler. Remove from the oven and let set for 5-10 minutes. Cut into wedges and serve.
3.2.2802

Filed Under: Breakfast, Main Dishes, Pasta Tagged With: breakfast, chicken, frittata, light dinner, lunch, orzo

Mushroom Soup

January 18, 2011 by Susan

MushroomSoupR

I have become slightly obsessed with soups this winter.  Mainly because it has been absolutely freezing cold here in NYC over the past month.  And let’s not forget about the 3 snowstorms we have already had.  I am not a cold-weather-winter person.  At all.  Soups, however, make it all somewhat bearable.

In light of this obsession I have been scouring recipes for some interesting new soups to add to my repertoire.  I could not find one specific recipe that knocked me over, so I decided to create my own.  Ideally I like to pick a new soup each week and make a big pot of it.  I think having 5 excellent soups in the rotation would be ideal.  This mushroom soup is one of the five, for sure.

If you like mushrooms you will love this soup.  It is luscious and complex.  There is not one drop of cream in this soup so I hereby declare it healthy.  And if I can impress one thought upon you right now it would be this…do not skip the sherry!  And I wouldn’t skip the truffle oil either, come to think of it.  Without them this soup is just ok.  These two ingredients take this soup from average to outstanding.

Here’s what you will need to make a big pot that serves about 8-10…

Recipe

32 ounces of mushrooms, I use a mix of shiitake (sliced) and crimini (cut in half or quarters)

2 tbsp butter

2 tbsp olive oil

1 large onion, diced

1 large leek, white and light green part only, washed and sliced

6 cloves garlic, smashed

12-15 sprigs thyme, tied in a bundle

1 large Idaho potato, peeled and cut into 3/4 inch cubes

8 cups chicken stock

4 oz dry sherry

2 tsp white truffle oil

palmful of parsley leaves

salt & pepper

chopped parsley, for garnish

Method

In a large soup pot heat the olive oil and butter.  As the butter is melting add the bundle of thyme and stir it around in the butter and oil for a few seconds.  Add the onion, leek (wash really well, these suckers are very dirty!) and a pinch of salt & pepper.  Saute over medium heat for 5-6 minutes.  Add the mushrooms and garlic and cook for 8-10 minutes.

Next add the potato and chicken stock.  Bring to a boil, lower heat and simmer for one hour.  After 45 minutes of cooking add the parsley leaves, then allow to continue cooking for the remaining 15 minutes.  Remove thyme bundle.

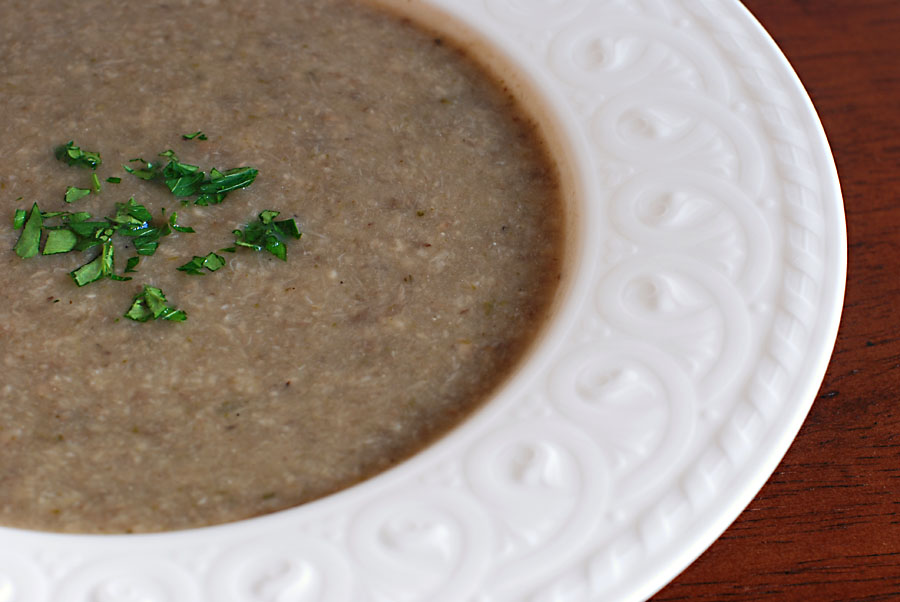
Puree the mixture with an immersion blender (love this tool!) or in a blender or food processor until smooth.  As you can see from the photo above, I do not puree this soup into oblivion, I like the rusticity of a few small pieces of mushroom every now and again.  Those types of things don’t get me upset.

Once the mixture is pureed (to the consistency of your choosing) add the sherry and truffle oil and stir with a spoon to combine.  As I mentioned above, please don’t skip these last two ingredients.  Trust me.

Recipe inspired by various sources.

Mushroom Soup
 
Print
Author: Feasts And Fotos
Ingredients
  • 32 ounces of mushrooms, I use a mix of shiitake (sliced) and crimini (cut in half or quarters)
  • 2 tbsp butter
  • 2 tbsp olive oil
  • 1 large onion, diced
  • 1 large leek, white and light green part only, washed and sliced
  • 6 cloves garlic, smashed
  • 12-15 sprigs thyme, tied in a bundle
  • 1 large Idaho potato, peeled and cut into ¾ inch cubes
  • 8 cups chicken stock
  • 4 oz dry sherry
  • 2 tsp white truffle oil
  • palmful of parsley leaves
  • salt & pepper
  • chopped parsley, for garnish
Method
  1. In a large soup pot heat the olive oil and butter.  As the butter is melting add the bundle of thyme and stir it around in the butter and oil for a few seconds.  Add the onion, leek (wash really well, these suckers are very dirty!) and a pinch of salt & pepper.  Saute over medium heat for 5-6 minutes.  Add the mushrooms and garlic and cook for 8-10 minutes.
  2. Next add the potato and chicken stock.  Bring to a boil, lower heat and simmer for one hour.  After 45 minutes of cooking add the parsley leaves, then allow to continue cooking for the remaining 15 minutes.  Remove thyme bundle.
  3. Puree the mixture with an immersion blender (love this tool!) or in a blender or food processor until smooth.  As you can see from the photo above, I do not puree this soup into oblivion, I like the rusticity of a few small pieces of mushroom every now and again.  Those types of things don't get me upset.
  4. Once the mixture is pureed (to the consistency of your choosing) add the sherry and truffle oil and stir with a spoon to combine.  As I mentioned above, please don't skip these last two ingredients.  Trust me.
3.2.2802

Filed Under: Soup Tagged With: dinner, first course, healthy, lunch, mushroom, soup

Chick Pea Salad With Olives

October 20, 2009 by Susan

ChickPeaSalad2RedBowlR

I just love when a side dish can double as a main dish!  This chick pea salad with olives is yummy and filling, as well as being incredibly healthy for you.  I have taken what could’ve been an ordinary chick pea salad and bumped it up with healthy ingredients such as broccoli and sun dried tomatoes, making this dish interesting and substantial.  All of these flavors blend wonderfully together.

You can certainly used dried beans for this recipe and soak them overnight and then cook them for an hour….but I just didn’t have the time.  You can also substitute different beans in this dish, but I really love chick peas.  I think their texture in this dish is perfection.

This salad holds up great in the fridge for a few days.  Add a sprinkle of olive oil before each subsequent serving to freshen it up and add that mouth-watering shine.

Here’s what you will need to serve 6-8 as a side dish…

Recipe

2 cans chick peas, drained & rinsed

4 cloves garlic, minced

1/4 cup Kalamata olives, pitted and coarsely chopped

1/4 cup green olives, pitted and coarsely chopped

1/4 cup sun dried tomatoes, chopped (can be packed in oil)

1/3 cup chopped scallions, white and light green part

steamed broccoli, 2 large florets (not heads), cut up into very small pieces

1/4 cup red wine vinegar

1/3 cup, plus 1 tbsp  extra virgin olive oil

1 tbsp fresh mint, minced

1.5 tbsp fresh basil, minced

1 tsp fresh thyme, minced

1 tsp fresh rosemary, minced

1 tsp fresh oregano, minced (can use dried)

Salt & Pepper to taste

Method 

Rinse and drain chick peas and place in a large bowl.  Add olives, scallions, sun dried tomatoes and broccoli, mix well.  In a small bowl whisk together red wine vinegar, olive oil and all the herbs.  Pour over chick peas and mix until incorporated.  If needed, add a touch more olive oil.  Mixture should be coated with the dressing, not soaked.  Allow to sit for 30 minutes to let the flavors blend.  Serve at room temperature.


Chick Pea Salad With Olives
 
Print
Author: Feasts And Fotos
Ingredients
  • 2 cans chick peas, drained & rinsed
  • 4 cloves garlic, minced
  • ¼ cup Kalamata olives, pitted and coarsely chopped
  • ¼ cup green olives, pitted and coarsely chopped
  • ¼ cup sun dried tomatoes, chopped (can be packed in oil)
  • ⅓ cup chopped scallions, white and light green part
  • steamed broccoli, 2 large florets (not heads), cut up into very small pieces
  • ¼ cup red wine vinegar
  • ⅓ cup, plus 1 tbsp  extra virgin olive oil
  • 1 tbsp fresh mint, minced
  • 1.5 tbsp fresh basil, minced
  • 1 tsp fresh thyme, minced
  • 1 tsp fresh rosemary, minced
  • 1 tsp fresh oregano, minced (can use dried)
  • Salt & Pepper to taste
Method
  1. Rinse and drain chick peas and place in a large bowl.  Add olives, scallions, sun dried tomatoes and broccoli, mix well.  In a small bowl whisk together red wine vinegar, olive oil and all the herbs.  Pour over chick peas and mix until incorporated.  If needed, add a touch more olive oil.  Mixture should be coated with the dressing, not soaked.  Allow to sit for 30 minutes to let the flavors blend.  Serve at room temperature.
3.2.2802

Filed Under: Main Dishes, Sides and Sauces Tagged With: chick pea, lunch, olives, salad, Sides and Sauces, vegetarian

Bulgar Salad With Broccoli

July 28, 2009 by Susan

BulgarSalad

This is one big bowl of healthy goodness.

Most people will recognize bulgar from tabbouleh, the middle eastern dish often eaten as an appetizer.  As it turns out, bulgar is much more nutritious than rice and couscous because it contains more fiber, vitamins and minerals.  Also, it has a better glycemic index than white rice or couscous.  I wanted to branch out from my current quinoa frenzy and give bulgar a try…and I’m happy I did.  It is very versatile, has a slightly chewy texture and a lovely nutty flavor.

I got the idea for this bulgar salad while flipping through some magazines in a bookstore.  For the life of me I can’t remember which magazine it was.  I liked the idea of the salad, however, I wanted to bulk it up a bit more so I thought to add steamed broccoli.  Anytime I can add broccoli to something, I go for it.  It’s common knowledge, for anyone that hasn’t been living under a rock, that broccoli is one of the most healthy, nutritious, anti-cancer foods available today.  It is one of the richest vegetable sources of calcium, iron and magnesium and is loaded with vitamins A and C and K.  The edamame, tomatoes and fresh herbs contribute to making this salad clean and wholesome.

This dish is quick to assemble, light and refreshing.  And at the risk of repeating myself, super healthy.  Every time I eat it I feel as if I’m taking a big scrub brush and cleaning my insides of anything harmful.

The salad is a terrific side dish for a piece of grilled chicken or fish.  It keeps well in the fridge for a few days and is great served at room temperature, or slightly cool from the fridge.  I like to drizzle some olive oil over the leftovers just before serving.

Here’s what you will need to serve 4 as a side dish….

Recipe

1 cup cooked bulgar (follow directions on bag)

2 cups cut up broccoli, steamed until tender but not too soft, cooled

1 pint grape tomatoes, cut in half lengthwise

1 cup frozen edamame, defrosted

1/2 cup scallions, chopped

2 tablespoons dill, chopped

1 cup parsley, chopped

1/4 cup mint, finely chopped

1/4 cup lemon juice

1/4 cup olive oil

1/8 tsp cayenne pepper

salt & pepper to taste

Method

Cook bulgar (boil in water, 2 to 1 ratio, simmer for 15 minutes).  Allow to cool.  Fluff and separate with a fork.

Steam broccoli, allow to cool.

In a large bowl add the broccoli, tomatoes, scallions, edamame, dill, parsley, mint and bulgar.  Stir to combine.  In a separate bowl whisk together the lemon juice, olive oil , cayenne pepper and salt (pepper is optional).  Pour over the bulgar salad and mix to incorporate.  The salad should just glisten with the dressing, it should not be soaked.

It’s as easy as that!


Bulgar Salad With Broccoli
 
Print
Author: Feasts And Fotos
Ingredients
  • 1 cup cooked bulgar (follow directions on bag)
  • 2 cups cut up broccoli, steamed until tender but not too soft, cooled
  • 1 pint grape tomatoes, cut in half lengthwise
  • 1 cup frozen edamame, defrosted
  • ½ cup scallions, chopped
  • 2 tablespoons dill, chopped
  • 1 cup parsley, chopped
  • ¼ cup mint, finely chopped
  • ¼ cup lemon juice
  • ¼ cup olive oil
  • ⅛ tsp cayenne pepper
  • salt & pepper to taste
Method
  1. Cook bulgar (boil in water, 2 to 1 ratio, simmer for 15 minutes).  Allow to cool.  Fluff and separate with a fork.
  2. Steam broccoli, allow to cool.
  3. In a large bowl add the broccoli, tomatoes, scallions, edamame, dill, parsley, mint and bulgar.  Stir to combine.  In a separate bowl whisk together the lemon juice, olive oil , cayenne pepper and salt (pepper is optional).  Pour over the bulgar salad and mix to incorporate.  The salad should just glisten with the dressing, it should not be soaked.
3.2.2802

Filed Under: Rice and Grains, Salads, Sides and Sauces Tagged With: broccoli, bulgar, edamame, healthy, lunch, side dish, tomatoes, vegetarian, wheat

  • 1
  • 2
  • Next Page »
Hello and welcome to Feasts and Fotos!

Archives

Categories

Copyright © 2025 · Foodie Pro Theme by Shay Bocks · Built on the Genesis Framework · Powered by WordPress