FEASTS AND FOTOS

  • Home
  • About
  • Happenings
  • Contact
You are here: Home / Archives for dessert

No-Bake Tiramisu Balls

February 8, 2015 by Susan

TiramisuBalls1

Tiramisu might be one of those desserts that everyone has heard of and loves. An Italian favorite consisting of coffee-soaked cookies layered with mascarpone and cocoa, what’s not to love?

I must admit, I have never actually made this dessert.  I think the reason is mostly because I don’t have one of those lovely trifle dishes that tiramisu is usually prepared in.  A secondary reason is that soaking the cookies always sounded a bit labor intensive to me.  When I came across this particular recipe I was intrigued and so excited that I went out immediately and bought some ladyfingers (I already had every other ingredient in my pantry).  I was excited because…well, no soaking and no trifle dish!  And intrigued because I wondered if they could actually TASTE like tiramisu.

I really love baking.  I enjoy the process, I love the way it makes the house smell so delicious and comforting and I most especially love eating baked goods.  But it is nice (and possibly mandatory) to have a simple, no-bake recipe in your back pocket for those times when you are simply all baked out.  For when you invite someone to dinner last minute and need something special for dessert but just don’t have the time (or oven space) to start baking.  And most importantly, if you don’t really like to bake, these are perfect for you!  You get that unmistakable flavor in these tiny little bite-sized treats.  It’s amazing, they taste exactly like tiramisu!

These tiramisu balls are a terrific, quick dessert to make this upcoming Valentine’s Day. For anyone that might be intimidated by baking but wants to impress someone special, I encourage you to give these a try.  They are very simple to make. But be careful, they are addicting!

Here’s what you will need to make approximately 16 tiramisu balls…

Recipe

3.5 oz. hard ladyfingers (12 cookies)

1/2 cup confectioners sugar

1/2 tbsp instant espresso powder

1/4 tsp ground cinnamon

1/3 cup mascarpone

1/2 tbsp coffee-flavored liqueur (I use Kahlua)

Coating

1 tbsp confectioners sugar

1 tbsp unsweetened cocoa powder

Method

In a food processor, pulse the cookies, 1 cup confectioners sugar, espresso powder and cinnamon until very finely ground. Add the mascarpone and liqueur and process until the dough comes together.  Roll a small amount of dough (depending on the size you prefer), one by one, into balls and transfer to a baking sheet. Cover and refrigerate for 30 minutes.

Meanwhile, in a small bowl whisk the cocoa powder and remaining 1 tbsp confectioners sugar.  Add the balls, one at a time, gently tossing to coat completely.

Recipe adapted from Rachael Ray


No-Bake Tiramisu Balls
 
Print
Author: Feasts And Fotos
Ingredients
  • 3.5 oz. hard ladyfingers (12 cookies)
  • ½ cup confectioners sugar
  • ½ tbsp instant espresso powder
  • ¼ tsp ground cinnamon
  • ⅓ cup mascarpone
  • ½ tbsp coffee-flavored liqueur (I use Kahlua)
  • Coating
  • 1 tbsp confectioners sugar
  • 1 tbsp unsweetened cocoa powder
Method
  1. In a food processor, pulse the cookies, 1 cup confectioners sugar, espresso powder and cinnamon until very finely ground. Add the mascarpone and liqueur and process until the dough comes together. Roll a small amount of dough (depending on the size you prefer), one by one, into balls and transfer to a baking sheet. Cover and refrigerate for 30 minutes.
  2. Meanwhile, in a small bowl whisk the cocoa powder and remaining 1 tbsp confectioners sugar. Add the balls, one at a time, gently tossing to coat completely.
3.2.2802

Filed Under: Sweets Tagged With: balls, cocoa, dessert, ladyfingers, sweets, tiramisu, treats

Rice Krispies Treats With Double Chocolate Drizzle

December 16, 2014 by Susan

RiceTreatsCut2 copy 2R

There are a handful of snacks that bring me right back to my childhood and this is one of them.  Rice Krispies Treats are old-school and eating them make me feel like a kid again.  And feeling like a kid again is fun!

Actually, I feel like a kid most days mainly because I am hanging around with (running after) my very-soon-to-be-three-year-old. Going to the playground, riding a carousel, horsey rides on my back and tea parties…it’s all about kid stuff around here.  So these fit into my lifestyle quite nicely these days.

The recipe for these treats is very basic.  Prepare them in the normal fashion and press them into the dish.  Then comes the fun part.  The double chocolate drizzle is the final element that takes these over the top and turns them into something special.  A work of art, even.

The real beauty of this dessert, for me, is that there are no eggs or peanuts involved.  My daughter is allergic to both so finding acceptable treats for her is not easy.  I don’t have to worry or alter anything for this recipe.  Plain and simple.  Oh, but with an amazing chocolate explosion over top.  And my baby loves chocolate,  just like her mamma.

You remember eating (and loving) these as a kid, right?  Go ahead, whip up a batch and tap into your inner child.  The holidays are right around the corner (how did that happen so fast?!) and these would be a perfect treat to bring to a holiday party or even give away as edible gifts.

Here’s what you need to make approximately 12-16 bars (depending on the size you prefer)…

Recipe

4 Tbsp butter

10 oz mini marshmallows

6 cups rice cereal

pinch of salt

8 x 10 baking dish

2 pieces of parchment paper, one piece slightly longer than your baking dish

3-4 oz bittersweet chocolate (or semi sweet), melted

3-4 oz white chocolate, melted

Method

In a large pot over medium heat melt the butter.  Once melted add all the marshmallows and lower the heat to low. Add a pinch of salt and stir until all the marshmallows are melted into the butter and the mixture is smooth.  (The key step here is lowering the heat so they don’t burn).

Once the mixture is smooth add the rice cereal and stir so all the cereal is coated with the marshmallow mixture.  You will need to put a little muscle into it!

Lay the longer piece of parchment paper on the bottom of your baking dish, with the long ends slightly over hanging the end of the dish.  You will use this as handles to lift the treats out of the dish.  Dump the mixture into the baking dish  and carefully spread out evenly.  I found the best method for this step is to use a piece of parchment paper.  Simply lay the paper over the pan and press and slide your hand (and side of your palm) over the mixture until it is smooth and level. Peel off the parchment paper.

Meanwhile, melt both the bittersweet chocolate and the white chocolate in separate bowls.  I do this in the microwave, melting each in 20 second intervals until completely melted.  Drizzle over the top as much or as little as you like.  I usually just use a fork and flick my wrist, spraying chocolate over the treats.  Another (less messy) option is to put the chocolate in a small zip top back, cut a tiny piece of a corner off and drizzle.  Create your artwork.

Allow rice treats to sit for another hour or so until the chocolate sets.  If you are in a rush, you can pop them in the fridge.  Once set, left the entire block out of the pan (lifting by the parchment paper).  Lay on a flat surface and cut into squares.  You can make big squares or cut them into smaller, bite-size pieces.

This is the size and thickness I usually prefer.

RiceTreatTowerR


Rice Krispies Treats With Double Chocolate Drizzle
 
Print
4 Tbsp butter 10 oz mini marshmallows 6 cups rice cereal pinch of salt 8 x 10 baking dish 2 pieces of parchment paper, one piece slightly longer than your baking dish 3-4 oz bittersweet chocolate (or semi sweet), melted 3-4 oz white chocolate, melted
Author: Feasts And Fotos
Ingredients
  • 4 Tbsp butter
  • 10 oz mini marshmallows
  • 6 cups rice cereal
  • pinch of salt
  • 8 x 10 baking dish
  • 2 pieces of parchment paper, one piece slightly longer than your baking dish
  • 3-4 oz bittersweet chocolate (or semi sweet), melted
  • 3-4 oz white chocolate, melted
Method
  1. In a large pot over medium heat melt the butter. Once melted add all the marshmallows and lower the heat to low. Add a pinch of salt and stir until all the marshmallows are melted into the butter and the mixture is smooth. (The key step here is lowering the heat so they don't burn).
  2. Once the mixture is smooth add the rice cereal and stir so all the cereal is coated with the marshmallow mixture. You will need to put a little muscle into it!
  3. Lay the longer piece of parchment paper on the bottom of your baking dish, with the long ends slightly over hanging the end of the dish. You will use this as handles to lift the treats out of the dish. Dump the mixture into the baking dish and carefully spread out evenly. I found the best method for this step is to use a piece of parchment paper. Simply lay the paper over the pan and press and slide your hand (and side of your palm) over the mixture until it is smooth and level. Peel off the parchment paper.
  4. Meanwhile, melt both the bittersweet chocolate and the white chocolate in separate bowls. I do this in the microwave, melting each in 20 second intervals until completely melted. Drizzle over the top as much or as little as you like. I usually just use a fork and flick my wrist, spraying chocolate over the treats. Another (less messy) option is to put the chocolate in a small zip top back, cut a tiny piece of a corner off and drizzle. Create your artwork.
  5. Allow rice treats to sit for another hour or so until the chocolate sets. If you are in a rush, you can pop them in the fridge. Once set, left the entire block out of the pan (lifting by the parchment paper). Lay on a flat surface and cut into squares. You can make big squares or cut them into smaller, bite-size pieces.
3.2.2802

Filed Under: Snacks, Sweets, Uncategorized Tagged With: chocolate, dessert, krispies, marshmellow, rice, sweets, treats, white chocolate

Classic Bread Pudding

November 23, 2014 by Susan

ClassicBreadPuddingDiag

Prior to meeting my husband, I never had bread pudding. Given the choice, I always choose a dessert that includes chocolate. Once we got married he happened to ‘mention’ to me that his favorite dessert was bread pudding.  And then for his birthday dinner he requested bread pudding for dessert.  Suddenly he was doing a lot of talking about this bread pudding.

And so I starting doing some research and comparing recipes.  There are tons of them out there.  We also started ordering bread pudding desserts at restaurants every now and again, so I got a good sampling.  Personally, I found most of them much too dense and sweet for my liking. My husband’s only request (demand) was that there be no raisins whatsoever.  None.  Apparently the inclusion of raisins completely ruins the dessert (in his opinion).

My guess is I only had to make bread pudding 2 times before I got it exactly how we like it.  By the 3rd time it was perfect, just the right amount of bread, not too much sugar and the perfect amount of pecans to give it that crunch it absolutely needs. And the whiskey cream sauce?  Totally makes the dessert!

I am proud to say my husband, the connoisseur of bread pudding, told me this is the best bread pudding he has ever had.  He might be exaggerating a bit due to the fact that he is married to me, but I have to say I agree with him. It is delicious and so easy to make, it takes all my willpower to not make it once a week!

If you need an amazing, easy dessert to add to all the pecan and pumpkin pies on your Thanksgiving table this week, try this one. You won’t be disappointed.

Here’s what you will need to serve 4-5 people…

Recipe

5 cups day old challah bread, cubed into 1 inch pieces

2 eggs

2 Tbsp vanilla

2 cups whole milk

1 cup sugar

2 Tbsp melted butter, cooled

pinch of cinnamon

pinch of salt

1/4 cup chopped pecans

Whiskey Cream Sauce

1/4 cup sugar

1/2 stick of butter

1/4 cup heavy cream (heaping)

1/8 cup Jack Daniels

pinch of salt

Method

The bread needs to be somewhat dried out, so if it is not old bread that is already dried out cut the bread into cubes and bake on a sheet pan in a 275 degree oven for about 10-15 minutes or so until the cubes are lightly toasted.  Allow to cool.  Place in a baking dish (approximately 8×10 in size).  The bread should fit tightly in the baking dish.

Preheat oven to 325 degrees.

In a large bowl, whisk eggs, melted and cooled butter, vanilla and milk.  Add the sugar and mix until incorporated.  Pour liquid over all the bread cubes, pressing the bread down slightly to ensure most of the bread is covered with the liquid.  Scatter chopped pecans over the top and place in the oven to cook for approximately 45 minutes until golden brown and puffed. It will soon deflate, don’t worry, that’s normal.

While the bread pudding is cooking, start on the whiskey cream sauce.  Basically just add all the ingredients into a small saucepan over medium low heat and cook, stirring until everything is melted and gently boiling.  Remove from heat and use when needed.  You might need to reheat this mixture a bit and stir again.  If there is any leftover sauce, store in the refrigerator and reheat gently.

ClassicBreadPuddingVertical

Portion out the bread pudding into bowls and drizzle the whiskey cream sauce over the top.  I like to just moisten the bread pudding with the sauce, not drench it.  If you prefer to have your bread pudding soaking in the cream sauce you might want to double the sauce recipe.

Whiskey Cream Sauce courtesy of The Pioneer Woman


Classic Bread Pudding
 
Print
Author: Feasts And Fotos
Ingredients
  • 5 cups day old challah bread, cubed into 1 inch pieces
  • 2 eggs
  • 2 Tbsp vanilla
  • 2 cups whole milk
  • 1 cup sugar
  • 2 Tbsp melted butter, cooled
  • pinch of cinnamon
  • pinch of salt
  • ¼ cup chopped pecans
  • Whiskey Cream Sauce
  • ¼ cup sugar
  • ½ stick of butter
  • ¼ cup heavy cream (heaping)
  • ⅛ cup Jack Daniels
  • pinch of salt
Method
  1. The bread needs to be somewhat dried out, so if it is not old bread that is already dried out cut the bread into cubes and bake on a sheet pan in a 275 degree oven for about 10-15 minutes or so until the cubes are lightly toasted. Allow to cool. Place in a baking dish (approximately 8x10 in size). The bread should fit tightly in the baking dish.
  2. Preheat oven to 325 degrees.
  3. In a large bowl, whisk eggs, melted and cooled butter, vanilla and milk. Add the sugar and mix until incorporated. Pour liquid over all the bread cubes, pressing the bread down slightly to ensure most of the bread is covered with the liquid. Scatter chopped pecans over the top and place in the oven to cook for approximately 45 minutes until golden brown and puffed. It will soon deflate, don't worry, that's normal.
  4. While the bread pudding is cooking, start on the whiskey cream sauce. Basically just add all the ingredients into a small saucepan over medium low heat and cook, stirring until everything is melted and gently boiling. Remove from heat and use when needed. You might need to reheat this mixture a bit and stir again. If there is any leftover sauce, store in the refrigerator and reheat gently.
  5. Portion out the bread pudding into bowls and drizzle the whiskey cream sauce over the top. I like to just moisten the bread pudding with the sauce, not drench it. If you prefer to have your bread pudding soaking in the cream sauce you might want to double the sauce recipe.
3.2.2802

Filed Under: Sweets Tagged With: bread pudding, cream, dessert, pecan, sauce, sweets, whiskey

Frozen Banana Bon Bons

September 1, 2012 by Susan

BonbonsR

I would like to introduce you to my new obsession…frozen banana bites coated in chocolate.  You cannot imagine how good these are.

I meant to post these treats two years ago.  Yup, TWO years ago.  Pathetic.  We usually have these in the summer and it seems the summer flies by in the blink of an eye and I neglect to post this year after year.  And again this summer zipped on by and here I am on Labor Day weekend finally getting around to it.  Oiy.

Anyway, back to the goodies.  Thick slices of banana coated in dark chocolate and then frozen for a few hours.  The banana becomes similar to ice cream, you would think you are eating banana ice cream!  In this photo above (2 years old) I topped each banana with chopped nuts.  Lately I have not been using the nuts, just leaving them a little naked and they are equally outstanding.  I simply don’t have time for that extra step anymore.

If you like banana and you like chocolate and you love having a cold treat on a hot day I guarantee you will absolutely love these.  And since the summer is coming to a close please give these a try soon.  You won’t regret it.

Here’s what you will need…

Recipe

1 Banana, not too ripe (preferably cool from the fridge)

4 oz melted chocolate ( I use 60% or 70% cacao)

chopped nuts (optional)

2 forks

cookie sheet

parchment paper


Method 

Remove banana from fridge, peel and remove any of those stringy things on the sides.  Cut the banana into large chunks (about 1/2 inch thick).  Taking one piece of banana at a time, drop it into the bowl of chocolate and with the forks turn the banana over a few times to coat (don’t prick the banana).  Pick the banana up using the flat side of one fork and gently tap it against the edge of the bowl to remove excess chocolate.  (If you are using the nuts you would put them on the top now).  Lay the banana bite on the cookie sheet.

Continue with all the banana pieces and then put the cookie sheet in the freezer for a few hours.  Once they are frozen you can put them in a ziplock back and keep them stored in the freezer.

Hurry up and make these – the summer’s almost over!

*The banana does end up making the chocolate a bit mealy after the 8th or 9th piece.  If you want to make more just clean out that chocolate and start over with a new 4 oz bar.


Frozen Banana Bon Bons
 
Print
Author: Feasts And Fotos
Ingredients
  • 1 Banana, not too ripe (preferably cool from the fridge)
  • 4 oz melted chocolate ( I use 60% or 70% cacao)
  • chopped nuts (optional)
  • 2 forks
  • cookie sheet
  • parchment paper
Method
  1. Remove banana from fridge, peel and remove any of those stringy things on the sides.  Cut the banana into large chunks (about ½ inch thick).  Taking one piece of banana at a time, drop it into the bowl of chocolate and with the forks turn the banana over a few times to coat (don't prick the banana).  Pick the banana up using the flat side of one fork and gently tap it against the edge of the bowl to remove excess chocolate.  (If you are using the nuts you would put them on the top now).  Lay the banana bite on the cookie sheet.
  2. Continue with all the banana pieces and then put the cookie sheet in the freezer for a few hours.  Once they are frozen you can put them in a ziplock back and keep them stored in the freezer.
3.2.2802

Filed Under: Sweets Tagged With: banana, chocolate, dessert, frozen, healthy, treat

Rugelach

December 20, 2010 by Susan

RugelachInTinR

It’s Christmas Cookie time!

These rugelach have made an appearance in my house every Christmas for the past 5 or so years.  I love them.  Everyone loves them.  They are made with…cream cheese dough.  What’s not to love?!

I will admit, these cookies are a labor of love.  Slightly time consuming and you need to exhibit a fair amount of patience, first allowing the dough to chill, gently rolling each little cookie up, then waiting for the rolled up cookies to chill for 30 minutes prior to baking.  In general I don’t have all that much patience, particularly if it involves waiting to eat cookies, but oh, is it worth it.  Trust me.  Just the smell of these baking will rock your world.

Here’s what you will need to make 4 dozen cookies…

Recipe

8 ounces cream cheese, at room temperature

1/2 pound unsalted butter, at room temperature

1/4 cup granulated sugar, plus 9 tablespoons

1/4 teaspoon kosher salt

1 teaspoon pure vanilla extract

2 cups all-purpose flour

1/4 cup light brown sugar, packed

1 1/2 teaspoons ground cinnamon

3/4 cup raisins

1 cup walnuts, finely chopped

1/2 cup apricot preserves, pureed in a food processor (I also love blackberry)

1 egg beaten with 1 tablespoon milk, for egg wash

Method

Preheat oven to 350 degrees.  Line a baking sheet with parchment paper.

Cream the cheese and butter in the bowl of an electric mixer fitted with the paddle attachment until light.  Add 1/4 cup granulated sugar, salt and vanilla.  With mixer on low add the flour and mix until just combined.  Dump the dough out onto a well floured board and roll it into a ball.  Cut the ball in quarters, flatten each quarter slightly then wrap each piece in plastic and refrigerate for at least one hour, up to a few days.

To make the filling:  combine 6 tablespoons of granulated sugar, brown sugar, 1/2 teaspoon cinnamon, raisins and walnuts.  (I always have some leftover filling at the end).

On a well floured board, roll each ball of dough into a 9 inch circle.  Spread the dough with about 2 tablespoons of preserves (all the way to the edge) and sprinkle with approximately 1/2 cup of the filling.  There should only be a thin layer of preserves to act as the ‘glue’.  Resist the temptation to put too much preserves or filling on the dough.  Press the filling lightly into the dough.  Cut the circle into 12 equal wedges, first cutting the whole circle in quarters, then each quarter into thirds.  At this point I look at each triangle and determine if any of them are a bit short on nuts or raisins.  If so, I just add what is needed.  Starting with the wide edge, roll up each wedge.  Place rolled up cookies, points tucked under, on baking sheet.  Chill for 30 minutes.

Brush each cookie with the egg wash.  Combine 3 tablespoons granulated sugar and 1 teaspoon cinnamon and sprinkle on the cookies.  Bake for 18 to 25 minutes or until lightly browned.  Place cookies on a wire rack to cool before devouring them.

Recipe courtesy of Ina Garten.

Rugelach
 
Print
Author: Feasts And Fotos
Ingredients
  • 8 ounces cream cheese, at room temperature
  • ½ pound unsalted butter, at room temperature
  • ¼ cup granulated sugar, plus 9 tablespoons
  • ¼ teaspoon kosher salt
  • 1 teaspoon pure vanilla extract
  • 2 cups all-purpose flour
  • ¼ cup light brown sugar, packed
  • 1½ teaspoons ground cinnamon
  • ¾ cup raisins
  • 1 cup walnuts, finely chopped
  • ½ cup apricot preserves, pureed in a food processor (I also love blackberry)
  • 1 egg beaten with 1 tablespoon milk, for egg wash
Method
  1. Preheat oven to 350 degrees.  Line a baking sheet with parchment paper.
  2. Cream the cheese and butter in the bowl of an electric mixer fitted with the paddle attachment until light.  Add ¼ cup granulated sugar, salt and vanilla.  With mixer on low add the flour and mix until just combined.  Dump the dough out onto a well floured board and roll it into a ball.  Cut the ball in quarters, flatten each quarter slightly then wrap each piece in plastic and refrigerate for at least one hour, up to a few days.
  3. To make the filling:  combine 6 tablespoons of granulated sugar, brown sugar, ½ teaspoon cinnamon, raisins and walnuts.  (I always have some leftover filling at the end).
  4. On a well floured board, roll each ball of dough into a 9 inch circle.  Spread the dough with about 2 tablespoons of preserves (all the way to the edge) and sprinkle with approximately ½ cup of the filling.  There should only be a thin layer of preserves to act as the 'glue'.  Resist the temptation to put too much preserves or filling on the dough.  Press the filling lightly into the dough.  Cut the circle into 12 equal wedges, first cutting the whole circle in quarters, then each quarter into thirds.  At this point I look at each triangle and determine if any of them are a bit short on nuts or raisins.  If so, I just add what is needed.  Starting with the wide edge, roll up each wedge.  Place rolled up cookies, points tucked under, on baking sheet.  Chill for 30 minutes.
  5. Brush each cookie with the egg wash.  Combine 3 tablespoons granulated sugar and 1 teaspoon cinnamon and sprinkle on the cookies.  Bake for 18 to 25 minutes or until lightly browned.  Place cookies on a wire rack to cool before devouring them.
3.2.2802

Filed Under: Sweets Tagged With: cookie, dessert, rugelach

Pumpkin Walnut Muffins

November 4, 2010 by Susan

PumpkinMuffinFINALR

When the cold weather starts rolling in and fall is in the air I immediately start making baked items involving pumpkin.  It’s mandatory, isn’t it?

A few years back I posted my favorite pumpkin spice bread recipe, it’s my go-to pumpkin bread.  This year I made a few changes to that recipe and turned that delicious bread into adorable muffins.  I even bake them up in cupcake tins for a smaller portion size (pictured above).  I find that the muffin and/or cupcake shape is a bit more transportable than the loaf and who wouldn’t appreciate that?  Running out the door?  Just grab one and go.  And let’s face it, they are very cute.  Nothing makes me feel more like a kid again than eating cupcakes.  Spread some cream cheese frosting on top of these cuties and just try to not eat five of them.  In one sitting.

These muffins are very moist and the addition of the walnuts provides a wonderful crunch.  In my opinion they are terrific eaten as-is.  But if you so choose, feel free to slice open and slather on some butter.  Or top with some regular cream cheese.  Or better yet – spread that cream cheese frosting on top.

Go ahead, bring out that kid in you!

Here’s what you need to make approximately 12 cupcakes or 8 muffins…

Recipe

1 cup regular flour

2/3 cups whole wheat flour

1 teaspoon baking soda

3/4 teaspoon ground cinnamon

1/4 teaspoon ground ginger

1/4 teaspoon ground cloves

1/4  teaspoon salt

1 and 1/3 cups sugar

1/3 cup vegetable oil

1 cup plus 2 tablespoons canned unsweetened pumpkin

1/2 cup chopped walnuts, plus a few extra for topping

1 large egg, room temperature

Method

Preheat oven to 350 degrees.   Spray muffin tin or cupcake tin with cooking spray.  If using a cupcake tin, add your cupcake liners if you so choose.

Mix first seven ingredients together in a bowl with a whisk until well combined.

Combine sugar, oil and pumpkin in the bowl of electric mixer.  Beat at medium speed until smooth.  Add egg, beating until well blended.  Gradually add dry ingredients, beating at a low speed until blended.  Add chopped walnuts to the batter and gently fold in using a spatula or wooden spoon.  Transfer batter to tin.  If you want them to look extra special place a few broken pieces of walnuts on top of each.  Not only does this make them look great but it also lets people know there are walnuts inside!

Bake for approximately 20-35 minutes, depending on the size of your tin.  You want them to be golden on top, firm to the touch and a when you insert a wooden pick in the center it comes out clean.  Let cool in pan on a wire rack for 5 minutes then remove from pan and allow to cool slightly.

Dig in!


Pumpkin Walnut Muffins
 
Print
Author: Feasts And Fotos
Ingredients
  • 1 cup regular flour
  • ⅔ cups whole wheat flour
  • 1 teaspoon baking soda
  • ¾ teaspoon ground cinnamon
  • ¼ teaspoon ground ginger
  • ¼ teaspoon ground cloves
  • ¼  teaspoon salt
  • 1 and ⅓ cups sugar
  • ⅓ cup vegetable oil
  • 1 cup plus 2 tablespoons canned unsweetened pumpkin
  • ½ cup chopped walnuts, plus a few extra for topping
  • 1 large egg, room temperature
Method
  1. Preheat oven to 350 degrees.   Spray muffin tin or cupcake tin with cooking spray.  If using a cupcake tin, add your cupcake liners if you so choose.
  2. Mix first seven ingredients together in a bowl with a whisk until well combined.
  3. Combine sugar, oil and pumpkin in the bowl of electric mixer.  Beat at medium speed until smooth.  Add egg, beating until well blended.  Gradually add dry ingredients, beating at a low speed until blended.  Add chopped walnuts to the batter and gently fold in using a spatula or wooden spoon.  Transfer batter to tin.  If you want them to look extra special place a few broken pieces of walnuts on top of each.  Not only does this make them look great but it also lets people know there are walnuts inside!
  4. Bake for approximately 20-35 minutes, depending on the size of your tin.  You want them to be golden on top, firm to the touch and a when you insert a wooden pick in the center it comes out clean.  Let cool in pan on a wire rack for 5 minutes then remove from pan and allow to cool slightly.
3.2.2802

Filed Under: Breakfast, Sweets Tagged With: breakfast, dessert, muffins, pumpkin, walnut

Banana Walnut Chocolate Chunk Cookies

August 2, 2010 by Susan

Cookies, good cookies, make me so incredibly happy.  Deliriously happy.  I think they are a perfect treat.

I have been making these particular cookies for several years now.  Every time I have that craving for a delicious cookie this is the recipe I reach for over an over again.  Why?  Because they are a wondrous combination of all that is good in this world.  First, chocolate.  Enough said.  Second, nuts.  I love the chocolate and nut combination.  Lastly, the surprise ingredient…bananas!  It is this trifecta that knocks these cookies out of the park.

When biting into these babies you are almost confused whether or not you are eating a cookie or a banana bread.  It’s got a hint of banana bread taste with the texture of a cookie.  Perfection!

As far as cookies go, I’m a crunchy girl.  Not overly crunchy, but I do love the outside edges to have that amazing crispyness while the inside is still soft.  To me, that is the perfect cookie texture. And that is exactly what you get with these .

Every time I make these cookies the first few bites are spent with me moaning and rolling my eyes into the back of my head.  That’s what these cookies do to me.  I think my husband is slightly jealous.

Here’s what you will need to make about 30 cookies…

Recipe

1 cup all purpose flour

1/2 cup whole-wheat flour

1 teaspoon coarse salt

1/2 teaspoon baking soda

3/4 cup (1 1/2 sticks) unsalted butter, softened

1/2 cup granulated sugar

1/2 cup packed light-brown sugar

1 large egg

1 1/2 teaspoons pure vanilla extract

1/2 cup mashed bananas (about 1 1/2 medium bananas)

1 cup old-fashioned rolled oats

8 ounces semi-sweet chocolate, coarsely chopped into 1/4 inch chunks

1/2 cup coarsely chopped walnuts, toasted

Preheat your oven to 375 degrees.

Method

Whisk flours, salt and baking soda in a small bowl, set aside.  Put butter and sugars into the bowl of an electric mixer fitted with the paddle attachment, mix on medium speed until pale and fluffy.  Reduce speed to low and add the egg and vanilla.  Mix until combined.  Add  in banana.  Add the flour mixture a little at a time until just combined.

Turn off the mixer.  At this time add the oats, chocolate and walnuts to the bowl.  Turn the mixer on very low just to mix the final ingredients into the batter.  Literally I only let it mix for about 4 or 5 turns of the paddle.

Using an ice cream scoop drop dough onto baking sheets lined with parchment paper, spacing them about 2 inches apart.  Bake cookies, rotating sheets halfway through, until golden brown and just set, approximately 20-25 minutes, depending on  your oven.  I would check in on them after about 16 minutes, just to be safe.

Allow the cookies to sit and cool on the baking sheets for 3-4 minutes, then transfer them to wire cooling racks, just like this…

Use all the self control you can muster to allow these things to cool before eating or else you will burn your precious tongue.  I say this from experience.

Thank you to Martha Stewart for this recipe.  You are a cookie genius.


Banana Walnut Chocolate Chunk Cookies
 
Print
Author: Feasts And Fotos
Ingredients
  • 1 cup all purpose flour
  • ½ cup whole-wheat flour
  • 1 teaspoon coarse salt
  • ½ teaspoon baking soda
  • ¾ cup (1½ sticks) unsalted butter, softened
  • ½ cup granulated sugar
  • ½ cup packed light-brown sugar
  • 1 large egg
  • 1½ teaspoons pure vanilla extract
  • ½ cup mashed bananas (about 1½ medium bananas)
  • 1 cup old-fashioned rolled oats
  • 8 ounces semi-sweet chocolate, coarsely chopped into ¼ inch chunks
  • ½ cup coarsely chopped walnuts, toasted
  • Preheat your oven to 375 degrees.
Method
  1. Whisk flours, salt and baking soda in a small bowl, set aside.  Put butter and sugars into the bowl of an electric mixer fitted with the paddle attachment, mix on medium speed until pale and fluffy.  Reduce speed to low and add the egg and vanilla.  Mix until combined.  Add  in banana.  Add the flour mixture a little at a time until just combined.
  2. Turn off the mixer.  At this time add the oats, chocolate and walnuts to the bowl.  Turn the mixer on very low just to mix the final ingredients into the batter.  Literally I only let it mix for about 4 or 5 turns of the paddle.
  3. Using an ice cream scoop drop dough onto baking sheets lined with parchment paper, spacing them about 2 inches apart.  Bake cookies, rotating sheets halfway through, until golden brown and just set, approximately 20-25 minutes, depending on  your oven.  I would check in on them after about 16 minutes, just to be safe.
  4. Allow the cookies to sit and cool on the baking sheets for 3-4 minutes, then transfer them to wire cooling racks.
3.2.2802

Filed Under: Sweets Tagged With: banana, chocolate, cookies, dessert, walnut

Blueberry Crumb Cake

July 7, 2010 by Susan

During the summer months, when berries are in season, I try to prepare desserts that showcase the delicious, ripe fruit.  There will be plenty of time to make a chocolate cake in the winter!  I usually love a fruit crisp but wanted to try something different, maybe even unexpected.  And a crumb cake is just that – I hardly see them prepared homemade.  Fruit tarts and apple pies are the usual suspects.  Once I tell people that I’ve prepared a blueberry crumb cake they reply…”crumb cake?”

And what a surprise it is….it’s absolutely delicious!  Everyone that I’ve made this for over the past few years loves it.  The cake is light and moist, studded with tender blueberries.  The crumb topping is a wonderful contrast to the cake it sits upon,  crunchy and nutty and most importantly not too sweet.  Who doesn’t love a crumb topping?!

Needless to say, this “dessert” makes a wonderful breakfast treat paired with a big cup of coffee or tea.  The only problem is making sure there are leftovers!

Here’s what you will need to make one cake that serves approximately 6-8 people…

Recipe

Topping

5 tbsp unsalted butter, room temperature

1/4 cup sugar

1/3 cup light brown sugar (packed)

1/3 cup all-purpose flour

1/4 tsp salt

1/2 cup chopped walnuts

Cake

1 pint blueberries, fresh

2 cups plus 2 tsp all-purpose flour

2 tsp baking powder

1/2 tsp baking soda

1/4 tsp salt

1/4 tsp cinnamon

1/8 tsp grated  nutmeg

2/3 cup sugar

grated zest of 1/2 lemon

6 tbsp unsalted butter, room temperature

2 large eggs, room temperature

1 tsp vanilla extract

1/2 cup buttermilk

Method

Preheat the oven to 350 degrees and butter an 8-inch square pan.

First step is to make the delicious crumb topping.  Basically, put all the ingredients (except the nuts) in a food processor and pulse just until the mixture forms clumps.  Scrape the topping into a bowl and stir in the nuts.  Either use right away or store in the fridge with a piece of plastic wrap pressed right onto the surface of the mixture.

Now for the cake…in a small bowl toss the blueberries with 2 tsp of flour to coat and set aside.  In a medium bowl, whisk together the remaining 2 cups flour, baking powder, baking soda, salt, cinnamon and nutmeg.

In the bowl of a stand mixer rub the sugar and zest together with your fingertips until the sugar is moist.  Add the butter and beat the butter and sugar mixture at medium speed until light, about 2-3 minutes.   Add the eggs, one by one, beating for 1 minute after each addition, then beat in the vanilla extract.

Reduce the mixer to low and add the flour mixture and the buttermilk alternately, starting with the flour.  You will add the flour in 3 parts and the buttermilk twice. The batter will be thick and creamy.  With a rubber spatula gently mix in the berries.  You don’t want them to burst.

Pour the batter into the buttered pan and smooth the top with a  spatula.  Scatter the crumb topping onto the batter, breaking it apart with your fingers.  Once the batter is mostly covered with the crumb topping press down on the topping ever so slightly.

Bake for 65-75 minutes until the crumbs are golden and a tooth pick inserted into the middle of the cake comes out mostly clean.  Transfer the cake to a rack and cool.

Recipe courtesy of Dorie Greenspan


Blueberry Crumb Cake
 
Print
Author: Feasts And Fotos
Ingredients
  • Topping
  • 5 tbsp unsalted butter, room temperature
  • ¼ cup sugar
  • ⅓ cup light brown sugar (packed)
  • ⅓ cup all-purpose flour
  • ¼ tsp salt
  • ½ cup chopped walnuts
  • Cake
  • 1 pint blueberries, fresh
  • 2 cups plus 2 tsp all-purpose flour
  • 2 tsp baking powder
  • ½ tsp baking soda
  • ¼ tsp salt
  • ¼ tsp cinnamon
  • ⅛ tsp grated nutmeg
  • ⅔ cup sugar
  • grated zest of ½ lemon
  • 6 tbsp unsalted butter, room temperature
  • 2 large eggs, room temperature
  • 1 tsp vanilla extract
  • ½ cup buttermilk
Method
  1. Preheat the oven to 350 degrees and butter an 8-inch square pan.
  2. First step is to make the delicious crumb topping. Basically, put all the ingredients (except the nuts) in a food processor and pulse just until the mixture forms clumps. Scrape the topping into a bowl and stir in the nuts. Either use right away or store in the fridge with a piece of plastic wrap pressed right onto the surface of the mixture.
  3. Now for the cake...in a small bowl toss the blueberries with 2 tsp of flour to coat and set aside. In a medium bowl, whisk together the remaining 2 cups flour, baking powder, baking soda, salt, cinnamon and nutmeg.
  4. In the bowl of a stand mixer rub the sugar and zest together with your fingertips until the sugar is moist. Add the butter and beat the butter and sugar mixture at medium speed until light, about 2-3 minutes. Add the eggs, one by one, beating for 1 minute after each addition, then beat in the vanilla extract.
  5. Reduce the mixer to low and add the flour mixture and the buttermilk alternately, starting with the flour. You will add the flour in 3 parts and the buttermilk twice. The batter will be thick and creamy. With a rubber spatula gently mix in the berries. You don't want them to burst.
  6. Pour the batter into the buttered pan and smooth the top with a spatula. Scatter the crumb topping onto the batter, breaking it apart with your fingers. Once the batter is mostly covered with the crumb topping press down on the topping ever so slightly.
3.2.2802

Filed Under: Breakfast, Sweets Tagged With: blueberry, breakfast, crumb cake, dessert

Shortbread Cookies

December 21, 2009 by Susan

It’s Christmas time and I’m on a sugar bender.  South Beach is nothing but a distant memory right now.  I have a target date of January 15th to reintroduce myself to phase one of South Beach, but until then, bring on the sweets!

How adorable are these shortbread cookies?  Little bite sized snowflakes that you can pop into your mouth.  It’s alot of fun to select holiday themed cutouts and shape your cookies into festive forms.  In addition to these cute snowflakes I made a batch of Christmas tree shaped cookies and decorated those with a combination of white sugar and green sugar.  Very festive.

These shortbread cookies are delicious, buttery and crumbly and highly addictive.  They are virtually the same recipe as my Pecan Shortbread cookie recipe, eliminating the pecans of course.  This is a better suited cookie for anyone out there with nut allergies.

The dough is easy to prepare and can be made ahead of time, stored in the fridge for a few days.  A big time saver around the busy holiday season.  Just pull the dough out of the fridge (or freezer) and bake as needed.

Here’s what you will need to make approximately 40 cookies, depending on the size and shape of your cookie cutter…

Recipe

2 sticks unsalted butter, room temperature

1/2 cup sugar

1/4 cup confectioners’ sugar, sifted

1/2 teaspoon salt

2 large egg yolks, room temperature

2 cups flour

Decorating sugar

egg wash

Method

In a stand mixer beat the butter at medium speed until smooth and very creamy.  Add sugars and salt and beat until well blended.  The mixture should be smooth and velvety, not fluffy and airy.  Reduce speed to low and beat in the egg yolks until incorporated.

Pour in the flour and pulse the mixer at low speed 5-7 times for a second or two each time.  (You can put a towel over the mixer to protect yourself from getting flour all over you).  Continue mixing at low speed for 20 seconds more, just until flour disappears into the dough.  The dough should be soft, moist and clumpy.

Scrape the dough onto a smooth work surface sprinkled with flour, gather into a ball and divide in half.  Flatten each half into a disk, wrap in plastic wrap and refrigerate for 3 hours or up to 3 days.

Center a rack in the oven and preheat to 350.  Line baking sheet with parchment.  Remove dough from refrigerator, remove from plastic, sprinkle with some flour and roll out to approximately 1/4 inch to 1/3 inch thick.  Use your favorite holiday shaped cutouts to form each cookie.

Whisk egg for egg wash.  Gently brush the top of each cookie with the egg wash and sprinkle generously with decorator’s sugar.  Place on baking sheet, one inch apart.

Bake for 15-20 minutes (smaller cookies might only need 12 minutes, watch carefully), rotating baking sheet at the midway point, until the edges are lightly golden and the tops of the cookies are slightly less golden.  Remove from oven, allow to sit for a minute, then transfer to a cooling rack.

Restrain yourself from eating 17 cookies in one sitting.  Or not.


Shortbread Cookies
 
Print
Author: Feasts And Fotos
Ingredients
  • 2 sticks unsalted butter, room temperature
  • ½ cup sugar
  • ¼ cup confectioners' sugar, sifted
  • ½ teaspoon salt
  • 2 large egg yolks, room temperature
  • 2 cups flour
  • Decorating sugar
  • egg wash
Method
  1. In a stand mixer beat the butter at medium speed until smooth and very creamy.  Add sugars and salt and beat until well blended.  The mixture should be smooth and velvety, not fluffy and airy.  Reduce speed to low and beat in the egg yolks until incorporated.
  2. Pour in the flour and pulse the mixer at low speed 5-7 times for a second or two each time.  (You can put a towel over the mixer to protect yourself from getting flour all over you).  Continue mixing at low speed for 20 seconds more, just until flour disappears into the dough.  The dough should be soft, moist and clumpy.
  3. Scrape the dough onto a smooth work surface sprinkled with flour, gather into a ball and divide in half.  Flatten each half into a disk, wrap in plastic wrap and refrigerate for 3 hours or up to 3 days.
  4. Center a rack in the oven and preheat to 350.  Line baking sheet with parchment.  Remove dough from refrigerator, remove from plastic, sprinkle with some flour and roll out to approximately ¼ inch to ⅓ inch thick.  Use your favorite holiday shaped cutouts to form each cookie.
  5. Whisk egg for egg wash.  Gently brush the top of each cookie with the egg wash and sprinkle generously with decorator's sugar.  Place on baking sheet, one inch apart.
  6. Bake for 15-20 minutes (smaller cookies might only need 12 minutes, watch carefully), rotating baking sheet at the midway point, until the edges are lightly golden and the tops of the cookies are slightly less golden.  Remove from oven, allow to sit for a minute, then transfer to a cooling rack.
3.2.2802

Filed Under: Uncategorized Tagged With: cookies, dessert, holiday, shortbread

Blueberry Buttermilk Scones

June 23, 2009 by Susan

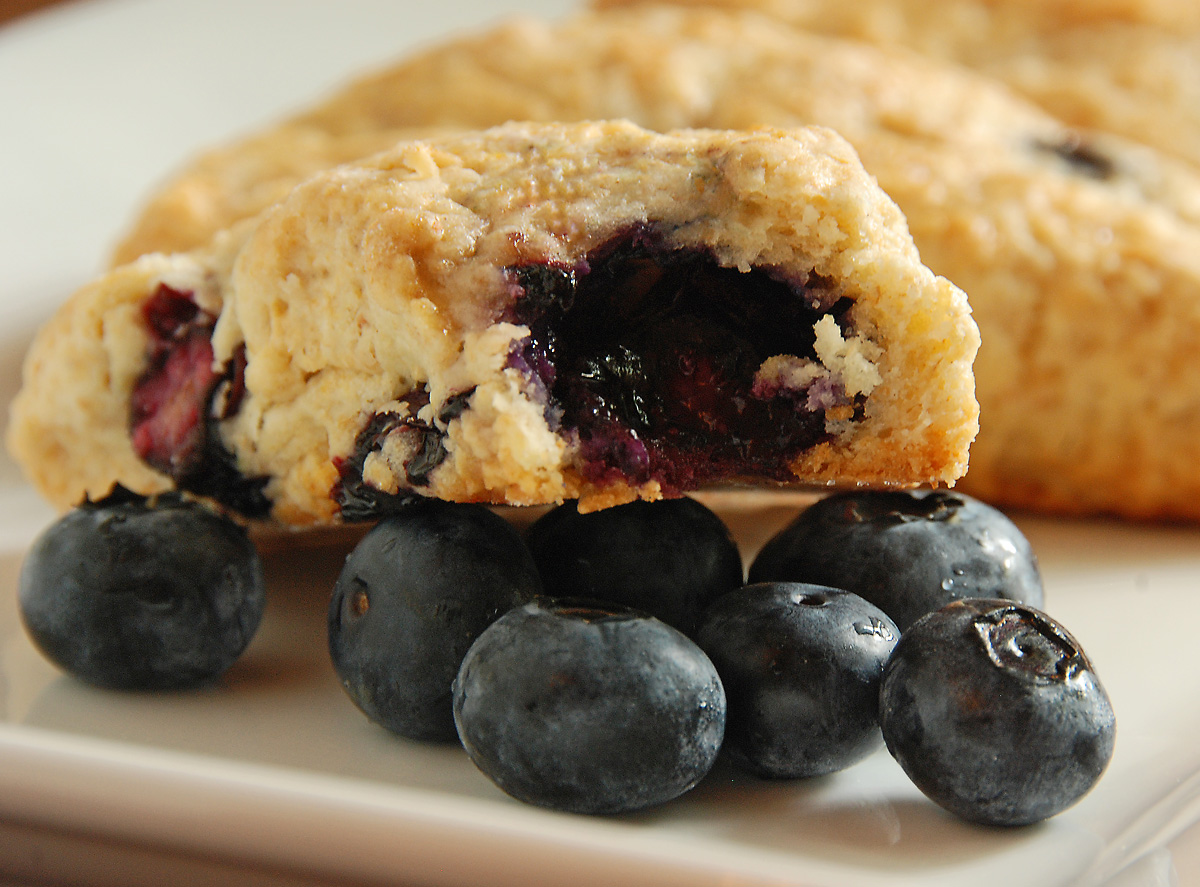
BlueberrySconeBerries

Dear lord these are delicious.

If I ever happen to be in a bakery (I try to avoid them due to my occassional lack of self control) I rarely ever choose scones.  I think the few times in my life that I’ve ever even eaten a scone I remember it to be very crumbly and dry.  Sort of like a brick.  Who would pay money for these things??  As far as I was concerned, I would rather have a muffin or croissant any day.

Then along comes Martha Stewart and her blueberry buttermilk scones.  I can’t say enough about these things.  They are spectacular!   So this is what a scone is supposed to taste like!   Ah ha!

The aroma while baking these is intoxicating.  The end product was slightly crumbly on the outside, soft and tender on the inside.  And that burst of blueberries adds a wonderful natural sweetness.  I love blueberries, they are sweet and delicious and are perfect to snack on.  Perfect size to just pop into your mouth.  It’s just an added bonus that they are very healthy and full of antioxidants.

After preparing the dough, I cut the scones a bit smaller (more narrow) than normal,  figuring it would be better on my waistline to eat smaller portions.  What a joke.  These were so good I ate TWO of the smaller scones.  See what I mean about the self control?  I baked off a few the first day reserving part of the dough in the fridge until the next day.  They came out just as yummy.  Also, leftover scones are delicious reheated in a toaster oven for a few minutes until warmed through.

I did make a few slight changes to the recipe.  I used whole wheat flour in place of cake flour and I used less sugar (as I usually do).  I used regular buttermilk, not low-fat.  Not sure they sell a low fat version where I shop.  Lastly, I added the lemon zest.

Here’s what you will need to make 10-12 scones….

Recipe

1 1/2 cups all purpose flour

1/2 cup whole wheat flour

1 1/2 tablespoon granulated sugar

2 1/2 tsp baking powder

3/4 tsp salt

4 ounces (1 stick) cold unsalted butter, cut into small pieces

1 heaping cup fresh blueberries

zest of one small lemon

1/2 cup buttermilk

1 large egg, plus 1 large egg lightly beaten for egg wash

1/2 teaspoon pure vanilla extract

fine sugar for sprinkling

Method

Preheat oven to 375 degrees.  Line a baking sheet with parchment paper.

Whisk together flours, granulated sugar, baking powder and salt in a large bowl.  Add butter and rub with your fingers until mixture has the texture of course meal.  Gently stir in blueberries.

In another bowl whisk together buttermilk, 1 egg , lemon zest and vanilla.  Drizzle over flour mixture and stir lightly with a fork until the dough comes together but a small amount of flour remains in bowl.  It’s important to not overwork the dough.

Turn out dough onto work surface and gently knead dough once or twice just to incorporate the flour.  Pat the dough into a 1-inch thick round.  Cut the round into approximately 10-12 wedges.  Transfer to baking sheet.

Brush the top of each scone with egg wash and sprinkle generously with sugar.  Bake until golden brown and cooked through, roughly 25 minutes.  Transfer scones to a wire rack to cool.

Just try to control yourself – you will be tempted to eat these piping hot out of the oven!  Use restraint until they are cool enough so you don’t burn your mouth.

Blueberry Buttermilk Scones
 
Print
Author: Feasts And Fotos
Ingredients
  • 1½ cups all purpose flour
  • ½ cup whole wheat flour
  • 1½ tablespoon granulated sugar
  • 2½ tsp baking powder
  • ¾ tsp salt
  • 4 ounces (1 stick) cold unsalted butter, cut into small pieces
  • 1 heaping cup fresh blueberries
  • zest of one small lemon
  • ½ cup buttermilk
  • 1 large egg, plus 1 large egg lightly beaten for egg wash
  • ½ teaspoon pure vanilla extract
  • fine sugar for sprinkling
Method
  1. Preheat oven to 375 degrees.  Line a baking sheet with parchment paper.
  2. Whisk together flours, granulated sugar, baking powder and salt in a large bowl.  Add butter and rub with your fingers until mixture has the texture of course meal.  Gently stir in blueberries.
  3. In another bowl whisk together buttermilk, 1 egg , lemon zest and vanilla.  Drizzle over flour mixture and stir lightly with a fork until the dough comes together but a small amount of flour remains in bowl.  It's important to not overwork the dough.
  4. Turn out dough onto work surface and gently knead dough once or twice just to incorporate the flour.  Pat the dough into a 1-inch thick round.  Cut the round into approximately 10-12 wedges.  Transfer to baking sheet.
  5. Brush the top of each scone with egg wash and sprinkle generously with sugar.  Bake until golden brown and cooked through, roughly 25 minutes.  Transfer scones to a wire rack to cool.
3.2.2802

Filed Under: Breakfast, Sweets Tagged With: blueberry, breakfast, buttermilk, dessert, scone, sweet

  • 1
  • 2
  • Next Page »
Hello and welcome to Feasts and Fotos!

Archives

Categories

Copyright © 2025 · Foodie Pro Theme by Shay Bocks · Built on the Genesis Framework · Powered by WordPress