FEASTS AND FOTOS

  • Home
  • About
  • Happenings
  • Contact

Thai Coconut Shrimp and Basil Curry

May 18, 2015 By Susan

ThaiCoconutShrimp

If you like Thai food I strongly urge you to try this recipe.  It is so delicious and you won’t believe how quick and easy it is to make!

When I saw this recipe I knew immediately that I needed make it and I had a very strong feeling that it would be really good.  If nothing else, I think I’m getting pretty good at being able to pick out a recipe right away and gauge that it will be a success.  Granted, there are still times when a recipe ends up being ‘just ok’, but it’s rare that I pick something that turns out awful.

I really, really like Thai food.  Such wonderful, bold flavor combinations, it’s never boring.  In this recipe the Thai curry paste combined with the coconut milk and ginger…so yummy.  Tons of fresh basil and the juice of a lime at the very end really finish this dish nicely and round out the flavors.  Oh, and the sauce?  It’s drinkable.  Seriously, it’s so good.  I’m almost embarrassed to say that we never have much left over when I make this.  If anything, we just have some of the sauce remaining and we love to pour it over plain white rice and eat it like that. Soooo good.

I will warn ahead that this dish is spicy.  It’s not ‘blow your head off’ spicy, but it does have a nice kick to it.  And I found that it’s even spicier the next day, if you are lucky enough to have any leftovers.  The Thai curry paste is what gives it the kick (so resist the urge to add more than this recipe calls for) but the sweet coconut milk balances it very nicely.  I really love that this is made with shrimp. I don’t make shrimp as much as I would like, which is one of the reasons this recipe caught my eye.  I can imagine this would work well substituting the shrimp with chicken, but I haven’t tried it.  The first few times I made this I used fresh shrimp but I have to say that frozen works perfectly.  So much so that it is all we use now.  The only change I sometimes like to make with this recipe is adding sliced baby bok choy.  It works really well.  But don’t fret if you don’t have it, just stick to the recipe as is and you will be thrilled.  I promise.

If you already like Thai food and are looking for a delicious, quick and easy meal to add to your recipe book, you must try this.  If you are interested in trying Thai food for the first time, I think this is a great dish to get started with.

Here’s what you will need to serve 2 very hungry, Thai-food-loving people…

Recipe

1 tbsp vegetable oil

2 cups broccoli florets, trimmed and sliced lengthwise into bite size pieces

1 red bell pepper, thinly sliced and then cut in half lengthwise

2  1/2 tbsp fresh ginger, peeled and minced

2  1/2 cups light coconut milk (comes in a can)

1  1/2 tbsp green curry paste (I use Thai Kitchen brand)

20-22 large shrimp, peeled & deveined (I use 21-25 count/pound)

3/4 cup sliced basil leaves

juice of one lime

3 cups cooked white rice (I use long grain basmati)

salt to taste

** optional addition: 2-3 small heads baby bok choy, each stem/leaf sliced in half lengthwise

Method

Prepare rice according to directions.

In a large sauce pan heat the oil over medium-low heat.  Add the broccoli, red pepper (and bok choy if using).  Add salt and stir.  Cover and cook until the vegetables begin to soften, 2-3 minutes.  Add the ginger and stir immediately and constantly for about 30 seconds.  Add the coconut milk and curry paste. Stir well until all the curry paste has dissolved into the milk.  Bring to a simmer.

Add the shrimp to the pan and cover.  Cook for a few minutes just until the shrimp turn pink and are cooked through.  Turn off heat.

Add the basil and lime juice to the pan and stir well to combine.

Divide the rice among bowls and ladle the shrimp curry on top, with a little extra liquid to soak into the rice.

Recipe slightly adapted from Rachael Ray Magazine


Thai Coconut Shrimp and Basil Curry
 
Print
Author: Feasts And Fotos
Ingredients
  • 1 tbsp vegetable oil
  • 2 cups broccoli florets, trimmed and sliced lengthwise into bite size pieces
  • 1 red bell pepper, thinly sliced and then cut in half lengthwise
  • 2½ tbsp fresh ginger, minced
  • 2½ cups light coconut milk
  • 1½ tbsp green curry paste
  • 20 large shrimp, peeled & deveined (I use 21-25 count/pound)
  • ¾ cup sliced basil leaves
  • juice of one lime
  • 3 cups cooked white rice (I use long grain basmati)
  • salt to taste
  • ** optional addition: 2-3 small heads baby bok choy, sliced in half lengthwise
Method
  1. Prepare rice according to directions.
  2. In a large sauce pan heat the oil over medium low head. Add the broccoli, red pepper (and bok choy if using). Add salt and stir. Cover and cook until the vegetables begin to soften, 2-3 minutes. Add the ginger and stir immediately and constantly for about 30 seconds. Add the coconut milk and curry paste. Stir well until all the curry paste has dissolved into the milk. Bring to a simmer.
  3. Add the shrimp to the pan and cover. Cook for a few minutes just until the shrimp turn pink and are cooked through. Turn off heat.
  4. Add the basil and lime juice to the pan and stir well to combine.
  5. Divide the rice among bowls and ladle the shrimp curry on top, with a little extra liquid to soak into the rice.
3.2.2929

Crock Pot Mexican Shredded Chicken

March 24, 2015 By Susan

MexicanShreddedChicken2R

My crock pot has been in a box, in my storage room, for years.  More years than I care to admit, really.  My issue with crock pots is this: if I have to pre-cook, or brown, meat prior to putting it into the crock pot then I might as well just cook the meal on the stove top or in the oven.  After all, I’ve already dirtied a pot.  For me, the only way I can get excited about using the crock pot is if there is zero ‘cooking’ prior.

It was this recipe that got me to unearth my crock pot and get on the bandwagon.  No prepping the meat at all beforehand, simply dump all the ingredients into the pot, turn it on and walk away.  It was great!  I absolutely loved having dinner cooking while I was busy doing other things all day long.  I suppose that’s the beauty of using a slow cooker, right?

I made quite a bit of changes to the original recipe from Skinnytaste.  I liked the idea of the recipe, and I did like the original recipe, but for me it was lacking a little something.  A few ideas immediately came to mind the first time I made it, and over the next few times I prepared this meal I perfected each change.  It is now exactly how we like it. The main changes I made are overall more spices, the addition of the poblano pepper and adding the frozen peas and corn at the very end, giving just enough time for them to thaw out.  I like my frozen veggies to still have their bright colors and a bit of a snap to them.  I always serve this dish over white long-grain rice, it really soaks up all the liquid nicely.  But I’m sure it would be perfect with brown rice too.

Other than the flavor, my favorite thing about this meal is the amount of leftovers.  This recipe makes a large amount and holds well in the fridge for at least 3-4 days.  When I make this, we usually eat it again for dinner once during the week, but also several times for lunch.  Sometimes, after I shred the chicken but before I add it back to the pot, I set some dry shredded chicken aside and use it in wraps the following day.  Delicious!

If your crock pot is in storage maybe this recipe will encourage you to dig it out. I really like crock pot cooking now and look forward to trying another recipe soon. Suggestions are welcome!

Here’s what you will need to serve 8-10….

Recipe

4 medium chicken breasts, boneless, skinless

1 large poblano pepper, diced (or one green pepper & one jalapeño, seeds and ribs mostly removed)

2-10 oz cans diced tomatoes with mild green chilies

15 oz can black beans, drained and rinsed

20 oz low sodium chicken stock

1 bunch scallions, chopped and divided in half

1 tsp garlic powder

1 tsp onion powder

1 tsp cumin (plus some more for sprinkling)

1 tsp coriander (plus some more for sprinkling)

1 tsp chili powder (plus some more for sprinkling)

1 tsp cayenne pepper

1 cup frozen corn

1 cup frozen peas

1/2 lime, juiced

1/2 bunch of cilantro

salt & pepper to taste

your favorite rice, cooked

Method

Lay chicken breasts in a shallow baking dish.  Sprinkle both sides with some cumin, coriander, chili powder, salt & pepper.  Set aside.

To the bowl of a crock pot combine chicken stock,  black beans, diced tomatoes, 1/2 the chopped scallions, poblano pepper, garlic & onion powder, cumin, coriander, chili and cayenne.  Stir to combine.  Lay chicken breasts on top of mixture, cover and turn the crock pot on for 6 hours.

Once the crock pot turns off (or just before), remove all the chicken breasts and shred (use 2 forks).  Return all the shredded chicken back to the pot, add in the remaining scallions, frozen corn & peas and most of the cilantro.  Stir to combine.  Put the cover back on and allow to sit for about 15 minutes.  Just before serving add the juice of 1/2 lime, stir and portion into bowls, on top of rice.  Sprinkle with cilantro and serve.

Original recipe: http://www.skinnytaste.com/2009/02/crock-pot-santa-fe-chicken-425-pts.html 


Mexican Shredded Chicken
 
Print
Author: Feasts And Fotos
Ingredients
  • 4 medium chicken breasts, boneless, skinless
  • 1 large poblano pepper, diced (or one green pepper & one jalapeño, seeds and ribs mostly removed)
  • 2-10 oz cans diced tomatoes with mild green chilies
  • 15 oz can black beans, drained and rinsed
  • 20 oz low sodium chicken stock
  • 1 bunch scallions, chopped and divided in half
  • 1 tsp garlic powder
  • 1 tsp onion powder
  • 1 tsp cumin (plus some more for sprinkling)
  • 1 tsp coriander (plus some more for sprinkling)
  • 1 tsp chili powder (plus some more for sprinkling)
  • 1 tsp cayenne pepper
  • 1 cup frozen corn
  • 1 cup frozen peas
  • ½ lime, juiced
  • ½ bunch of cilantro
  • salt & pepper to taste
  • your favorite rice, cooked
Method
  1. Lay chicken breasts in a shallow baking dish. Sprinkle both sides with some cumin, coriander, chili powder, salt & pepper. Set aside.
  2. To the bowl of a crock pot combine black beans, diced tomatoes, ½ the chopped scallions, poblano pepper, garlic & onion powder, cumin, coriander, chili and cayenne. Stir to combine. Lay chicken breasts on top of mixture, cover and turn the crock pot on for 6 hours.
  3. Once the crock pot turns off (or just before), remove all the chicken breasts and shred (use 2 forks). Return all the shredded chicken back to the pot, add in the remaining scallions, frozen corn & peas and most of the cilantro. Stir to combine. Put the cover back on and allow to sit for about 15 minutes. Just before serving add the juice of ½ lime, stir and portion into bowls, on top of rice. Sprinkle with cilantro and serve.
3.2.2929

Parsnip And White Bean Soup

March 2, 2015 By Susan

ParsnipSoupFinalRR

Meet my new favorite soup for the past month.  This soup has gotten us through the repeated snow storms we have been having here in New York.  It has eased the pain and monotony of being cooped up inside, (with a potty-training-toddler!) sheltering ourselves from the bitter, painful cold outside.  It has been a welcome reward after braving the cold to shovel yet more snow.  Is it spring yet?

Parsnips are delicious and, in my opinion, are an under used root vegetable. At least they have been in my house.  I do occasionally roast them and they are so good, they taste like candy.  Literally.  They are a very sweet vegetable.  For those of you that don’t know what a parsnip is, it is the ‘white carrot’.  It looks very similar to a carrot, but it’s cream-colored, has a tougher texture and is much sweeter.

The parsnips in this soup are paired with white beans which seems to mellow out the parsnip flavor a bit.  It is a wonderful flavor combination and the addition of sage really brings an earthy component. This soup is on the thicker side, and creamy, yet there is no cream or potatoes in the recipe.  The magic of pureed beans!

On the topic of sage, it was the one herb in my garden that remained throughout a good portion of this winter.  Even in the freezing cold, a few leaves were still there, hanging on for dear life.  It was the arrival of Winter Storm Juno that did my poor sage in.  Nothing could survive that storm.

I have Jamie Oliver to thank for this particular recipe (among many others).  I kinda have a small crush on him.  Most of his recipes (I try the easier ones) are fantastic and I think he is funny and adorable and I’m impressed with his Food Revolution crusade. I particularly love his 15- Minute Meals show and am hoping more of his shows will come to the US.

This is a very easy soup recipe to make.  And I hear we are supposed to get more snow this week, so you might want to go buy some parsnips.

Here’s what you will need to serve 4-6 people…

Recipe

2 tbsp olive oil

1 tbsp butter (optional)

3 medium parsnips (2 cups), peeled and chopped into cubes

1 large onion, roughly chopped

3 dried bay leaves

2 15-oz (or 19oz) cans cannellini beans, drained and rinsed

7 medium sage leaves, chopped

48 oz low-sodium chicken stock

salt & pepper to taste

Method

Heat the oil and butter in a soup pot over medium heat. Add the parsnips (don’t be tempted to add more than 2 cups, it will make the soup too sweet), onion, salt & pepper, stirring occasionally until softened and translucent.  Add the white beans, sage and stock.  Stir to combine.  Add the bay leaves and bring to a boil.  Reduce heat, partially cover the pot and simmer for 20 minutes.

Allow soup to cool slightly and then puree in batches in a high powered blender. The texture of the soup should be silky smooth.

Recipe adapted from Jamie Oliver


Parsnip And White Bean Soup
 
Print
Author: Feasts And Fotos
Ingredients
  • 2 tbsp olive oil
  • 1 tbsp butter (optional)
  • 3 medium parsnips (2 cups), peeled and chopped into cubes
  • 1 large onion, roughly chopped
  • 3 dried bay leaves
  • 2 15-oz cans cannellini beans, drained and rinsed
  • 7 medium sage leaves, chopped
  • 48 oz low-sodium chicken stock
  • salt & pepper to taste
Method
  1. Heat the oil and butter in a soup pot over medium heat. Add the parsnips, onion, salt & pepper, stirring occasionally until softened and translucent. Add the white beans, sage and stock. Stir to combine. Add the bay leaves and bring to a boil. Reduce heat, partially cover the pot and simmer for 20 minutes.
  2. Allow soup to cool slightly and then puree in batches in a high powered blender. The texture of the soup should be silky smooth.
3.2.2929

No-Bake Tiramisu Balls

February 8, 2015 By Susan

TiramisuBalls1

Tiramisu might be one of those desserts that everyone has heard of and loves. An Italian favorite consisting of coffee-soaked cookies layered with mascarpone and cocoa, what’s not to love?

I must admit, I have never actually made this dessert.  I think the reason is mostly because I don’t have one of those lovely trifle dishes that tiramisu is usually prepared in.  A secondary reason is that soaking the cookies always sounded a bit labor intensive to me.  When I came across this particular recipe I was intrigued and so excited that I went out immediately and bought some ladyfingers (I already had every other ingredient in my pantry).  I was excited because…well, no soaking and no trifle dish!  And intrigued because I wondered if they could actually TASTE like tiramisu.

I really love baking.  I enjoy the process, I love the way it makes the house smell so delicious and comforting and I most especially love eating baked goods.  But it is nice (and possibly mandatory) to have a simple, no-bake recipe in your back pocket for those times when you are simply all baked out.  For when you invite someone to dinner last minute and need something special for dessert but just don’t have the time (or oven space) to start baking.  And most importantly, if you don’t really like to bake, these are perfect for you!  You get that unmistakable flavor in these tiny little bite-sized treats.  It’s amazing, they taste exactly like tiramisu!

These tiramisu balls are a terrific, quick dessert to make this upcoming Valentine’s Day. For anyone that might be intimidated by baking but wants to impress someone special, I encourage you to give these a try.  They are very simple to make. But be careful, they are addicting!

Here’s what you will need to make approximately 16 tiramisu balls…

Recipe

3.5 oz. hard ladyfingers (12 cookies)

1/2 cup confectioners sugar

1/2 tbsp instant espresso powder

1/4 tsp ground cinnamon

1/3 cup mascarpone

1/2 tbsp coffee-flavored liqueur (I use Kahlua)

Coating

1 tbsp confectioners sugar

1 tbsp unsweetened cocoa powder

Method

In a food processor, pulse the cookies, 1 cup confectioners sugar, espresso powder and cinnamon until very finely ground. Add the mascarpone and liqueur and process until the dough comes together.  Roll a small amount of dough (depending on the size you prefer), one by one, into balls and transfer to a baking sheet. Cover and refrigerate for 30 minutes.

Meanwhile, in a small bowl whisk the cocoa powder and remaining 1 tbsp confectioners sugar.  Add the balls, one at a time, gently tossing to coat completely.

Recipe adapted from Rachael Ray


No-Bake Tiramisu Balls
 
Print
Author: Feasts And Fotos
Ingredients
  • 3.5 oz. hard ladyfingers (12 cookies)
  • ½ cup confectioners sugar
  • ½ tbsp instant espresso powder
  • ¼ tsp ground cinnamon
  • ⅓ cup mascarpone
  • ½ tbsp coffee-flavored liqueur (I use Kahlua)
  • Coating
  • 1 tbsp confectioners sugar
  • 1 tbsp unsweetened cocoa powder
Method
  1. In a food processor, pulse the cookies, 1 cup confectioners sugar, espresso powder and cinnamon until very finely ground. Add the mascarpone and liqueur and process until the dough comes together. Roll a small amount of dough (depending on the size you prefer), one by one, into balls and transfer to a baking sheet. Cover and refrigerate for 30 minutes.
  2. Meanwhile, in a small bowl whisk the cocoa powder and remaining 1 tbsp confectioners sugar. Add the balls, one at a time, gently tossing to coat completely.
3.2.2802

Chicken Tenders with Honey Mustard Sauce

January 28, 2015 By Susan

ChickenTenders3R

The big game is this weekend and that means we get to eat things this Sunday that we normally would not.  Right?  Cheesy dips. Sticky, gooey chicken wings. Let’s do it!

Ok, so if you are not willing to let this Sunday be a huge ‘cheat day’ from your regular eating pattern you can make these chicken tenders.  You might think they would be bad for you, but they are not.  There is no egg and flour or frying involved.  Just some buttermilk, breadcrumbs and cheese.  And they are baked! Even though they are not fried, they still are slightly crunchy on the outside and tender and juicy on the inside.

These chicken tenders would make a wonderful appetizer but, truthfully, we often eat these as a meal. The preparation is quick and easy and if you pair it with a cup or bowl of soup (which we do) you will be satisfied.  Depending on the size of the tenders, of course.  Most of the time the tenders are quite large so eating 4-5 each is usually enough.  I love honey mustard sauce for these (a little more honey tasting than mustard), however, feel free to use your favorite sauce.  We sometimes use BBQ sauce.

Although I am not a huge follower of football during the season, I do love watching the Superbowl.  Mostly for the commercials and the half-time entertainment.  This year I don’t think I’m going to go crazy with all the fried food and cheesy goodness. Instead, I am going to make these.  I’ll feel better about things and I won’t have to log in extra time on the elliptical machine.  And that is always a good thing!

Here’s what you will need to make approximately 15 tenders…

Recipe

1-2 packages chicken tenders

buttermilk

1/2 cup panko, mounded

1/2 cup Italian Seasoned Breadcrumbs, mounded

1/3 cup grated Parmigiano-Reggiano cheese

salt & pepper to taste

Honey Mustard Sauce

3 Tbsp honey

2 Tbsp mustard

1/2 tsp mayo

lemon juice (about 10 drops)

salt & pepper to taste

Method

In a medium bowl add the chicken tenders and enough buttermilk to cover all the chicken.  Allow to marinate in the refrigerator for at least one hour, preferably 4-5 hours.

Preheat oven to 500 degrees.

In a flat, rimmed pan add the panko, seasoned breadcrumbs, cheese, salt & pepper.  Mix with your fingers until ingredients are fully incorporated.

Line a large baking sheet with parchment paper.  Spray parchment paper with cooking spray.

Once the chicken is done marinating, remove from refrigerator.  Take one tender at a time, drain off some of the buttermilk and dredge it in the bread crumb mixture.  I use tongs for this and I usually pat down the breadcrumbs on each side.  Lift out of the breadcrumb mixture and gently shake off any excess. Lay on the baking sheet.  Continue with all the tenders.

Once you have all the tenders lined up drizzle a touch of olive oil over each one. Place in the oven for approximately 15-17 minutes total, flipping over when the bottoms are starting to turn golden (after about 8-10 minutes or so).  I usually don’t cook the 2nd side for as long as the first side.

Meanwhile, prepare the honey mustard sauce by simply adding all ingredients to a small bowl and mixing well.  Set aside.

Allow tenders to cool slightly (they will be piping hot!) and serve with the honey mustard sauce for dipping.

Recipe adapted from Giada De Laurentiis


Chicken Tenders with Honey Mustard Sauce
 
Print
Author: Feasts And Fotos
Ingredients
  • 1-2 packages chicken tenders
  • buttermilk
  • ½ cup panko, mounded
  • ½ cup Italian Seasoned Breadcrumbs, mounded
  • ⅓ cup grated Parmigiano-Reggiano cheese
  • salt & pepper to taste
  • Honey Mustard Sauce
  • 3 Tbsp honey
  • 2 Tbsp mustard
  • ½ tsp mayo
  • lemon juice (about 10 drops)
  • salt & pepper to taste
Method
  1. In a medium bowl add the chicken tenders and enough buttermilk to cover all the chicken. Allow to marinate in the refrigerator for at least one hour, preferably 4-5 hours.
  2. Preheat oven to 500 degrees.
  3. In a flat, rimmed pan add the panko, seasoned breadcrumbs, cheese, salt & pepper. Mix with your fingers until ingredients are fully incorporated.
  4. Line a large baking sheet with parchment paper. Spray parchment paper with cooking spray.
  5. Once the chicken is done marinating, remove from refrigerator. Take one tender at a time, drain off some of the buttermilk and dredge it in the bread crumb mixture. I use tongs for this and I usually pat down the breadcrumbs on each side. Lift out of the breadcrumb mixture and gently shake off any excess. Lay on the baking sheet. Continue with all the tenders.
  6. Once you have all the tenders lined up drizzle a touch of olive oil over each one. Place in the oven for approximately 15-17 minutes total, flipping over when the bottoms are starting to turn golden (after about 8-10 minutes or so). I usually don't cook the 2nd side for as long as the first side.
  7. Meanwhile, prepare the honey mustard sauce by simply adding all ingredients to a small bowl and mixing well. Set aside.
3.2.2802

Roasted Vegetable Soup

January 12, 2015 By Susan

RoastedVegetableSoupR

Most soups I make are prepared using the same method; sauteing onions, garlic and veggies in a pot on the stove and then adding stock and simmering away.  This soup turns that method upside down!  I loved the concept and it sounded so easy.  Naturally, I thought, could it actually be good?

Oh yeah!  So good.  I am already a huge fan of oven roasting vegetables to eat as a side dish. Favorites are broccoli, cauliflower and carrots.  I feel roasting the vegetables really brings out their flavor, so much more than, let’s say, steaming.

The other element that I love about this soup is that it includes eggplant. Eggplant!  I haven’t come across many soup recipes with eggplant in them, have you?  To be honest, you would be hard pressed to detect the eggplant in here.  All the flavors of the vegetables blend well and are so delicious.  Even the sage, it’s there in the background, not overpowering at all.  The sage I used to make this particular pot of soup came from my garden, still going strong in December!  It is a hearty herb, that sage.

I am happy to report that this soup recipe is quite forgiving.  I think if you stick to the base vegetables (eggplant, carrots, potatoes) you can add some others (celery, parsnips) and it would be just as great.  Making this recipe would be a great way to clear out your fridge of any root veggies that might be slightly past their prime.  You can also comfortably make some substitutions. Don’t have shallots?  Add an onion instead.  Want this soup to be vegetarian?  Use vegetable stock instead of chicken stock. Prefer it to be a touch thinner?  Add more stock.  Forgiving is good.

This roasted vegetable soup is very delicious and super comforting on a cold, snowy day (we’ve already had quite a few in the NY area).  It is very thick, so it is filling and perfect on its own for a lunch or light dinner.  And thick enough that my 3-year-old can feed herself this soup, which she loves.

Add a slice of toasted rustic bread to dip and you will be in heaven.

Here’s what you will need to serve 6-8…

Recipe

3-4 tbsp olive oil

1 large eggplant, peeled and chopped into 2 inch cubes

3 carrots, sliced into 1 inch pieces

3 large shallots, quartered

6 cloves garlic, whole

2 large Idaho potatoes, peeled and chopped into 1 inch chunks

6 cups chicken stock (or vegetable stock)

3 large sage leaves

sea salt & pepper, to taste

Method

Preheat oven to 375 degrees.

Oil the bottom of a large, rimmed sheet pan with 1 tbsp of oil (rub it around with your fingers to coat) and add everything except the sage leaves.  Add 2-3 tbsp of olive oil, salt & pepper and toss to coat.  Arrange in a single layer.

Roast for 45 minutes, flipping vegetables once or twice, ensuring they brown slightly but do not burn.  Remove pan from oven, add sage leaves on top of veggies on one side of the pan, and then pile the remaining veggies on top of the sage leaves.  The heat from the veggies will wilt the sage.  Allow to cool slightly.

In a high powered blender, add vegetables and broth in manageable batches.  Pour into a large pot, heat slightly and serve or store in the fridge for up to 4-5 days.

Recipe adapted from Clean Eating Magazine


Roasted Vegetable Soup
 
Print
Author: Feasts And Fotos
Ingredients
  • 3-4 tbsp olive oil
  • 1 large eggplant, peeled and chopped into 2 inch cubes
  • 3 carrots, sliced into 1 inch pieces
  • 3 large shallots, quartered
  • 6 cloves garlic, whole
  • 2 large Idaho potatoes, peeled and chopped into 1 inch chuncks
  • 6 cups chicken stock (or vegetable stock)
  • 3 large sage leaves
  • sea salt & pepper, to taste
Method
  1. Preheat oven to 375 degrees.
  2. Oil the bottom of a large, rimmed sheet pan with 1 tbsp of oil (rub it around with your fingers to coat) and add everything except the sage leaves. Add 2-3 tbsp of olive oil, salt & pepper and toss to coat. Arrange in a single layer.
  3. Roast for 45 minutes, flipping vegetables once or twice, ensuring they brown slightly but do not burn. Remove pan from oven, add sage leaves on top of veggies on one side of the pan, and then pile the remaining veggies on top of the sage leaves. The heat from the veggies will wilt the sage. Allow to cool slightly.
  4. In a high powered blender, add vegetables and broth in manageable batches. Pour into a large pot, heat slightly and serve or store in the fridge for up to 4-5 days.
3.2.2802

Rice Krispies Treats With Double Chocolate Drizzle

December 16, 2014 By Susan

RiceTreatsCut2 copy 2R

There are a handful of snacks that bring me right back to my childhood and this is one of them.  Rice Krispies Treats are old-school and eating them make me feel like a kid again.  And feeling like a kid again is fun!

Actually, I feel like a kid most days mainly because I am hanging around with (running after) my very-soon-to-be-three-year-old. Going to the playground, riding a carousel, horsey rides on my back and tea parties…it’s all about kid stuff around here.  So these fit into my lifestyle quite nicely these days.

The recipe for these treats is very basic.  Prepare them in the normal fashion and press them into the dish.  Then comes the fun part.  The double chocolate drizzle is the final element that takes these over the top and turns them into something special.  A work of art, even.

The real beauty of this dessert, for me, is that there are no eggs or peanuts involved.  My daughter is allergic to both so finding acceptable treats for her is not easy.  I don’t have to worry or alter anything for this recipe.  Plain and simple.  Oh, but with an amazing chocolate explosion over top.  And my baby loves chocolate,  just like her mamma.

You remember eating (and loving) these as a kid, right?  Go ahead, whip up a batch and tap into your inner child.  The holidays are right around the corner (how did that happen so fast?!) and these would be a perfect treat to bring to a holiday party or even give away as edible gifts.

Here’s what you need to make approximately 12-16 bars (depending on the size you prefer)…

Recipe

4 Tbsp butter

10 oz mini marshmallows

6 cups rice cereal

pinch of salt

8 x 10 baking dish

2 pieces of parchment paper, one piece slightly longer than your baking dish

3-4 oz bittersweet chocolate (or semi sweet), melted

3-4 oz white chocolate, melted

Method

In a large pot over medium heat melt the butter.  Once melted add all the marshmallows and lower the heat to low. Add a pinch of salt and stir until all the marshmallows are melted into the butter and the mixture is smooth.  (The key step here is lowering the heat so they don’t burn).

Once the mixture is smooth add the rice cereal and stir so all the cereal is coated with the marshmallow mixture.  You will need to put a little muscle into it!

Lay the longer piece of parchment paper on the bottom of your baking dish, with the long ends slightly over hanging the end of the dish.  You will use this as handles to lift the treats out of the dish.  Dump the mixture into the baking dish  and carefully spread out evenly.  I found the best method for this step is to use a piece of parchment paper.  Simply lay the paper over the pan and press and slide your hand (and side of your palm) over the mixture until it is smooth and level. Peel off the parchment paper.

Meanwhile, melt both the bittersweet chocolate and the white chocolate in separate bowls.  I do this in the microwave, melting each in 20 second intervals until completely melted.  Drizzle over the top as much or as little as you like.  I usually just use a fork and flick my wrist, spraying chocolate over the treats.  Another (less messy) option is to put the chocolate in a small zip top back, cut a tiny piece of a corner off and drizzle.  Create your artwork.

Allow rice treats to sit for another hour or so until the chocolate sets.  If you are in a rush, you can pop them in the fridge.  Once set, left the entire block out of the pan (lifting by the parchment paper).  Lay on a flat surface and cut into squares.  You can make big squares or cut them into smaller, bite-size pieces.

This is the size and thickness I usually prefer.

RiceTreatTowerR


Rice Krispies Treats With Double Chocolate Drizzle
 
Print
4 Tbsp butter 10 oz mini marshmallows 6 cups rice cereal pinch of salt 8 x 10 baking dish 2 pieces of parchment paper, one piece slightly longer than your baking dish 3-4 oz bittersweet chocolate (or semi sweet), melted 3-4 oz white chocolate, melted
Author: Feasts And Fotos
Ingredients
  • 4 Tbsp butter
  • 10 oz mini marshmallows
  • 6 cups rice cereal
  • pinch of salt
  • 8 x 10 baking dish
  • 2 pieces of parchment paper, one piece slightly longer than your baking dish
  • 3-4 oz bittersweet chocolate (or semi sweet), melted
  • 3-4 oz white chocolate, melted
Method
  1. In a large pot over medium heat melt the butter. Once melted add all the marshmallows and lower the heat to low. Add a pinch of salt and stir until all the marshmallows are melted into the butter and the mixture is smooth. (The key step here is lowering the heat so they don't burn).
  2. Once the mixture is smooth add the rice cereal and stir so all the cereal is coated with the marshmallow mixture. You will need to put a little muscle into it!
  3. Lay the longer piece of parchment paper on the bottom of your baking dish, with the long ends slightly over hanging the end of the dish. You will use this as handles to lift the treats out of the dish. Dump the mixture into the baking dish and carefully spread out evenly. I found the best method for this step is to use a piece of parchment paper. Simply lay the paper over the pan and press and slide your hand (and side of your palm) over the mixture until it is smooth and level. Peel off the parchment paper.
  4. Meanwhile, melt both the bittersweet chocolate and the white chocolate in separate bowls. I do this in the microwave, melting each in 20 second intervals until completely melted. Drizzle over the top as much or as little as you like. I usually just use a fork and flick my wrist, spraying chocolate over the treats. Another (less messy) option is to put the chocolate in a small zip top back, cut a tiny piece of a corner off and drizzle. Create your artwork.
  5. Allow rice treats to sit for another hour or so until the chocolate sets. If you are in a rush, you can pop them in the fridge. Once set, left the entire block out of the pan (lifting by the parchment paper). Lay on a flat surface and cut into squares. You can make big squares or cut them into smaller, bite-size pieces.
3.2.2802

Classic Bread Pudding

November 23, 2014 By Susan

ClassicBreadPuddingDiag

Prior to meeting my husband, I never had bread pudding. Given the choice, I always choose a dessert that includes chocolate. Once we got married he happened to ‘mention’ to me that his favorite dessert was bread pudding.  And then for his birthday dinner he requested bread pudding for dessert.  Suddenly he was doing a lot of talking about this bread pudding.

And so I starting doing some research and comparing recipes.  There are tons of them out there.  We also started ordering bread pudding desserts at restaurants every now and again, so I got a good sampling.  Personally, I found most of them much too dense and sweet for my liking. My husband’s only request (demand) was that there be no raisins whatsoever.  None.  Apparently the inclusion of raisins completely ruins the dessert (in his opinion).

My guess is I only had to make bread pudding 2 times before I got it exactly how we like it.  By the 3rd time it was perfect, just the right amount of bread, not too much sugar and the perfect amount of pecans to give it that crunch it absolutely needs. And the whiskey cream sauce?  Totally makes the dessert!

I am proud to say my husband, the connoisseur of bread pudding, told me this is the best bread pudding he has ever had.  He might be exaggerating a bit due to the fact that he is married to me, but I have to say I agree with him. It is delicious and so easy to make, it takes all my willpower to not make it once a week!

If you need an amazing, easy dessert to add to all the pecan and pumpkin pies on your Thanksgiving table this week, try this one. You won’t be disappointed.

Here’s what you will need to serve 4-5 people…

Recipe

5 cups day old challah bread, cubed into 1 inch pieces

2 eggs

2 Tbsp vanilla

2 cups whole milk

1 cup sugar

2 Tbsp melted butter, cooled

pinch of cinnamon

pinch of salt

1/4 cup chopped pecans

Whiskey Cream Sauce

1/4 cup sugar

1/2 stick of butter

1/4 cup heavy cream (heaping)

1/8 cup Jack Daniels

pinch of salt

Method

The bread needs to be somewhat dried out, so if it is not old bread that is already dried out cut the bread into cubes and bake on a sheet pan in a 275 degree oven for about 10-15 minutes or so until the cubes are lightly toasted.  Allow to cool.  Place in a baking dish (approximately 8×10 in size).  The bread should fit tightly in the baking dish.

Preheat oven to 325 degrees.

In a large bowl, whisk eggs, melted and cooled butter, vanilla and milk.  Add the sugar and mix until incorporated.  Pour liquid over all the bread cubes, pressing the bread down slightly to ensure most of the bread is covered with the liquid.  Scatter chopped pecans over the top and place in the oven to cook for approximately 45 minutes until golden brown and puffed. It will soon deflate, don’t worry, that’s normal.

While the bread pudding is cooking, start on the whiskey cream sauce.  Basically just add all the ingredients into a small saucepan over medium low heat and cook, stirring until everything is melted and gently boiling.  Remove from heat and use when needed.  You might need to reheat this mixture a bit and stir again.  If there is any leftover sauce, store in the refrigerator and reheat gently.

ClassicBreadPuddingVertical

Portion out the bread pudding into bowls and drizzle the whiskey cream sauce over the top.  I like to just moisten the bread pudding with the sauce, not drench it.  If you prefer to have your bread pudding soaking in the cream sauce you might want to double the sauce recipe.

Whiskey Cream Sauce courtesy of The Pioneer Woman


Classic Bread Pudding
 
Print
Author: Feasts And Fotos
Ingredients
  • 5 cups day old challah bread, cubed into 1 inch pieces
  • 2 eggs
  • 2 Tbsp vanilla
  • 2 cups whole milk
  • 1 cup sugar
  • 2 Tbsp melted butter, cooled
  • pinch of cinnamon
  • pinch of salt
  • ¼ cup chopped pecans
  • Whiskey Cream Sauce
  • ¼ cup sugar
  • ½ stick of butter
  • ¼ cup heavy cream (heaping)
  • ⅛ cup Jack Daniels
  • pinch of salt
Method
  1. The bread needs to be somewhat dried out, so if it is not old bread that is already dried out cut the bread into cubes and bake on a sheet pan in a 275 degree oven for about 10-15 minutes or so until the cubes are lightly toasted. Allow to cool. Place in a baking dish (approximately 8x10 in size). The bread should fit tightly in the baking dish.
  2. Preheat oven to 325 degrees.
  3. In a large bowl, whisk eggs, melted and cooled butter, vanilla and milk. Add the sugar and mix until incorporated. Pour liquid over all the bread cubes, pressing the bread down slightly to ensure most of the bread is covered with the liquid. Scatter chopped pecans over the top and place in the oven to cook for approximately 45 minutes until golden brown and puffed. It will soon deflate, don't worry, that's normal.
  4. While the bread pudding is cooking, start on the whiskey cream sauce. Basically just add all the ingredients into a small saucepan over medium low heat and cook, stirring until everything is melted and gently boiling. Remove from heat and use when needed. You might need to reheat this mixture a bit and stir again. If there is any leftover sauce, store in the refrigerator and reheat gently.
  5. Portion out the bread pudding into bowls and drizzle the whiskey cream sauce over the top. I like to just moisten the bread pudding with the sauce, not drench it. If you prefer to have your bread pudding soaking in the cream sauce you might want to double the sauce recipe.
3.2.2802

More Delicious Recipes

Roasted Cauliflower with Lemon Cilantro Dressing

Candied Bacon

Asian Marinade

Strawberry Jam

Green Smoothie

Kale and Brussel Sprout Salad

Soups and Stews

Mexican Chicken Soup

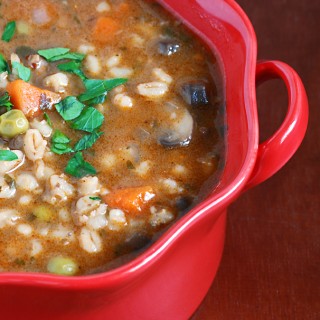
Beef Barley Soup

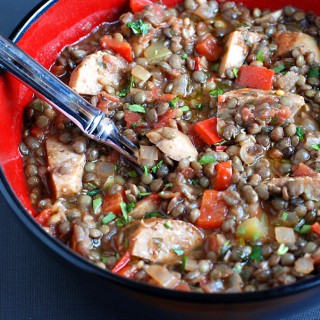
Lentil and Sausage Stew

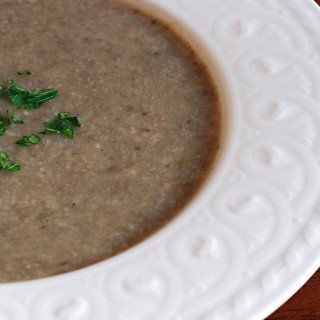
Mushroom Soup

Sweets

Frozen Banana Bon Bons

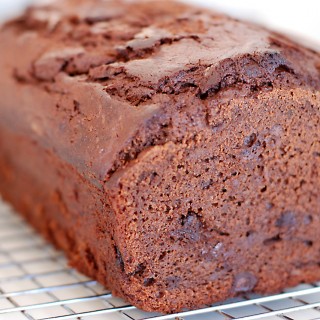
Coco-Nana Bread

Spiced Pear Jam

Christmas Bark

Hello and welcome to Feasts and Fotos!

Archives

Categories

Copyright © 2025 · Foodie Pro Theme by Shay Bocks · Built on the Genesis Framework · Powered by WordPress