FEASTS AND FOTOS

  • Home
  • About
  • Happenings
  • Contact
You are here: Home / Archives for Sweets

Banana Walnut Chocolate Chunk Cookies

August 2, 2010 by Susan

Cookies, good cookies, make me so incredibly happy.  Deliriously happy.  I think they are a perfect treat.

I have been making these particular cookies for several years now.  Every time I have that craving for a delicious cookie this is the recipe I reach for over an over again.  Why?  Because they are a wondrous combination of all that is good in this world.  First, chocolate.  Enough said.  Second, nuts.  I love the chocolate and nut combination.  Lastly, the surprise ingredient…bananas!  It is this trifecta that knocks these cookies out of the park.

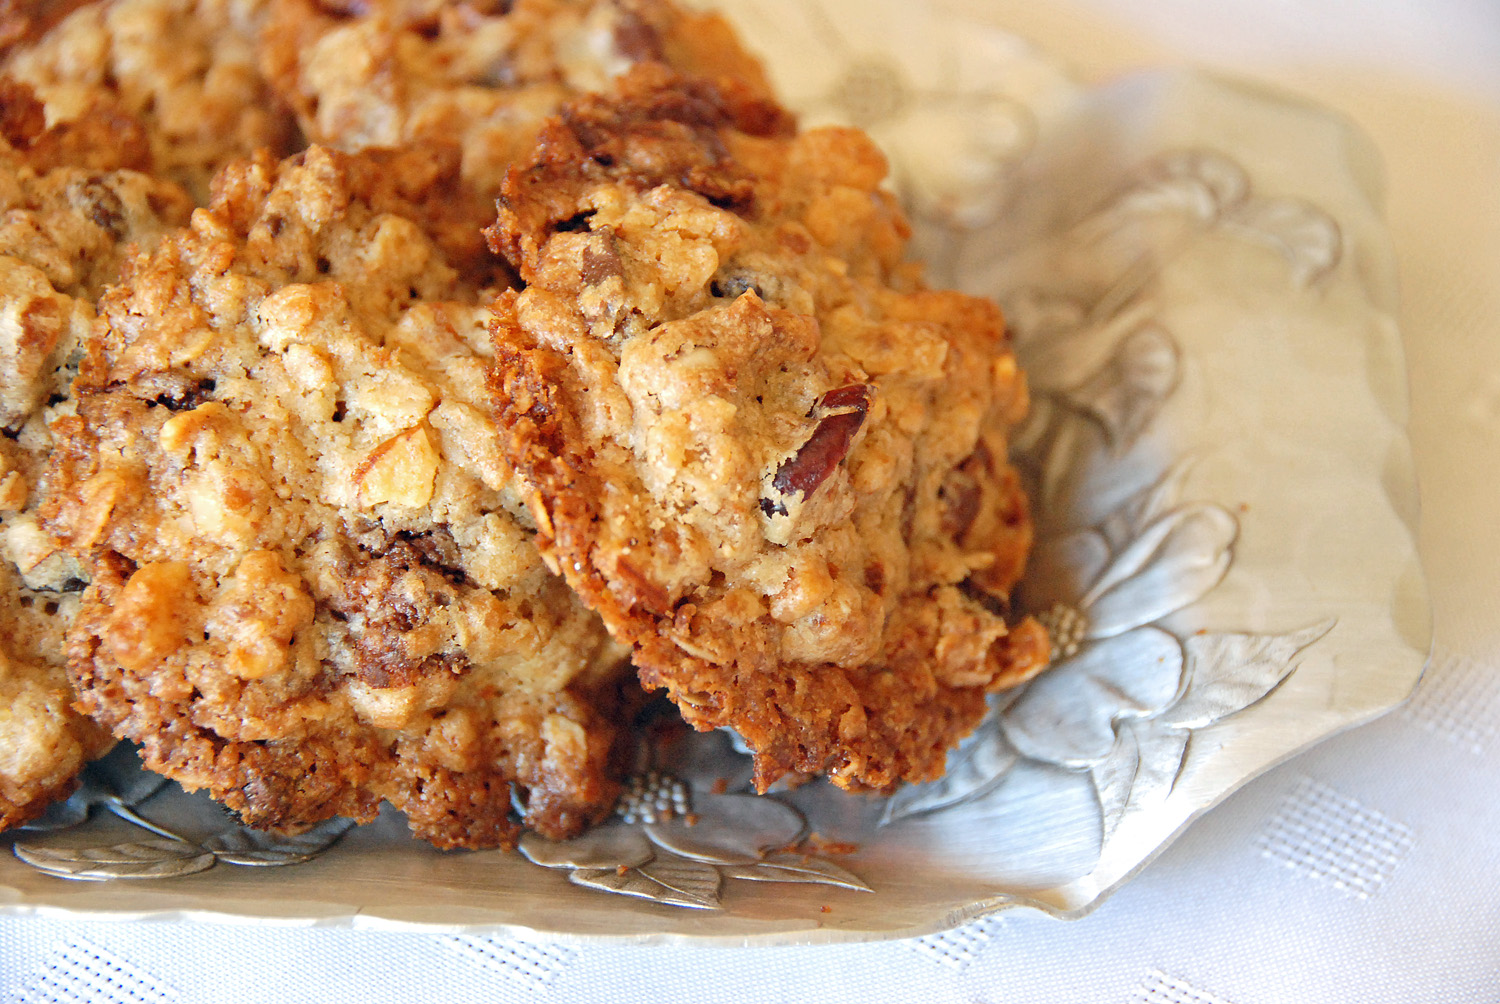
When biting into these babies you are almost confused whether or not you are eating a cookie or a banana bread.  It’s got a hint of banana bread taste with the texture of a cookie.  Perfection!

As far as cookies go, I’m a crunchy girl.  Not overly crunchy, but I do love the outside edges to have that amazing crispyness while the inside is still soft.  To me, that is the perfect cookie texture. And that is exactly what you get with these .

Every time I make these cookies the first few bites are spent with me moaning and rolling my eyes into the back of my head.  That’s what these cookies do to me.  I think my husband is slightly jealous.

Here’s what you will need to make about 30 cookies…

Recipe

1 cup all purpose flour

1/2 cup whole-wheat flour

1 teaspoon coarse salt

1/2 teaspoon baking soda

3/4 cup (1 1/2 sticks) unsalted butter, softened

1/2 cup granulated sugar

1/2 cup packed light-brown sugar

1 large egg

1 1/2 teaspoons pure vanilla extract

1/2 cup mashed bananas (about 1 1/2 medium bananas)

1 cup old-fashioned rolled oats

8 ounces semi-sweet chocolate, coarsely chopped into 1/4 inch chunks

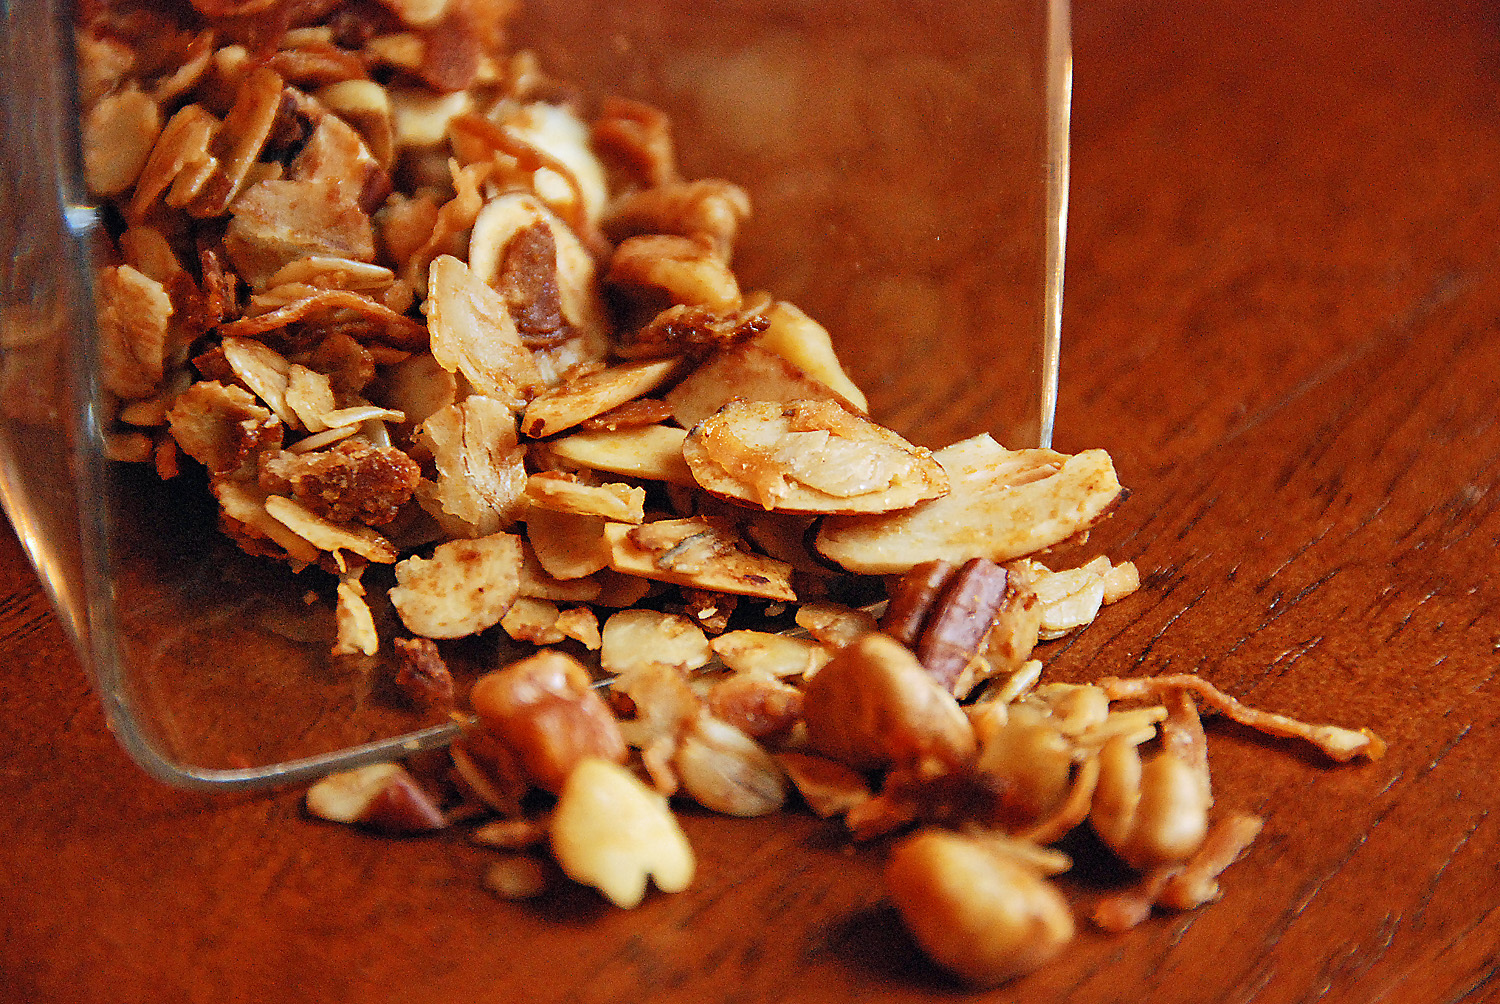
1/2 cup coarsely chopped walnuts, toasted

Preheat your oven to 375 degrees.

Method

Whisk flours, salt and baking soda in a small bowl, set aside.  Put butter and sugars into the bowl of an electric mixer fitted with the paddle attachment, mix on medium speed until pale and fluffy.  Reduce speed to low and add the egg and vanilla.  Mix until combined.  Add  in banana.  Add the flour mixture a little at a time until just combined.

Turn off the mixer.  At this time add the oats, chocolate and walnuts to the bowl.  Turn the mixer on very low just to mix the final ingredients into the batter.  Literally I only let it mix for about 4 or 5 turns of the paddle.

Using an ice cream scoop drop dough onto baking sheets lined with parchment paper, spacing them about 2 inches apart.  Bake cookies, rotating sheets halfway through, until golden brown and just set, approximately 20-25 minutes, depending on  your oven.  I would check in on them after about 16 minutes, just to be safe.

Allow the cookies to sit and cool on the baking sheets for 3-4 minutes, then transfer them to wire cooling racks, just like this…

Use all the self control you can muster to allow these things to cool before eating or else you will burn your precious tongue.  I say this from experience.

Thank you to Martha Stewart for this recipe.  You are a cookie genius.


Banana Walnut Chocolate Chunk Cookies
 
Print
Author: Feasts And Fotos
Ingredients
  • 1 cup all purpose flour
  • ½ cup whole-wheat flour
  • 1 teaspoon coarse salt
  • ½ teaspoon baking soda
  • ¾ cup (1½ sticks) unsalted butter, softened
  • ½ cup granulated sugar
  • ½ cup packed light-brown sugar
  • 1 large egg
  • 1½ teaspoons pure vanilla extract
  • ½ cup mashed bananas (about 1½ medium bananas)
  • 1 cup old-fashioned rolled oats
  • 8 ounces semi-sweet chocolate, coarsely chopped into ¼ inch chunks
  • ½ cup coarsely chopped walnuts, toasted
  • Preheat your oven to 375 degrees.
Method
  1. Whisk flours, salt and baking soda in a small bowl, set aside.  Put butter and sugars into the bowl of an electric mixer fitted with the paddle attachment, mix on medium speed until pale and fluffy.  Reduce speed to low and add the egg and vanilla.  Mix until combined.  Add  in banana.  Add the flour mixture a little at a time until just combined.
  2. Turn off the mixer.  At this time add the oats, chocolate and walnuts to the bowl.  Turn the mixer on very low just to mix the final ingredients into the batter.  Literally I only let it mix for about 4 or 5 turns of the paddle.
  3. Using an ice cream scoop drop dough onto baking sheets lined with parchment paper, spacing them about 2 inches apart.  Bake cookies, rotating sheets halfway through, until golden brown and just set, approximately 20-25 minutes, depending on  your oven.  I would check in on them after about 16 minutes, just to be safe.
  4. Allow the cookies to sit and cool on the baking sheets for 3-4 minutes, then transfer them to wire cooling racks.
3.2.2802

Filed Under: Sweets Tagged With: banana, chocolate, cookies, dessert, walnut

Blueberry Crumb Cake

July 7, 2010 by Susan

During the summer months, when berries are in season, I try to prepare desserts that showcase the delicious, ripe fruit.  There will be plenty of time to make a chocolate cake in the winter!  I usually love a fruit crisp but wanted to try something different, maybe even unexpected.  And a crumb cake is just that – I hardly see them prepared homemade.  Fruit tarts and apple pies are the usual suspects.  Once I tell people that I’ve prepared a blueberry crumb cake they reply…”crumb cake?”

And what a surprise it is….it’s absolutely delicious!  Everyone that I’ve made this for over the past few years loves it.  The cake is light and moist, studded with tender blueberries.  The crumb topping is a wonderful contrast to the cake it sits upon,  crunchy and nutty and most importantly not too sweet.  Who doesn’t love a crumb topping?!

Needless to say, this “dessert” makes a wonderful breakfast treat paired with a big cup of coffee or tea.  The only problem is making sure there are leftovers!

Here’s what you will need to make one cake that serves approximately 6-8 people…

Recipe

Topping

5 tbsp unsalted butter, room temperature

1/4 cup sugar

1/3 cup light brown sugar (packed)

1/3 cup all-purpose flour

1/4 tsp salt

1/2 cup chopped walnuts

Cake

1 pint blueberries, fresh

2 cups plus 2 tsp all-purpose flour

2 tsp baking powder

1/2 tsp baking soda

1/4 tsp salt

1/4 tsp cinnamon

1/8 tsp grated  nutmeg

2/3 cup sugar

grated zest of 1/2 lemon

6 tbsp unsalted butter, room temperature

2 large eggs, room temperature

1 tsp vanilla extract

1/2 cup buttermilk

Method

Preheat the oven to 350 degrees and butter an 8-inch square pan.

First step is to make the delicious crumb topping.  Basically, put all the ingredients (except the nuts) in a food processor and pulse just until the mixture forms clumps.  Scrape the topping into a bowl and stir in the nuts.  Either use right away or store in the fridge with a piece of plastic wrap pressed right onto the surface of the mixture.

Now for the cake…in a small bowl toss the blueberries with 2 tsp of flour to coat and set aside.  In a medium bowl, whisk together the remaining 2 cups flour, baking powder, baking soda, salt, cinnamon and nutmeg.

In the bowl of a stand mixer rub the sugar and zest together with your fingertips until the sugar is moist.  Add the butter and beat the butter and sugar mixture at medium speed until light, about 2-3 minutes.   Add the eggs, one by one, beating for 1 minute after each addition, then beat in the vanilla extract.

Reduce the mixer to low and add the flour mixture and the buttermilk alternately, starting with the flour.  You will add the flour in 3 parts and the buttermilk twice. The batter will be thick and creamy.  With a rubber spatula gently mix in the berries.  You don’t want them to burst.

Pour the batter into the buttered pan and smooth the top with a  spatula.  Scatter the crumb topping onto the batter, breaking it apart with your fingers.  Once the batter is mostly covered with the crumb topping press down on the topping ever so slightly.

Bake for 65-75 minutes until the crumbs are golden and a tooth pick inserted into the middle of the cake comes out mostly clean.  Transfer the cake to a rack and cool.

Recipe courtesy of Dorie Greenspan


Blueberry Crumb Cake
 
Print
Author: Feasts And Fotos
Ingredients
  • Topping
  • 5 tbsp unsalted butter, room temperature
  • ¼ cup sugar
  • ⅓ cup light brown sugar (packed)
  • ⅓ cup all-purpose flour
  • ¼ tsp salt
  • ½ cup chopped walnuts
  • Cake
  • 1 pint blueberries, fresh
  • 2 cups plus 2 tsp all-purpose flour
  • 2 tsp baking powder
  • ½ tsp baking soda
  • ¼ tsp salt
  • ¼ tsp cinnamon
  • ⅛ tsp grated nutmeg
  • ⅔ cup sugar
  • grated zest of ½ lemon
  • 6 tbsp unsalted butter, room temperature
  • 2 large eggs, room temperature
  • 1 tsp vanilla extract
  • ½ cup buttermilk
Method
  1. Preheat the oven to 350 degrees and butter an 8-inch square pan.
  2. First step is to make the delicious crumb topping. Basically, put all the ingredients (except the nuts) in a food processor and pulse just until the mixture forms clumps. Scrape the topping into a bowl and stir in the nuts. Either use right away or store in the fridge with a piece of plastic wrap pressed right onto the surface of the mixture.
  3. Now for the cake...in a small bowl toss the blueberries with 2 tsp of flour to coat and set aside. In a medium bowl, whisk together the remaining 2 cups flour, baking powder, baking soda, salt, cinnamon and nutmeg.
  4. In the bowl of a stand mixer rub the sugar and zest together with your fingertips until the sugar is moist. Add the butter and beat the butter and sugar mixture at medium speed until light, about 2-3 minutes. Add the eggs, one by one, beating for 1 minute after each addition, then beat in the vanilla extract.
  5. Reduce the mixer to low and add the flour mixture and the buttermilk alternately, starting with the flour. You will add the flour in 3 parts and the buttermilk twice. The batter will be thick and creamy. With a rubber spatula gently mix in the berries. You don't want them to burst.
  6. Pour the batter into the buttered pan and smooth the top with a spatula. Scatter the crumb topping onto the batter, breaking it apart with your fingers. Once the batter is mostly covered with the crumb topping press down on the topping ever so slightly.
3.2.2802

Filed Under: Breakfast, Sweets Tagged With: blueberry, breakfast, crumb cake, dessert

Blueberry Buttermilk Scones

June 23, 2009 by Susan

BlueberrySconeBerries

Dear lord these are delicious.

If I ever happen to be in a bakery (I try to avoid them due to my occassional lack of self control) I rarely ever choose scones.  I think the few times in my life that I’ve ever even eaten a scone I remember it to be very crumbly and dry.  Sort of like a brick.  Who would pay money for these things??  As far as I was concerned, I would rather have a muffin or croissant any day.

Then along comes Martha Stewart and her blueberry buttermilk scones.  I can’t say enough about these things.  They are spectacular!   So this is what a scone is supposed to taste like!   Ah ha!

The aroma while baking these is intoxicating.  The end product was slightly crumbly on the outside, soft and tender on the inside.  And that burst of blueberries adds a wonderful natural sweetness.  I love blueberries, they are sweet and delicious and are perfect to snack on.  Perfect size to just pop into your mouth.  It’s just an added bonus that they are very healthy and full of antioxidants.

After preparing the dough, I cut the scones a bit smaller (more narrow) than normal,  figuring it would be better on my waistline to eat smaller portions.  What a joke.  These were so good I ate TWO of the smaller scones.  See what I mean about the self control?  I baked off a few the first day reserving part of the dough in the fridge until the next day.  They came out just as yummy.  Also, leftover scones are delicious reheated in a toaster oven for a few minutes until warmed through.

I did make a few slight changes to the recipe.  I used whole wheat flour in place of cake flour and I used less sugar (as I usually do).  I used regular buttermilk, not low-fat.  Not sure they sell a low fat version where I shop.  Lastly, I added the lemon zest.

Here’s what you will need to make 10-12 scones….

Recipe

1 1/2 cups all purpose flour

1/2 cup whole wheat flour

1 1/2 tablespoon granulated sugar

2 1/2 tsp baking powder

3/4 tsp salt

4 ounces (1 stick) cold unsalted butter, cut into small pieces

1 heaping cup fresh blueberries

zest of one small lemon

1/2 cup buttermilk

1 large egg, plus 1 large egg lightly beaten for egg wash

1/2 teaspoon pure vanilla extract

fine sugar for sprinkling

Method

Preheat oven to 375 degrees.  Line a baking sheet with parchment paper.

Whisk together flours, granulated sugar, baking powder and salt in a large bowl.  Add butter and rub with your fingers until mixture has the texture of course meal.  Gently stir in blueberries.

In another bowl whisk together buttermilk, 1 egg , lemon zest and vanilla.  Drizzle over flour mixture and stir lightly with a fork until the dough comes together but a small amount of flour remains in bowl.  It’s important to not overwork the dough.

Turn out dough onto work surface and gently knead dough once or twice just to incorporate the flour.  Pat the dough into a 1-inch thick round.  Cut the round into approximately 10-12 wedges.  Transfer to baking sheet.

Brush the top of each scone with egg wash and sprinkle generously with sugar.  Bake until golden brown and cooked through, roughly 25 minutes.  Transfer scones to a wire rack to cool.

Just try to control yourself – you will be tempted to eat these piping hot out of the oven!  Use restraint until they are cool enough so you don’t burn your mouth.

Blueberry Buttermilk Scones
 
Print
Author: Feasts And Fotos
Ingredients
  • 1½ cups all purpose flour
  • ½ cup whole wheat flour
  • 1½ tablespoon granulated sugar
  • 2½ tsp baking powder
  • ¾ tsp salt
  • 4 ounces (1 stick) cold unsalted butter, cut into small pieces
  • 1 heaping cup fresh blueberries
  • zest of one small lemon
  • ½ cup buttermilk
  • 1 large egg, plus 1 large egg lightly beaten for egg wash
  • ½ teaspoon pure vanilla extract
  • fine sugar for sprinkling
Method
  1. Preheat oven to 375 degrees.  Line a baking sheet with parchment paper.
  2. Whisk together flours, granulated sugar, baking powder and salt in a large bowl.  Add butter and rub with your fingers until mixture has the texture of course meal.  Gently stir in blueberries.
  3. In another bowl whisk together buttermilk, 1 egg , lemon zest and vanilla.  Drizzle over flour mixture and stir lightly with a fork until the dough comes together but a small amount of flour remains in bowl.  It's important to not overwork the dough.
  4. Turn out dough onto work surface and gently knead dough once or twice just to incorporate the flour.  Pat the dough into a 1-inch thick round.  Cut the round into approximately 10-12 wedges.  Transfer to baking sheet.
  5. Brush the top of each scone with egg wash and sprinkle generously with sugar.  Bake until golden brown and cooked through, roughly 25 minutes.  Transfer scones to a wire rack to cool.
3.2.2802

Filed Under: Breakfast, Sweets Tagged With: blueberry, breakfast, buttermilk, dessert, scone, sweet

Pecan Sables

February 13, 2009 by Susan

pecansableresize

Valentine’s Day is tomorrow!  As far as I’m concerned it’s an excellent reason/excuse to eat tons of chocolate…I’m a big fan of chocolate.  I will be making my chocolate cupcakes with peanut butter frosting, however, I also wanted to make a little something else, a non-chocolate cookie (shocking!) in the shape of a heart, especially for the occasion.

I knew I wanted to make a shortbread cookie, preferably with pecans.  After scouring Dorie Greenspan’s recipes I chose this one.  Dorie is pure genius, so I had a good feeling these would come out great.  I was quite happy with the result.  These cookies are crumbly and delicious, perfect with a glass of cold milk or a hot latte.

So go ahead…whip up a batch of these heart shaped goodies and share the love.

Here’s what you will need to make approximately 40 cookies…

Recipe

2 sticks unsalted butter, room temperature

1/2 cup sugar

1/2 cup confectioners’ sugar, sifted

1/2 teaspoon salt

2 large egg yolks, room temperature

1 1/2 cups flour

1/2 cup finely ground pecans

Decorating sugar

egg wash

Method 

In a stand mixer beat the butter at medium speed until smooth and very creamy.  Add sugars and salt and beat until well blended.  The mixture should be smooth and velvety, not fluffy and airy.  Add the pecans.  Reduce speed to low and beat in the egg yolks until incorporated.

Pour in the flour and pulse the mixer at low speed 5-7 times for a second or two each time.  (You can put a towel over the mixer to protect yourself from getting flour all over you).  Continue mixing at low speed for 20 seconds more, just until flour disappears into the dough.  The dough should be soft, moist and clumpy.

Scrape the dough onto a smooth work surface sprinkled with flour, gather into a ball and divide in half.  Flatten each half into a disk, wrap in plastic wrap and refrigerate for 3 hours or up to 3 days.

Center a rack in the oven and preheat to 350.  Line baking sheet with parchment.  Remove dough from refrigerator, remove from plastic, sprinkle with some flour and roll out to approximately 1/4 inch to 1/3 inch thick.  Use heart shape cutouts to form each cookie.

Whisk egg for egg wash.  Brush the top of each cookie with the egg wash and sprinkle generously with decorator’s sugar.  Place on baking sheet, one inch apart.

Bake for 10-12 minutes, rotating baking sheet at the midway point, until the edges are lightly golden and the tops of the cookies are slightly less golden.  Remove from oven, allow to sit for a minute, then transfer to a cooling rack.


Pecan Sables
 
Print
Author: Feasts And Fotos
Ingredients
  • 2 sticks unsalted butter, room temperature
  • ½ cup sugar
  • ½ cup confectioners' sugar, sifted
  • ½ teaspoon salt
  • 2 large egg yolks, room temperature
  • 1½ cups flour
  • ½ cup finely ground pecans
  • Decorating sugar
  • egg wash
Method
  1. In a stand mixer beat the butter at medium speed until smooth and very creamy.  Add sugars and salt and beat until well blended.  The mixture should be smooth and velvety, not fluffy and airy.  Add the pecans.  Reduce speed to low and beat in the egg yolks until incorporated.
  2. Pour in the flour and pulse the mixer at low speed 5-7 times for a second or two each time.  (You can put a towel over the mixer to protect yourself from getting flour all over you).  Continue mixing at low speed for 20 seconds more, just until flour disappears into the dough.  The dough should be soft, moist and clumpy.
  3. Scrape the dough onto a smooth work surface sprinkled with flour, gather into a ball and divide in half.  Flatten each half into a disk, wrap in plastic wrap and refrigerate for 3 hours or up to 3 days.
  4. Center a rack in the oven and preheat to 350.  Line baking sheet with parchment.  Remove dough from refrigerator, remove from plastic, sprinkle with some flour and roll out to approximately ¼ inch to ⅓ inch thick.  Use heart shape cutouts to form each cookie.
  5. Whisk egg for egg wash.  Brush the top of each cookie with the egg wash and sprinkle generously with decorator's sugar.  Place on baking sheet, one inch apart.
  6. Bake for 10-12 minutes, rotating baking sheet at the midway point, until the edges are lightly golden and the tops of the cookies are slightly less golden.  Remove from oven, allow to sit for a minute, then transfer to a cooling rack.
3.2.2802

Filed Under: Sweets Tagged With: cookies, pecan, sables, shortbread

Pumpkin Spice Bread

December 13, 2008 by Susan

PumpkinBreadSliceFinalR

Another loaf!  If you have read some of my past posts on here, you already know that I love making loaves.  I always make this one in the fall and winter.  I am aware that there are so many various recipes for pumpkin bread out there, it is difficult to pick which is the best.  I grew up eating my mom’s pumpkin bread, she bakes it in coffee cans and the final product is quite dense and much darker in color than the one I make.  Both are great, it’s really a personal choice.  I think I might like this pumpkin bread slightly better than the one I grew up eating.  I find this version lighter and more ‘cake’ like.  This pumpkin bread is outstanding served warm right out of the oven.  It is still wonderful if eaten at room temperature.

Here is what you will need to make one loaf…

Recipe

1 and 2/3 cups flour (I usually use 1 cup white flour and 2/3 cup whole wheat flour)

1 teaspoon baking soda

3/4 teaspoon ground cinnamon

1/4 teaspoon ground ginger

1/4 teaspoon ground cloves

1/4  teaspoon salt

1 and 1/3 cups sugar

1/3 cup canola oil

1 cup plus 1 and 1/2 tablespoons canned unsweetened pumpkin

1 large egg

Method

Preheat oven to 350 degrees.  Grease and flour a loaf pan (roughly 8×4).

Mix first six ingredients together in a bowl with a whisk until well combined.

Combine sugar, oil and pumpkin in the bowl of electric mixer.  Beat at medium speed until smooth.  Add egg, beating until well blended.  Gradually add dry ingredients, beating at a low speed until blended.  Transfer batter to loaf pan.

Bake for 1 hour and 5 minutes or until loaf is golden and a wooden pick inserted in the center comes out clean.  Let cool in pan on a wire rack for 15 minutes then remove from pan.

I just love that pumpkiny color!  I hope you enjoy this as much as I do.

This recipe is adapted from Cottage Living.


Pumpkin Spice Bread
 
Print
Author: Feasts And Fotos
Ingredients
  • 1 and ⅔ cups flour (I usually use 1 cup white flour and ⅔ cup whole wheat flour)
  • 1 teaspoon baking soda
  • ¾ teaspoon ground cinnamon
  • ¼ teaspoon ground ginger
  • ¼ teaspoon ground cloves
  • ¼  teaspoon salt
  • 1 and ⅓ cups sugar
  • ⅓ cup canola oil
  • 1 cup plus 1 and ½ tablespoons canned unsweetened pumpkin
  • 1 large egg
Method
  1. Preheat oven to 350 degrees.  Grease and flour a loaf pan (roughly 8x4).
  2. Mix first six ingredients together in a bowl with a whisk until well combined.
  3. Combine sugar, oil and pumpkin in the bowl of electric mixer.  Beat at medium speed until smooth.  Add egg, beating until well blended.  Gradually add dry ingredients, beating at a low speed until blended.  Transfer batter to loaf pan.
  4. Bake for 1 hour and 5 minutes or until loaf is golden and a wooden pick inserted in the center comes out clean.  Let cool in pan on a wire rack for 15 minutes then remove from pan.
3.2.2802

Filed Under: Breakfast, Sweets Tagged With: bread, breakfast, loaf, pumpkin, spice, sweets

Granola Grabbers

November 11, 2008 by Susan

TrayofGranolaGrabbersFinalR

Who can resist a healthy cookie?  Not me!  Sure, these have the traditional butter and flour, however, the main ingredient is granola.  I make my own, so that makes these cookies even more healthy.  My prior post details my granola recipe,  you can find it in the right hand column under Recent Posts.

This recipe is adapted from Dorie Greenspan’s Granola Grabbers.  I have made several changes to the recipe.  First, I make my own granola instead of using store bought.  In my granola I already have almonds and coconut, so they did not need to be added.  I use other nuts in my granola, so now these cookies have walnuts and pecans in them.  I omitted the peanuts and added chocolate and cranberries.  In my opinion, a cookie should not be without chocolate!  Particularly one with this many ingredients in it.  Also, I cut back slightly on the butter using 13 tablespoons instead of 14.  I noticed zero difference from the first time I made these using all 14 tablespoons.  Next time I make them I will try it with 12, any less than that I think could be a problem.

These cookies came out delicious.  I was apprehensive about bringing them to my parents house for everyone to try, thinking they would be adverse to a ‘healthy cookie’ and not like the oatmeal/granola taste.  Oh, how wrong I was!  They LOVED them.  Even my ever-critical brother (that doesn’t even cook!)…he had six of them.   My co-workers also loved them, they were a big hit.

Here’s my version of this healthy cookie…

Recipe

3 cups granola without fruit

1/2 cup dried cranberries

1/2 cup raisins

1/2 cup semi sweet chocolate, cut into chunks

1/3 cup wheat germ

13 tablespoons butter, room temperature

3/4 cup packed light brown sugar

1/4 sugar

1 large egg

1/4 tsp salt

1 cup flour

Method

Make homemade granola (see recipe in right hand column under Recent Posts).  Allow granola to cool.  Put it in a large bowl and add the cranberries, raisins and wheat germ.  Mix together.

Beat the butter at medium speed until smooth, about 2 minutes.  Add the sugars and beat for another 3 minutes or until creamy. Add the egg and salt and beat until well blended.  Reduce speed to low and add the flour in three additions (not all at once).  Mix until just incorporated, then steadily add most of the granola mixture. Once that is just blended turn off the mixer and add the remaining granola and all the chocolate, mixing by hand with a sturdy spatula.

Scoop out rounded tablespoons of dough.  I use an ice-cream scoop.  Pack the scoops between your palms and arrange the mounds on the baking sheet, lined with parchment paper.  Flatten the mounds slightly with your fingers.

Bake for 12 minutes, rotating the sheets from top to bottom and front to back midway.  Cookies should be golden brown, but not firm.  Allow to rest for 2 minutes before transferring them to a cooling rack.


Granola Grabbers
 
Print
Author: Feasts And Fotos
Ingredients
  • 3 cups granola without fruit
  • ½ cup dried cranberries
  • ½ cup raisins
  • ½ cup semi sweet chocolate, cut into chunks
  • ⅓ cup wheat germ
  • 13 tablespoons butter, room temperature
  • ¾ cup packed light brown sugar
  • ¼ sugar
  • 1 large egg
  • ¼ tsp salt
  • 1 cup flour
Method
  1. Make homemade granola (see recipe in right hand column under Recent Posts).  Allow granola to cool.  Put it in a large bowl and add the cranberries, raisins and wheat germ.  Mix together.
  2. Beat the butter at medium speed until smooth, about 2 minutes.  Add the sugars and beat for another 3 minutes or until creamy. Add the egg and salt and beat until well blended.  Reduce speed to low and add the flour in three additions (not all at once).  Mix until just incorporated, then steadily add most of the granola mixture. Once that is just blended turn off the mixer and add the remaining granola and all the chocolate, mixing by hand with a sturdy spatula.
  3. Scoop out rounded tablespoons of dough.  I use an ice-cream scoop.  Pack the scoops between your palms and arrange the mounds on the baking sheet, lined with parchment paper.  Flatten the mounds slightly with your fingers.
  4. Bake for 12 minutes, rotating the sheets from top to bottom and front to back midway.  Cookies should be golden brown, but not firm.  Allow to rest for 2 minutes before transferring them to a cooling rack.
3.2.2802

Filed Under: Sweets Tagged With: cookies, granola

Homemade Granola

November 4, 2008 by Susan

GranolaGlass

You have to watch out with some store bought granola, they can be quite fattening.  When someone wants to be healthy and they think that eating granola is a step in the right direction, it can be frustrating to learn how fattening some of them could be!  Granola is usually associated with health and goodness.  It should be heart-healthy and surely not something that will make us fat.  We’ve got chocolate cupcakes with peanut butter frosting to do that!

Granola is usually filled with nuts and yes, nuts can be fattening, but they are the good kind of fat.  I think where the store bought versions get us is with the oils.  They really go overboard cooking it in alot of oil…the more the granola is sticking together in clumps, the more oil and sugar they used to cook it.  I use a very small amount of vegetable oil or canola oil, a heart-healthy oil.

I make my own granola and quite frankly will never again buy it from the store.  There is simply no reason to.  It’s beyond simple to make and I know exactly what I’m putting into it.  Not to mention the store bought ones can be quite pricey!  Also, I really love my granola to have a nice crunch to it and I’ve noticed some store bought ones just don’t measure up.

My favorite way to eat this granola is in low fat vanilla yogurt.  Dear lord, it’s delicious.  Not sure about you, but I like a little crunch in my yogurt.  I add about 2 tablespoons of granola to the little cup of yogurt and mix it all up. So simple!  I have this for breakfast often.

I usually make a large batch, it keeps well in an air-tight container for several weeks.  I would say I make a batch every 2-3 weeks or so.  I get a wave of panic over me when I see my stash is getting very low.  I like to have it on hand all the time.

Here’s what you will need…

Recipe

2 cups old fashioned rolled oats

1 cup sweetened shredded coconut

1 cup sliced almonds

1/2 cup chopped walnuts

1/2 cup chopped pecans

1/4 cup canola oil or vegetable oil (i usually use just a touch less than a 1/4 cup)

1/4 cup agave nectar (or any good honey)

1/4 tsp cinnamon (optional)

1/4 tsp vanilla extract (optional)

Method

Preheat the oven to 275 degrees.

Toss the oats, coconut, almonds, walnuts, pecans and cinnamon together in a large bowl.  In a small bowl whisk together the oil, honey and vanilla extract (if you choose to include it).  Pour the liquid mixture over the oat and nut mixture and mix well.  You do not want the mixture to be soaked.  You just want it coated and slightly moist.  Most of the time I don’t even use all this oil/honey mixture if it starts looking too wet and clumpy.  Use your judgement.

Pour into a large sheet pan (with a rim).

granola-step-one-fix-resize

Bake until everything turns a nice golden brown color, roughly 20-25 minutes, stirring once or twice during cooking.  You really must watch it, it goes from cooked just right to burnt VERY quickly.  The color change is amazing, right?

granola-final-fix-resize

And look, not one clump.  Not one to be found.

Allow to cool completely before storing.  I like to keep the granola in this ‘plain’ state, as opposed to adding in dried fruit.  Once you add the fruit the shelf life decreases dramatically.  However, it is a nice touch (change) to add some dried fruit to a small portion of the granola to eat immediately.  I like adding dried cranberries and/or dried chopped apricots.


Homemade Granola
 
Print
Author: Feasts And Fotos
Ingredients
  • 2 cups old fashioned rolled oats
  • 1 cup sweetened shredded coconut
  • 1 cup sliced almonds
  • ½ cup chopped walnuts
  • ½ cup chopped pecans
  • ¼ cup canola oil or vegetable oil (i usually use just a touch less than a ¼ cup)
  • ¼ cup agave nectar (or any good honey)
  • ¼ tsp cinnamon (optional)
  • ¼ tsp vanilla extract (optional)
Method
  1. Preheat the oven to 275 degrees.
  2. Toss the oats, coconut, almonds, walnuts, pecans and cinnamon together in a large bowl.  In a small bowl whisk together the oil, honey and vanilla extract (if you choose to include it).  Pour the liquid mixture over the oat and nut mixture and mix well.  You do not want the mixture to be soaked.  You just want it coated and slightly moist.  Most of the time I don't even use all this oil/honey mixture if it starts looking too wet and clumpy.  Use your judgement.
  3. Pour into a large sheet pan (with a rim).
  4. Bake until everything turns a nice golden brown color, roughly 20-25 minutes, stirring once or twice during cooking.  You really must watch it, it goes from cooked just right to burnt VERY quickly.
  5. Allow to cool completely before storing.  I like to keep the granola in this 'plain' state, as opposed to adding in dried fruit.  Once you add the fruit the shelf life decreases dramatically.  However, it is a nice touch (change) to add some dried fruit to a small portion of the granola to eat immediately.  I like adding dried cranberries and/or dried chopped apricots.
3.2.2802

Filed Under: Sweets Tagged With: granola, healthy, nuts, oats

Whole-Wheat Banana Nut Bread

October 2, 2008 by Susan

BananaBreadFinalR

I really enjoy making quick breads such as this one.  I find them extremely comforting and once they come out of the oven I always feel I’ve made something substantial.  This particular bread is quite healthy because it’s made with whole wheat flour as opposed to white flour.  The bananas provide a substantial and sustainable boost of energy and the walnuts are an excellent source of protein and are rich in fiber and antioxidants.  So there is absolutely no feeling guilty about enjoying this bread!  Just try not to eat the whole thing in one sitting…

The only planning in advance you need to do is buying the bananas and letting them sit on your counter for a few days until they are good and dark….very dark.  Over ripe.  I’m a bit picky with my bananas if I’m just peeling one and eating it.  It must be yellow, preferably with no spots at all.  But when you are making a banana bread, the blacker the better.  They become super sweet and moist.  And that keeps the bread very moist.

BananaBreadSlicedFinalR

A slice of this bread is great for breakfast or a snack anytime of day – and, honestly you don’t even have to toast it.  It’s perfect plain, however, if you are so inclined, feel free to toast up a slice and slather it with some cream cheese or butter (or not for those keeping things on the healthy side).  Either way, I promise you that your home with smell intoxicating while this is baking in the oven!

Here’s what you need to make one loaf…

Recipe

1 1/2 cups whole-wheat flour

1 teaspoon baking soda

1/2 teaspoon salt

1 stick unsalted butter, room temperature

3/4 cup sugar

2 large bananas, mashed, very ripe

2 eggs

1/2 cup chopped walnuts

Method

Preheat oven to 350 degrees.  Grease and flour a standard loaf pan (I use a Pyrex).

In a medium bowl stir together the flour, baking soda and salt.  Set aside.  In a large bowl beat together the butter and sugar until blended.  Beat in the banana, then beat in the eggs until completely mixed.  Add the flour mixture into the egg mixture in three additions, being careful to not over mix.  Stir in the walnuts with a spatula just until blended.

Spread the mixture into the loaf pan and bake for 60 minutes, or until a toothpick inserted in the center of the loaf comes out clean.  Cool in the pan for about 15 minutes, then turn onto a wire rack to cool completely.

This recipe is adapted from a Williams Sonoma cookbook.


Whole-Wheat Banana Nut Bread
 
Print
Author: Feasts And Fotos
Ingredients
  • 1½ cups whole-wheat flour
  • 1 teaspoon baking soda
  • ½ teaspoon salt
  • 1 stick unsalted butter, room temperature
  • ¾ cup sugar
  • 2 large bananas, mashed, very ripe
  • 2 eggs
  • ½ cup chopped walnuts
Method
  1. Preheat oven to 350 degrees.  Grease and flour a standard loaf pan (I use a Pyrex).
  2. In a medium bowl stir together the flour, baking soda and salt.  Set aside.  In a large bowl beat together the butter and sugar until blended.  Beat in the banana, then beat in the eggs until completely mixed.  Add the flour mixture into the egg mixture in three additions, being careful to not overmix.  Stir in the walnuts with a spatula just until blended.
  3. Spread the mixture into the loaf pan and bake for 60 minutes, or until a toothpick inserted in the center of the loaf comes out clean.  Cool in the pan for about 15 minutes, then turn onto a wire rack to cool completely.
3.2.2802

Filed Under: Breakfast, Sweets Tagged With: banana, quick bread, walnuts

Chocolate Cupcakes with Peanut Butter Frosting

July 2, 2008 by Susan

CupcakeOpenFinalR

These cupcakes are exceptional.  The combination of the peanut butter icing with the dark chocolate cupcakes….wow!  Whoever invented the marriage of peanut butter and chocolate should go straight to heaven.  Genius.  It’s a favorite of mine.  I love how the inside of these cupcakes are jet black, decadent!  Although the cupcakes are moist and delicious, the star is truly the peanut butter icing.   This recipe makes 12 cupcakes.  I made alot of people at work VERY happy.

Before you dig into one of these you might want to grab yourself a glass of cold milk.

Recipe

1/2 cup cocoa powder

2 oz bittersweet chocolate bar

8 tbsp butter

**Melt these over a double boiler, wisk until combined

3/4 cup flour

3/4 tsp baking powder

1/2 tsp baking soda

**Whisk together in a bowl

2 eggs

3/4 cup sugar

1 tsp vanilla extract

1/2 tsp salt

**Whisk together in a bowl

sour cream – keep on hand for a last minute addition

Method

Now…add the chocolate mixture to the egg mixture and wisk together.  Sift 1/2 of the flour mixture into the egg mixture slowly.  Stop and add 1/2 cup of sour cream and mix into the batter.  Once incorporated, add the remaining flour mixture until combined.

Bake at 350 degrees for about 18 minutes.

Peanut Butter Icing – by Ina Garten

1 cup confectioners sugar

1 cup creamy peanut butter

5 tbsp unsalted butter (room temperature)

3/4 tsp vanilla extract

1/4 tsp salt

1/3 cup heavy cream

Place confectioners sugar, peanut butter, butter, vanilla and salt in the bowl of an electric mixer fitted with a paddle attachment.  Mix on medium speed until creamy, scraping down the sides of the bowl.  Add the cream and beat on high speed until the mixture is light and smooth.

As you can see I couldn’t wait to bite into one…

Cupcake BiteFinalR

Filed Under: Sweets Tagged With: chocolate, cupcakes, dessert, icing, peanut butter, sweets

  • « Previous Page
  • 1
  • 2
Hello and welcome to Feasts and Fotos!

Archives

Categories

Copyright © 2025 · Foodie Pro Theme by Shay Bocks · Built on the Genesis Framework · Powered by WordPress