FEASTS AND FOTOS

  • Home
  • About
  • Happenings
  • Contact
You are here: Home / Archives for Sweets

No-Bake Tiramisu Balls

February 8, 2015 by Susan

TiramisuBalls1

Tiramisu might be one of those desserts that everyone has heard of and loves. An Italian favorite consisting of coffee-soaked cookies layered with mascarpone and cocoa, what’s not to love?

I must admit, I have never actually made this dessert.  I think the reason is mostly because I don’t have one of those lovely trifle dishes that tiramisu is usually prepared in.  A secondary reason is that soaking the cookies always sounded a bit labor intensive to me.  When I came across this particular recipe I was intrigued and so excited that I went out immediately and bought some ladyfingers (I already had every other ingredient in my pantry).  I was excited because…well, no soaking and no trifle dish!  And intrigued because I wondered if they could actually TASTE like tiramisu.

I really love baking.  I enjoy the process, I love the way it makes the house smell so delicious and comforting and I most especially love eating baked goods.  But it is nice (and possibly mandatory) to have a simple, no-bake recipe in your back pocket for those times when you are simply all baked out.  For when you invite someone to dinner last minute and need something special for dessert but just don’t have the time (or oven space) to start baking.  And most importantly, if you don’t really like to bake, these are perfect for you!  You get that unmistakable flavor in these tiny little bite-sized treats.  It’s amazing, they taste exactly like tiramisu!

These tiramisu balls are a terrific, quick dessert to make this upcoming Valentine’s Day. For anyone that might be intimidated by baking but wants to impress someone special, I encourage you to give these a try.  They are very simple to make. But be careful, they are addicting!

Here’s what you will need to make approximately 16 tiramisu balls…

Recipe

3.5 oz. hard ladyfingers (12 cookies)

1/2 cup confectioners sugar

1/2 tbsp instant espresso powder

1/4 tsp ground cinnamon

1/3 cup mascarpone

1/2 tbsp coffee-flavored liqueur (I use Kahlua)

Coating

1 tbsp confectioners sugar

1 tbsp unsweetened cocoa powder

Method

In a food processor, pulse the cookies, 1 cup confectioners sugar, espresso powder and cinnamon until very finely ground. Add the mascarpone and liqueur and process until the dough comes together.  Roll a small amount of dough (depending on the size you prefer), one by one, into balls and transfer to a baking sheet. Cover and refrigerate for 30 minutes.

Meanwhile, in a small bowl whisk the cocoa powder and remaining 1 tbsp confectioners sugar.  Add the balls, one at a time, gently tossing to coat completely.

Recipe adapted from Rachael Ray


No-Bake Tiramisu Balls
 
Print
Author: Feasts And Fotos
Ingredients
  • 3.5 oz. hard ladyfingers (12 cookies)
  • ½ cup confectioners sugar
  • ½ tbsp instant espresso powder
  • ¼ tsp ground cinnamon
  • ⅓ cup mascarpone
  • ½ tbsp coffee-flavored liqueur (I use Kahlua)
  • Coating
  • 1 tbsp confectioners sugar
  • 1 tbsp unsweetened cocoa powder
Method
  1. In a food processor, pulse the cookies, 1 cup confectioners sugar, espresso powder and cinnamon until very finely ground. Add the mascarpone and liqueur and process until the dough comes together. Roll a small amount of dough (depending on the size you prefer), one by one, into balls and transfer to a baking sheet. Cover and refrigerate for 30 minutes.
  2. Meanwhile, in a small bowl whisk the cocoa powder and remaining 1 tbsp confectioners sugar. Add the balls, one at a time, gently tossing to coat completely.
3.2.2802

Filed Under: Sweets Tagged With: balls, cocoa, dessert, ladyfingers, sweets, tiramisu, treats

Rice Krispies Treats With Double Chocolate Drizzle

December 16, 2014 by Susan

RiceTreatsCut2 copy 2R

There are a handful of snacks that bring me right back to my childhood and this is one of them.  Rice Krispies Treats are old-school and eating them make me feel like a kid again.  And feeling like a kid again is fun!

Actually, I feel like a kid most days mainly because I am hanging around with (running after) my very-soon-to-be-three-year-old. Going to the playground, riding a carousel, horsey rides on my back and tea parties…it’s all about kid stuff around here.  So these fit into my lifestyle quite nicely these days.

The recipe for these treats is very basic.  Prepare them in the normal fashion and press them into the dish.  Then comes the fun part.  The double chocolate drizzle is the final element that takes these over the top and turns them into something special.  A work of art, even.

The real beauty of this dessert, for me, is that there are no eggs or peanuts involved.  My daughter is allergic to both so finding acceptable treats for her is not easy.  I don’t have to worry or alter anything for this recipe.  Plain and simple.  Oh, but with an amazing chocolate explosion over top.  And my baby loves chocolate,  just like her mamma.

You remember eating (and loving) these as a kid, right?  Go ahead, whip up a batch and tap into your inner child.  The holidays are right around the corner (how did that happen so fast?!) and these would be a perfect treat to bring to a holiday party or even give away as edible gifts.

Here’s what you need to make approximately 12-16 bars (depending on the size you prefer)…

Recipe

4 Tbsp butter

10 oz mini marshmallows

6 cups rice cereal

pinch of salt

8 x 10 baking dish

2 pieces of parchment paper, one piece slightly longer than your baking dish

3-4 oz bittersweet chocolate (or semi sweet), melted

3-4 oz white chocolate, melted

Method

In a large pot over medium heat melt the butter.  Once melted add all the marshmallows and lower the heat to low. Add a pinch of salt and stir until all the marshmallows are melted into the butter and the mixture is smooth.  (The key step here is lowering the heat so they don’t burn).

Once the mixture is smooth add the rice cereal and stir so all the cereal is coated with the marshmallow mixture.  You will need to put a little muscle into it!

Lay the longer piece of parchment paper on the bottom of your baking dish, with the long ends slightly over hanging the end of the dish.  You will use this as handles to lift the treats out of the dish.  Dump the mixture into the baking dish  and carefully spread out evenly.  I found the best method for this step is to use a piece of parchment paper.  Simply lay the paper over the pan and press and slide your hand (and side of your palm) over the mixture until it is smooth and level. Peel off the parchment paper.

Meanwhile, melt both the bittersweet chocolate and the white chocolate in separate bowls.  I do this in the microwave, melting each in 20 second intervals until completely melted.  Drizzle over the top as much or as little as you like.  I usually just use a fork and flick my wrist, spraying chocolate over the treats.  Another (less messy) option is to put the chocolate in a small zip top back, cut a tiny piece of a corner off and drizzle.  Create your artwork.

Allow rice treats to sit for another hour or so until the chocolate sets.  If you are in a rush, you can pop them in the fridge.  Once set, left the entire block out of the pan (lifting by the parchment paper).  Lay on a flat surface and cut into squares.  You can make big squares or cut them into smaller, bite-size pieces.

This is the size and thickness I usually prefer.

RiceTreatTowerR


Rice Krispies Treats With Double Chocolate Drizzle
 
Print
4 Tbsp butter 10 oz mini marshmallows 6 cups rice cereal pinch of salt 8 x 10 baking dish 2 pieces of parchment paper, one piece slightly longer than your baking dish 3-4 oz bittersweet chocolate (or semi sweet), melted 3-4 oz white chocolate, melted
Author: Feasts And Fotos
Ingredients
  • 4 Tbsp butter
  • 10 oz mini marshmallows
  • 6 cups rice cereal
  • pinch of salt
  • 8 x 10 baking dish
  • 2 pieces of parchment paper, one piece slightly longer than your baking dish
  • 3-4 oz bittersweet chocolate (or semi sweet), melted
  • 3-4 oz white chocolate, melted
Method
  1. In a large pot over medium heat melt the butter. Once melted add all the marshmallows and lower the heat to low. Add a pinch of salt and stir until all the marshmallows are melted into the butter and the mixture is smooth. (The key step here is lowering the heat so they don't burn).
  2. Once the mixture is smooth add the rice cereal and stir so all the cereal is coated with the marshmallow mixture. You will need to put a little muscle into it!
  3. Lay the longer piece of parchment paper on the bottom of your baking dish, with the long ends slightly over hanging the end of the dish. You will use this as handles to lift the treats out of the dish. Dump the mixture into the baking dish and carefully spread out evenly. I found the best method for this step is to use a piece of parchment paper. Simply lay the paper over the pan and press and slide your hand (and side of your palm) over the mixture until it is smooth and level. Peel off the parchment paper.
  4. Meanwhile, melt both the bittersweet chocolate and the white chocolate in separate bowls. I do this in the microwave, melting each in 20 second intervals until completely melted. Drizzle over the top as much or as little as you like. I usually just use a fork and flick my wrist, spraying chocolate over the treats. Another (less messy) option is to put the chocolate in a small zip top back, cut a tiny piece of a corner off and drizzle. Create your artwork.
  5. Allow rice treats to sit for another hour or so until the chocolate sets. If you are in a rush, you can pop them in the fridge. Once set, left the entire block out of the pan (lifting by the parchment paper). Lay on a flat surface and cut into squares. You can make big squares or cut them into smaller, bite-size pieces.
3.2.2802

Filed Under: Snacks, Sweets, Uncategorized Tagged With: chocolate, dessert, krispies, marshmellow, rice, sweets, treats, white chocolate

Classic Bread Pudding

November 23, 2014 by Susan

ClassicBreadPuddingDiag

Prior to meeting my husband, I never had bread pudding. Given the choice, I always choose a dessert that includes chocolate. Once we got married he happened to ‘mention’ to me that his favorite dessert was bread pudding.  And then for his birthday dinner he requested bread pudding for dessert.  Suddenly he was doing a lot of talking about this bread pudding.

And so I starting doing some research and comparing recipes.  There are tons of them out there.  We also started ordering bread pudding desserts at restaurants every now and again, so I got a good sampling.  Personally, I found most of them much too dense and sweet for my liking. My husband’s only request (demand) was that there be no raisins whatsoever.  None.  Apparently the inclusion of raisins completely ruins the dessert (in his opinion).

My guess is I only had to make bread pudding 2 times before I got it exactly how we like it.  By the 3rd time it was perfect, just the right amount of bread, not too much sugar and the perfect amount of pecans to give it that crunch it absolutely needs. And the whiskey cream sauce?  Totally makes the dessert!

I am proud to say my husband, the connoisseur of bread pudding, told me this is the best bread pudding he has ever had.  He might be exaggerating a bit due to the fact that he is married to me, but I have to say I agree with him. It is delicious and so easy to make, it takes all my willpower to not make it once a week!

If you need an amazing, easy dessert to add to all the pecan and pumpkin pies on your Thanksgiving table this week, try this one. You won’t be disappointed.

Here’s what you will need to serve 4-5 people…

Recipe

5 cups day old challah bread, cubed into 1 inch pieces

2 eggs

2 Tbsp vanilla

2 cups whole milk

1 cup sugar

2 Tbsp melted butter, cooled

pinch of cinnamon

pinch of salt

1/4 cup chopped pecans

Whiskey Cream Sauce

1/4 cup sugar

1/2 stick of butter

1/4 cup heavy cream (heaping)

1/8 cup Jack Daniels

pinch of salt

Method

The bread needs to be somewhat dried out, so if it is not old bread that is already dried out cut the bread into cubes and bake on a sheet pan in a 275 degree oven for about 10-15 minutes or so until the cubes are lightly toasted.  Allow to cool.  Place in a baking dish (approximately 8×10 in size).  The bread should fit tightly in the baking dish.

Preheat oven to 325 degrees.

In a large bowl, whisk eggs, melted and cooled butter, vanilla and milk.  Add the sugar and mix until incorporated.  Pour liquid over all the bread cubes, pressing the bread down slightly to ensure most of the bread is covered with the liquid.  Scatter chopped pecans over the top and place in the oven to cook for approximately 45 minutes until golden brown and puffed. It will soon deflate, don’t worry, that’s normal.

While the bread pudding is cooking, start on the whiskey cream sauce.  Basically just add all the ingredients into a small saucepan over medium low heat and cook, stirring until everything is melted and gently boiling.  Remove from heat and use when needed.  You might need to reheat this mixture a bit and stir again.  If there is any leftover sauce, store in the refrigerator and reheat gently.

ClassicBreadPuddingVertical

Portion out the bread pudding into bowls and drizzle the whiskey cream sauce over the top.  I like to just moisten the bread pudding with the sauce, not drench it.  If you prefer to have your bread pudding soaking in the cream sauce you might want to double the sauce recipe.

Whiskey Cream Sauce courtesy of The Pioneer Woman


Classic Bread Pudding
 
Print
Author: Feasts And Fotos
Ingredients
  • 5 cups day old challah bread, cubed into 1 inch pieces
  • 2 eggs
  • 2 Tbsp vanilla
  • 2 cups whole milk
  • 1 cup sugar
  • 2 Tbsp melted butter, cooled
  • pinch of cinnamon
  • pinch of salt
  • ¼ cup chopped pecans
  • Whiskey Cream Sauce
  • ¼ cup sugar
  • ½ stick of butter
  • ¼ cup heavy cream (heaping)
  • ⅛ cup Jack Daniels
  • pinch of salt
Method
  1. The bread needs to be somewhat dried out, so if it is not old bread that is already dried out cut the bread into cubes and bake on a sheet pan in a 275 degree oven for about 10-15 minutes or so until the cubes are lightly toasted. Allow to cool. Place in a baking dish (approximately 8x10 in size). The bread should fit tightly in the baking dish.
  2. Preheat oven to 325 degrees.
  3. In a large bowl, whisk eggs, melted and cooled butter, vanilla and milk. Add the sugar and mix until incorporated. Pour liquid over all the bread cubes, pressing the bread down slightly to ensure most of the bread is covered with the liquid. Scatter chopped pecans over the top and place in the oven to cook for approximately 45 minutes until golden brown and puffed. It will soon deflate, don't worry, that's normal.
  4. While the bread pudding is cooking, start on the whiskey cream sauce. Basically just add all the ingredients into a small saucepan over medium low heat and cook, stirring until everything is melted and gently boiling. Remove from heat and use when needed. You might need to reheat this mixture a bit and stir again. If there is any leftover sauce, store in the refrigerator and reheat gently.
  5. Portion out the bread pudding into bowls and drizzle the whiskey cream sauce over the top. I like to just moisten the bread pudding with the sauce, not drench it. If you prefer to have your bread pudding soaking in the cream sauce you might want to double the sauce recipe.
3.2.2802

Filed Under: Sweets Tagged With: bread pudding, cream, dessert, pecan, sauce, sweets, whiskey

Strawberry Jam

September 30, 2014 by Susan

StrawberryJamFinalR

I am very into making jam lately.  Not the jam that requires all the sterilizing and sealing.  Although I would like to try that one day, that day is not today.  Or anytime soon.  It just seems rather daunting to me and alot of work.  I am all about  refrigerator jam, which basically means making a smaller batch and storing it in the refrigerator for up to a month instead of sterilizing and storing it on a shelf for longer periods of time.

This method of making jam is perfect for me.  First, I don’t want or need to make 15 jars of the same jam right now. Second, making smaller batches allows me the freedom to experiment with different fruits and spices and not be so committed to having a large quantity of one flavor in my pantry.

This is a basic, delicious strawberry jam recipe I have been going back to again and again.  I really love it.  It tastes fresh, bright and slightly sweet.  Most importantly, it truly tastes like strawberries!  It is sad to say many jams and jellies don’t actually taste like the fruit they are supposedly made from, instead tasting very processed and sugary.  Why is there so much sugar added?  I don’t think it needs it which is why I only put 3/4 of a cup in mine.  Let the fruit shine.

If you make this strawberry jam just store it in the fridge and consume it within 1 month.  Give one away to a good friend or family and keep the rest for yourself.  Trust me, you won’t have a problem finishing it all in time.  You will want to slather this on everything!

Here’s what you will need to make about 3 small jars…

Recipe

5 cups strawberries, washed, hulled and cut in half

3/4 cup sugar

2 Tbsp lemon juice, plus a few squeezes more

*2 teaspoons

Method

In a large non-reactive bowl add the strawberries, sugar and 2 Tbsp of lemon juice.  Mix to combine well.  Cover with plastic wrap and refrigerate overnight.

Remove plastic wrap and stir strawberry mixture.  Transfer to a large non-reactive pot and place pot over a medium heat.  Cook for 5 minutes, stirring occasionally, until all the sugar has melted and mixture begins to foam.

Place 2 teaspoons in the freezer.

Increase the heat to high and bring to a rolling boil, stirring almost constantly until thick and shiny, approximately 15 minutes.  Once you notice the jam starting to thicken (about 10 minutes in) add a few squeezes of fresh lemon juice to the pot.  Literally, only about 6-8 drops.

Place a small drop of jam on the back of one of the spoons and place the spoon back into the freezer for about 30 seconds. Remove spoon and tilt it.  The jam should just barely move.  If the jam slides down off the spoon easily continue cooking the jam for a few more minutes and then test again.

Allow mixture to cool slightly.  With an immersion blender puree 1/2 of the mixture until smooth, leaving the remaining slightly chunky.  If you want your jam completely smooth with no chunks at all, puree it all.

Allow to cool completely and fill your jars!  Store in refrigerator for up to one month.


Strawberry Jam
 
Print
Author: Feasts And Fotos
Ingredients
  • 5 cups strawberries, washed, hulled and cut in half
  • ¾ cup sugar
  • 2 Tbsp lemon juice, plus a few squeezes more
  • *2 teaspoons
Method
  1. In a large non-reactive bowl add the strawberries, sugar and 2 Tbsp of lemon juice.  Mix to combine well.  Cover with plastic wrap and refrigerate overnight.
  2. Remove plastic wrap and stir strawberry mixture.  Transfer to a large non-reactive pot and place pot over a medium heat.  Cook for 5 minutes, stirring occasionally, until all the sugar has melted and mixture begins to foam.
  3. Place 2 teaspoons in the freezer.
  4. Increase the heat to high and bring to a rolling boil, stirring almost constantly until thick and shiny, approximately 15 minutes.  Once you notice the jam starting to thicken (about 10 minutes in) add a few squeezes of fresh lemon juice to the pot.  Literally, only about 6-8 drops.
  5. Place a small drop of jam on the back of one of the spoons and place the spoon back into the freezer for about 30 seconds. Remove spoon and tilt it.  The jam should just barely move.  If the jam slides down off the spoon easily continue cooking the jam for a few more minutes and then test again.
  6. Allow mixture to cool slightly.  With an immersion blender puree ½ of the mixture until smooth, leaving the remaining slightly chunky.  If you want your jam completely smooth with no chunks at all, puree it all.
  7. Allow to cool completely and fill your jars!  Store in refrigerator for up to one month.
3.2.2802

Filed Under: Breakfast, Sweets Tagged With: jam, low sugar, refrigerator, strawberry, sweet

Frozen Banana Bon Bons

September 1, 2012 by Susan

BonbonsR

I would like to introduce you to my new obsession…frozen banana bites coated in chocolate.  You cannot imagine how good these are.

I meant to post these treats two years ago.  Yup, TWO years ago.  Pathetic.  We usually have these in the summer and it seems the summer flies by in the blink of an eye and I neglect to post this year after year.  And again this summer zipped on by and here I am on Labor Day weekend finally getting around to it.  Oiy.

Anyway, back to the goodies.  Thick slices of banana coated in dark chocolate and then frozen for a few hours.  The banana becomes similar to ice cream, you would think you are eating banana ice cream!  In this photo above (2 years old) I topped each banana with chopped nuts.  Lately I have not been using the nuts, just leaving them a little naked and they are equally outstanding.  I simply don’t have time for that extra step anymore.

If you like banana and you like chocolate and you love having a cold treat on a hot day I guarantee you will absolutely love these.  And since the summer is coming to a close please give these a try soon.  You won’t regret it.

Here’s what you will need…

Recipe

1 Banana, not too ripe (preferably cool from the fridge)

4 oz melted chocolate ( I use 60% or 70% cacao)

chopped nuts (optional)

2 forks

cookie sheet

parchment paper


Method 

Remove banana from fridge, peel and remove any of those stringy things on the sides.  Cut the banana into large chunks (about 1/2 inch thick).  Taking one piece of banana at a time, drop it into the bowl of chocolate and with the forks turn the banana over a few times to coat (don’t prick the banana).  Pick the banana up using the flat side of one fork and gently tap it against the edge of the bowl to remove excess chocolate.  (If you are using the nuts you would put them on the top now).  Lay the banana bite on the cookie sheet.

Continue with all the banana pieces and then put the cookie sheet in the freezer for a few hours.  Once they are frozen you can put them in a ziplock back and keep them stored in the freezer.

Hurry up and make these – the summer’s almost over!

*The banana does end up making the chocolate a bit mealy after the 8th or 9th piece.  If you want to make more just clean out that chocolate and start over with a new 4 oz bar.


Frozen Banana Bon Bons
 
Print
Author: Feasts And Fotos
Ingredients
  • 1 Banana, not too ripe (preferably cool from the fridge)
  • 4 oz melted chocolate ( I use 60% or 70% cacao)
  • chopped nuts (optional)
  • 2 forks
  • cookie sheet
  • parchment paper
Method
  1. Remove banana from fridge, peel and remove any of those stringy things on the sides.  Cut the banana into large chunks (about ½ inch thick).  Taking one piece of banana at a time, drop it into the bowl of chocolate and with the forks turn the banana over a few times to coat (don't prick the banana).  Pick the banana up using the flat side of one fork and gently tap it against the edge of the bowl to remove excess chocolate.  (If you are using the nuts you would put them on the top now).  Lay the banana bite on the cookie sheet.
  2. Continue with all the banana pieces and then put the cookie sheet in the freezer for a few hours.  Once they are frozen you can put them in a ziplock back and keep them stored in the freezer.
3.2.2802

Filed Under: Sweets Tagged With: banana, chocolate, dessert, frozen, healthy, treat

Coco-Nana Bread

February 17, 2012 by Susan

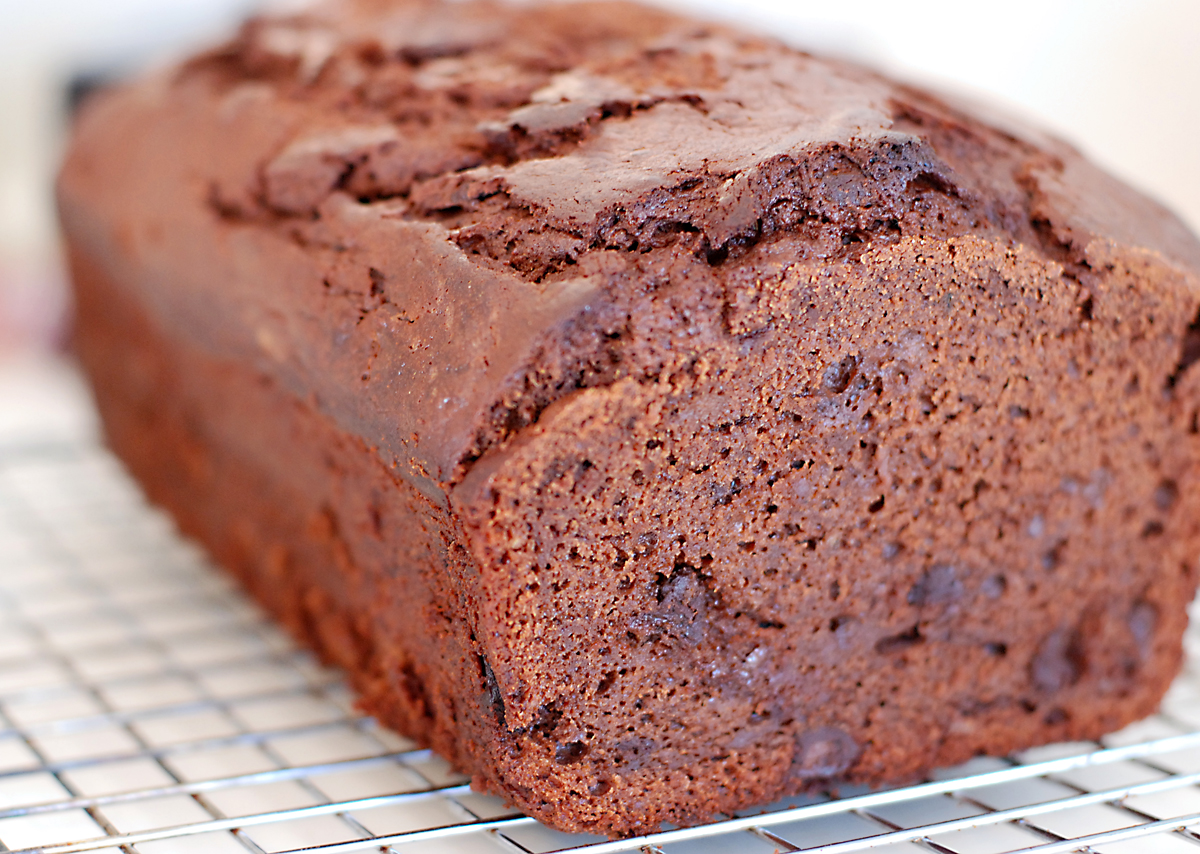
Life with a newborn has been challenging, to say the least. I barely have time to eat anything, let alone actually cook.  It has become essential that I have some type of bread/loaf such as this one on hand everyday so I can just slice a piece and eat it with one hand.  If not I would wither away to nothing, running on fumes.

I wanted something a bit different and this loaf fit the bill. Also, it had alot of chocolate in it, something I have grown frighteningly dependent upon lately.  Did I love this bread?  Not exactly.  But I did like it and it actually grew on me…I liked it more and more as the days went on. It is rich and dense yet very moist. And quite filling – like a meal.  And when you don’t have time to eat meals anymore you become thankful for a slice of chocolate banana bread that will fill you up and provide some comfort as well.

Here’s what you will need to make one loaf…

Recipe

2 cups all-purpose flour
1 cup unsweetened cocoa powder
1 1/2 tsp baking powder
1/2 tsp salt
1/4 tsp baking soda
1 stick unsalted butter, room temp
3/4 cup sugar
1/2 cup packed light brown sugar
2 large eggs, room temp
2 ripe bananas, mashed
3/4 cup buttermilk
3 ounces bittersweet chocolate, coarsely chopped
Preheat oven to 350. Butter a 9 x 5 inch loaf pan and place it on an insulated baking sheet or on two regular baking sheets stacked on top of the other. (This extra insulation will keep the bottom of the bread from over baking.)

Method

Sift together the flour, cocoa, baking powder, salt and baking soda.

Working with a stand mixer fitted with a paddle attachment beat the butter at medium speed for about a minute, until softened. Add the sugars and beat for 2 minutes more. Add the eggs one at a time, beating for a minute after each addition. At this point, the batter may look a little curdled — it’s okay. Reduce the mixer speed to low and mix in the mashed bananas. Add the dry ingredients in 3 additions, mixing only until they disappear into the batter. Still on low speed, add the buttermilk, mixing until it is incorporated. Stir in the chopped chocolate. Scrape the batter into the pan.

Bake for 30 minutes. Cover the bread loosely with a foil tent to keep the top from getting too dark, and continue to bake for another 45 to 65 minutes or until a thin knife inserted into the center comes out clean. Transfer the pan to a rack and cool for at least 20 minutes before running a knife around the edges of the bread and unmolding. Invert and cool to room temp right side up.

Cut yourself a nice thick slice and enjoy!

Recipe courtesy Dorie Greenspan

Filed Under: Breakfast, Sweets Tagged With: banana, bread, chocolate, loaf

Spiced Pear Jam

May 6, 2011 by Susan

PearJamR

Mother’s Day is this Sunday and I can’t think of a better way to sweeten your mom’s day than with this pear jam.   It is slightly sweet, a little spicy and best of all – it is homemade.  What mom wouldn’t love that?

Here’s what you need to make approximately three 70 ml jars…

Recipe

7 large, ripe Bartlett pears, peeled, cored and cut into 1/2 inch pieces

2 cups sugar

10 cardamom pods, lightly crushed

1/4 cup lemon juice

1 tbsp honey

Method

In a large glass bowl toss the pears with the sugar and lemon juice.  Cover and refrigerate overnight.

Transfer the pears and their liquid to a wide, heavy pot and bring to a boil.  Put the crushed cardamom in a tea ball and add it to the pot. Cook the pears over a high heat, stirring frequently, until the liquid starts to thicken and the pears become translucent, about 10 minutes.  Remove the pot from the heat.

Place a metal spoon in the freezer (you will use this to test if the jam is cooked to the correct thickness).

Transfer one-third of the pears to a food processor and puree until smooth.  Add the puree back to the pot.  Boil over moderately high heat, stirring until the jam is very thick, about 5-10 minutes.

To test the jam, removed the chilled spoon from the freezer and drop a small amount of the pear jam on the back of the spoon and place back in the freezer for 30 seconds.  Remove the spoon again and tilt the spoon.  The jam should be thick and run down the spoon slowly.  If it is too runny, continue cooking the jam for a few minutes more, then test again.

Remove the tea ball and stir in the honey.

Ladle the jam into your jars, allow to cool completely, then cover and refrigerate for up to 2 months.

Adapted from Food & Wine/Blue Chair Fruit

Spiced Pear Jam
 
Print
Author: Feasts And Fotos
Ingredients
  • 7 large, ripe Bartlett pears, peeled, cored and cut into ½ inch pieces
  • 2 cups sugar
  • 10 cardamom pods, lightly crushed
  • ¼ cup lemon juice
  • 1 tbsp honey
Method
  1. In a large glass bowl toss the pears with the sugar and lemon juice.  Cover and refrigerate overnight.
  2. Transfer the pears and their liquid to a wide, heavy pot and bring to a boil.  Put the crushed cardamom in a tea ball and add it to the pot. Cook the pears over a high heat, stirring frequently, until the liquid starts to thicken and the pears become translucent, about 10 minutes.  Remove the pot from the heat.
  3. Place a metal spoon in the freezer (you will use this to test if the jam is cooked to the correct thickness).
  4. Transfer one-third of the pears to a food processor and puree until smooth.  Add the puree back to the pot.  Boil over moderately high heat, stirring until the jam is very thick, about 5-10 minutes.
  5. To test the jam, removed the chilled spoon from the freezer and drop a small amount of the pear jam on the back of the spoon and place back in the freezer for 30 seconds.  Remove the spoon again and tilt the spoon.  The jam should be thick and run down the spoon slowly.  If it is too runny, continue cooking the jam for a few minutes more, then test again.
  6. Remove the tea ball and stir in the honey.
  7. Ladle the jam into your jars, allow to cool completely, then cover and refrigerate for up to 2 months.
3.2.2802

Filed Under: Breakfast, Sweets Tagged With: cardamom, jam, pear

Christmas Bark

December 30, 2010 by Susan

Bark2R

I love to make this Christmas Bark every year for the holidays.  It’s just so festive looking with the red cranberries and the green pistachios.  You can find that peppermint bark everywhere during the holidays, I prefer this version, it’s a little different, somewhat unexpected.  Plus, it makes me feel like I’m eating something kinda good for me, with the dark chocolate and nuts.  Kinda.

This treat is very easy to make which means there is still time to whip up a batch to bring as a hostess gift to your New Year’s Eve party.  You might want to double this recipe, you will want to keep some for yourself!

Happy New Year everyone!  

Here’s what you will need to make approximately 10 medium sized pieces…

Recipe 

4 oz semi-sweet chocolate

4 oz bittersweet chocolate 

2-3 oz white chocolate

dried cranberries (a handful)

pistachios, shelled and roughly chopped (a handful)

dried apricots, rough chopped (a handful)

Method

Line a large baking sheet with parchment paper.

Break up all the chocolate into small pieces and place approximately 3 oz of the semi-sweet chocolate and 3 oz of the bittersweet chocolate in a microwave safe bowl.  Keep the white chocolate separate for later use.  Microwave in 30 second increments, stirring with a spatula after each 30 seconds, until 90% melted.  Remove bowl from microwave and stir until all the chocolate has melted.

Immediately add the remaining semi-sweet and bittersweet chocolate pieces to the bowl and stir until melted.  This is my lazy man’s way of tempering chocolate.  I have absolutely no patience for dealing with a candy thermometer, etc.

Ok, your dark chocolate is done.  In another microwave safe bowl do the same process with the white chocolate.

While the white chocolate is melting pour the dark chocolate onto the parchment lined baking sheet.  With an offset spatula spread out the chocolate to an even thickness of your choice.  You can see from the above photo the thickness I prefer.

Next, take the melted white chocolate and drizzle it all over the dark chocolate with a spoon.  You can add as much or as little of the white chocolate as you want.  With the edge of a sharp knife, swirl the chocolate.  Next sprinkle the dried cranberries, pistachios and dried apricots all over the chocolate, all the way to the edges.  Again, you can add as much or as little as you want.  Ever so slightly press some of the larger pieces into the still liquid chocolate.

Place the baking tray into the fridge until the chocolate is firm, approximately 30 minutes, although this really depends on how thick you made your bark.  Once firm, with your hands, break  the chocolate into large chunks.

Store in refrigerator until just ready to eat.


Christmas Bark
 
Print
Author: Feasts And Fotos
Ingredients
  • 4 oz semi-sweet chocolate
  • 4 oz bittersweet chocolate
  • 2-3 oz white chocolate
  • dried cranberries (a handful)
  • pistachios, shelled and roughly chopped (a handful)
  • dried apricots, rough chopped (a handful)
Method
  1. Line a large baking sheet with parchment paper.
  2. Break up all the chocolate into small pieces and place approximately 3 oz of the semi-sweet chocolate and 3 oz of the bittersweet chocolate in a microwave safe bowl.  Keep the white chocolate separate for later use.  Microwave in 30 second increments, stirring with a spatula after each 30 seconds, until 90% melted.  Remove bowl from microwave and stir until all the chocolate has melted.
  3. Immediately add the remaining semi-sweet and bittersweet chocolate pieces to the bowl and stir until melted.  In another microwave safe bowl do the same process with the white chocolate.
  4. While the white chocolate is melting pour the dark chocolate onto the parchment lined baking sheet.  With an offset spatula spread out the chocolate to an even thickness of your choice.
  5. Next, take the melted white chocolate and drizzle it all over the dark chocolate with a spoon.  You can add as much or as little of the white chocolate as you want.  With the edge of a sharp knife, swirl the chocolate.  Next sprinkle the dried cranberries, pistachios and dried apricots all over the chocolate, all the way to the edges.  Again, you can add as much or as little as you want.  Ever so slightly press some of the larger pieces into the still liquid chocolate.
3.2.2802

Filed Under: Sweets Tagged With: bark, chocolate, christmas, dried fruit

Rugelach

December 20, 2010 by Susan

RugelachInTinR

It’s Christmas Cookie time!

These rugelach have made an appearance in my house every Christmas for the past 5 or so years.  I love them.  Everyone loves them.  They are made with…cream cheese dough.  What’s not to love?!

I will admit, these cookies are a labor of love.  Slightly time consuming and you need to exhibit a fair amount of patience, first allowing the dough to chill, gently rolling each little cookie up, then waiting for the rolled up cookies to chill for 30 minutes prior to baking.  In general I don’t have all that much patience, particularly if it involves waiting to eat cookies, but oh, is it worth it.  Trust me.  Just the smell of these baking will rock your world.

Here’s what you will need to make 4 dozen cookies…

Recipe

8 ounces cream cheese, at room temperature

1/2 pound unsalted butter, at room temperature

1/4 cup granulated sugar, plus 9 tablespoons

1/4 teaspoon kosher salt

1 teaspoon pure vanilla extract

2 cups all-purpose flour

1/4 cup light brown sugar, packed

1 1/2 teaspoons ground cinnamon

3/4 cup raisins

1 cup walnuts, finely chopped

1/2 cup apricot preserves, pureed in a food processor (I also love blackberry)

1 egg beaten with 1 tablespoon milk, for egg wash

Method

Preheat oven to 350 degrees.  Line a baking sheet with parchment paper.

Cream the cheese and butter in the bowl of an electric mixer fitted with the paddle attachment until light.  Add 1/4 cup granulated sugar, salt and vanilla.  With mixer on low add the flour and mix until just combined.  Dump the dough out onto a well floured board and roll it into a ball.  Cut the ball in quarters, flatten each quarter slightly then wrap each piece in plastic and refrigerate for at least one hour, up to a few days.

To make the filling:  combine 6 tablespoons of granulated sugar, brown sugar, 1/2 teaspoon cinnamon, raisins and walnuts.  (I always have some leftover filling at the end).

On a well floured board, roll each ball of dough into a 9 inch circle.  Spread the dough with about 2 tablespoons of preserves (all the way to the edge) and sprinkle with approximately 1/2 cup of the filling.  There should only be a thin layer of preserves to act as the ‘glue’.  Resist the temptation to put too much preserves or filling on the dough.  Press the filling lightly into the dough.  Cut the circle into 12 equal wedges, first cutting the whole circle in quarters, then each quarter into thirds.  At this point I look at each triangle and determine if any of them are a bit short on nuts or raisins.  If so, I just add what is needed.  Starting with the wide edge, roll up each wedge.  Place rolled up cookies, points tucked under, on baking sheet.  Chill for 30 minutes.

Brush each cookie with the egg wash.  Combine 3 tablespoons granulated sugar and 1 teaspoon cinnamon and sprinkle on the cookies.  Bake for 18 to 25 minutes or until lightly browned.  Place cookies on a wire rack to cool before devouring them.

Recipe courtesy of Ina Garten.

Rugelach
 
Print
Author: Feasts And Fotos
Ingredients
  • 8 ounces cream cheese, at room temperature
  • ½ pound unsalted butter, at room temperature
  • ¼ cup granulated sugar, plus 9 tablespoons
  • ¼ teaspoon kosher salt
  • 1 teaspoon pure vanilla extract
  • 2 cups all-purpose flour
  • ¼ cup light brown sugar, packed
  • 1½ teaspoons ground cinnamon
  • ¾ cup raisins
  • 1 cup walnuts, finely chopped
  • ½ cup apricot preserves, pureed in a food processor (I also love blackberry)
  • 1 egg beaten with 1 tablespoon milk, for egg wash
Method
  1. Preheat oven to 350 degrees.  Line a baking sheet with parchment paper.
  2. Cream the cheese and butter in the bowl of an electric mixer fitted with the paddle attachment until light.  Add ¼ cup granulated sugar, salt and vanilla.  With mixer on low add the flour and mix until just combined.  Dump the dough out onto a well floured board and roll it into a ball.  Cut the ball in quarters, flatten each quarter slightly then wrap each piece in plastic and refrigerate for at least one hour, up to a few days.
  3. To make the filling:  combine 6 tablespoons of granulated sugar, brown sugar, ½ teaspoon cinnamon, raisins and walnuts.  (I always have some leftover filling at the end).
  4. On a well floured board, roll each ball of dough into a 9 inch circle.  Spread the dough with about 2 tablespoons of preserves (all the way to the edge) and sprinkle with approximately ½ cup of the filling.  There should only be a thin layer of preserves to act as the 'glue'.  Resist the temptation to put too much preserves or filling on the dough.  Press the filling lightly into the dough.  Cut the circle into 12 equal wedges, first cutting the whole circle in quarters, then each quarter into thirds.  At this point I look at each triangle and determine if any of them are a bit short on nuts or raisins.  If so, I just add what is needed.  Starting with the wide edge, roll up each wedge.  Place rolled up cookies, points tucked under, on baking sheet.  Chill for 30 minutes.
  5. Brush each cookie with the egg wash.  Combine 3 tablespoons granulated sugar and 1 teaspoon cinnamon and sprinkle on the cookies.  Bake for 18 to 25 minutes or until lightly browned.  Place cookies on a wire rack to cool before devouring them.
3.2.2802

Filed Under: Sweets Tagged With: cookie, dessert, rugelach

Pumpkin Walnut Muffins

November 4, 2010 by Susan

PumpkinMuffinFINALR

When the cold weather starts rolling in and fall is in the air I immediately start making baked items involving pumpkin.  It’s mandatory, isn’t it?

A few years back I posted my favorite pumpkin spice bread recipe, it’s my go-to pumpkin bread.  This year I made a few changes to that recipe and turned that delicious bread into adorable muffins.  I even bake them up in cupcake tins for a smaller portion size (pictured above).  I find that the muffin and/or cupcake shape is a bit more transportable than the loaf and who wouldn’t appreciate that?  Running out the door?  Just grab one and go.  And let’s face it, they are very cute.  Nothing makes me feel more like a kid again than eating cupcakes.  Spread some cream cheese frosting on top of these cuties and just try to not eat five of them.  In one sitting.

These muffins are very moist and the addition of the walnuts provides a wonderful crunch.  In my opinion they are terrific eaten as-is.  But if you so choose, feel free to slice open and slather on some butter.  Or top with some regular cream cheese.  Or better yet – spread that cream cheese frosting on top.

Go ahead, bring out that kid in you!

Here’s what you need to make approximately 12 cupcakes or 8 muffins…

Recipe

1 cup regular flour

2/3 cups whole wheat flour

1 teaspoon baking soda

3/4 teaspoon ground cinnamon

1/4 teaspoon ground ginger

1/4 teaspoon ground cloves

1/4  teaspoon salt

1 and 1/3 cups sugar

1/3 cup vegetable oil

1 cup plus 2 tablespoons canned unsweetened pumpkin

1/2 cup chopped walnuts, plus a few extra for topping

1 large egg, room temperature

Method

Preheat oven to 350 degrees.   Spray muffin tin or cupcake tin with cooking spray.  If using a cupcake tin, add your cupcake liners if you so choose.

Mix first seven ingredients together in a bowl with a whisk until well combined.

Combine sugar, oil and pumpkin in the bowl of electric mixer.  Beat at medium speed until smooth.  Add egg, beating until well blended.  Gradually add dry ingredients, beating at a low speed until blended.  Add chopped walnuts to the batter and gently fold in using a spatula or wooden spoon.  Transfer batter to tin.  If you want them to look extra special place a few broken pieces of walnuts on top of each.  Not only does this make them look great but it also lets people know there are walnuts inside!

Bake for approximately 20-35 minutes, depending on the size of your tin.  You want them to be golden on top, firm to the touch and a when you insert a wooden pick in the center it comes out clean.  Let cool in pan on a wire rack for 5 minutes then remove from pan and allow to cool slightly.

Dig in!


Pumpkin Walnut Muffins
 
Print
Author: Feasts And Fotos
Ingredients
  • 1 cup regular flour
  • ⅔ cups whole wheat flour
  • 1 teaspoon baking soda
  • ¾ teaspoon ground cinnamon
  • ¼ teaspoon ground ginger
  • ¼ teaspoon ground cloves
  • ¼  teaspoon salt
  • 1 and ⅓ cups sugar
  • ⅓ cup vegetable oil
  • 1 cup plus 2 tablespoons canned unsweetened pumpkin
  • ½ cup chopped walnuts, plus a few extra for topping
  • 1 large egg, room temperature
Method
  1. Preheat oven to 350 degrees.   Spray muffin tin or cupcake tin with cooking spray.  If using a cupcake tin, add your cupcake liners if you so choose.
  2. Mix first seven ingredients together in a bowl with a whisk until well combined.
  3. Combine sugar, oil and pumpkin in the bowl of electric mixer.  Beat at medium speed until smooth.  Add egg, beating until well blended.  Gradually add dry ingredients, beating at a low speed until blended.  Add chopped walnuts to the batter and gently fold in using a spatula or wooden spoon.  Transfer batter to tin.  If you want them to look extra special place a few broken pieces of walnuts on top of each.  Not only does this make them look great but it also lets people know there are walnuts inside!
  4. Bake for approximately 20-35 minutes, depending on the size of your tin.  You want them to be golden on top, firm to the touch and a when you insert a wooden pick in the center it comes out clean.  Let cool in pan on a wire rack for 5 minutes then remove from pan and allow to cool slightly.
3.2.2802

Filed Under: Breakfast, Sweets Tagged With: breakfast, dessert, muffins, pumpkin, walnut

  • 1
  • 2
  • Next Page »
Hello and welcome to Feasts and Fotos!

Archives

Categories

Copyright © 2025 · Foodie Pro Theme by Shay Bocks · Built on the Genesis Framework · Powered by WordPress