FEASTS AND FOTOS

  • Home
  • About
  • Happenings
  • Contact
You are here: Home / Archives for Sides and Sauces

Roasted Cauliflower with Lemon Cilantro Dressing

November 3, 2014 by Susan

RoastedCauliflowerR

Whenever I  make vegetables as a side dish, 98% of the time I will roast them.  I think roasting brings out a wonderful, deep flavor of the vegetables and they get all crisp and caramelized on the outside. And, truthfully, roasting vegetables is so easy!  Just season and pop in the oven.  You only need to flip them once during the cooking time and voila, they are done.  My favorite vegetables to roast are cauliflower, broccoli and carrots.

This recipe is actually two recipes in one.  The first part, simply roasting the cauliflower with just salt, pepper and oil, is my basic recipe for making roasted vegetables and is practically effortless.  The cauliflower is delicious just like that. But every once in a while it is nice to have something a bit different, so I created this dressing to toss with the cauliflower after they have been roasted.  It comes together very quickly and can be prepared just after you toss the cauliflower in the oven.

Now we are having a hard time figuring out which preparation is our favorite.  If I told you we snacked on these during the day once would you believe me?  It’s true!  We actually snacked on cauliflower, as strange as that sounds.  The vinaigrette is such a terrific complement to the cauliflower and the addition of that cumin just makes it.  It almost lends an Indian spin to the recipe.

I love it when food that is healthy for us is also delicious. Cauliflower is filled with phytonutrients that fight disease and fiber that really helps to keep you full longer.  I end up feeling good about eating it, and there is no guilt over eating a lot of it.

Here’s what you will need to serve 2-3 as a side dish…

Recipe

1 small head of cauliflower, cut into florets of various sizes, washed and pat dried

2 Tbsp olive oil

Sea Salt (to taste)

Pepper (to taste)

Vinaigrette

1/2 lemon, zested

1 Tbsp lemon juice

2 Tbsp cilantro, finely chopped

3 Tbsp olive oil

1 small clove garlic, grated

1/8 tsp (scant) of ground cumin

Method

Preheat the oven to 400 degrees.

Turn the cauliflower upside down and start cutting into all the stalks and leaves until they are all removed.  Cut cauliflower into florets.  Wash and pat dry.  Lay on a large rimmed baking sheet and add 2 Tbsp olive oil, sea salt and pepper.  Mix well with your hands until the cauliflower is coated.

Roast in the oven for 30 – 40 minutes depending on how large your florets are and how soft you like your vegetables cooked.  I prefer mine more firm (as opposed to my husband who likes his softer), so I leave 1/2 the florets large so they don’t get overcooked.  Half way through the cooking time take the baking sheet out of the oven and turn each cauliflower floret over.  I find using a pair of tongs works the best.  Put back in the oven.

While the cauliflower is cooking get started on the vinaigrette.  To a small bowl add the lemon zest, juice, cilantro, grated garlic, cumin and 3 Tbsp of olive oil.  Whisk well until completely mixed.

Once done, remove  the cauliflower from the oven and transfer them directly into a large bowl.  Add the vinaigrette, one tablespoon at a time, to the cooked cauliflower, mixing to combine.  I usually end up using all the vinaigrette, but if you see they are getting soaked in the liquid, stop adding and taste.  This will all depend upon how large your cauliflower is. In the end, I don’t soak the vegetables, just give them a nice coating.


Roasted Cauliflower
 
Print
Author: Feasts And Fotos
Ingredients
  • 1 small head of cauliflower, cut into florets of various sizes, washed and pat dried
  • 2 Tbsp olive oil
  • Sea Salt (to taste)
  • Pepper (to taste)
  • Vinaigrette
  • ½ lemon, zested
  • 1 Tbsp lemon juice
  • 2 Tbsp cilantro, finely chopped
  • 3 Tbsp olive oil
  • 1 small clove garlic, grated
Method
  1. Preheat the oven to 400 degrees.
  2. Turn the cauliflower upside down and start cutting into all the stalks and leaves until they are all removed.  Cut cauliflower into florets.  Wash and pat dry.  Lay on a large rimmed baking sheet and add 2 Tbsp olive oil, sea salt and pepper.  Mix well with your hands until the cauliflower is coated.
  3. Roast in the oven for 30 - 40 minutes depending on how large your florets are and how soft you like your vegetables cooked.  I prefer mine more firm (as opposed to my husband who likes his softer), so I leave ½ the florets large so they don't get overcooked.  Half way through the cooking time take baking sheet out of the oven and turn each cauliflower floret over.  I find using a pair of tongs works the best.  Put back in the oven.
  4. While the cauliflower is cooking get started on the vinaigrette.  To a small bowl add the lemon zest, juice, cilantro, grated garlic and 3 Tbsp of olive oil.  Whisk well until completely mixed.
  5. Once done, remove  the cauliflower from the oven and transfer them directly into a large bowl.  Add the vinaigrette, one tablespoon at a time, to the cooked cauliflower, mixing to combine.  I usually end up using all the vinaigrette, but if you see they are getting soaked in the liquid, stop adding and taste.  This will all depend upon how large your cauliflower is. In the end, I don't soak the vegetables, just give them a nice coating.
3.2.2802

Filed Under: Sides and Sauces, Vegetables Tagged With: cauliflower, cilantro, comfort food, cumin, healthy, lemon, roasted, side dish, vegetable, vegetarian

Skillet Cornbread

April 27, 2012 by Susan

SkilletCornbreadR

Break out that cast iron skillet!  You won’t believe how delicious and easy this cornbread is.

I always, always make this cornbread when I serve chicken enchiladas.  The enchiladas are delicious as well, so much so that I can never get a photo of them because they are eaten immediately.  Next time, I keep telling myself. And the years have just flown by.  Oh well, back to the cornbread…

Outstanding.  Ever so slightly crispy on the outside and light and moist on the inside.  The scallions give a nice mild oniony flavor and the cheddar adds a richness.  If you are into a little spice, go ahead and throw in some jalapeno.  We like a little spice around here.

If you have any leftovers you will be happy to know that it holds up really well in the fridge.  I just wrap it in plastic and reheat in a toaster oven, or if I’m in a rush, a quick reheat in the microwave.  (Better in the toaster).  I’ve even been known to eat a big slice for breakfast…yum.

Here’s what you need to make one 10 inch cornbread…

Recipe

1 1/4 cups yellow cornmeal

1 1/4 cups all purpose flour

2 tbsp sugar

1 1/2 tsp baking powder

1/2 tsp baking soda

1 1/4 tsp salt

1 large egg

1 3/4 cups buttermilk

2 tbsp butter

1/2 cup cheddar cheese, shredded

1/3 cup scallions, chopped

1 jalapeno (optional)

Method

Preheat oven to 425.

Whisk together cornmeal, flour, sugar, baking powder, baking soda and salt in a large bowl.  Set aside.  Whisk together egg and buttermilk, stir into flour mixture.  Add cheese and scallions, and jalapeno if you are going for a little kick.

Melt butter in a 10 inch cast iron skillet.  Swirl to coat bottom and sides.  Pour batter into skillet and smooth out mixture slightly.  Bake in the oven for approximately 20-25 minutes.

Fresh out of the oven and gorgeous!


Skillet Cornbread
 
Print
Author: Feasts And Fotos
Ingredients
  • 1 1/4 cups yellow cornmeal
  • 1 1/4 cups all purpose flour
  • 2 tbsp sugar
  • 1 1/2 tsp baking powder
  • ½ tsp baking soda
  • 1 1/4 tsp salt
  • 1 large egg
  • 1 3/4 cups buttermilk
  • 2 tbsp butter
  • ½ cup cheddar cheese, shredded
  • ⅓ cup scallions, chopped
  • 1 jalapeno (optional)
Method
  1. Preheat oven to 425.
  2. Whisk together cornmeal, flour, sugar, baking powder, baking soda and salt in a large bowl.  Set aside.  Whisk together egg and buttermilk, stir into flour mixture.  Add cheese and scallions, and jalapeno if you are going for a little kick.
  3. Melt butter in a 10 inch cast iron skillet.  Swirl to coat bottom and sides.  Pour batter into skillet and smooth out mixture slightly.  Bake in the oven for approximately 20-25 minutes.
3.2.2802

Filed Under: Sides and Sauces

Marinated Cauliflower

June 15, 2010 by Susan

I am back from my honeymoon in Hawaii and just barely coming out of the depression over not being in Hawaii anymore.  That place is paradise.  Two weeks in paradise makes getting back to reality quite a challenge.  No big surprise, cooking has not been at the forefront of my mind.  Two weeks of having all my meals served to me (sometimes in a fluffy bathrobe!) was glorious.  Glorious!  But alas, my reality includes getting back to cooking…

So, something quick and easy was in order.  To ease the shock of not stumbling past roughly four gorgeous natural waterfalls per day.  (Not having an easy time with the ‘get back to reality’ concept.)  Anyway, this marinated cauliflower recipe is just that, quick and easy.  It’s also super delicious.  It’s a wonderful side dish for just about anything and is served at room temperature (or slightly chilled) making it a wonderful option for an outdoor BBQ.

This recipe is best if left to marinate overnight, allowing the cauliflower to soak up all the yummy vinaigrette.  It just gets better the longer it sits.

Here’s what you will need to serve 4-6 people…

Recipe

1 very large head of cauliflower (or 2 medium), broken up into bite sized florets

1/4 cup chopped shallots

2 tablespoons capers, drained

3 tablespoons chopped parsley

1/4 cup white wine vinegar

1 teaspoon Dijon mustard

1/2 cup extra virgin olive oil

salt & pepper to taste

Method

Steam cauliflower until just tender.  You want the cauliflower to still have a bite to it, so don’t overcook.   Transfer to a large bowl.

Whisk together vinegar, shallots and mustard in a small bowl.  Add some salt and pepper.  Pour in the oil in a slow, steady stream, whisking constantly.  Pour vinaigrette over warm cauliflower.  Add the capers and parsley.  Stir to combine.

Cover and refrigerate overnight.  Serve chilled or at room temperature.

This recipe is adapted from Martha Stewart.

Marinated Cauliflower
 
Print
Author: Feasts And Fotos
Ingredients
  • 1 very large head of cauliflower (or 2 medium), broken up into bite sized florets
  • ¼ cup chopped shallots
  • 2 tablespoons capers, drained
  • 3 tablespoons chopped parsley
  • ¼ cup white wine vinegar
  • 1 teaspoon Dijon mustard
  • ½ cup extra virgin olive oil
  • salt & pepper to taste
Method
  1. Steam cauliflower until just tender.  You want the cauliflower to still have a bite to it, so don't overcook.   Transfer to a large bowl.
  2. Whisk together vinegar, shallots and mustard in a small bowl.  Add some salt and pepper.  Pour in the oil in a slow, steady stream, whisking constantly.  Pour vinaigrette over warm cauliflower.  Add the capers and parsley.  Stir to combine.
  3. Cover and refrigerate overnight.  Serve chilled or at room temperature.
3.2.2802

Filed Under: Salads, Sides and Sauces Tagged With: cauliflower, healthy, side dish

Cauliflower Zahlouk

February 10, 2010 by Susan

Cauliflower Zahlouk Above

I have seriously been under using cauliflower.  To be honest, I used to find it quite boring and uninspiring.   Boiled.  Bland.  Yuck.  But all that has changed.  I’ve forced myself to use the vegetable more and have stumbled upon some wonderful recipes.  This particular one is outstanding.  Typically zahlouk, a chopped or mashed salad, is made with eggplant.  However, you can substitute any vegetable.

There are so many flavors and textures going on in this dish – it’s actually exciting to eat it!  And you hardly remember you are eating what used to be boring, bland cauliflower.  The charmoula dressing (a typical Moroccan sauce) really brings the ingredients alive.  I have made this repeatedly over the past few months, using it as a side dish with grilled chicken, baked fish and even a steak.  It goes with everything or can be eaten alone as a vegetarian dish.  Also, it lasts for up to 4-5 days in the fridge!

I adapted this recipe from the cookbook Mediterranean Fresh.  Fabulous book with many excellent recipes.  I’m working my way through some dishes that have caught my eye and will most certainly post another one shortly.

In the meantime give this recipe a try, you will be amazed at how delicious cauliflower can be.

Here’s what  you will need to serve 4-6 as a side dish…

Recipe

1 large cauliflower (largest you can find), cut into small florets

4 cloves garlic, whole

1 strip fresh lemon peel

1/8 lb green beans (I use a fist full of haricot verts), cut into 1/2 inch dice

3/4 cup chickpeas, drained and rinsed

2 Tbsp oil cured black olives, roughly chopped

3/4 cup – 1 cup charmoula dressing, thinned with lemon juice

Charmoula Dressing (makes 1 cup)

1/8 cup lemon juice, plus 1 Tbsp

1/8 cup red wine vinegar

3 cloves garlic, finely minced

1 tsp paprika

1 tsp ground cumin

1/8 tsp cayenne

3 Tbsp chopped parsley

3 Tbsp chopped cilantro

1/2 cup olive oil, plus some extra if needed

salt & pepper

Method

Place the cauliflower florets, whole garlic cloves and lemon peel in a steamer and steam until just tender (not too mushy), about 6-7 minutes.  Remove from pan.  Add green beans to steamer and cook until just tender (still having a slight crunch).

While the cauliflower is steaming, prepare the dressing by mixing the lemon juice, red wine vinegar, garlic, paprika, cumin, cayenne, salt & pepper in a bowl.  Stir in the parsley, cilantro and olive oil. Set aside.

Place the cauliflower and garlic cloves in a large bowl and mash coarsely.  I still like for many of the florets to stay intact, so be gentle.  Add the green beans and stir in most of the charmoula dressing.  (I say “most” because you really don’t want this to swim in the dressing and that really hinges on how large the cauliflower is, which will differ from one person to the next.)  Gently fold in the chick peas and olives.

Dressing should lightly coat all the ingredients.  If you feel you need a touch more dressing, add it.  You can also add more olive oil if needed as well.

 
Cauliflower Zahlouk
 
Print
Author: Feasts And Fotos
Ingredients
  • ⅛ lb green beans (I use a fist full of haricot verts), cut into ½ inch dice
  • ¾ cup chickpeas, drained and rinsed
  • 2 Tbsp oil cured black olives, roughly chopped
  • ¾ cup - 1 cup charmoula dressing, thinned with lemon juice
  • Charmoula Dressing (makes 1 cup)
  • ⅛ cup lemon juice, plus 1 Tbsp
  • ⅛ cup red wine vinegar
  • 3 cloves garlic, finely minced
  • 1 tsp paprika
  • 1 tsp ground cumin
  • ⅛ tsp cayenne
  • 3 Tbsp chopped parsley
  • 3 Tbsp chopped cilantro
  • ½ cup olive oil, plus some extra if needed
  • salt & pepper
Method
  1. Place the cauliflower florets, whole garlic cloves and lemon peel in a steamer and steam until just tender (not too mushy), about 6-7 minutes.  Remove from pan.  Add green beans to steamer and cook until just tender (still having a slight crunch).
  2. While the cauliflower is steaming, prepare the dressing by mixing the lemon juice, red wine vinegar, garlic, paprika, cumin, cayenne, salt & pepper in a bowl.  Stir in the parsley, cilantro and olive oil. Set aside.
  3. Place the cauliflower and garlic cloves in a large bowl and mash coarsely.  I still like for many of the florets to stay intact, so be gentle.  Add the green beans and stir in most of the charmoula dressing.  (I say "most" because you really don't want this to swim in the dressing and that really hinges on how large the cauliflower is, which will differ from one person to the next.)  Gently fold in the chick peas and olives.
  4. Dressing should lightly coat all the ingredients.  If you feel you need a touch more dressing, add it.  You can also add more olive oil if needed as well.
3.2.2802

Filed Under: Salads, Sides and Sauces Tagged With: cauliflower, healthy, side dish, vegetables, vegetarian, zahlouk

Wild & Brown Rice with Mushrooms

January 7, 2010 by Susan

I am obsessed with side dishes lately.  There are so many of them out there!  To be honest, the sides really can make a meal very interesting.  And, they can also make something like a grilled piece of chicken taste almost like a different meal on the second night – depending on which side you serve it with.  Same goes with a piece of steak.  Or a piece of fish.  I like trying to figure out which side would go best with which protein.

My favorite side dishes are the ones that are chock full of ingredients and can actually be eaten as a meal themselves.  It’s a side dish one night, the next day it’s a light lunch or a snack.  This wild and brown rice with mushrooms (and peas and chick peas and pecans!) is one of those perfect side dishes.  And, it’s healthy for you!  Wild and brown rice are much better for you than all that bad white stuff, they have low glycemic indexes and are more filling.

This dish is chewy from the rice, crunchy from the pecans and earthy from the mushrooms and herbs…extremely satisfying.  Pair it with your favorite protein and enjoy.

Here’s what you will need to serve 4 sides…

Recipe

1 cup uncooked brown & wild rice blend

5-6 medium sage leaves, minced

1 tsp thyme

2 tbsp parsley

1 tbsp butter

1 tbsp olive oil

1 cup frozen peas

1 package baby portobello mushrooms, sliced thick (stems removed)

1/3 cup pecans

15 oz can chick peas, rinsed and drained

salt & pepper, to taste

Method

Prepare wild rice blend according to package directions (takes about 40 minutes to cook).

Meanwhile, toast the pecans in a dry skillet for approximately 5 minutes, tossing often.  Remove from pan.

In a large skillet heat the butter and olive oil.  Add the mushrooms and saute for 3-4 minutes.  Add the thyme, sage and frozen peas.  Saute for 2-3 minutes.  Add pecans to the skillet, mix and continue to cook for 2-3 minutes more.

Add the cooked wild rice blend and some salt & pepper to the mushroom mixture and stir to combine well.  Finally, add the chick peas to the pan and fold in gently.  Just before serving sprinkle with parsley.


Wild & Brown Rice with Mushrooms
 
Print
Author: Feasts And Fotos
Ingredients
  • 1 cup uncooked brown & wild rice blend
  • 5-6 medium sage leaves, minced
  • 1 tsp thyme
  • 2 tbsp parsley
  • 1 tbsp butter
  • 1 tbsp olive oil
  • 1 cup frozen peas
  • 1 package baby portobello mushrooms, sliced thick (stems removed)
  • ⅓ cup pecans
  • 15 oz can chick peas, rinsed and drained
  • salt & pepper, to taste
Method
  1. Prepare wild rice blend according to package directions (takes about 40 minutes to cook).
  2. Meanwhile, toast the pecans in a dry skillet for approximately 5 minutes, tossing often.  Remove from pan.
  3. In a large skillet heat the butter and olive oil.  Add the mushrooms and saute for 3-4 minutes.  Add the thyme, sage and frozen peas.  Saute for 2-3 minutes.  Add pecans to the skillet, mix and continue to cook for 2-3 minutes more.
  4. Add the cooked wild rice blend and some salt & pepper to the mushroom mixture and stir to combine well.  Finally, add the chick peas to the pan and fold in gently.  Just before serving sprinkle with parsley.
3.2.2802

Filed Under: Rice and Grains, Sides and Sauces Tagged With: brown rice, healthy, low glycemic, mushrooms, Sides and Sauces, wild rice

Stuffed Mushrooms

November 23, 2009 by Susan

LineupR

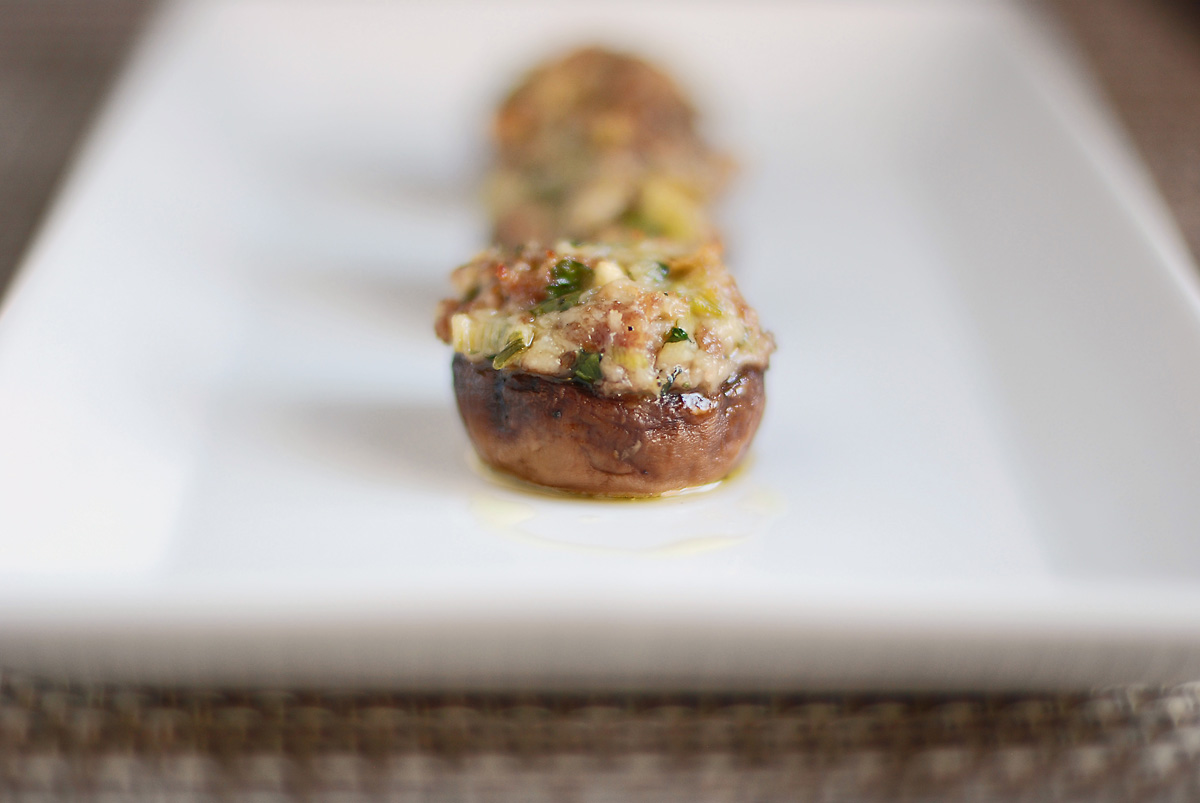
I can hardly believe Thanksgiving is here already!  Shocking how time flies; one minute you are applying sunscreen, then next you are planning Thanksgiving dinner.  Sort of.  Anyway, I’ve got myself a new favorite side dish, one that would be perfect on any Thanksgiving table.  Stuffed mushrooms!

One word sufficiently describes these babies.  Superb.  Truly, they are delicious.  My fiance actually rolled his eyes back into his head during his first bite.  They are that good.

I saw Ina make these the other day and just had to try them.  She never disappoints!  I made a few slight changes to her recipe (added thyme, decreased amount of mascarpone).  Very yummy and very hearty.  A few big stuffed mushrooms can hold their own for a light lunch, for sure.

One of my favorite things about these mushrooms is that you can make them ahead.  Stuff them, put them in a baking dish, cover and keep in the fridge until ready to bake.  Or, store the filling in the fridge and just stuff the mushrooms as needed and pop in the oven.  Works really well during the week when you are short on time and energy and need just a little something to go with that piece of chicken or steak.

If you think your turkey can stand not being the center of attention this Thanksgiving, go ahead and give these mushrooms a try.  You won’t be disappointed.

Here’s what you will need to make approximately 25 medium/large stuffed mushrooms…

Recipe

25 medium/large white mushrooms, cleaned

3/4 pound sausage (remove from casing)

4-5 scallions, chopped

2 large cloves garlic, minced

2/3 cup panko (bread crumbs)

3 oz mascarpone (roughly 1/3 of a container)

1/3 cup parmigiano reggiano

1/2 cup chopped parsley

1 tbsp chopped thyme

2.5 tbsp marsala

3 tbsp olive oil

salt & pepper

Method

Preheat oven to 375 degrees.  Remove stems from mushrooms and reserve.  Clean mushroom caps with a damp paper towel, put in a large bowl.  Add marsala and 3 tbsp olive oil and mix to coat all mushrooms.  Put aside.

In a large skillet add a few tablespoons of olive oil, when hot add sausage and cook until just browned, breaking up with the back of a wooden spoon.  Meanwhile, chop mushroom stems and then add to the sausage.  Add scallions, garlic and panko and thyme.  Mix to combine and cook for about 5-7 minutes.  Turn off the heat, add mascarpone, parmigiano cheese, parsley and salt & pepper to taste.  Mix well until the mascarpone has fully melted into the sausage mixture.  Allow to cool slightly.

Now comes the time to stuff these guys.  Be careful, the mushrooms will be somewhat slippery to handle due to the marsala and olive oil.  Just take your time.  Stuff each mushroom well, mounding the tops with the delicious filling.  Pack the filling down slightly.  Place each stuffed mushroom in the baking dish.  Pop in the oven, uncovered, and bake for approximately 40 minutes.  As an added touch, I sometimes like to turn the broiler on for a minute or two towards the end of the cooking time.  This helps to brown the tops nicely, creating a bit of a an extra crunch on top.  If you do this, do not leave the stove, watch it carefully.  One or two minutes is enough, you don’t want to burn them!

Have I mentioned how delicious these are?

HeadOfLineR


Stuffed Mushrooms
 
Print
Author: Feasts And Fotos
Ingredients
  • 25 medium/large white mushrooms, cleaned
  • ¾ pound sausage (remove from casing)
  • 4-5 scallions, chopped
  • 2 large cloves garlic, minced
  • ⅔ cup panko (bread crumbs)
  • 3 oz mascarpone (roughly ⅓ of a container)
  • ⅓ cup parmigiano reggiano
  • ½ cup chopped parsley
  • 1 tbsp chopped thyme
  • 2.5 tbsp marsala
  • 3 tbsp olive oil
  • salt & pepper
Method
  1. Preheat oven to 375 degrees.  Remove stems from mushrooms and reserve.  Clean mushroom caps with a damp paper towel, put in a large bowl.  Add marsala and 3 tbsp olive oil and mix to coat all mushrooms.  Put aside.
  2. In a large skillet add a few tablespoons of olive oil, when hot add sausage and cook until just browned, breaking up with the back of a wooden spoon.  Meanwhile, chop mushroom stems and then add to the sausage.  Add scallions, garlic and panko and thyme.  Mix to combine and cook for about 5-7 minutes.  Turn off the heat, add mascarpone, parmigiano cheese, parsley and salt & pepper to taste.  Mix well until the mascarpone has fully melted into the sausage mixture.  Allow to cool slightly.
  3. Now comes the time to stuff these guys.  Be careful, the mushrooms will be somewhat slippery to handle due to the marsala and olive oil.  Just take your time.  Stuff each mushroom well, mounding the tops with the delicious filling.  Pack the filling down slightly.  Place each stuffed mushroom in the baking dish.  Pop in the oven, uncovered, and bake for approximately 40 minutes.  As an added touch, I sometimes like to turn the broiler on for a minute or two towards the end of the cooking time.  This helps to brown the tops nicely, creating a bit of a an extra crunch on top.  If you do this, do not leave the stove, watch it carefully.  One or two minutes is enough, you don't want to burn them!
3.2.2802

Filed Under: Sides and Sauces Tagged With: comfort food, mushrooms, sausage, side dish, stuffed

Chick Pea Salad With Olives

October 20, 2009 by Susan

ChickPeaSalad2RedBowlR

I just love when a side dish can double as a main dish!  This chick pea salad with olives is yummy and filling, as well as being incredibly healthy for you.  I have taken what could’ve been an ordinary chick pea salad and bumped it up with healthy ingredients such as broccoli and sun dried tomatoes, making this dish interesting and substantial.  All of these flavors blend wonderfully together.

You can certainly used dried beans for this recipe and soak them overnight and then cook them for an hour….but I just didn’t have the time.  You can also substitute different beans in this dish, but I really love chick peas.  I think their texture in this dish is perfection.

This salad holds up great in the fridge for a few days.  Add a sprinkle of olive oil before each subsequent serving to freshen it up and add that mouth-watering shine.

Here’s what you will need to serve 6-8 as a side dish…

Recipe

2 cans chick peas, drained & rinsed

4 cloves garlic, minced

1/4 cup Kalamata olives, pitted and coarsely chopped

1/4 cup green olives, pitted and coarsely chopped

1/4 cup sun dried tomatoes, chopped (can be packed in oil)

1/3 cup chopped scallions, white and light green part

steamed broccoli, 2 large florets (not heads), cut up into very small pieces

1/4 cup red wine vinegar

1/3 cup, plus 1 tbsp  extra virgin olive oil

1 tbsp fresh mint, minced

1.5 tbsp fresh basil, minced

1 tsp fresh thyme, minced

1 tsp fresh rosemary, minced

1 tsp fresh oregano, minced (can use dried)

Salt & Pepper to taste

Method 

Rinse and drain chick peas and place in a large bowl.  Add olives, scallions, sun dried tomatoes and broccoli, mix well.  In a small bowl whisk together red wine vinegar, olive oil and all the herbs.  Pour over chick peas and mix until incorporated.  If needed, add a touch more olive oil.  Mixture should be coated with the dressing, not soaked.  Allow to sit for 30 minutes to let the flavors blend.  Serve at room temperature.


Chick Pea Salad With Olives
 
Print
Author: Feasts And Fotos
Ingredients
  • 2 cans chick peas, drained & rinsed
  • 4 cloves garlic, minced
  • ¼ cup Kalamata olives, pitted and coarsely chopped
  • ¼ cup green olives, pitted and coarsely chopped
  • ¼ cup sun dried tomatoes, chopped (can be packed in oil)
  • ⅓ cup chopped scallions, white and light green part
  • steamed broccoli, 2 large florets (not heads), cut up into very small pieces
  • ¼ cup red wine vinegar
  • ⅓ cup, plus 1 tbsp  extra virgin olive oil
  • 1 tbsp fresh mint, minced
  • 1.5 tbsp fresh basil, minced
  • 1 tsp fresh thyme, minced
  • 1 tsp fresh rosemary, minced
  • 1 tsp fresh oregano, minced (can use dried)
  • Salt & Pepper to taste
Method
  1. Rinse and drain chick peas and place in a large bowl.  Add olives, scallions, sun dried tomatoes and broccoli, mix well.  In a small bowl whisk together red wine vinegar, olive oil and all the herbs.  Pour over chick peas and mix until incorporated.  If needed, add a touch more olive oil.  Mixture should be coated with the dressing, not soaked.  Allow to sit for 30 minutes to let the flavors blend.  Serve at room temperature.
3.2.2802

Filed Under: Main Dishes, Sides and Sauces Tagged With: chick pea, lunch, olives, salad, Sides and Sauces, vegetarian

Herbed Basmati Rice

August 9, 2009 by Susan

 BasmatiRiceWide

As promised in my previous chicken piccata post, this is my favorite herbed basmati rice recipe.  Yes, it does require a few additional steps, but it’s worth it.  I usually make a big batch, it reheats wonderfully.  Trust me, this rice is very flavorful.  And doesn’t it look terrific?!

My chicken piccata recipe can be found here http://feastsandfotos.wordpress.com/2009/08/06/chicken-piccata/

Here’s what you will need to serve 4 people…

Recipe

2 tablespoons butter

1 small onion, chopped fine

1 cup basmati rice

2 garlic cloves, minced

1 teaspoon fresh thyme, chopped

1 large bay leaf

1 3/4 cups low-sodium chicken broth

1/2 cup sliced almonds, toasted

1/4 cup chopped parsley

Salt & pepper, to taste.

Method

Melt the butter in a large pot over medium heat.  Cook onion with salt and pepper until just softened, about 3 minutes.  Add rice and cook, stirring frequently, until edges begin to turn translucent, roughly 2 minutes.  Add garlic, thyme and bay leaf and cook, stirring constantly, until frangrant, about 30 seconds.

Stir in broth and bring to a boil.  Cover, reduce heat to low and cook until liquid is absorbed, about 20 minutes.  Remove from heat and let stand, covered for 10 minutes.

Discard bay leaf and fluff with a fork.  Stir in almonds and parsley.


Herbed Basmati Rice
 
Print
Author: Feasts And Fotos
Ingredients
  • 2 tablespoons butter
  • 1 small onion, chopped fine
  • 1 cup basmati rice
  • 2 garlic cloves, minced
  • 1 teaspoon fresh thyme, chopped
  • 1 large bay leaf
  • 1¾ cups low-sodium chicken broth
  • ½ cup sliced almonds, toasted
  • ¼ cup chopped parsley
  • Salt & pepper, to taste.
Method
  1. Melt the butter in a large pot over medium heat.  Cook onion with salt and pepper until just softened, about 3 minutes.  Add rice and cook, stirring frequently, until edges begin to turn translucent, roughly 2 minutes.  Add garlic, thyme and bay leaf and cook, stirring constantly, until frangrant, about 30 seconds.
  2. Stir in broth and bring to a boil.  Cover, reduce heat to low and cook until liquid is absorbed, about 20 minutes.  Remove from heat and let stand, covered for 10 minutes.
  3. Discard bay leaf and fluff with a fork.  Stir in almonds and parsley.
3.2.2802

Filed Under: Rice and Grains, Sides and Sauces Tagged With: almonds, basmati, herb, rice, side dish

Bulgar Salad With Broccoli

July 28, 2009 by Susan

BulgarSalad

This is one big bowl of healthy goodness.

Most people will recognize bulgar from tabbouleh, the middle eastern dish often eaten as an appetizer.  As it turns out, bulgar is much more nutritious than rice and couscous because it contains more fiber, vitamins and minerals.  Also, it has a better glycemic index than white rice or couscous.  I wanted to branch out from my current quinoa frenzy and give bulgar a try…and I’m happy I did.  It is very versatile, has a slightly chewy texture and a lovely nutty flavor.

I got the idea for this bulgar salad while flipping through some magazines in a bookstore.  For the life of me I can’t remember which magazine it was.  I liked the idea of the salad, however, I wanted to bulk it up a bit more so I thought to add steamed broccoli.  Anytime I can add broccoli to something, I go for it.  It’s common knowledge, for anyone that hasn’t been living under a rock, that broccoli is one of the most healthy, nutritious, anti-cancer foods available today.  It is one of the richest vegetable sources of calcium, iron and magnesium and is loaded with vitamins A and C and K.  The edamame, tomatoes and fresh herbs contribute to making this salad clean and wholesome.

This dish is quick to assemble, light and refreshing.  And at the risk of repeating myself, super healthy.  Every time I eat it I feel as if I’m taking a big scrub brush and cleaning my insides of anything harmful.

The salad is a terrific side dish for a piece of grilled chicken or fish.  It keeps well in the fridge for a few days and is great served at room temperature, or slightly cool from the fridge.  I like to drizzle some olive oil over the leftovers just before serving.

Here’s what you will need to serve 4 as a side dish….

Recipe

1 cup cooked bulgar (follow directions on bag)

2 cups cut up broccoli, steamed until tender but not too soft, cooled

1 pint grape tomatoes, cut in half lengthwise

1 cup frozen edamame, defrosted

1/2 cup scallions, chopped

2 tablespoons dill, chopped

1 cup parsley, chopped

1/4 cup mint, finely chopped

1/4 cup lemon juice

1/4 cup olive oil

1/8 tsp cayenne pepper

salt & pepper to taste

Method

Cook bulgar (boil in water, 2 to 1 ratio, simmer for 15 minutes).  Allow to cool.  Fluff and separate with a fork.

Steam broccoli, allow to cool.

In a large bowl add the broccoli, tomatoes, scallions, edamame, dill, parsley, mint and bulgar.  Stir to combine.  In a separate bowl whisk together the lemon juice, olive oil , cayenne pepper and salt (pepper is optional).  Pour over the bulgar salad and mix to incorporate.  The salad should just glisten with the dressing, it should not be soaked.

It’s as easy as that!


Bulgar Salad With Broccoli
 
Print
Author: Feasts And Fotos
Ingredients
  • 1 cup cooked bulgar (follow directions on bag)
  • 2 cups cut up broccoli, steamed until tender but not too soft, cooled
  • 1 pint grape tomatoes, cut in half lengthwise
  • 1 cup frozen edamame, defrosted
  • ½ cup scallions, chopped
  • 2 tablespoons dill, chopped
  • 1 cup parsley, chopped
  • ¼ cup mint, finely chopped
  • ¼ cup lemon juice
  • ¼ cup olive oil
  • ⅛ tsp cayenne pepper
  • salt & pepper to taste
Method
  1. Cook bulgar (boil in water, 2 to 1 ratio, simmer for 15 minutes).  Allow to cool.  Fluff and separate with a fork.
  2. Steam broccoli, allow to cool.
  3. In a large bowl add the broccoli, tomatoes, scallions, edamame, dill, parsley, mint and bulgar.  Stir to combine.  In a separate bowl whisk together the lemon juice, olive oil , cayenne pepper and salt (pepper is optional).  Pour over the bulgar salad and mix to incorporate.  The salad should just glisten with the dressing, it should not be soaked.
3.2.2802

Filed Under: Rice and Grains, Salads, Sides and Sauces Tagged With: broccoli, bulgar, edamame, healthy, lunch, side dish, tomatoes, vegetarian, wheat

Stuffed Potatoes

June 29, 2009 by Susan

StuffedPotatoesResize1NEW

It’s 4th of July week (already?!) and everyone is preparing for BBQ’s.  And praying for good weather, considering it’s rained practically every day this month.  Awful!  Well, keeping positive, here’s a post on delicious stuffed potatoes that are just perfect for a summer BBQ – rain or shine.

I’ve been making these stuffed cuties for a few years now and every time I do people rave about them.  They are delicious and the perfect one or two bite appetizer.  Basically, they are stuffed little red potatoes.  The filling is creamy with a slight sharpness in the background from the blue cheese.  If you don’t love blue cheese, cut back on how much you include.  I usually don’t use the entire 1 cup, I add a little at a time and taste.

When making them, allow for 3-4 halves (2 potatoes) per person, at least.  They will be devoured.

Here’s what you will need to serve approximately 10-12 people…

Recipe 

24 new red potatoes, halved lengthwise

2 teaspoons extra-virgin olive oil

1 1/2 cup sour cream

1 cup crumbled blue cheese (I end up using 3/4 cup usually)

1/2 cup crumbled, cooked bacon, plus more for garnish

1/3 cup (heaping) chopped parsley, plus more for garnish

1/4 red onion, finely chopped, plus more for garnish

Method 

Preheat the oven to 400 degrees.

Toss the potato halves with olive oil and mix well until each half is coated.  Place cut side down on a baking sheet and bake until the skins are crisp and the potatoes are tender, roughly 30 minutes.  The original recipe states 20-25 minutes, but in my oven it takes more like 30-40 minutes.  Allow potatoes to cool.

Gently scoop out the center of each potato half and place in a medium bowl.  Using a small ice cream scoop or melon baller is sometimes helpful for this step.  You do not need to make yourself nuts getting all the potato out of the skin, some can remain inside.  Actually, it’s best if some does remain inside, it will make the potato boats more sturdy.  To the bowl add the sour cream, blue cheese, bacon, parsley and onion.  Stir to mix together.

Fill each potato skin with the sour cream mixture and top each potato with more bacon, onion and parsley.

This recipe is adapted from the Grucci family.


Stuffed Potatoes
 
Print
Author: Feasts And Fotos
Ingredients
  • 24 new red potatoes, halved lengthwise
  • 2 teaspoons extra-virgin olive oil
  • 1½ cup sour cream
  • 1 cup crumbled blue cheese (I end up using ¾ cup usually)
  • ½ cup crumbled, cooked bacon, plus more for garnish
  • ⅓ cup (heaping) chopped parsley, plus more for garnish
  • ¼ red onion, finely chopped, plus more for garnish
Method
  1. Preheat the oven to 400 degrees.
  2. Toss the potato halves with olive oil and mix well until each half is coated.  Place cut side down on a baking sheet and bake until the skins are crisp and the potatoes are tender, roughly 30 minutes.  The original recipe states 20-25 minutes, but in my oven it takes more like 30-40 minutes.  Allow potatoes to cool.
  3. Gently scoop out the center of each potato half and place in a medium bowl.  Using a small ice cream scoop or melon baller is sometimes helpful for this step.  You do not need to make yourself nuts getting all the potato out of the skin, some can remain inside.  Actually, it's best if some does remain inside, it will make the potato boats more sturdy.  To the bowl add the sour cream, blue cheese, bacon, parsley and onion.  Stir to mix together.
  4. Fill each potato skin with the sour cream mixture and top each potato with more bacon, onion and parsley.
3.2.2802

Filed Under: Appetizers, Sides and Sauces Tagged With: appetizer, bacon, bbq, potatoes, side dish, stuffed, summer

  • 1
  • 2
  • Next Page »
Hello and welcome to Feasts and Fotos!

Archives

Categories

Copyright © 2025 · Foodie Pro Theme by Shay Bocks · Built on the Genesis Framework · Powered by WordPress