FEASTS AND FOTOS

  • Home
  • About
  • Happenings
  • Contact
You are here: Home / Archives for Main Dishes

Stuffed Cabbage

October 6, 2009 by Susan

StuffedCabbageR

Now that there is a slight chill back in the air I immediately start thinking of comfort food dishes.  This stuffed cabbage recipe certainly fits the bill.  I made it a few times last year and have now arrived at the perfect combination of ingredients for this recipe.  Perfect for me, that is!  Not sure how much weight that carries considering I’m Italian and this is a Polish/Hungarian dish.  On that note, I will mention that my fiance is Ukranian and absolutely loves them!

Rolling up the leaves does require some time.  I happen to love doing it, I find it fun.  As you will see from the recipe below, this makes roughly 20 rolls!  Since it’s just the two of us, we can eat this for dinner twice during the week as well as bring them for lunch almost everyday.  So that’s what we’ve been doing.  And no, we’re not sick of them yet!

To be honest, they get better as the days go on.

Here’s what you will need to serve 6-8 people (roughly 20 cabbage rolls)…

Recipe

1 large dutch oven

Savoy Cabbage – 2 medium or large heads

Meat Mixture:

2 lbs chop meat (sirloin & pork)

1 cup cooked brown rice

1 large yellow onion, finely chopped

1 egg

1/4 cup parsley

3 cloves garlic, finely chopped

salt & pepper

Sauce

2 28 oz cans whole, peeled tomatoes

2 cans low-sodium tomato juice (soda can size)

2 large spanish onions, sliced

>water

salt & pepper

Preheat oven to 325 degrees.

Method

The cabbage:  There are 2 ways you can tackle the head of cabbage.  First option is to remove the core (I find this difficult to do) and place the entire head of cabbage in a large pot of boiling water.  As the leaves soften they will start to break away from the head.  With tongs gently remove each leaf, one at a time, as it softens.  Lay on a tray to cool.

The other method is to turn the cabbage upside down and gently cut eat piece off near the core.  Once you slice through the first leaf, gently pull the leaf away from the head of cabbage.  Place each leaf in a large pot of boiling water until softened.  Lay on a tray to cool.

For the sauce, pour the whole, peeled tomatoes into a food processor and pulse until broken up.  Pour into a bowl and add the cans of tomato juice.  Add salt & pepper to taste.

To make the meat mixture, simply add the brown rice, onions, garlic, parsley and 1-2 ladles of the sauce to the chop meat and mix well.  I like to use a combination of sirloin and pork for the filling.  You can always add veal to this as well.

Now for the fun part.  Assembling!  Ok, lay one cabbage leaf down and cut the end portion of the core out.  Place a small palmful of meat onto the leaf and roll.  I like to fold the sides in first and then roll up.  It’s best to use all the large leaves from the cabbage, it gets difficult to roll the smaller ones.  That’s why I suggest to buy 2 heads of cabbage.

In the bottom of a large dutch oven place one layer of flat cabbage leaves, overlapping slightly.  Spread some sliced onions over the cabbage leaves.  Lay each stuffed cabbage roll, seam side down, in a single layer, on top of the onions.  Pour a few ladles of sauce over the cabbages.  Place another layer of sliced onions.  Now for the 2nd layer, go ahead and place the rolled up cabbages in another single layer, pour a few ladles of sauce over the cabbages, now some more onions.  You get the picture.  Continue until all your stuffed cabbages are in the pot.  I usually get 3 layers in my big pot.  This is what my 2nd layer looked like…
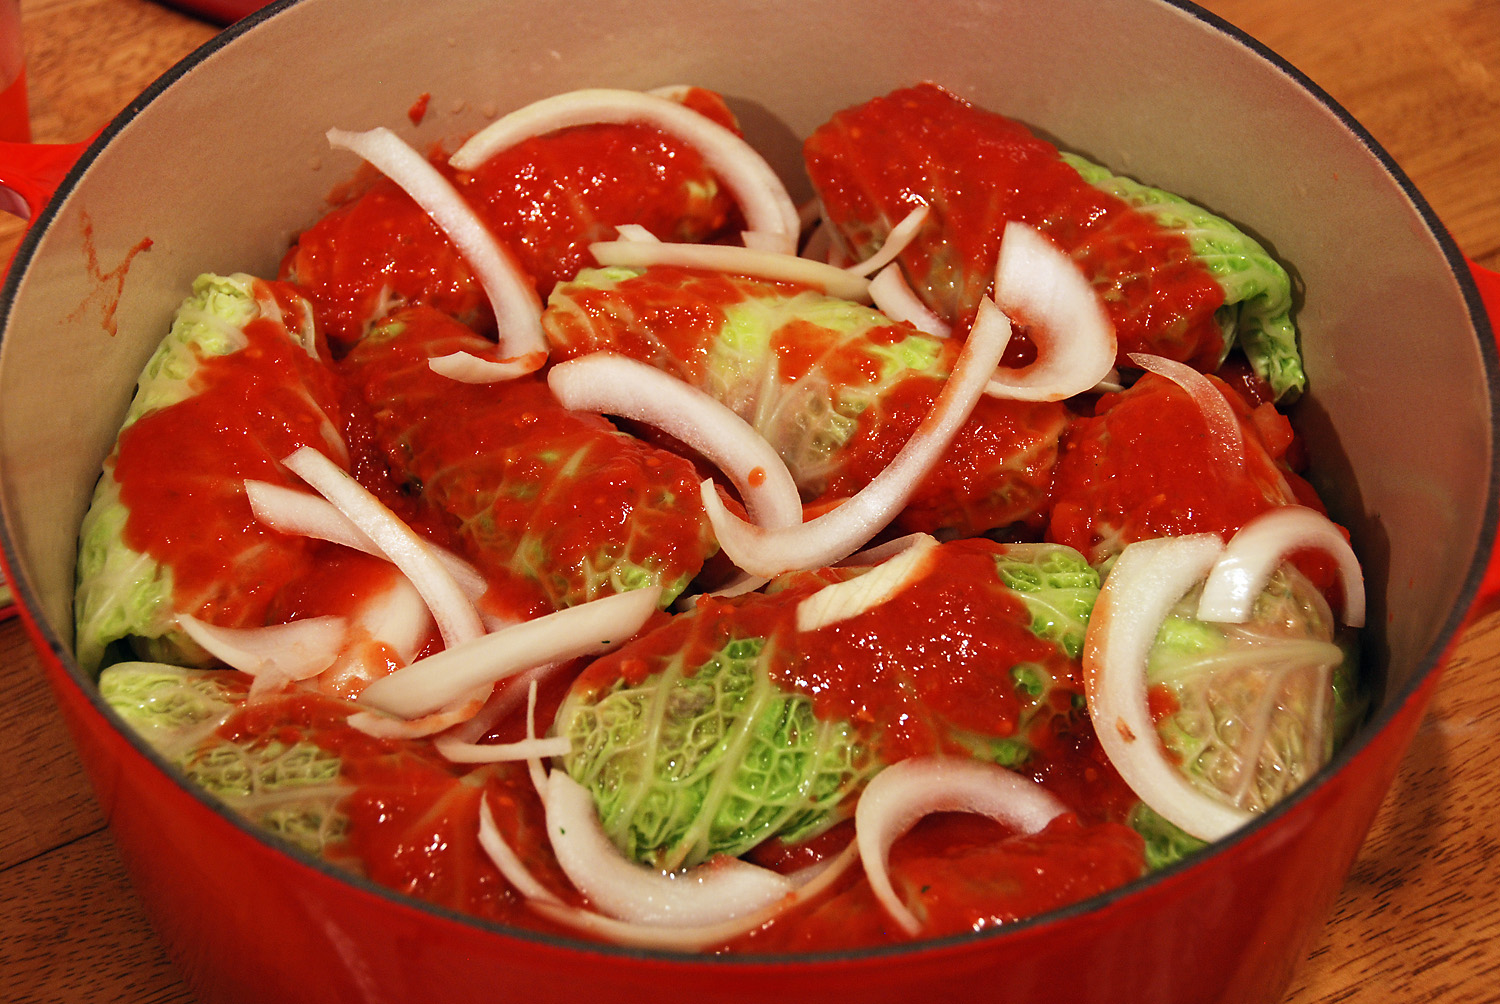
StuffedCabbagePot

Let me take a moment here to state how much I love this red Le Creuset pot (above).  Love.  Cooks soups, stews and stuffed cabbage like a dream.  Cleans beautifully.  Love.  Ok, moving on…

Pour any and all remaining sauce over the top of the last layer.  If all cabbages are not submerged in liquid, add water to the pot until they are submerged.  If you have any leftover cabbage, you can thinly slice (shred) some leaves and place on top of the rolls.  Place a lid on the pot and put in the oven.  Bake for roughly 2.5 to 3 hours.

Low.  And.  Slow.   Then, you will be rewarded with this…
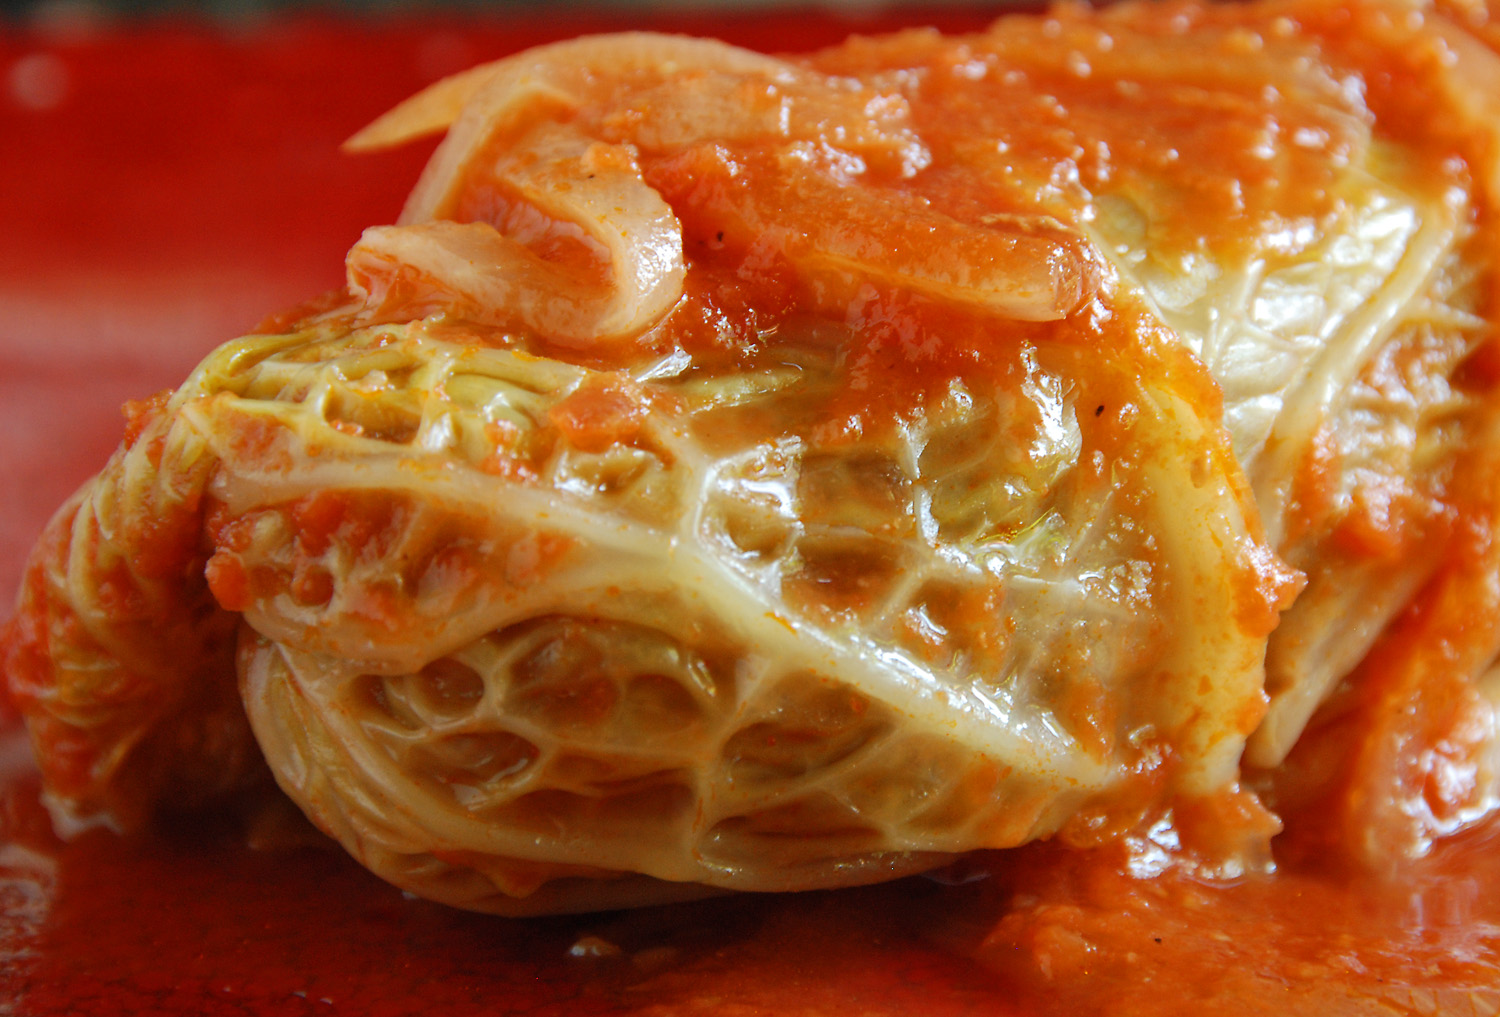
StuffedCabbageWholeR


Stuffed Cabbage
 
Print
Author: Feasts And Fotos
Ingredients
  • 1 large dutch oven
  • Savoy Cabbage - 2 medium or large heads
  • Meat Mixture:
  • 2 lbs chop meat (sirloin & pork)
  • 1 cup cooked brown rice
  • 1 large yellow onion, finely chopped
  • 1 egg
  • ¼ cup parsley
  • 3 cloves garlic, finely chopped
  • salt & pepper
  • Sauce
  • 2 28 oz cans whole, peeled tomatoes
  • 2 cans low-sodium tomato juice (soda can size)
  • 2 large spanish onions, sliced
  • >water
  • salt & pepper
  • Preheat oven to 325 degrees.
Method
  1. The cabbage: There are 2 ways you can tackle the head of cabbage. First option is to remove the core (I find this difficult to do) and place the entire head of cabbage in a large pot of boiling water. As the leaves soften they will start to break away from the head. With tongs gently remove each leaf, one at a time, as it softens. Lay on a tray to cool.
  2. The other method is to turn the cabbage upside down and gently cut eat piece off near the core. Once you slice through the first leaf, gently pull the leaf away from the head of cabbage. Place each leaf in a large pot of boiling water until softened. Lay on a tray to cool.
  3. For the sauce, pour the whole, peeled tomatoes into a food processor and pulse until broken up. Pour into a bowl and add the cans of tomato juice. Add salt & pepper to taste.
  4. To make the meat mixture, simply add the brown rice, onions, garlic, parsley and 1-2 ladles of the sauce to the chop meat and mix well. I like to use a combination of sirloin and pork for the filling. You can always add veal to this as well.
  5. Lay one cabbage leaf down and cut the end portion of the core out. Place a small palmful of meat onto the leaf and roll. I like to fold the sides in first and then roll up. It's best to use all the large leaves from the cabbage, it gets difficult to roll the smaller ones. That's why I suggest to buy 2 heads of cabbage.
  6. In the bottom of a large dutch oven place one layer of flat cabbage leaves, overlapping slightly. Spread some sliced onions over the cabbage leaves. Lay each stuffed cabbage roll, seam side down, in a single layer, on top of the onions. Pour a few ladles of sauce over the cabbages. Place another layer of sliced onions. Now for the 2nd layer, go ahead and place the rolled up cabbages in another single layer, pour a few ladles of sauce over the cabbages, now some more onions.
  7. Pour any and all remaining sauce over the top of the last layer. If all cabbages are not submerged in liquid, add water to the pot until they are submerged. If you have any leftover cabbage, you can thinly slice (shred) some leaves and place on top of the rolls. Place a lid on the pot and put in the oven. Bake for roughly 2.5 to 3 hours.
3.2.2802

Filed Under: Main Dishes Tagged With: cabbage, comfort food, rolls, stuffed

Tuna Salad Roll

September 16, 2009 by Susan

TunaRollFixResize

I have been making this delicious fresh tuna salad for a few years now and it just occured to me to put it into a hot dog bun.  I got the idea from lobster rolls, abundant during the summer months.  Both lobster and tuna are somewhat pricey but the tuna is easier and quicker to cook.  You don’t have to concern yourself with taking the lobster meat out of the shells.

This tuna roll is terrific as a light dinner on a hot summer evening.  You only need to stand over a flame for 2 minutes, the rest comes together quite easily.  It is also great for lunch.  If you don’t want to put it in a hot dog bun it is wonderful placed on a bed of greens.

Recipe

1 pound sushi grade tuna steak, cut one inch thick

2 tbsp olive oil, plus extra for brushing

1 large lime, zested and juiced

1 tsp wasabi powder

1 tsp soy sauce

1 tsp toasted seasame oil

5 dashes tobasco sauce

1 ripe Haas avocado

1/4 cup minced scallions

2 tbsp red onion, finely chopped

Salt & pepper

Spinach leaves

Hot dog buns (top slit), lightly toasted

Method

Brush steaks with olive oil and sprinkle with salt & pepper.  Place tuna steak in a very hot saute pan (or grill pan) and cook for only one minute on each side.  The center of the steaks should still be raw.  Set aside on a platter to cool.

In a small bowl, combine the olive oil, lime zest, wasabi, lime juice, soy sauce and hot sauce along with a dash of salt & pepper.  Add the avocados to the vinaigrette and toss to combine.

Cut the tuna into chunks and add to the vinaigrette.  Finally, add the scallions and red onions to the mixture.  Mix well.

Lightly toast the hot dog buns.  Place a layer of spinach leaves in the buns.  Pile the tuna mixture on top of the leaves.

Recipe adapted from Ina Garten.


Tuna Salad Roll
 
Print
Author: Feasts And Fotos
Ingredients
  • 1 pound sushi grade tuna steak, cut one inch thick
  • 2 tbsp olive oil, plus extra for brushing
  • 1 large lime, zested and juiced
  • 1 tsp wasabi powder
  • 1 tsp soy sauce
  • 1 tsp toasted seasame oil
  • 5 dashes tobasco sauce
  • 1 ripe Haas avocado
  • ¼ cup minced scallions
  • 2 tbsp red onion, finely chopped
  • Salt & pepper
  • Spinach leaves
  • Hot dog buns (top slit), lightly toasted
Method
  1. Brush steaks with olive oil and sprinkle with salt & pepper.  Place tuna steak in a very hot saute pan (or grill pan) and cook for only one minute on each side.  The center of the steaks should still be raw.  Set aside on a platter to cool.
  2. In a small bowl, combine the olive oil, lime zest, wasabi, lime juice, soy sauce and hot sauce along with a dash of salt & pepper.  Add the avocados to the vinaigrette and toss to combine.
  3. Cut the tuna into chunks and add to the vinaigrette.  Finally, add the scallions and red onions to the mixture.  Mix well.
  4. Lightly toast the hot dog buns.  Place a layer of spinach leaves in the buns.  Pile the tuna mixture on top of the leaves.
3.2.2802

Filed Under: Main Dishes, Salads Tagged With: roll, salad, spinach, tuna

Chicken Piccata

August 6, 2009 by Susan

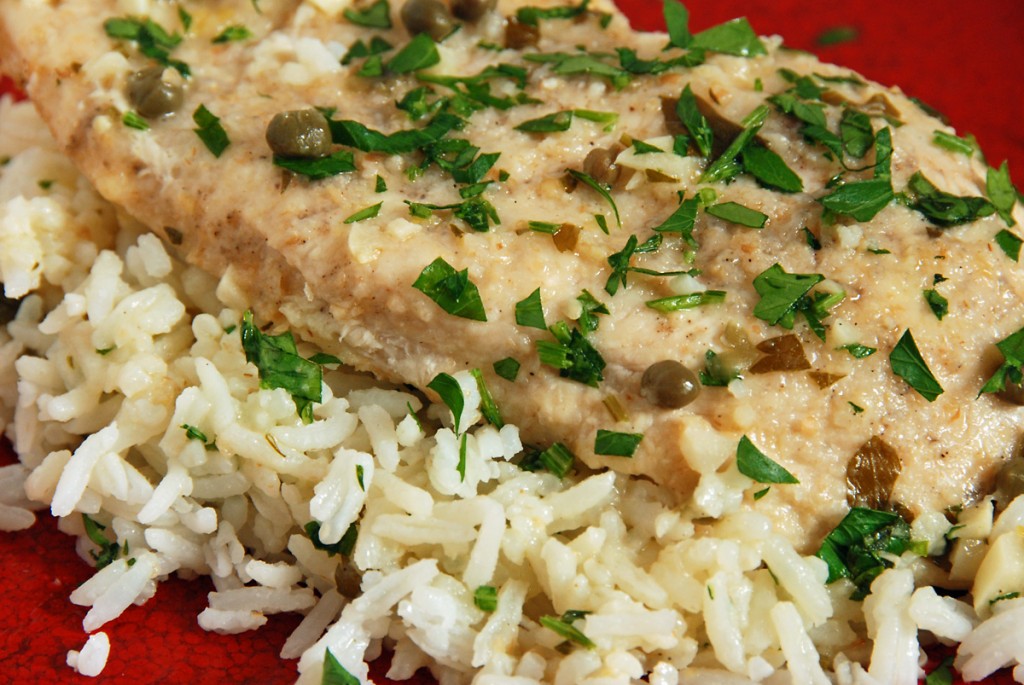
ChickenPicattaResize

If I was forced to pick some absolute favorite meals that I make, this particular chicken piccata dish would be on that list.  It would not just be on the list, it would be near the top.  It is quick and easy to prepare, everything happens in one large skillet, there are only a few simple ingredients and the flavor is outstanding.  That’s what I like to call a home run!

I normally buy two packages of thin chicken cutlets and slice the cutlets in half down the seam, creating more pieces, although smaller.  It makes me feel like I’m eating more food than I actually am when I place TWO pieces of chicken on the plate!  Clearly, this is not a necessary step in the recipe.  I usually serve the chicken over insanely delicious herbed basmati rice (not pictured in this post).  I cut some corners on the above basmati rice, due to a particularly busy day.  I will, however, post the recipe and a photo at some point this week.  Truthfully, any rice would work well here, use your favorite.

Every single time I make this dish my boyfriend and I sit down to eat and here’s what transpires…

We both take our first bite.  He goes on with a few mmmm mmmmm’s, nodding in acceptance.  I exclaim ‘delicious’.   He agrees.  After our second bite I say “I know I say this every single time I make this dish, but it’s just so good.  I love it.  I really need to make this once a week.”  He agrees and states that he could easily eat this several times a week and be very happy about it.

We’re a match made in heaven, I’ll tell ya.

Here’s what you will need to serve 2-3 people…

Recipe

4 thin chicken cutlets (cut in half, optional)

1/2 cup dry white wine

1 cup chicken broth

3 cloves garlic, minced

2 tablespoons lemon juice

zest of 1/2 lemon

1 tablespoon capers, drained

whole wheat flour

1-2 tablespoons butter (optional)

1/2 cup chopped parsley

Salt & pepper

Olive oil

Method

Season cutlets with salt & pepper, then dust both sides with flour.

In a large skillet heat a few tablespoons of olive oil (to coat the bottom of the pan) until very hot.  Add the chicken cutlets and saute 2-3 minutes on one side, flip over and saute 1-2 minutes on the other side.  Remove chicken from the skillet and reserve in a plate.

Lower the heat to medium and add the chopped garlic to the pan.  Saute 1 minute.  Add wine to the pan, deglazing it.  Scrape up all those brown bits!  Simmer for 1-2 minutes.  Add chicken broth, lemon juice, lemon zest and capers.  If you feel you want to add more salt & pepper (I usually don’t) add it at this time.  Simmer for about 5 minutes over low-medium heat.

Add 2 tablespoons of parsley and return cutlets to the skillet, allowing them to simmer in the liquid for about 3-4 minutes with the lid on, flipping them once.

Turn off the heat.  Add butter and stir until melted into the sauce.  Add most of remaining parsley, reserving some for garnish.


Chicken Piccata
 
Print
Author: Feasts And Fotos
Ingredients
  • 4 thin chicken cutlets (cut in half, optional)
  • ½ cup dry white wine
  • 1 cup chicken broth
  • 3 cloves garlic, minced
  • 2 tablespoons lemon juice
  • zest of ½ lemon
  • 1 tablespoon capers, drained
  • whole wheat flour
  • 1-2 tablespoons butter (optional)
  • ½ cup chopped parsley
  • Salt & pepper
  • Olive oil
Method
  1. Season cutlets with salt & pepper, then dust both sides with flour.
  2. In a large skillet heat a few tablespoons of olive oil (to coat the bottom of the pan) until very hot.  Add the chicken cutlets and saute 2-3 minutes on one side, flip over and saute 1-2 minutes on the other side.  Remove chicken from the skillet and reserve in a plate.
  3. Lower the heat to medium and add the chopped garlic to the pan.  Saute 1 minute.  Add wine to the pan, deglazing it.  Scrape up all those brown bits!  Simmer for 1-2 minutes.  Add chicken broth, lemon juice, lemon zest and capers.  If you feel you want to add more salt & pepper (I usually don't) add it at this time.  Simmer for about 5 minutes over low-medium heat.
  4. Add 2 tablespoons of parsley and return cutlets to the skillet, allowing them to simmer in the liquid for about 3-4 minutes with the lid on, flipping them once.
  5. Turn off the heat.  Add butter and stir until melted into the sauce.  Add most of remaining parsley, reserving some for garnish.
3.2.2802

Filed Under: Main Dishes

Jerk Pork Tenderloin

June 10, 2009 by Susan

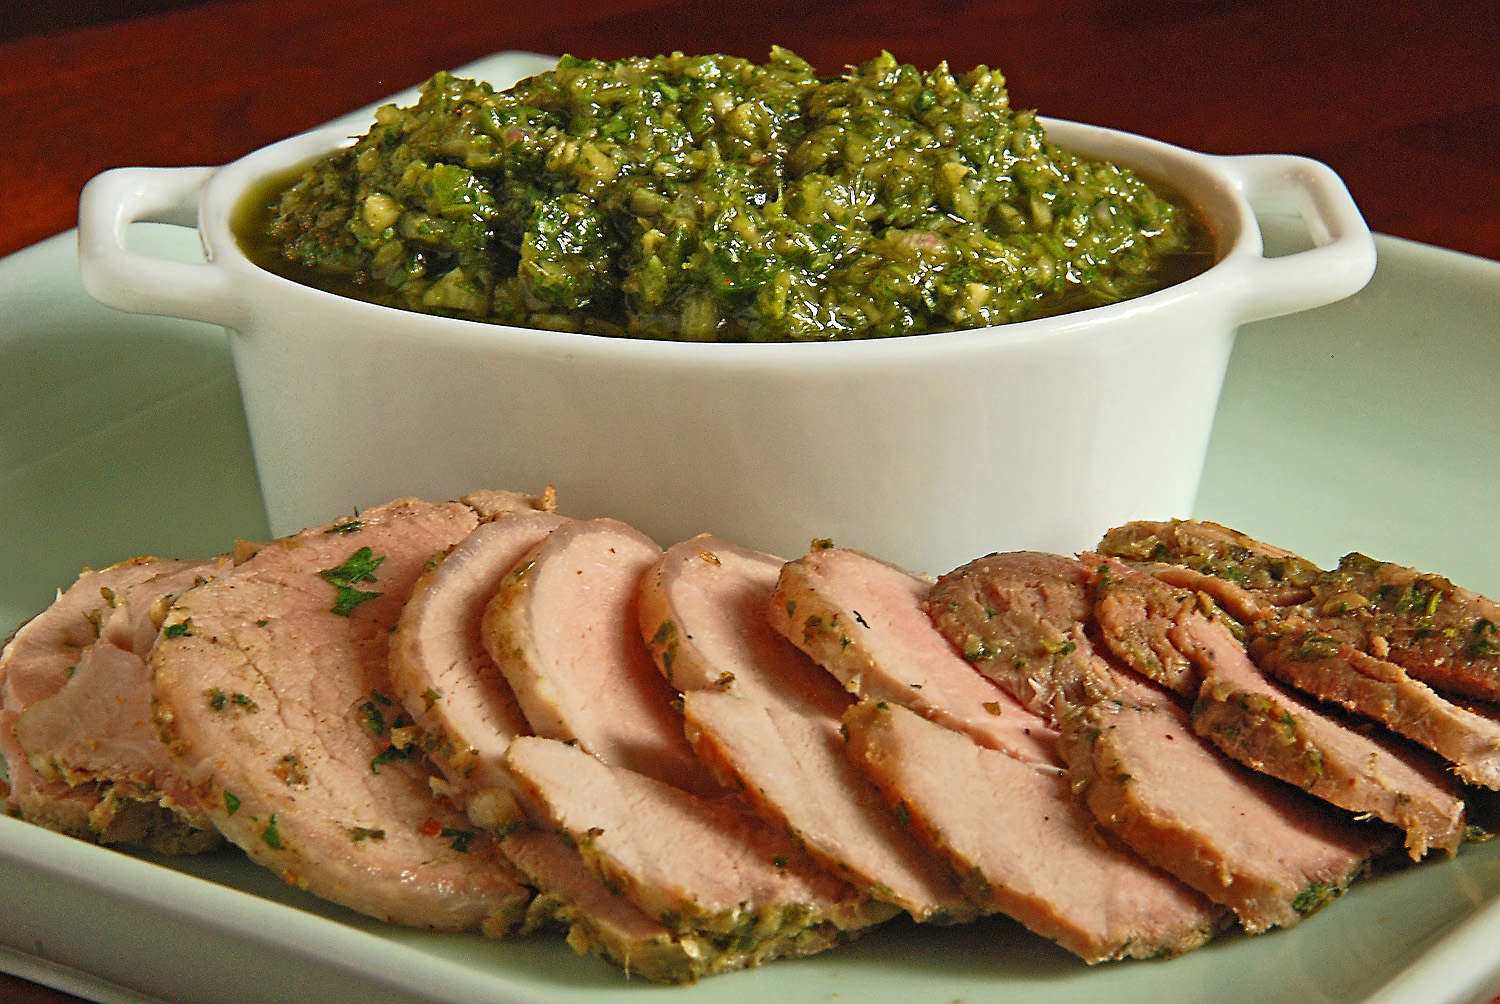
PorkTenderloinSliced

While flipping through an old issue of Oprah Magazine, I stumbled upon this recipe from Michelle Bernstein, the cooking dynamo from Miami.  It sounded so delicious I ripped out the page and made it a few nights later.

I love pork tenderloin.  It is lean and flavorful and very quick to cook.  (Be careful not to overcook it!)   Just like chicken, you can marinate pork tenderloin in so many different ways giving a new flavors to the meat each time.

At first glance this recipe looked like it had alot of ingredients (something I usually shy away from) however most of them I had on hand and everything simply gets tossed into a food processor.  Easy!  I made very few changes to her recipe, the main one being roasting the tenderloins in the oven instead of grilling them.  The pork came out tender and flavorful and the sauce…oh, the sauce.  Such a burst of flavors…herbs, spice, sweetness.

Although the meat was yummy freshly cooked, what amazed me was the leftovers.  Outstanding.  I sliced the leftover pork into very thin slices (as in above photo).  Then, I toasted two pieces of whole wheat bread.  Slathered the leftover sauce on both sides of the bread, then layered on the pork slices.  That’s it.  I didn’t even need to add anything else to it.  I can’t tell you how delicious this sandwich is!  I cannot wait to make this again just to have the leftovers.  Is that even normal?

So make extra, either buy bigger tenderloins or even an extra one.  You will love this sandwich.

Here’s what you will need to make 4 servings…

Recipe

1 cup olive oil

1/4 cup fresh orange juice

1 small bunch fresh flat leaf parsley

1 small bunch fresh cilantro

1/2 bunch whole scallions, coarsely chopped

2 medium shallots, coarsely chopped

1 (1.5 inch) piece fresh ginger, peeled and coarsely chopped

3 tbsp white wine vinegar

2 tbsp fresh thyme leaves

1 medium jalapeno pepper, coarsely chopped (with some seeds and ribs)

2 tbsp light brown sugar

1 tbsp worchestershire sauce

1/4 tsp ground cloves

1/4 tsp ground all spice

2 pork tenderloins

1 tsp salt

Method

Preheat the oven to 425 degrees.  Put all ingredients (except pork and salt) into a food processor and puree until smooth.

Place tenderloins in a non reactive dish and pour half the marinade over the pork, massaging it into the pork on all sides.  Cover with plastic wrap and place in the fridge.  Marinate for at least 8 hours, up to 24 hours.  Cover and refrigerate remaining marinade.

When you are ready to cook the pork remove the tenderloins from the fridge and allow to sit out for 20 minutes or so.  Scrape most of the marinade off the pork and sprinkle with salt.  Discard marinade.  Remove remaining sauce from the fridge and allow to come to room temperature.

Roast tenderloins in the oven for roughly 20 minutes (depending on the size of the tenderloins) or until a meat thermometer reads 145 degrees.  Of course you can grill them if you are lucky enough to have a grill and an outdoor space to put a grill.  Remove from the oven, transfer to a cutting board, cover with aluminum foil and allow the meat to rest 10 minutes.  The meat should be pink and juicy.

Cut pork into 1/2 inch diagonal slices and arrange on serving platter.  Sprinkle some of the sauce over the sliced pork, serving the remaining sauce alongside.

Original recipe found here http://www.oprah.com/recipe/omagazine/recipes/200903_omag_recipe_jerk_pork


Jerk Pork Tenderloin
 
Print
Author: Feasts And Fotos
Ingredients
  • 1 cup olive oil
  • ¼ cup fresh orange juice
  • 1 small bunch fresh flat leaf parsley
  • 1 small bunch fresh cilantro
  • ½ bunch whole scallions, coarsely chopped
  • 2 medium shallots, coarsely chopped
  • 1 (1.5 inch) piece fresh ginger, peeled and coarsely chopped
  • 3 tbsp white wine vinegar
  • 2 tbsp fresh thyme leaves
  • 1 medium jalapeno pepper, coarsely chopped (with some seeds and ribs)
  • 2 tbsp light brown sugar
  • 1 tbsp worchestershire sauce
  • ¼ tsp ground cloves
  • ¼ tsp ground all spice
  • 2 pork tenderloins
  • 1 tsp salt
Method
  1. Preheat the oven to 425 degrees.  Put all ingredients (except pork and salt) into a food processor and puree until smooth.
  2. Place tenderloins in a non reactive dish and pour half the marinade over the pork, massaging it into the pork on all sides.  Cover with plastic wrap and place in the fridge.  Marinate for at least 8 hours, up to 24 hours.  Cover and refrigerate remaining marinade.
  3. When you are ready to cook the pork remove the tenderloins from the fridge and allow to sit out for 20 minutes or so.  Scrape most of the marinade off the pork and sprinkle with salt.  Discard marinade.  Remove remaining sauce from the fridge and allow to come to room temperature.
  4. Roast tenderloins in the oven for roughly 20 minutes (depending on the size of the tenderloins) or until a meat thermometer reads 145 degrees.  Of course you can grill them if you are lucky enough to have a grill and an outdoor space to put a grill.  Remove from the oven, transfer to a cutting board, cover with aluminum foil and allow the meat to rest 10 minutes.  The meat should be pink and juicy.
  5. Cut pork into ½ inch diagonal slices and arrange on serving platter.  Sprinkle some of the sauce over the sliced pork, serving the remaining sauce alongside.
3.2.2802

Filed Under: Main Dishes Tagged With: dinner, jerk, Marinade, meat, pork tenderloin

Curried Egg Salad

June 1, 2009 by Susan

EggSaladBowl

I have become a big fan of hard boiled eggs of late.  I was never much into them, aside from eating a few on Easter.  I have recently discovered they are wonderful as a little snack to get me through until my next meal.

This new found interest of mine started me thinking…how about egg salad??  Again, never much of a fan.  If you’ve read my other post on chicken salad you will know I do not like super gloppy mayo mixtures – and that’s unfortunately how they come at most delis.  Also, egg salad is usually a bit on the boring side, right?

So, I set out to create a non-boring one.  I originally was leaning towards using paprika as the main spice, but I switched to curry – much more interesting.  The curry goes perfectly with the toasted almonds, a delicious combination.  I list 1/8 tsp of curry powder in the recipe.  This amount provides a nice curry flavor but if you are not afraid of curry feel free to use 1/4 tsp.  I usually find myself adding another pinch or so after the 1/8 tsp.

Of course this mixture needed a fresh green herb, I chose chives to provide another hint of onion flavor along with the shallots, as well as a shot of color.

This egg salad makes a great sandwich.  I use organic whole grain bread, toasted.  I like the contrast of the toasty bread with the smooth, soft egg salad.  Then, throw down a layer of baby spinach leaves, pile the eggs salad high on top and finish off with another piece of bread.  Another option…slather some on a toasted bagel in the morning for breakfast.  Terrific, either way.

Here’s what you will need to make 2–3 medium sized sandwiches…

Recipe

5 eggs

1 medium shallot, finely chopped

1/4 cup sliced almonds, toasted and cooled, roughly chopped

4 tsp chives

3 tbsp mayo

1 tsp mustard

1 tsp coarse mustard

1/8 tsp curry powder

whole grain bread, toasted

spinach leaves (optional)

salt & pepper to taste

Method

First task – hard boil your eggs.  This is a very important step!  Place the eggs in a sauce pan and cover with water by one inch.  Set over medium heat and bring to a slow, soft boil.  Turn off heat, cover and let sit for exactly 12 minutes.  Set your timer!  After the 12 minutes, drain the hot water, then run the eggs under cold water a few times, finally leaving cold water in the pot and allowing the eggs to sit for roughly 10-15 minutes.  Peel eggs.  Cut in half lenthwise and seperate whites from yolks.

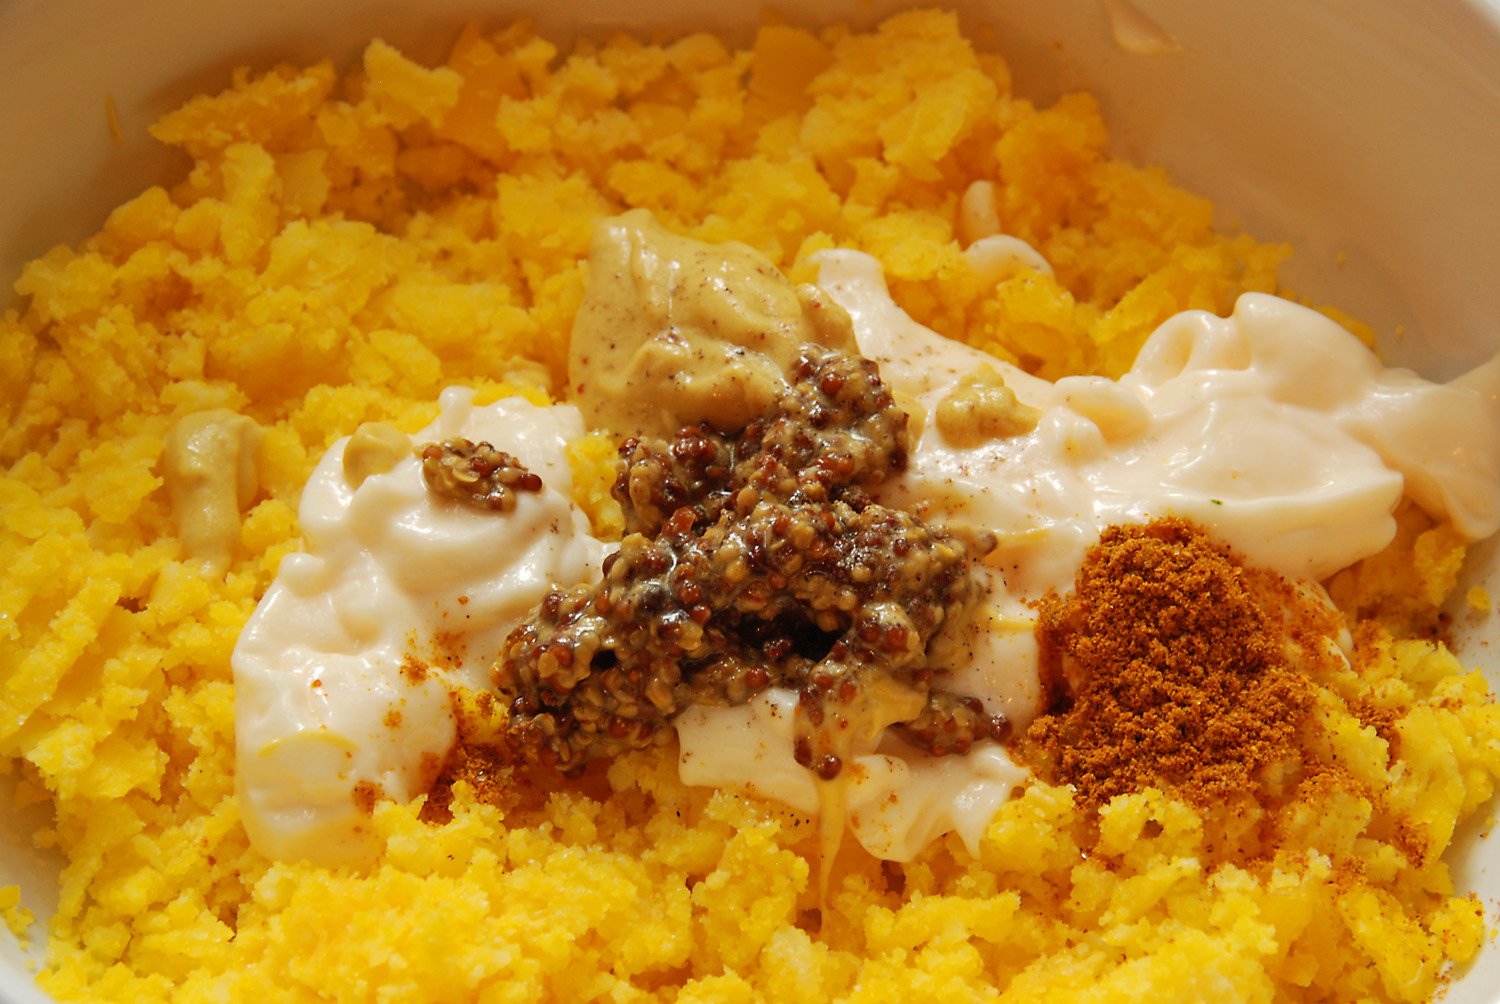
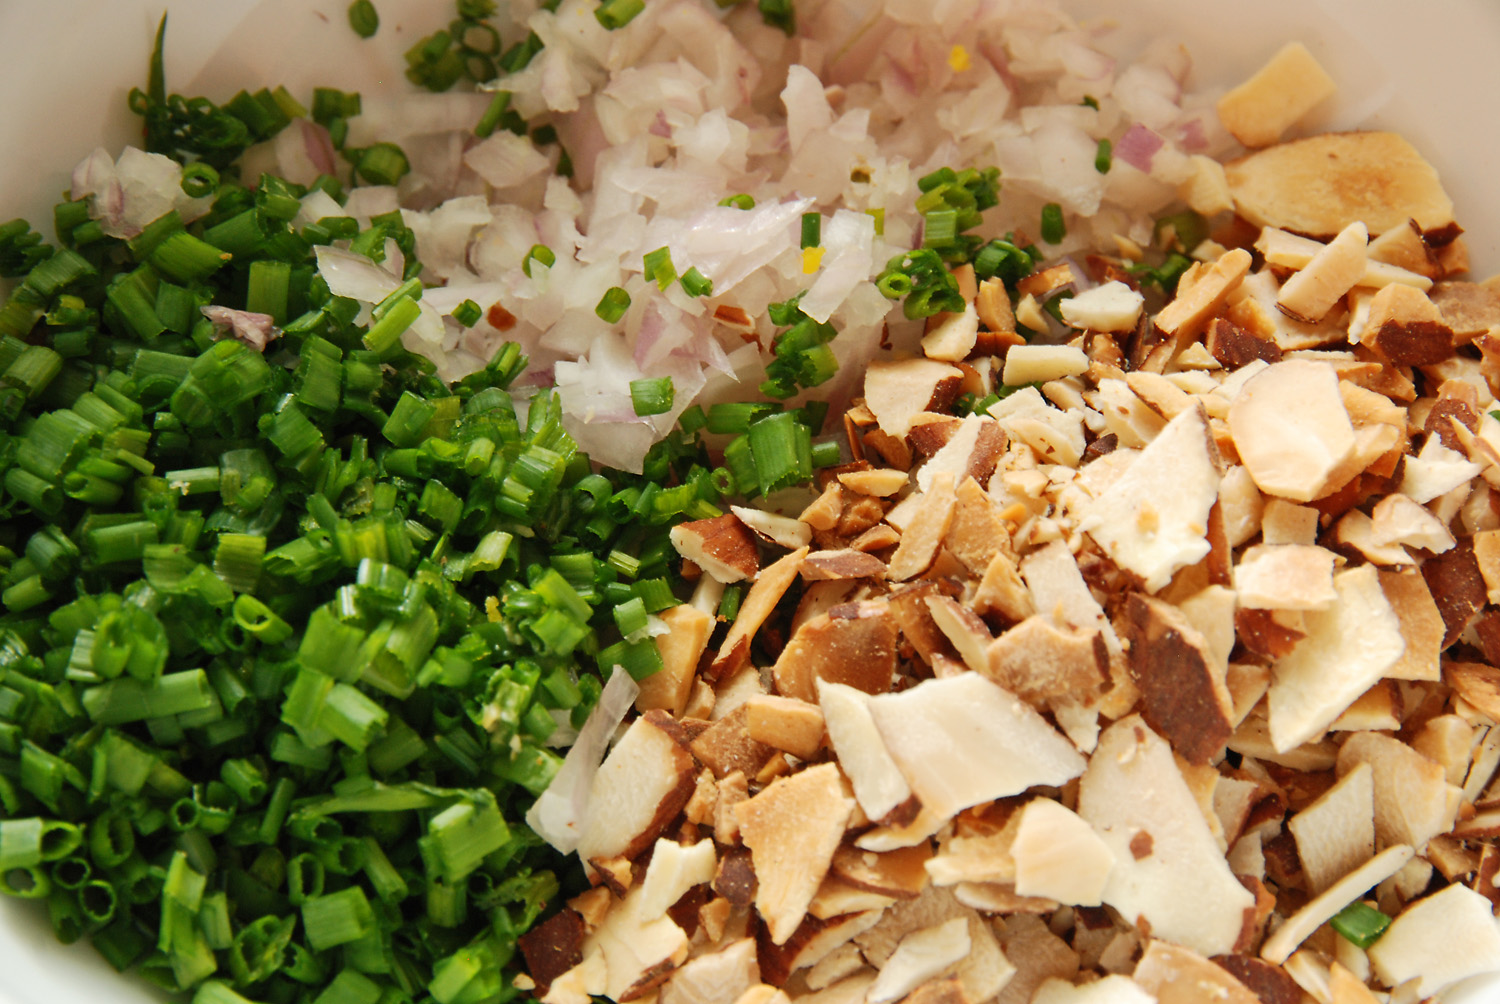
Put yolks in a bowl and mash with the back of a fork.  To the bowl add the mayo, both mustards, curry powder, shallots, chives and almonds.  Mix to combine well.

EggSaladIngredientsEggSaladIngredient2

Take the whites from two of the eggs and chop them with a knife.  I cut them into a small dice.  Then, with the back of a fork, gently mash the remaining egg whites, adding them to the bowl.  Mix everything together, adding salt & pepper to taste.   Assemble your sandwich and get eating!

Curried Egg Salad
 
Print
Author: Feasts And Fotos
Ingredients
  • 5 eggs
  • 1 medium shallot, finely chopped
  • ¼ cup sliced almonds, toasted and cooled, roughly chopped
  • 4 tsp chives
  • 3 tbsp mayo
  • 1 tsp mustard
  • 1 tsp coarse mustard
  • ⅛ tsp curry powder
  • whole grain bread, toasted
  • spinach leaves (optional)
  • salt & pepper to taste
Method
  1. First task - hard boil your eggs. This is a very important step! Place the eggs in a sauce pan and cover with water by one inch. Set over medium heat and bring to a slow, soft boil. Turn off heat, cover and let sit for exactly 12 minutes. Set your timer! After the 12 minutes, drain the hot water, then run the eggs under cold water a few times, finally leaving cold water in the pot and allowing the eggs to sit for roughly 10-15 minutes. Peel eggs. Cut in half lenthwise and seperate whites from yolks.
  2. Put yolks in a bowl and mash with the back of a fork. To the bowl add the mayo, both mustards, curry powder, shallots, chives and almonds. Mix to combine well.
  3. Take the whites from two of the eggs and chop them with a knife. I cut them into a small dice. Then, with the back of a fork, gently mash the remaining egg whites, adding them to the bowl. Mix everything together, adding salt & pepper to taste.
3.2.2802

Filed Under: Main Dishes, Salads Tagged With: almonds, chives, curry, egg, lunch, salad, sandwich

Chicken Vegetable Couscous

March 19, 2009 by Susan

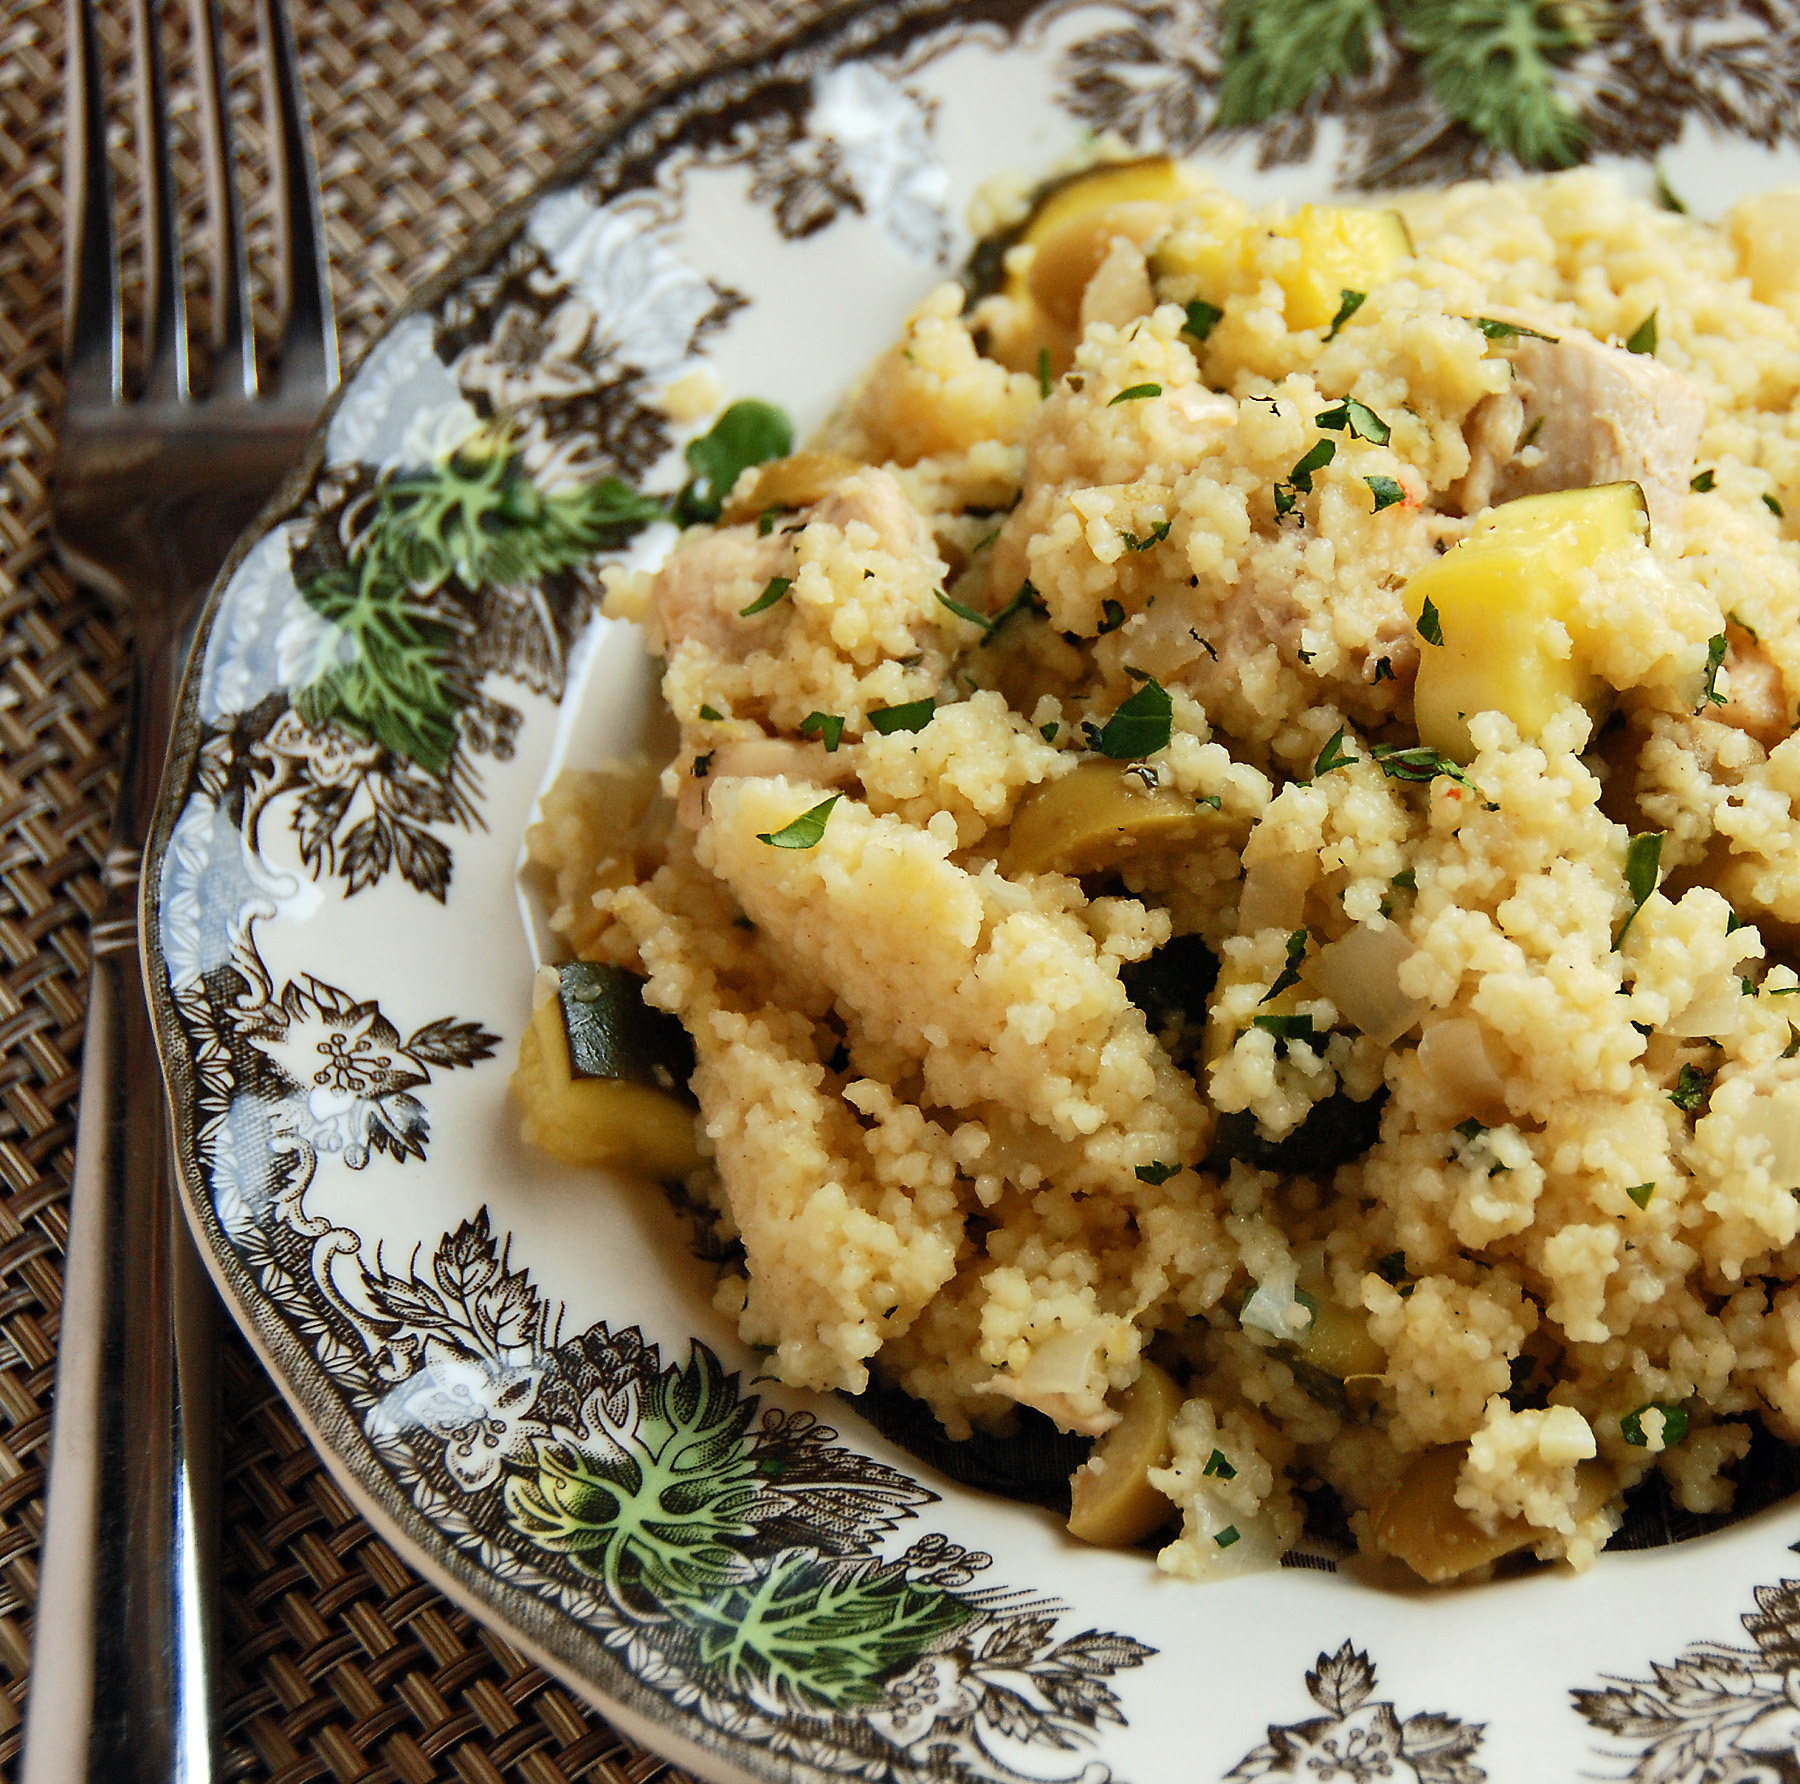
couscousforkresize

Quick and simple dishes that actually taste good are my favorite things to make.  If the dish stands up well to being left in the fridge for a few days, even better!  I discovered this recipe from the Rachael Ray magazine and only made a few small changes.  It’s a wonderful side dish, however, I eat it as my main meal, in a bowl, sitting in front of the TV…

I doubled the amount of zucchini as well as eliminating the fennel seeds (her recipe called for 1/2 tsp).  The other change I sometimes make is not sauteing the chicken in the pan – sometimes I have leftover oven roasted chicken that I shred up or cut into cubes and throw in.  Also note that I have made this dish with quinoa instead of couscous many times and it’s delicious.  Actually, I think I prefer it.  Just cook the quinoa separately (as directed on the box)  and add to the zucchini mixture for a gluten-free, protein packed version of this meal.

Here’s what you need to serve 4…

Recipe

2 tbsp olive oil

1 pound boneless chicken breasts, chopped (or leftover chicken)

1 onion

2 zucchini, chopped

2 cloves garlic, minced

2 tsp grated lemon zest

Juice of one lemon

1/2 tsp crushed red pepper

Pinch of cinnamon

1 cup green olives, chopped

Low sodium chicken stock (use amount as directed on couscous box)

One 10 oz box couscous (or 1 cup quinoa)

1/4 cup parsley, chopped

1/4 cup mint leaves, chopped

Salt & pepper

hot sauce (optional)

Method

Heat olive oil in a large skillet.   Add the chicken and cook until lightly browned, 3 minutes.  Add the onion, zucchini, garlic, lemon zest, red pepper and cinnamon.  Season with salt & pepper.  Cook for 3-5 minutes, then add the olives.  Cook for 3 more minutes.

Stir in the chicken stock and bring to a boil.  Stir in the couscous, cover the pan, turn off the heat and let stand for 5 minutes.  Fluff with a fork and then add the parsley, mint and lemon juice.  Toss to combine.  If you are so inclined, sprinkle some hot sauce on it and enjoy!


Chicken Vegetable Couscous
 
Print
Author: Feasts And Fotos
Ingredients
  • 2 tbsp olive oil
  • 1 pound boneless chicken breasts, chopped (or leftover chicken)
  • 1 onion
  • 2 zucchini, chopped
  • 2 cloves garlic, minced
  • 2 tsp grated lemon zest
  • Juice of one lemon
  • ½ tsp crushed red pepper
  • Pinch of cinnamon
  • 1 cup green olives, chopped
  • Low sodium chicken stock (use amount as directed on couscous box)
  • One 10 oz box couscous (or 1 cup quinoa)
  • ¼ cup parsley, chopped
  • ¼ cup mint leaves, chopped
  • Salt & pepper
  • hot sauce (optional)
Method
  1. Heat olive oil in a large skillet.   Add the chicken and cook until lightly browned, 3 minutes.  Add the onion, zucchini, garlic, lemon zest, red pepper and cinnamon.  Season with salt & pepper.  Cook for 3-5 minutes, then add the olives.  Cook for 3 more minutes.
  2. Stir in the chicken stock and bring to a boil.  Stir in the couscous, cover the pan, turn off the heat and let stand for 5 minutes.  Fluff with a fork and then add the parsley, mint and lemon juice.  Toss to combine.  If you are so inclined, sprinkle some hot sauce on it and enjoy!
3.2.2802

Filed Under: Main Dishes, Rice and Grains, Sides and Sauces Tagged With: chicken, couscous, green olives, Quinoa, zucchini

Smoked Salmon and Egg Salad Tartines

January 20, 2009 by Susan

EggSaladSalmonResizeFinalR

These little open faced sandwiches are one of my absolute favorite things.  I have been making them alot, serving them as appetizers when I have a dinner or get together.  Everyone just loves them.  If I ever have any leftovers (which doesn’t happen often) I enjoy them anytime of day – either as a breakfast or a light dinner.  It’s a fantastic spin on the classic egg salad.  I got this recipe from The Barefoot Contessa – I love just about everything she does.  I didn’t make any changes to this recipe basically because it’s perfect as it is.  I do, however, cook my eggs slightly different.  I’ve included my version below, but you can feel free to cook them as you wish.  Just be careful not to over cook them – you don’t want that greenish ring around the yokes!

The combination of flavors as well as textures is amazing.  I love the crunchy bread contrasting with the soft salmon and the almost creaminess of the egg salad.  Amazing!  The addition of the dill takes these over the top.

Here’s what you will need to serve 8 people…

Recipe

12 extra large eggs

1/3 cup mayonnaise

2 tsp whole-grain mustard

1 tbsp minced fresh dill, plus sprigs for garnish

1 tsp salt

1/2 tsp pepper

8 slices of good bread (whole wheat or 7 grain works well)

8 slices of smoked salmon (buy the best you can afford)

Method

Place eggs in a saucepan large enough to accommodate them in a single layer. Fill pan with cold water, covering eggs by 1 inch. Bring water to a boil over medium-high heat. Turn off heat, cover and allow to sit for 11 minutes.  Once cooked, transfer to a bowl of ice water and allow to sit for 1-2 minutes.  Crack and peel eggs.

Place eggs in the bowl of a food processor fitted with a steel blade.  Pulse about 10 times to break them up, do not puree.  Transfer chopped eggs to a bowl and add the mayonnaise, dill, salt & pepper.  Combine lightly with a fork.

Toast the bread.  Lay one slice of salmon on each piece of bread, spoon egg salad onto salmon, garnish with a sprig of dill.  Serve at room temperature.

Original recipe from The Barefoot Contessa can be found here…  http://www.foodnetwork.com/recipes/ina-garten/smoked-salmon-and-egg-salad-tartines-recipe/index.html


Smoked Salmon and Egg Salad Tartines
 
Print
Author: Feasts And Fotos
Ingredients
  • 12 extra large eggs
  • ⅓ cup mayonnaise
  • 2 tsp whole-grain mustard
  • 1 tbsp minced fresh dill, plus sprigs for garnish
  • 1 tsp salt
  • ½ tsp pepper
  • 8 slices of good bread (whole wheat or 7 grain works well)
  • 8 slices of smoked salmon (buy the best you can afford)
Method
  1. Place eggs in a saucepan large enough to accommodate them in a single layer. Fill pan with cold water, covering eggs by 1 inch. Bring water to a boil over medium-high heat. Turn off heat, cover and allow to sit for 11 minutes.  Once cooked, transfer to a bowl of ice water and allow to sit for 1-2 minutes.  Crack and peel eggs.
  2. Place eggs in the bowl of a food processor fitted with a steel blade.  Pulse about 10 times to break them up, do not puree.  Transfer chopped eggs to a bowl and add the mayonnaise, dill, salt & pepper.  Combine lightly with a fork.
  3. Toast the bread.  Lay one slice of salmon on each piece of bread, spoon egg salad onto salmon, garnish with a sprig of dill.  Serve at room temperature.
3.2.2802

Filed Under: Appetizers, Main Dishes, Salads Tagged With: egg, salad, salmon, smoked, tartine

Spinach and Chickpea Curry

December 26, 2008 by Susan


ChickPeaCurryFixR

When I came across this recipe I immediately thought I had to try it.  I had been thinking about attempting to cook an Indian dish at home for some time and this one seemed so simple and quick I felt comfortable giving it a try – if it didn’t turn out well I would not have invested much time and energy into it.  I hate wasting time and energy!

Not only is this dish super fast to whip up, it’s healthy.  The chickpeas are high in fiber and a great source of protein.  And thanks to Popeye we all know the health benefits of spinach by now!

This dish goes so well with lamb.  I like to buy the small loin lamb chops and broil them in the oven for about 10 minutes.  I serve this curry alongside the lamb – it’s spectacular.  I have also spooned this mixture over a piece of Tilapia and it was very tasty.  This spinach and chickpea curry would also be fantastic as a vegetarian meal all on it’s own served over basmati rice.

This is what you will need to serve as a side dish for 4-6 people…

Recipe

1 cup coarsely chopped onion

1 tablespoon ground ginger

1 teaspoon olive oil

1 teaspoon red curry powder

1/8 teaspoon garam masala

1 19-oz can chick peas, drained and rinsed

1 14-oz can diced tomatoes with juice

4-5 cups spinach leaves

chicken stock (optional)

Method

In a food processor, combine onion and ginger,  pulse until minced.

Heat oil in a large skillet.  Add onion mixture, curry powder and garam masala to the pan and saute 3 minutes.  Add chickpeas and tomatoes to the pan, crushing some of the tomatoes with the back of your spoon.  Simmer for 2-3 minutes.  Stir in spinach and simmer until wilted.

If you would like the mixture to be more liquidy, feel free to add some chicken stock (or vegetable stock).  I prefer mine on the thicker side.

That’s it, really.  So fast.  So simple.  So delicious.


Spinach and Chickpea Curry
 
Print
Author: Feasts And Fotos
Ingredients
  • 1 cup coarsely chopped onion
  • 1 tablespoon ground ginger
  • 1 teaspoon olive oil
  • 1 teaspoon red curry powder
  • ⅛ teaspoon garam masala
  • 1 19-oz can chick peas, drained and rinsed
  • 1 14-oz can diced tomatoes with juice
  • 4-5 cups spinach leaves
  • chicken stock (optional)
Method
  1. In a food processor, combine onion and ginger,  pulse until minced.
  2. Heat oil in a large skillet.  Add onion mixture, curry powder and garam masala to the pan and saute 3 minutes.  Add chickpeas and tomatoes to the pan, crushing some of the tomatoes with the back of your spoon.  Simmer for 2-3 minutes.  Stir in spinach and simmer until wilted.
  3. If you would like the mixture to be more liquidy, feel free to add some chicken stock (or vegetable stock).  I prefer mine on the thicker side.
3.2.2802

Filed Under: Main Dishes, Sides and Sauces Tagged With: chickpea, curry, ginger, spinach

Pasta With Lentils

December 6, 2008 by Susan

PastaLentilsFinalR

The Italian name for this deliciousness is Pasta e Lenticchie.  The way I see it, this dish should really be called Lentils with Pasta.  It is mostly lentils with some pasta thrown in, not the other way around.  It is an Italian dish that I grew up eating, my mom cooked this for us all the time.  It is traditionally from the Campania region of Italy, specifically the Naples area, which is where my family is from.

I can’t quite decide if this is more of a stew or a soup.  I think it is a mixture of both.  A stoup!  It is quite hearty and as most of you  might already know, lentils are super healthy.  They are loaded with folate, fiber and potassium and are an excellent source of protein.

I put my own slight spin on this recipe, it is not the exact same one my mother makes.  However, it’s very close.  I saute my vegetables first in some olive oil (she doesn’t) and I thought to add the bay leaves and thyme.  Basically, you make a big pot of the lentils and you store it in the fridge.  When you want to eat it, you boil up some pasta and then add the lentils to the pasta.  If you add all the pasta into the lentils and store it that way, the pasta tends to get mushy.  About the pasta – you can use any small shape you like.  Normally, this is made with spaghetti broken into 1 inch pieces, or the little elbows that I used in the photo above.  Both are fantastic.  I usually get the whole wheat or multi grain pasta.

Once the pot of lentils is made, this is a very quick and easy meal that you can enjoy all week long for lunch, dinner or a comforting snack on a cold day.

Here is what you will need to serve 4-6…

Recipe 

2 cups lentils (picked through and rinsed)

3 cups water

3 cups chicken stock (or vegetable stock)

2 medium carrots, diced

3 stalks celery, diced

1 large onion, diced

2 cloves garlic, minced

1 teaspoon pepperoncino

2 bay leaves

1 tsp thyme

4 whole peeled tomatoes, chopped with their juice

chopped parsley

short/small pasta (shape of your choice)

parmigiano reggiano or pecorino romano cheese

Method 

Coat the bottom of a dutch oven with olive oil and saute onions, carrots and celery for about 5 minutes or until they begin to soften.  Add garlic and pepperoncino and saute for one minute.  Add lentils and stir one minute.  Add water, stock, tomatoes, bay leaves and thyme and stir to combine.  Bring to a boil, reduce heat to a simmer , cover and cook for approximately 70-90 minutes or until the lentils are tender.  Lentils are done!

For reheating/serving:  boil water and cook the pasta until just about done (one minute shy of the directed cooking time).  Drain pasta, reserving some of the pasta water.  This is important!  The lentils thicken up and you most likely will have to add some pasta water to the mixture to loosen it up a bit.  Add some lentils to the pasta, as much as you like and depending on how many people you are serving.  Stir and cook together for one minute.  Turn off heat and add a handful of fresh parsley.  I love alot of parsley in this, it really give a nice, fresh flavor.  Top with a spoonful of cheese and enjoy!


Pasta With Lentils
 
Print
Author: Feasts And Fotos
Ingredients
  • 2 cups lentils (picked through and rinsed)
  • 3 cups water
  • 3 cups chicken stock (or vegetable stock)
  • 2 medium carrots, diced
  • 3 stalks celery, diced
  • 1 large onion, diced
  • 2 cloves garlic, minced
  • 1 teaspoon pepperoncino
  • 2 bay leaves
  • 1 tsp thyme
  • 4 whole peeled tomatoes, chopped with their juice
  • chopped parsley
  • short/small pasta (shape of your choice)
  • parmigiano reggiano or pecorino romano cheese
Method
  1. Coat the bottom of a dutch oven with olive oil and saute onions, carrots and celery for about 5 minutes or until they begin to soften.  Add garlic and pepperoncino and saute for one minute.  Add lentils and stir one minute.  Add water, stock, tomatoes, bay leaves and thyme and stir to combine.  Bring to a boil, reduce heat to a simmer , cover and cook for approximately 70-90 minutes or until the lentils are tender.  Lentils are done!
  2. For reheating/serving:  boil water and cook the pasta until just about done (one minute shy of the directed cooking time).  Drain pasta, reserving some of the pasta water.  This is important!  The lentils thicken up and you most likely will have to add some pasta water to the mixture to loosen it up a bit.  Add some lentils to the pasta, as much as you like and depending on how many people you are serving.  Stir and cook together for one minute.  Turn off heat and add a handful of fresh parsley.  I love alot of parsley in this, it really give a nice, fresh flavor.  Top with a spoonful of cheese and enjoy!
3.2.2802

Filed Under: Main Dishes, Pasta Tagged With: dinner, healthy, lentils, lunch, pasta, soup, stew

Vegetable Stuffed Peppers

October 15, 2008 by Susan

DoublePeppersFinalR

I had no idea how nutritious red peppers are!  They are an excellent source of vitamins C and A and they contain lycopene, a powerful antioxidant that helps neutralize free radicals (bad things) that cause some types of cancers and heart disease.  Surprisingly, red peppers contain almost three times the amount of vitamin C as green peppers.   Poor green peppers, they just aren’t up to snuff.

Traditionally, stuffed peppers are made with chop meat.  I do make the meat version at times, however, I like to keep things on the healthy side over here, so I try to make it with mostly veggies now, or sometimes I will add some ground turkey.  All versions are delicious.  I like to bring a stuffed pepper with me to work for lunch, and since I make 4 or 5 of them I eat one a day, everyday for lunch that week.  And NO, I don’t get sick of it!  They are so delicious, healthy and filling.  A complete meal stuffed inside a nutritionally packed red pepper.  What more could I ask for?

Here’s what you will need to make approximately 6 peppers…

Recipe

4 large red peppers

1 cup brown rice, cooked

1 large zucchini, small dice

1 large yellow squash, small dice

1 large onion

1 small container crimini mushrooms, small dice

1 can whole peeled tomatoes, mashed up

1/2 cup chopped baby spinach

2 cloves garlic, grated

1/4 cup chopped parsley

2 tbsp grated parmigiano reggiano cheese

pinch dried oregano

pinch pepperoncino

olive oil

Method

In a skillet over medium heat coat pan with some olive oil.  Saute the zucchini, squash, onion and mushrooms until slightly softened, roughly 5 minutes.  Add grated garlic, spinach, oregano and pepperoncino and some salt & pepper.  Cook for additional 2-3 minutes.

Add tomatoes and bring to a boil.  Reduce to a simmer and cook for about 15-20 minutes.

While the filling is simmering away, carefully cut out the tops of the peppers and remove the seeds and ribs from the inside of the pepper.  It helps to have small hands!  I usually discard the tops, but once or twice I did keep them and put them back on top of the peppers for decoration, like little hats.  Up to you.

Once the filling mixture has cooked for awhile, add all the brown rice and parsley and stir well.  Turn off the heat and add the cheese.  Mix well again.  I’ll tell you, this sauce (minus the rice) would be perfect over some pasta!  Here’s how things should be looking at this point.

PepperRiceMixtureFinalR

Now for the fun part…stuffing!  I love stuffing these guys.  I use a teaspoon for this.  Basically just stuff the filling mixture into each pepper, pressing the filling down into the bottom of the pepper.  Fill them way up to the top.  Just like this…

DoublePeppersFinalR

In the bottom of a baking dish, I put some water and oil (and some tomato sauce if I have some left over) to keep things moist.  Arrange the now stuffed peppers in the baking dish and sprinkle the tops of the peppers with some olive oil.  Bake at 375 degrees for about 45 – 60 minutes, or until the peppers have become slightly wrinkly and soft.  I prefer my peppers to still have a slight bite to them.  Some people like to cook them alot until they are very mushy, again – up to you.  As I said, I like mine with a bite, not too mushy.

Get stuffing people!


Vegetable Stuffed Peppers
 
Print
Author: Feasts And Fotos
Ingredients
  • 4 large red peppers
  • 1 cup brown rice, cooked
  • 1 large zucchini, small dice
  • 1 large yellow squash, small dice
  • 1 large onion
  • 1 small container crimini mushrooms, small dice
  • 1 can whole peeled tomatoes, mashed up
  • ½ cup chopped baby spinach
  • 2 cloves garlic, grated
  • ¼ cup chopped parsley
  • 2 tbsp grated parmigiano reggiano cheese
  • pinch dried oregano
  • pinch pepperoncino
  • olive oil
Method
  1. In a skillet over medium heat coat pan with some olive oil. Saute the zucchini, squash, onion and mushrooms until slightly softened, roughly 5 minutes. Add grated garlic, spinach, oregano and pepperoncino and some salt & pepper. Cook for additional 2-3 minutes.
  2. Add tomatoes and bring to a boil. Reduce to a simmer and cook for about 15-20 minutes.
  3. While the filling is simmering away, carefully cut out the tops of the peppers and remove the seeds and ribs from the inside of the pepper. It helps to have small hands! I usually discard the tops, but once or twice I did keep them and put them back on top of the peppers for decoration, like little hats. Up to you.
  4. Once the filling mixture has cooked for awhile, add all the brown rice and parsley and stir well. Turn off the heat and add the cheese. Mix well again.
  5. Once the filling mixture has cooked for awhile, add all the brown rice and parsley and stir well. Turn off the heat and add the cheese. Mix well again.
  6. Now for the fun part...stuffing! I use a teaspoon for this. Basically just stuff the filling mixture into each pepper, pressing the filling down into the bottom of the pepper. Fill them way up to the top.
  7. In the bottom of a baking dish, I put some water and oil (and some tomato sauce if I have some left over) to keep things moist. Arrange the now stuffed peppers in the baking dish and sprinkle the tops of the peppers with some olive oil. Bake at 375 degrees for about 45 - 60 minutes, or until the peppers have become slightly wrinkly and soft.
3.2.2802

Filed Under: Main Dishes, Sides and Sauces Tagged With: brown rice, dinner, healthy, lunch, red peppers, stuffed, vegetables

  • « Previous Page
  • 1
  • 2
  • 3
  • Next Page »
Hello and welcome to Feasts and Fotos!

Archives

Categories

Copyright © 2025 · Foodie Pro Theme by Shay Bocks · Built on the Genesis Framework · Powered by WordPress