FEASTS AND FOTOS

  • Home
  • About
  • Happenings
  • Contact
You are here: Home / Archives for Main Dishes

Thai Coconut Shrimp and Basil Curry

May 18, 2015 by Susan

ThaiCoconutShrimp

If you like Thai food I strongly urge you to try this recipe.  It is so delicious and you won’t believe how quick and easy it is to make!

When I saw this recipe I knew immediately that I needed make it and I had a very strong feeling that it would be really good.  If nothing else, I think I’m getting pretty good at being able to pick out a recipe right away and gauge that it will be a success.  Granted, there are still times when a recipe ends up being ‘just ok’, but it’s rare that I pick something that turns out awful.

I really, really like Thai food.  Such wonderful, bold flavor combinations, it’s never boring.  In this recipe the Thai curry paste combined with the coconut milk and ginger…so yummy.  Tons of fresh basil and the juice of a lime at the very end really finish this dish nicely and round out the flavors.  Oh, and the sauce?  It’s drinkable.  Seriously, it’s so good.  I’m almost embarrassed to say that we never have much left over when I make this.  If anything, we just have some of the sauce remaining and we love to pour it over plain white rice and eat it like that. Soooo good.

I will warn ahead that this dish is spicy.  It’s not ‘blow your head off’ spicy, but it does have a nice kick to it.  And I found that it’s even spicier the next day, if you are lucky enough to have any leftovers.  The Thai curry paste is what gives it the kick (so resist the urge to add more than this recipe calls for) but the sweet coconut milk balances it very nicely.  I really love that this is made with shrimp. I don’t make shrimp as much as I would like, which is one of the reasons this recipe caught my eye.  I can imagine this would work well substituting the shrimp with chicken, but I haven’t tried it.  The first few times I made this I used fresh shrimp but I have to say that frozen works perfectly.  So much so that it is all we use now.  The only change I sometimes like to make with this recipe is adding sliced baby bok choy.  It works really well.  But don’t fret if you don’t have it, just stick to the recipe as is and you will be thrilled.  I promise.

If you already like Thai food and are looking for a delicious, quick and easy meal to add to your recipe book, you must try this.  If you are interested in trying Thai food for the first time, I think this is a great dish to get started with.

Here’s what you will need to serve 2 very hungry, Thai-food-loving people…

Recipe

1 tbsp vegetable oil

2 cups broccoli florets, trimmed and sliced lengthwise into bite size pieces

1 red bell pepper, thinly sliced and then cut in half lengthwise

2  1/2 tbsp fresh ginger, peeled and minced

2  1/2 cups light coconut milk (comes in a can)

1  1/2 tbsp green curry paste (I use Thai Kitchen brand)

20-22 large shrimp, peeled & deveined (I use 21-25 count/pound)

3/4 cup sliced basil leaves

juice of one lime

3 cups cooked white rice (I use long grain basmati)

salt to taste

** optional addition: 2-3 small heads baby bok choy, each stem/leaf sliced in half lengthwise

Method

Prepare rice according to directions.

In a large sauce pan heat the oil over medium-low heat.  Add the broccoli, red pepper (and bok choy if using).  Add salt and stir.  Cover and cook until the vegetables begin to soften, 2-3 minutes.  Add the ginger and stir immediately and constantly for about 30 seconds.  Add the coconut milk and curry paste. Stir well until all the curry paste has dissolved into the milk.  Bring to a simmer.

Add the shrimp to the pan and cover.  Cook for a few minutes just until the shrimp turn pink and are cooked through.  Turn off heat.

Add the basil and lime juice to the pan and stir well to combine.

Divide the rice among bowls and ladle the shrimp curry on top, with a little extra liquid to soak into the rice.

Recipe slightly adapted from Rachael Ray Magazine


Thai Coconut Shrimp and Basil Curry
 
Print
Author: Feasts And Fotos
Ingredients
  • 1 tbsp vegetable oil
  • 2 cups broccoli florets, trimmed and sliced lengthwise into bite size pieces
  • 1 red bell pepper, thinly sliced and then cut in half lengthwise
  • 2½ tbsp fresh ginger, minced
  • 2½ cups light coconut milk
  • 1½ tbsp green curry paste
  • 20 large shrimp, peeled & deveined (I use 21-25 count/pound)
  • ¾ cup sliced basil leaves
  • juice of one lime
  • 3 cups cooked white rice (I use long grain basmati)
  • salt to taste
  • ** optional addition: 2-3 small heads baby bok choy, sliced in half lengthwise
Method
  1. Prepare rice according to directions.
  2. In a large sauce pan heat the oil over medium low head. Add the broccoli, red pepper (and bok choy if using). Add salt and stir. Cover and cook until the vegetables begin to soften, 2-3 minutes. Add the ginger and stir immediately and constantly for about 30 seconds. Add the coconut milk and curry paste. Stir well until all the curry paste has dissolved into the milk. Bring to a simmer.
  3. Add the shrimp to the pan and cover. Cook for a few minutes just until the shrimp turn pink and are cooked through. Turn off heat.
  4. Add the basil and lime juice to the pan and stir well to combine.
  5. Divide the rice among bowls and ladle the shrimp curry on top, with a little extra liquid to soak into the rice.
3.2.2929

Filed Under: Main Dishes Tagged With: basil, broccoli, coconut, coconut milk, ginger, red pepper, shrimp, Thai, thai curry paste

Crock Pot Mexican Shredded Chicken

March 24, 2015 by Susan

MexicanShreddedChicken2R

My crock pot has been in a box, in my storage room, for years.  More years than I care to admit, really.  My issue with crock pots is this: if I have to pre-cook, or brown, meat prior to putting it into the crock pot then I might as well just cook the meal on the stove top or in the oven.  After all, I’ve already dirtied a pot.  For me, the only way I can get excited about using the crock pot is if there is zero ‘cooking’ prior.

It was this recipe that got me to unearth my crock pot and get on the bandwagon.  No prepping the meat at all beforehand, simply dump all the ingredients into the pot, turn it on and walk away.  It was great!  I absolutely loved having dinner cooking while I was busy doing other things all day long.  I suppose that’s the beauty of using a slow cooker, right?

I made quite a bit of changes to the original recipe from Skinnytaste.  I liked the idea of the recipe, and I did like the original recipe, but for me it was lacking a little something.  A few ideas immediately came to mind the first time I made it, and over the next few times I prepared this meal I perfected each change.  It is now exactly how we like it. The main changes I made are overall more spices, the addition of the poblano pepper and adding the frozen peas and corn at the very end, giving just enough time for them to thaw out.  I like my frozen veggies to still have their bright colors and a bit of a snap to them.  I always serve this dish over white long-grain rice, it really soaks up all the liquid nicely.  But I’m sure it would be perfect with brown rice too.

Other than the flavor, my favorite thing about this meal is the amount of leftovers.  This recipe makes a large amount and holds well in the fridge for at least 3-4 days.  When I make this, we usually eat it again for dinner once during the week, but also several times for lunch.  Sometimes, after I shred the chicken but before I add it back to the pot, I set some dry shredded chicken aside and use it in wraps the following day.  Delicious!

If your crock pot is in storage maybe this recipe will encourage you to dig it out. I really like crock pot cooking now and look forward to trying another recipe soon. Suggestions are welcome!

Here’s what you will need to serve 8-10….

Recipe

4 medium chicken breasts, boneless, skinless

1 large poblano pepper, diced (or one green pepper & one jalapeño, seeds and ribs mostly removed)

2-10 oz cans diced tomatoes with mild green chilies

15 oz can black beans, drained and rinsed

20 oz low sodium chicken stock

1 bunch scallions, chopped and divided in half

1 tsp garlic powder

1 tsp onion powder

1 tsp cumin (plus some more for sprinkling)

1 tsp coriander (plus some more for sprinkling)

1 tsp chili powder (plus some more for sprinkling)

1 tsp cayenne pepper

1 cup frozen corn

1 cup frozen peas

1/2 lime, juiced

1/2 bunch of cilantro

salt & pepper to taste

your favorite rice, cooked

Method

Lay chicken breasts in a shallow baking dish.  Sprinkle both sides with some cumin, coriander, chili powder, salt & pepper.  Set aside.

To the bowl of a crock pot combine chicken stock,  black beans, diced tomatoes, 1/2 the chopped scallions, poblano pepper, garlic & onion powder, cumin, coriander, chili and cayenne.  Stir to combine.  Lay chicken breasts on top of mixture, cover and turn the crock pot on for 6 hours.

Once the crock pot turns off (or just before), remove all the chicken breasts and shred (use 2 forks).  Return all the shredded chicken back to the pot, add in the remaining scallions, frozen corn & peas and most of the cilantro.  Stir to combine.  Put the cover back on and allow to sit for about 15 minutes.  Just before serving add the juice of 1/2 lime, stir and portion into bowls, on top of rice.  Sprinkle with cilantro and serve.

Original recipe: http://www.skinnytaste.com/2009/02/crock-pot-santa-fe-chicken-425-pts.html 


Mexican Shredded Chicken
 
Print
Author: Feasts And Fotos
Ingredients
  • 4 medium chicken breasts, boneless, skinless
  • 1 large poblano pepper, diced (or one green pepper & one jalapeño, seeds and ribs mostly removed)
  • 2-10 oz cans diced tomatoes with mild green chilies
  • 15 oz can black beans, drained and rinsed
  • 20 oz low sodium chicken stock
  • 1 bunch scallions, chopped and divided in half
  • 1 tsp garlic powder
  • 1 tsp onion powder
  • 1 tsp cumin (plus some more for sprinkling)
  • 1 tsp coriander (plus some more for sprinkling)
  • 1 tsp chili powder (plus some more for sprinkling)
  • 1 tsp cayenne pepper
  • 1 cup frozen corn
  • 1 cup frozen peas
  • ½ lime, juiced
  • ½ bunch of cilantro
  • salt & pepper to taste
  • your favorite rice, cooked
Method
  1. Lay chicken breasts in a shallow baking dish. Sprinkle both sides with some cumin, coriander, chili powder, salt & pepper. Set aside.
  2. To the bowl of a crock pot combine black beans, diced tomatoes, ½ the chopped scallions, poblano pepper, garlic & onion powder, cumin, coriander, chili and cayenne. Stir to combine. Lay chicken breasts on top of mixture, cover and turn the crock pot on for 6 hours.
  3. Once the crock pot turns off (or just before), remove all the chicken breasts and shred (use 2 forks). Return all the shredded chicken back to the pot, add in the remaining scallions, frozen corn & peas and most of the cilantro. Stir to combine. Put the cover back on and allow to sit for about 15 minutes. Just before serving add the juice of ½ lime, stir and portion into bowls, on top of rice. Sprinkle with cilantro and serve.
3.2.2929

Filed Under: Main Dishes, Uncategorized Tagged With: black beans, chicken, chili, cumin, dinner, healthy, lunch, mexican, poblano, shredded

Chicken Tenders with Honey Mustard Sauce

January 28, 2015 by Susan

ChickenTenders3R

The big game is this weekend and that means we get to eat things this Sunday that we normally would not.  Right?  Cheesy dips. Sticky, gooey chicken wings. Let’s do it!

Ok, so if you are not willing to let this Sunday be a huge ‘cheat day’ from your regular eating pattern you can make these chicken tenders.  You might think they would be bad for you, but they are not.  There is no egg and flour or frying involved.  Just some buttermilk, breadcrumbs and cheese.  And they are baked! Even though they are not fried, they still are slightly crunchy on the outside and tender and juicy on the inside.

These chicken tenders would make a wonderful appetizer but, truthfully, we often eat these as a meal. The preparation is quick and easy and if you pair it with a cup or bowl of soup (which we do) you will be satisfied.  Depending on the size of the tenders, of course.  Most of the time the tenders are quite large so eating 4-5 each is usually enough.  I love honey mustard sauce for these (a little more honey tasting than mustard), however, feel free to use your favorite sauce.  We sometimes use BBQ sauce.

Although I am not a huge follower of football during the season, I do love watching the Superbowl.  Mostly for the commercials and the half-time entertainment.  This year I don’t think I’m going to go crazy with all the fried food and cheesy goodness. Instead, I am going to make these.  I’ll feel better about things and I won’t have to log in extra time on the elliptical machine.  And that is always a good thing!

Here’s what you will need to make approximately 15 tenders…

Recipe

1-2 packages chicken tenders

buttermilk

1/2 cup panko, mounded

1/2 cup Italian Seasoned Breadcrumbs, mounded

1/3 cup grated Parmigiano-Reggiano cheese

salt & pepper to taste

Honey Mustard Sauce

3 Tbsp honey

2 Tbsp mustard

1/2 tsp mayo

lemon juice (about 10 drops)

salt & pepper to taste

Method

In a medium bowl add the chicken tenders and enough buttermilk to cover all the chicken.  Allow to marinate in the refrigerator for at least one hour, preferably 4-5 hours.

Preheat oven to 500 degrees.

In a flat, rimmed pan add the panko, seasoned breadcrumbs, cheese, salt & pepper.  Mix with your fingers until ingredients are fully incorporated.

Line a large baking sheet with parchment paper.  Spray parchment paper with cooking spray.

Once the chicken is done marinating, remove from refrigerator.  Take one tender at a time, drain off some of the buttermilk and dredge it in the bread crumb mixture.  I use tongs for this and I usually pat down the breadcrumbs on each side.  Lift out of the breadcrumb mixture and gently shake off any excess. Lay on the baking sheet.  Continue with all the tenders.

Once you have all the tenders lined up drizzle a touch of olive oil over each one. Place in the oven for approximately 15-17 minutes total, flipping over when the bottoms are starting to turn golden (after about 8-10 minutes or so).  I usually don’t cook the 2nd side for as long as the first side.

Meanwhile, prepare the honey mustard sauce by simply adding all ingredients to a small bowl and mixing well.  Set aside.

Allow tenders to cool slightly (they will be piping hot!) and serve with the honey mustard sauce for dipping.

Recipe adapted from Giada De Laurentiis


Chicken Tenders with Honey Mustard Sauce
 
Print
Author: Feasts And Fotos
Ingredients
  • 1-2 packages chicken tenders
  • buttermilk
  • ½ cup panko, mounded
  • ½ cup Italian Seasoned Breadcrumbs, mounded
  • ⅓ cup grated Parmigiano-Reggiano cheese
  • salt & pepper to taste
  • Honey Mustard Sauce
  • 3 Tbsp honey
  • 2 Tbsp mustard
  • ½ tsp mayo
  • lemon juice (about 10 drops)
  • salt & pepper to taste
Method
  1. In a medium bowl add the chicken tenders and enough buttermilk to cover all the chicken. Allow to marinate in the refrigerator for at least one hour, preferably 4-5 hours.
  2. Preheat oven to 500 degrees.
  3. In a flat, rimmed pan add the panko, seasoned breadcrumbs, cheese, salt & pepper. Mix with your fingers until ingredients are fully incorporated.
  4. Line a large baking sheet with parchment paper. Spray parchment paper with cooking spray.
  5. Once the chicken is done marinating, remove from refrigerator. Take one tender at a time, drain off some of the buttermilk and dredge it in the bread crumb mixture. I use tongs for this and I usually pat down the breadcrumbs on each side. Lift out of the breadcrumb mixture and gently shake off any excess. Lay on the baking sheet. Continue with all the tenders.
  6. Once you have all the tenders lined up drizzle a touch of olive oil over each one. Place in the oven for approximately 15-17 minutes total, flipping over when the bottoms are starting to turn golden (after about 8-10 minutes or so). I usually don't cook the 2nd side for as long as the first side.
  7. Meanwhile, prepare the honey mustard sauce by simply adding all ingredients to a small bowl and mixing well. Set aside.
3.2.2802

Filed Under: Appetizers, Main Dishes Tagged With: appetizer, baked, breadcrumbs, chicken, dinner, honey, lunch, mustard, panko, sauce, tenders

Mushroom and Leek Pizza

June 11, 2012 by Susan

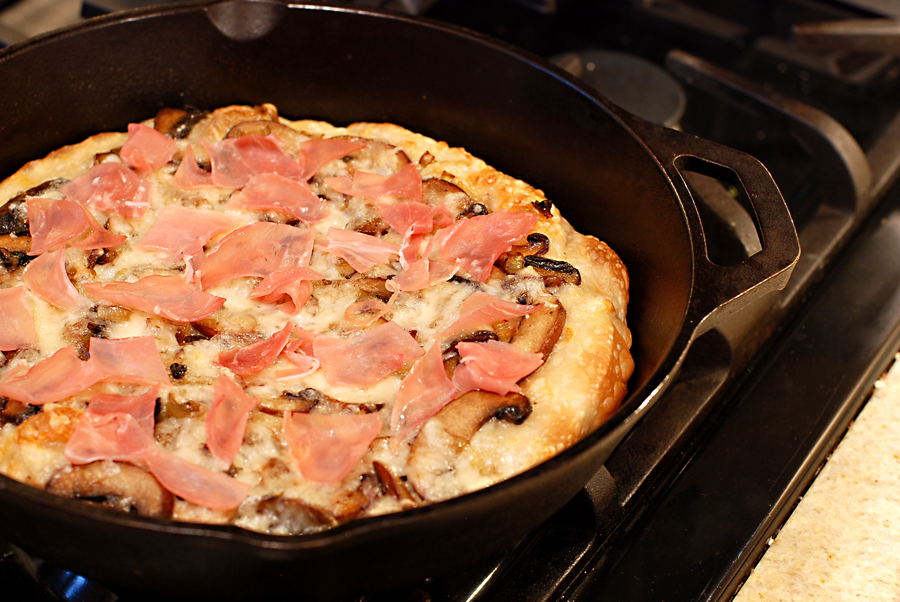
Looks as if I am on a cast iron skillet kick, doesn’t it?  As it turns out this pizza and the cornbread (in my previous post) are the only two things I make in my cast iron skillet.  And to be honest, I would’ve never thought to make either in a cast iron skillet – thank you Martha Stewart for opening my eyes!  This technique for making a pizza is brilliant, you don’t have to deal with pizza stones or anything else, just a skillet.

This pizza is delicious. The mushroom and leek combination is wonderful, the fontina cheese melts beautifully and the prosciutto, which doesn’t even actually cook, takes it over the top with a slightly salty punch.  Heaven.  And you know what else is heaven?  I bought the pizza dough.  I could certainly make it myself, but why would I?  I have an infant that occupies demands 98% of my time and the pizza place around the corner happily sells me the dough they have made to perfection.

This pizza is leagues above any frozen pizza out there and cooks in almost the same amount of time.  Why wouldn’t you make this?

Here’s what you will need to make one small pizza…

Recipe

2 tablespoons unsalted butter

1 large leek, white and pale green parts only, sliced

1 package crimini mushrooms, cleaned and sliced

1 teaspoon extra virgin olive oil

2 cups fontina cheese, grated

3-4 thin slices prosciutto, chopped into 1 inch pieces

1 small pizza dough (I get it drizzled with olive oil)

*10 inch cast iron skillet

Method

Preheat the oven to 500 degrees.

First get started on the leek.  Using the white and pale green parts only, slice the leek down the center lengthwise, then slice crosswise into 1/2 moons.  Place in a deep bowl and rinse under cold water once or twice, running your fingers through the leeks, breaking them apart.  Fill up the bowl with cold water and let the leeks sit for a few minutes.  Any remaining grit will sink to the bottom of the bowl.

Carefully scoop out the leeks, being sure to not disturb the water below.  Lay on a kitchen towel to dry a bit.

While the leeks are sitting in the water, clean and slice your mushrooms.

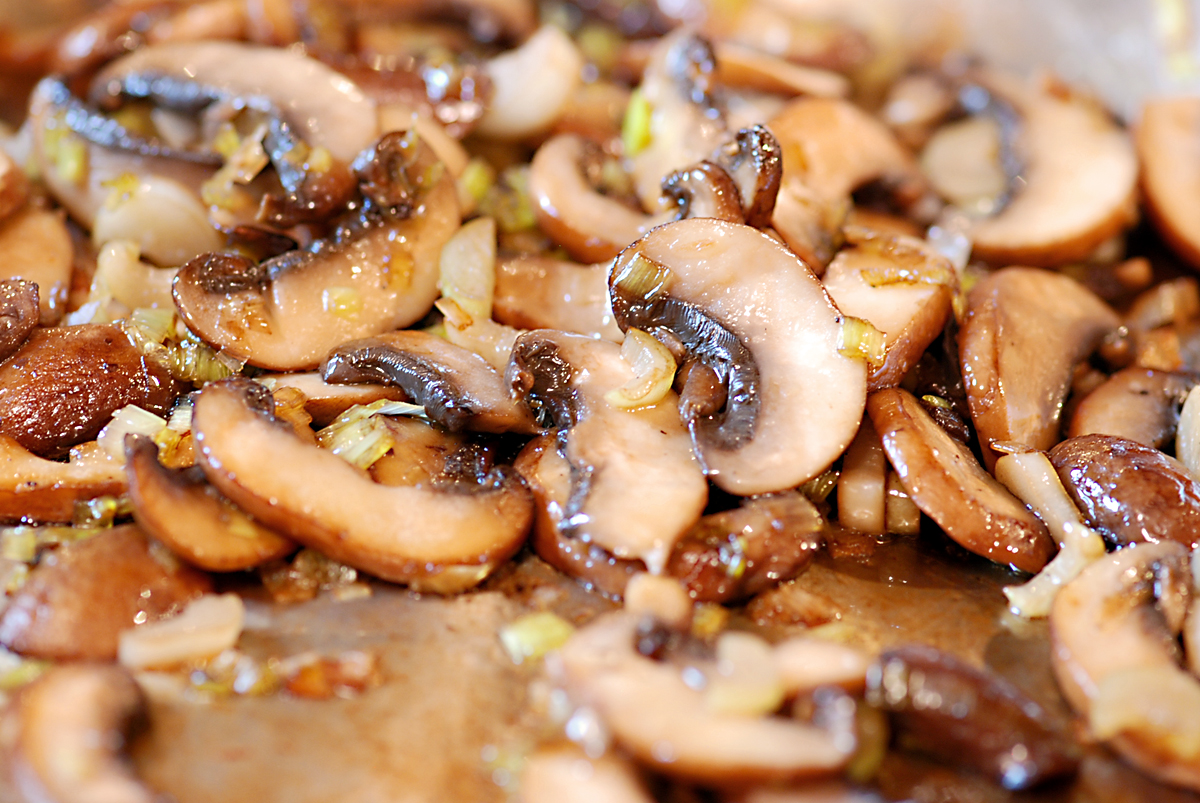
In a medium skillet (not the cast iron skillet) melt 1 tablespoon of butter over medium heat.  Add the leeks and cook until softened, about 4 minutes.  Add sliced mushrooms to the pan as well as the remaining tablespoon of butter.  Saute until the mushrooms soften, 4-5 minutes.  Allow to cool slightly.  While the mushrooms are cooking, shred the fontina cheese.  (It helps to put the cheese in the freezer for about 20 minutes before shredding).
I love mushrooms.


Pour 1 tablespoon of oil in the middle of the cast iron skillet and spread it all around, coating the entire bottom as well as a portion of the sides.  (I use a pastry brush for this).  Lay the pizza dough in the skillet and flatten and stretch out with your fingertips.  The edges of the dough should cover the entire bottom of the skillet.

Turn the flame on to medium under the cast iron skillet.   Lay about 1 cup of fontina cheese on the pizza dough.  Then top the cheese with the mushroom mixture (I usually have some leftover, good for throwing into a frittata or for snacking).  Finally, add the rest of the fontina on top of the mushrooms.  Allow the pizza to cook on the stove top for approximately 4-5 minutes.  You will notice the bottom starting to brown.

Now transfer the skillet into the oven.  Allow to cook for about 10 minutes, being careful not to burn the pizza.  Take the skillet out of the oven and scatter the prosciutto pieces over the top of the pizza.  Slice and serve!

Filed Under: Main Dishes Tagged With: cast iron skillet, fontina cheese, leek, mushroom, pizza, prosciutto

Chicken Madison

December 14, 2011 by Susan

ChickenMadisonR

A few years ago, while my husband and I were planning our wedding, we went out for dinner near the reception hall we had just chosen for our wedding day.  We both ordered the same chicken entrée because it sounded so delicious.  And it was.  We loved it so much that as I was eating it I thought…I’m going to try to recreate this dish at home.  How hard can it be?

Well, here’s the dish.  And I must say, it’s pretty darn close to the original one we had at the restaurant that night – minus the tons of butter I’m sure they put in it.  It has turned out to be one of our favorite meals.  I named this dish after the town the restaurant is in and every time I make it we are reminded of our wedding and all the planning that went into it.

Hopefully by following this recipe you will have extra sauce leftover once you have eaten all the chicken.  Absolutely do not throw that sauce away.  It is utterly spectacular over pasta.

Here’s what you will need to serve 4….

Recipe

6 thin chicken cutlets (they come butterflied in my store, I usually cut them in 1/2 down the center).

whole wheat flour

4 cloves garlic, smashed

2 garlic cloves, minced

1 box crimini mushrooms, cleaned and sliced (not too thin)

1 12 oz bag of frozen artichoke hearts, slightly defrosted, cut in half lengthwise

1 Tbsp tomato paste

1  7 ounce jar of sun dried tomatoes, drained and sliced, 2-3 tbsp of oil reserved

1/2 – 3/4 cup white wine

3/4 – 1 cup chicken stock, low sodium

1 tsp fresh thyme, chopped

1/3 cup fresh parsley, chopped

Salt & Pepper

Olive oil

1 Tbsp butter, optional

Method

Heat a few tablespoons of olive oil in a large skillet over medium heat.  Add 2 smashed garlic cloves, to season the oil.  Season chicken with salt & pepper and coat in the flour, tapping off excess.  Add some of the chicken to oil, being sure not to overcrowd the pan, cooking them until golden brown on each side.  Remove from skillet and transfer to a plate.  Be careful to watch the cloves of garlic and be sure to remove them once they appear to be getting too golden.  You don’t want them to burn.  Repeat with remaining chicken and smashed garlic.

In the same skillet you just cooked all the chicken in add the oil you reserved from the sun dried tomatoes.  Into that oil add the artichoke hearts and cook, stirring occasionally, for 3-4 minutes.  To the artichokes add the sliced mushrooms and cook for 3-4 minutes, or until they start to soften a bit.  Next, add the tomato paste and garlic and stir into the vegetables, cooking for 2-3 minutes.  At this point I usually add some salt and pepper.  Next comes the liquids…add the wine first, allowing it to simmer for a few minutes.  Finally add the chicken stock and the fresh thyme.  Allow liquids to simmer together for 4-5 minutes.  To thicken this liquid mixture a bit, add approximately 1-2 tablespoons of the leftover whole wheat flour to the skillet, whisking to mix.

Add the chicken cutlets back into the skillet, nestling them all in under the veggies, gently, as best as you can.  Ideally you want most of the chicken to be submerged into the liquid.  It is ok if the tops of a few pieces are not submerged.  If you feel you need a bit more liquid, add some more chicken stock.  Put a cover on the skillet, lower heat to low and gently simmer for 15 – 20 minutes, or until the chicken is cooked through.  Once cooked, turn off heat and add the parsley.  If you so choose, you can also add the butter, just to finish the sauce a bit.  A little tablespoon of butter won’t hurt!

I always serve this over a creamy white bean puree (recipe coming soon!).  However, it would be equally as delicious served over mashed potatoes or white rice.

Chicken Madison
 
Print
Author: Feasts And Fotos
Ingredients
  • 6 thin chicken cutlets (they come butterflied in my store, I usually cut them in ½ down the center).
  • whole wheat flour
  • 4 cloves garlic, smashed
  • 2 garlic cloves, minced
  • 1 box crimini mushrooms, cleaned and sliced (not too thin)
  • 1 12 oz bag of frozen artichoke hearts, slightly defrosted, cut in half lengthwise
  • 1 Tbsp tomato paste
  • 1  7 ounce jar of sun dried tomatoes, drained and sliced, 2-3 tbsp of oil reserved
  • ½ - ¾ cup white wine
  • ¾ - 1 cup chicken stock, low sodium
  • 1 tsp fresh thyme, chopped
  • ⅓ cup fresh parsley, chopped
  • Salt & Pepper
  • Olive oil
  • 1 Tbsp butter, optional
Method
  1. Heat a few tablespoons of olive oil in a large skillet over medium heat.  Add 2 smashed garlic cloves, to season the oil.  Season chicken with salt & pepper and coat in the flour, tapping off excess.  Add some of the chicken to oil, being sure not to overcrowd the pan, cooking them until golden brown on each side.  Remove from skillet and transfer to a plate.  Be careful to watch the cloves of garlic and be sure to remove them once they appear to be getting too golden.  You don't want them to burn.  Repeat with remaining chicken and smashed garlic.
  2. In the same skillet you just cooked all the chicken in add the oil you reserved from the sun dried tomatoes.  Into that oil add the artichoke hearts and cook, stirring occasionally, for 3-4 minutes.  To the artichokes add the sliced mushrooms and cook for 3-4 minutes, or until they start to soften a bit.  Next, add the tomato paste and garlic and stir into the vegetables, cooking for 2-3 minutes.  At this point I usually add some salt and pepper.  Next comes the liquids...add the wine first, allowing it to simmer for a few minutes.  Finally add the chicken stock and the fresh thyme.  Allow liquids to simmer together for 4-5 minutes.  To thicken this liquid mixture a bit, add approximately 1-2 tablespoons of the leftover whole wheat flour to the skillet, whisking to mix.
  3. Add the chicken cutlets back into the skillet, nestling them all in under the veggies, gently, as best as you can.  Ideally you want most of the chicken to be submerged into the liquid.  It is ok if the tops of a few pieces are not submerged.  If you feel you need a bit more liquid, add some more chicken stock.  Put a cover on the skillet, lower heat to low and gently simmer for 15 - 20 minutes, or until the chicken is cooked through.  Once cooked, turn off heat and add the parsley.  If you so choose, you can also add the butter, just to finish the sauce a bit.
3.2.2802

Filed Under: Main Dishes Tagged With: artichoke hearts, chicken, dinner, mushrooms, sun-dried tomatoes

Curry Yogurt Chicken

July 29, 2011 by Susan


Every time I make this dish the two of us can’t stop exclaiming how much we love it.  I now try to make it once a week, regardless of what season it is or what the temperature is outside.  Hot out?  Don’t care, still going to make it.  We love it that much.

As my husband was quick to point out to me, this dish has just about everything anyone could want in a meal.  The chicken and rice help to fill you up, the curry, ginger and chili give it just the right amount of tingle (be sure to de-seed the chili pepper if you don’t want the fire!) and the yogurt gives the sauce just the right amount of velvety goodness.  Yet, it’s not too heavy.

Another thing I love about this meal…you can eat it in a bowl sitting in front of the TV.  Casual and comforting.  And the leftovers – amazing.

Here’s what you will need to serve 4-5 people…

Recipe

1/4 cup canola oil

2 pounds thin chicken cutlets, cubed

whole wheat flour, for dusting

2 tbsp finely chopped fresh ginger

1.5 tbsp curry powder

1 large garlic clove, minced

1 red chili pepper, sliced thin (seeds and ribs removed if you don’t want it spicy)

1 large red bell pepper, cored, seeded and cut into large dice

6-7 large vine ripened tomatoes, cut into large chunks

1/2 cup frozen corn kernels

1/3 cup frozen peas

7 oz container Greek yogurt, plain

1/2 – 2/3 cup water

1/3 cup chopped cilantro leaves, for garnish

salt & pepper

basmati rice

Method

In a large, deep skillet heat the oil.   Season the chicken cubes with salt and pepper then dust lightly with flour, coating all sides.  Tap off the excess flour and add chicken to hot oil in batches (don’t overload the skillet).  Cook chicken until lightly browned.  Transfer chicken to a plate.

In the same skillet add the ginger, red pepper, chile pepper and garlic and cook, stirring occasionally, until peppers are slightly softened, about 2 minutes.  Add the curry powder and cook for one minute longer.  Add the chopped tomatoes, corn, peas and water.  Bring to a soft boil.  Next add most of the yogurt.  Stir until smooth.

Add the chicken and any juices to the skillet.  Bring to a boil, reduce heat to low, cover and simmer for approximately 20 – 25 minutes stirring occasionally.  Turn off heat, add the remaining yogurt, stir until smooth and sprinkle with cilantro.  Serve over basmati rice.

Recipe adapted from Food & Wine Magazine

Curry Yogurt Chicken
 
Print
Author: Feasts And Fotos
Ingredients
  • ¼ cup canola oil
  • 2 pounds thin chicken cutlets, cubed
  • whole wheat flour, for dusting
  • 2 tbsp finely chopped fresh ginger
  • 1.5 tbsp curry powder
  • 1 large garlic clove, minced
  • 1 red chili pepper, sliced thin (seeds and ribs removed if you don't want it spicy)
  • 1 large red bell pepper, cored, seeded and cut into large dice
  • 6-7 large vine ripened tomatoes, cut into large chunks
  • ½ cup frozen corn kernels
  • ⅓ cup frozen peas
  • 7 oz container Greek yogurt, plain
  • ½ - ⅔ cup water
  • ⅓ cup chopped cilantro leaves, for garnish
  • salt & pepper
  • basmati rice
Method
  1. In a large, deep skillet heat the oil.   Season the chicken cubes with salt and pepper then dust lightly with flour, coating all sides.  Tap off the excess flour and add chicken to hot oil in batches (don't overload the skillet).  Cook chicken until lightly browned.  Transfer chicken to a plate.
  2. In the same skillet add the ginger, red pepper, chile pepper and garlic and cook, stirring occasionally, until peppers are slightly softened, about 2 minutes.  Add the curry powder and cook for one minute longer.  Add the chopped tomatoes, corn, peas and water.  Bring to a soft boil.  Next add most of the yogurt.  Stir until smooth.
  3. Add the chicken and any juices to the skillet.  Bring to a boil, reduce heat to low, cover and simmer for approximately 20 - 25 minutes stirring occasionally.  Turn off heat, add the remaining yogurt, stir until smooth and sprinkle with cilantro.  Serve over basmati rice.
3.2.2802

Filed Under: Main Dishes Tagged With: chicken, curry, dinner, lunch, yogurt

Chicken and Orzo Frittata

July 13, 2011 by Susan


I am finally back in the kitchen!  Let me just say that morning sickness is no joke.  Or shall I say all day sickness.  Yes, that’s more accurate.  All.  Day.  Sickness.

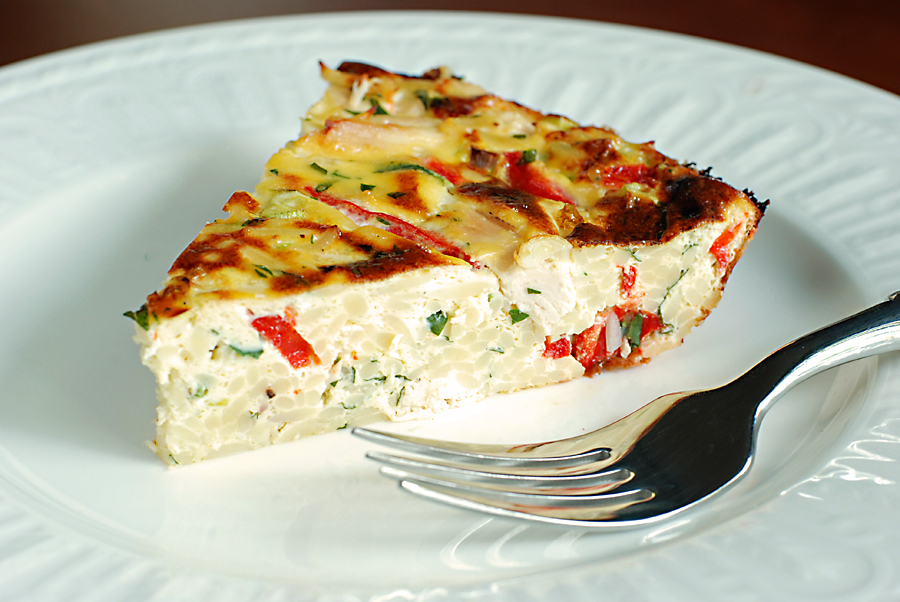
But that phase seems to be mostly over and I can now stand up long enough to prepare some food!  Yay!  Since I took a few months off I decided to ease my way back into the kitchen by preparing some yummy things that could be eaten any time of day, since I now eat all day long.  This frittata is perfect, it can be eaten for breakfast, lunch, a light dinner with a side salad, a snack, heated or at room temperature.  And it’s a very substantial frittata with the inclusion of chicken and pasta.  It is filling and satisfying…and delicious.

Here’s what you need to make one frittata…


Recipe

3/4 cup orzo pasta

6 eggs

1/3 cup whole milk ricotta

1/4 cup creme fraiche (optional)

2 cooked chicken breasts, cubed (about 2 cups)

4 scallions, chopped

1/4 cup chopped Italian flat-leaf parsley

1/3 cup (heaping) diced roasted red bell peppers

1 teaspoon salt

1/4 teaspoon freshly ground black pepper


Method

Preheat the oven to 375 degrees F.

Bring a small pot of salted water to a boil over high heat. Add the orzo and cook until tender but still firm to the bite, stirring occasionally, about 8 – 10 minutes. Drain pasta.

In a large bowl combine the eggs, ricotta, and creme fraiche (if using) and stir until the eggs are beaten and the ingredients are combined. Add the cooked orzo, chicken, scallions, parsley, red bell peppers, salt, and pepper. Stir to combine.

Pour the mixture into a 1 1/2-quart baking dish. Bake for 25 – 30 minutes or until firm to the touch and the center is no longer soft. Turn on the broiler. Place the pan under the broiler until golden on top, about 5 minutes. It is best to not leave the stove while doing this, things have a way of burning quickly under the broiler.  Remove from the oven and let set for 5-10 minutes.  Cut into wedges and serve.

Recipe courtesy Giada DeLaurentiis

Chicken and Orzo Frittata
 
Print
Author: Feasts And Fotos
Ingredients
  • ¾ cup orzo pasta
  • 6 eggs
  • ⅓ cup whole milk ricotta
  • ¼ cup creme fraiche (optional)
  • 2 cooked chicken breasts, cubed (about 2 cups)
  • 4 scallions, chopped
  • ¼ cup chopped Italian flat-leaf parsley
  • ⅓ cup (heaping) diced roasted red bell peppers
  • 1 teaspoon salt
  • ¼ teaspoon freshly ground black pepper
Method
  1. Preheat the oven to 375 degrees F.
  2. Bring a small pot of salted water to a boil over high heat. Add the orzo and cook until tender but still firm to the bite, stirring occasionally, about 8 - 10 minutes. Drain pasta.
  3. In a large bowl combine the eggs, ricotta, and creme fraiche (if using) and stir until the eggs are beaten and the ingredients are combined. Add the cooked orzo, chicken, scallions, parsley, red bell peppers, salt, and pepper. Stir to combine.
  4. Pour the mixture into a 1½-quart baking dish. Bake for 25 - 30 minutes or until firm to the touch and the center is no longer soft. Turn on the broiler. Place the pan under the broiler until golden on top, about 5 minutes. It is best to not leave the stove while doing this, things have a way of burning quickly under the broiler. Remove from the oven and let set for 5-10 minutes. Cut into wedges and serve.
3.2.2802

Filed Under: Breakfast, Main Dishes, Pasta Tagged With: breakfast, chicken, frittata, light dinner, lunch, orzo

Chicken Korma

December 1, 2009 by Susan

Chicken KormaR

Love it or hate it.  When it comes to Indian food I find that people are in one of those two categories.  Rarely is someone on the fence.  I happen to love it.  I wouldn’t say I have it often, but I do really enjoy it.  Sometimes I even crave it.

For years I’ve wanted to try making an Indian dish at home.  A whole dish.  Not just a side dish like my spinach and chick pea curry.  Not sure what the hold up was, but the wait is now over!  I tried my first Indian dish the other night and we absolutely loved it!!  I get so happy when a new meal turns out spectacular.

I adapted this recipe from Jamie Oliver.  Those Brits sure know their Indian food so I thought I’d give this one a spin.  The chick peas, cilantro and almonds give this Chicken Korma so much flavor and great texture.  And the coconut milk.  Oh the coconut milk.  It really brings the entire dish together, giving that silky, creamy texture.

Surprisingly, this entire meal took very little time.  Everything takes place in one skillet so there is not alot of cleanup, and who doesn’t love that?!

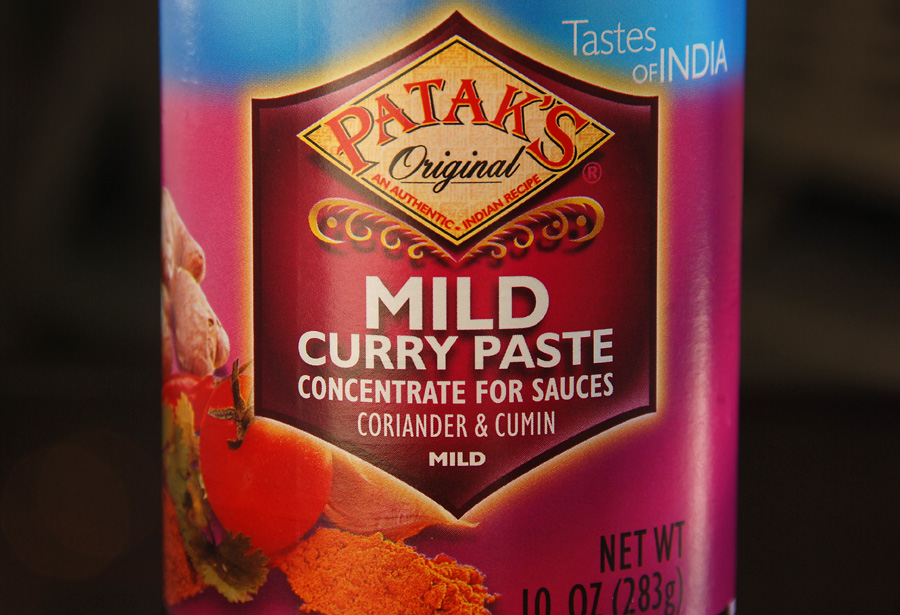
If you haven’t tried cooking any type of Indian dish before, you will have to purchase a few new ingredients from the store.  Don’t let that dissuade you from giving this a try.  The ingriedients are rather common and should be easily found.  I’m pretty sure everyone has seen or used coconut milk before.  The other new ingredient was the mild curry paste.  This is the one I used…

I will, without a doubt, continue to make this Chicken Korma recipe.  Sparingly, though.  This is not a low fat dish, just look at the fat content in the coconut milk and you might fall off your chair.  Everything in moderation.

So…love it or hate it…which category are you in?

Here’s what you will need to serve 4-5 people….

Recipe

1 3/4 pounds chicken breasts, cut into large dice

2 medium onions, chopped

1 green chile, most seeds and ribs removed, minced

2″ piece of ginger, peeled and minced

1/2 cup cilantro, chopped

15 oz can chick peas, drained and rinsed

1 tbsp vegetable oil

1 tbsp butter

1/2 cup mild curry paste

14 oz can coconut milk

7 oz water

1/4 cup sliced almonds

basmati rice

Method

Prepare basmati rice according to package.

Meanwhile,, heat 1 tablespoon butter and 1 tablespoon oil over medium heat in a large skillet.  Add onions, chile and ginger.  Saute until onions are translucent, roughly 8-10 minutes.  Add the chopped cilantro and stir.  Add chicken to the skillet and cook for a few minutes, turning the pieces over to allow both sides to lightly brown.  After about 4 minutes add the curry paste, coconut milk, chick peas and half the sliced almonds.  Fill up half of the empty can of coconut milk with water and add to the skillet.  Stir to combine all ingredients.  Bring to a boil.  Reduce heat and simmer for approximately 30 minutes.  Add a touch more water if necessary.

Serve over basmati rice.


Chicken Korma
 
Print
Author: Feasts And Fotos
Ingredients
  • 1¾ pounds chicken breasts, cut into large dice
  • 2 medium onions, chopped
  • 1 green chile, most seeds and ribs removed, minced
  • 2" piece of ginger, peeled and minced
  • ½ cup cilantro, chopped
  • 15 oz can chick peas, drained and rinsed
  • 1 tbsp vegetable oil
  • 1 tbsp butter
  • ½ cup mild curry paste
  • 14 oz can coconut milk
  • 7 oz water
  • ¼ cup sliced almonds
  • basmati rice
Method
  1. Prepare basmati rice according to package.
  2. Meanwhile,, heat 1 tablespoon butter and 1 tablespoon oil over medium heat in a large skillet.  Add onions, chile and ginger.  Saute until onions are translucent, roughly 8-10 minutes.  Add the chopped cilantro and stir.  Add chicken to the skillet and cook for a few minutes, turning the pieces over to allow both sides to lightly brown.  After about 4 minutes add the curry paste, coconut milk, chick peas and half the sliced almonds.  Fill up half of the empty can of coconut milk with water and add to the skillet.  Stir to combine all ingredients.  Bring to a boil.  Reduce heat and simmer for approximately 30 minutes.  Add a touch more water if necessary.
  3. Serve over basmati rice.
3.2.2802

Filed Under: Main Dishes Tagged With: basmati rice, chicken korma, coconut milk, indian

Taco Lettuce Cups

November 16, 2009 by Susan

Taco2

We’ve been trying to cut back on our carb intake lately (brief stint on South Beach).  Just to be completely clear, it has not been fun.  Not fun at all.  I really like carbs!!   Eliminating them from meals is….difficult.  Take something as simple as a taco.  Can’t have the taco.  Now what?!  Lettuce leaves have never played such an important role in cooking.

I did some searching around on the web for carb free meals and phase one South Beach meals.  I came across some interesting ideas.  One of which was this taco, using lettuce as a vessel to hold the taco filling.  Genius.  I love using Boston lettuce for this, the leaves act as perfect little cups.  I serve the tacos with salsa and guacamole.  You can certainly use any toppings you like!

I have to say, I really like this meal.  Even in the lettuce cup!  But I’ll tell you what I love most… the leftovers!  (Yes, again with the leftovers.)  I use the taco filling in an omelette for breakfast.  Super genius.  It’s SO delicious.  I spread guacamole over the top and I swear it’s almost as if I’m eating a burrito, but in an egg!

So, if you are trying to cut back (or cut out) carbs give this recipe a try and be sure to make an omelette with the leftovers, if there are any.

Here’s what you will need to serve 4 people…

Recipe

2 pounds ground pork (or turkey, or sirloin)

1 medium onion, chopped

2 cloves garlic, minced

1 large jalapeno, minced very fine

2-3 large plum tomatoes, diced

1/4 tsp red pepper flakes

1-2 tbsp chili powder (start off with one and add to suit your taste)

1.5 tsp ground cumin

1.5 tsp ground coriander

1/4 tsp cayenne

1/4 tsp paprika

1/3 cup (plus 2 tbsp) fresh cilantro, chopped

1-2 tbsp lime juice

Boston lettuce (one head)

Method

In a large skillet saute the onion and red pepper flakes in some olive oil for about 3 minutes.  Add jalapeno and diced tomatoes, saute for another 3 minutes.  Slide the onion mixture to the side of the skillet and add the chop meat, breaking up the meat.  If you are using sirloin you will probably need to drain out some of the fat in the skillet.  Using turkey and/or lean pork doesn’t yield as much fat.

To the meat mixture add the fresh cilantro, cumin, coriander, cayenne and paprika.  Mix around and cook until slightly browned and cooked through.  Once cooked, turn off flame and add remaining 2 tbsp of fresh cilantro and lime juice.

Meanwhile, remove any outer/damaged leaves from the head of lettuce and discard.  Carefully break inner leaves away from the head and rinse and pat dry.  Personally, I prefer using the inner leaves that are smaller, they are more sturdy and therefore much less messy.

Arrange lettuce cups on a platter and fill with taco mixture.  Give a good dollop of salsa and guacamole to each one and serve.

My inspiration for this meal came from Kayln’s Kitchen http://kalynskitchen.blogspot.com/2009/04/turkey-lettuce-wrap-tacos-with-chiles.html


Taco Lettuce Cups
 
Print
Author: Feasts And Fotos
Ingredients
  • 2 pounds ground pork (or turkey, or sirloin)
  • 1 medium onion, chopped
  • 2 cloves garlic, minced
  • 1 large jalapeno, minced very fine
  • 2-3 large plum tomatoes, diced
  • ¼ tsp red pepper flakes
  • 1-2 tbsp chili powder (start off with one and add to suit your taste)
  • 1.5 tsp ground cumin
  • 1.5 tsp ground coriander
  • ¼ tsp cayenne
  • ¼ tsp paprika
  • ⅓ cup (plus 2 tbsp) fresh cilantro, chopped
  • 1-2 tbsp lime juice
  • Boston lettuce (one head)
Method
  1. In a large skillet saute the onion and red pepper flakes in some olive oil for about 3 minutes.  Add jalapeno and diced tomatoes, saute for another 3 minutes.  Slide the onion mixture to the side of the skillet and add the chop meat, breaking up the meat.  If you are using sirloin you will probably need to drain out some of the fat in the skillet.  Using turkey and/or lean pork doesn't yield as much fat.
  2. To the meat mixture add the fresh cilantro, cumin, coriander, cayenne and paprika.  Mix around and cook until slightly browned and cooked through.  Once cooked, turn off flame and add remaining 2 tbsp of fresh cilantro and lime juice.
  3. Meanwhile, remove any outer/damaged leaves from the head of lettuce and discard.  Carefully break inner leaves away from the head and rinse and pat dry.  Personally, I prefer using the inner leaves that are smaller, they are more sturdy and therefore much less messy.
  4. Arrange lettuce cups on a platter and fill with taco mixture.  Give a good dollop of salsa and guacamole to each one and serve.
3.2.2802

Filed Under: Main Dishes Tagged With: lettuce cups, mexican, no carbs, south beach, taco

Chick Pea Salad With Olives

October 20, 2009 by Susan

ChickPeaSalad2RedBowlR

I just love when a side dish can double as a main dish!  This chick pea salad with olives is yummy and filling, as well as being incredibly healthy for you.  I have taken what could’ve been an ordinary chick pea salad and bumped it up with healthy ingredients such as broccoli and sun dried tomatoes, making this dish interesting and substantial.  All of these flavors blend wonderfully together.

You can certainly used dried beans for this recipe and soak them overnight and then cook them for an hour….but I just didn’t have the time.  You can also substitute different beans in this dish, but I really love chick peas.  I think their texture in this dish is perfection.

This salad holds up great in the fridge for a few days.  Add a sprinkle of olive oil before each subsequent serving to freshen it up and add that mouth-watering shine.

Here’s what you will need to serve 6-8 as a side dish…

Recipe

2 cans chick peas, drained & rinsed

4 cloves garlic, minced

1/4 cup Kalamata olives, pitted and coarsely chopped

1/4 cup green olives, pitted and coarsely chopped

1/4 cup sun dried tomatoes, chopped (can be packed in oil)

1/3 cup chopped scallions, white and light green part

steamed broccoli, 2 large florets (not heads), cut up into very small pieces

1/4 cup red wine vinegar

1/3 cup, plus 1 tbsp  extra virgin olive oil

1 tbsp fresh mint, minced

1.5 tbsp fresh basil, minced

1 tsp fresh thyme, minced

1 tsp fresh rosemary, minced

1 tsp fresh oregano, minced (can use dried)

Salt & Pepper to taste

Method 

Rinse and drain chick peas and place in a large bowl.  Add olives, scallions, sun dried tomatoes and broccoli, mix well.  In a small bowl whisk together red wine vinegar, olive oil and all the herbs.  Pour over chick peas and mix until incorporated.  If needed, add a touch more olive oil.  Mixture should be coated with the dressing, not soaked.  Allow to sit for 30 minutes to let the flavors blend.  Serve at room temperature.


Chick Pea Salad With Olives
 
Print
Author: Feasts And Fotos
Ingredients
  • 2 cans chick peas, drained & rinsed
  • 4 cloves garlic, minced
  • ¼ cup Kalamata olives, pitted and coarsely chopped
  • ¼ cup green olives, pitted and coarsely chopped
  • ¼ cup sun dried tomatoes, chopped (can be packed in oil)
  • ⅓ cup chopped scallions, white and light green part
  • steamed broccoli, 2 large florets (not heads), cut up into very small pieces
  • ¼ cup red wine vinegar
  • ⅓ cup, plus 1 tbsp  extra virgin olive oil
  • 1 tbsp fresh mint, minced
  • 1.5 tbsp fresh basil, minced
  • 1 tsp fresh thyme, minced
  • 1 tsp fresh rosemary, minced
  • 1 tsp fresh oregano, minced (can use dried)
  • Salt & Pepper to taste
Method
  1. Rinse and drain chick peas and place in a large bowl.  Add olives, scallions, sun dried tomatoes and broccoli, mix well.  In a small bowl whisk together red wine vinegar, olive oil and all the herbs.  Pour over chick peas and mix until incorporated.  If needed, add a touch more olive oil.  Mixture should be coated with the dressing, not soaked.  Allow to sit for 30 minutes to let the flavors blend.  Serve at room temperature.
3.2.2802

Filed Under: Main Dishes, Sides and Sauces Tagged With: chick pea, lunch, olives, salad, Sides and Sauces, vegetarian

  • 1
  • 2
  • 3
  • Next Page »
Hello and welcome to Feasts and Fotos!

Archives

Categories

Copyright © 2025 · Foodie Pro Theme by Shay Bocks · Built on the Genesis Framework · Powered by WordPress