FEASTS AND FOTOS

  • Home
  • About
  • Happenings
  • Contact
You are here: Home / Archives for Breakfast

Blueberry Crumb Cake

July 7, 2010 by Susan

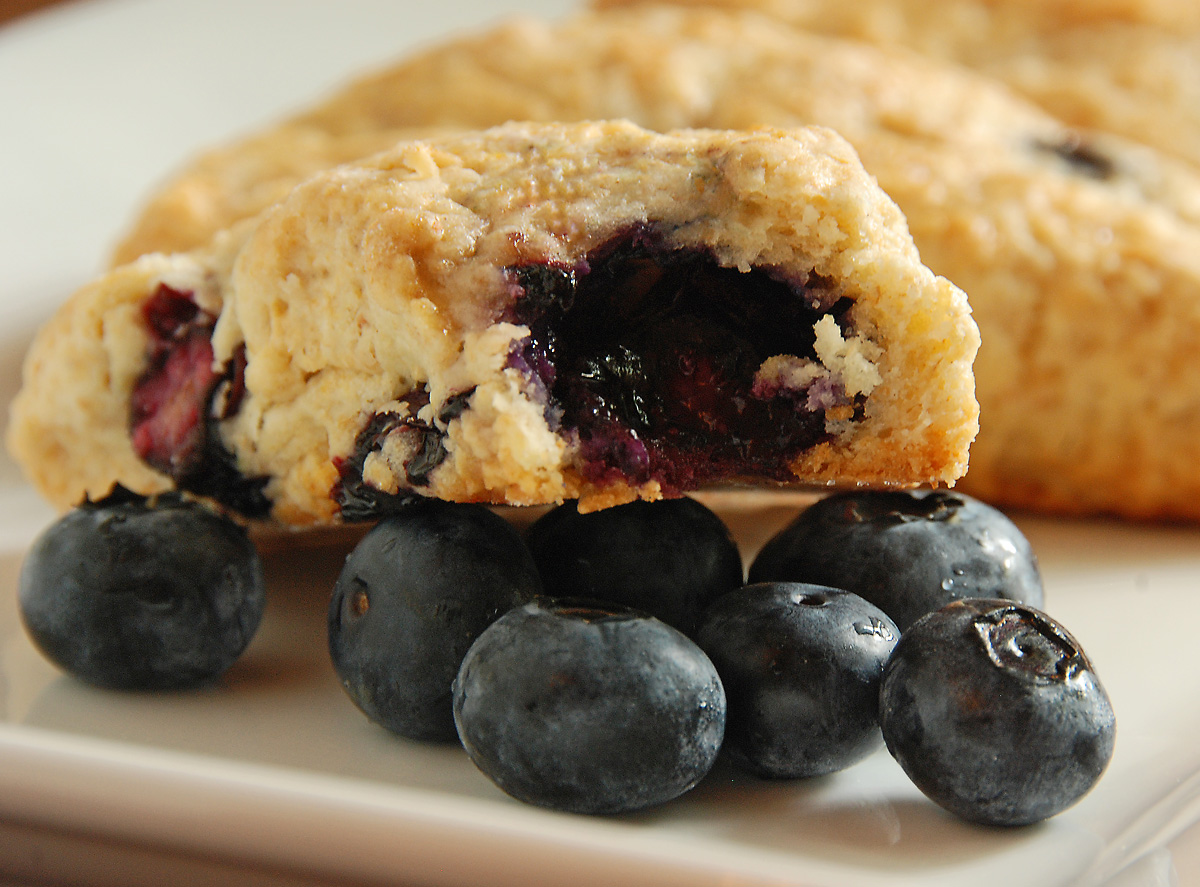
During the summer months, when berries are in season, I try to prepare desserts that showcase the delicious, ripe fruit.  There will be plenty of time to make a chocolate cake in the winter!  I usually love a fruit crisp but wanted to try something different, maybe even unexpected.  And a crumb cake is just that – I hardly see them prepared homemade.  Fruit tarts and apple pies are the usual suspects.  Once I tell people that I’ve prepared a blueberry crumb cake they reply…”crumb cake?”

And what a surprise it is….it’s absolutely delicious!  Everyone that I’ve made this for over the past few years loves it.  The cake is light and moist, studded with tender blueberries.  The crumb topping is a wonderful contrast to the cake it sits upon,  crunchy and nutty and most importantly not too sweet.  Who doesn’t love a crumb topping?!

Needless to say, this “dessert” makes a wonderful breakfast treat paired with a big cup of coffee or tea.  The only problem is making sure there are leftovers!

Here’s what you will need to make one cake that serves approximately 6-8 people…

Recipe

Topping

5 tbsp unsalted butter, room temperature

1/4 cup sugar

1/3 cup light brown sugar (packed)

1/3 cup all-purpose flour

1/4 tsp salt

1/2 cup chopped walnuts

Cake

1 pint blueberries, fresh

2 cups plus 2 tsp all-purpose flour

2 tsp baking powder

1/2 tsp baking soda

1/4 tsp salt

1/4 tsp cinnamon

1/8 tsp grated  nutmeg

2/3 cup sugar

grated zest of 1/2 lemon

6 tbsp unsalted butter, room temperature

2 large eggs, room temperature

1 tsp vanilla extract

1/2 cup buttermilk

Method

Preheat the oven to 350 degrees and butter an 8-inch square pan.

First step is to make the delicious crumb topping.  Basically, put all the ingredients (except the nuts) in a food processor and pulse just until the mixture forms clumps.  Scrape the topping into a bowl and stir in the nuts.  Either use right away or store in the fridge with a piece of plastic wrap pressed right onto the surface of the mixture.

Now for the cake…in a small bowl toss the blueberries with 2 tsp of flour to coat and set aside.  In a medium bowl, whisk together the remaining 2 cups flour, baking powder, baking soda, salt, cinnamon and nutmeg.

In the bowl of a stand mixer rub the sugar and zest together with your fingertips until the sugar is moist.  Add the butter and beat the butter and sugar mixture at medium speed until light, about 2-3 minutes.   Add the eggs, one by one, beating for 1 minute after each addition, then beat in the vanilla extract.

Reduce the mixer to low and add the flour mixture and the buttermilk alternately, starting with the flour.  You will add the flour in 3 parts and the buttermilk twice. The batter will be thick and creamy.  With a rubber spatula gently mix in the berries.  You don’t want them to burst.

Pour the batter into the buttered pan and smooth the top with a  spatula.  Scatter the crumb topping onto the batter, breaking it apart with your fingers.  Once the batter is mostly covered with the crumb topping press down on the topping ever so slightly.

Bake for 65-75 minutes until the crumbs are golden and a tooth pick inserted into the middle of the cake comes out mostly clean.  Transfer the cake to a rack and cool.

Recipe courtesy of Dorie Greenspan


Blueberry Crumb Cake
 
Print
Author: Feasts And Fotos
Ingredients
  • Topping
  • 5 tbsp unsalted butter, room temperature
  • ¼ cup sugar
  • ⅓ cup light brown sugar (packed)
  • ⅓ cup all-purpose flour
  • ¼ tsp salt
  • ½ cup chopped walnuts
  • Cake
  • 1 pint blueberries, fresh
  • 2 cups plus 2 tsp all-purpose flour
  • 2 tsp baking powder
  • ½ tsp baking soda
  • ¼ tsp salt
  • ¼ tsp cinnamon
  • ⅛ tsp grated nutmeg
  • ⅔ cup sugar
  • grated zest of ½ lemon
  • 6 tbsp unsalted butter, room temperature
  • 2 large eggs, room temperature
  • 1 tsp vanilla extract
  • ½ cup buttermilk
Method
  1. Preheat the oven to 350 degrees and butter an 8-inch square pan.
  2. First step is to make the delicious crumb topping. Basically, put all the ingredients (except the nuts) in a food processor and pulse just until the mixture forms clumps. Scrape the topping into a bowl and stir in the nuts. Either use right away or store in the fridge with a piece of plastic wrap pressed right onto the surface of the mixture.
  3. Now for the cake...in a small bowl toss the blueberries with 2 tsp of flour to coat and set aside. In a medium bowl, whisk together the remaining 2 cups flour, baking powder, baking soda, salt, cinnamon and nutmeg.
  4. In the bowl of a stand mixer rub the sugar and zest together with your fingertips until the sugar is moist. Add the butter and beat the butter and sugar mixture at medium speed until light, about 2-3 minutes. Add the eggs, one by one, beating for 1 minute after each addition, then beat in the vanilla extract.
  5. Reduce the mixer to low and add the flour mixture and the buttermilk alternately, starting with the flour. You will add the flour in 3 parts and the buttermilk twice. The batter will be thick and creamy. With a rubber spatula gently mix in the berries. You don't want them to burst.
  6. Pour the batter into the buttered pan and smooth the top with a spatula. Scatter the crumb topping onto the batter, breaking it apart with your fingers. Once the batter is mostly covered with the crumb topping press down on the topping ever so slightly.
3.2.2802

Filed Under: Breakfast, Sweets Tagged With: blueberry, breakfast, crumb cake, dessert

Blueberry Buttermilk Scones

June 23, 2009 by Susan

BlueberrySconeBerries

Dear lord these are delicious.

If I ever happen to be in a bakery (I try to avoid them due to my occassional lack of self control) I rarely ever choose scones.  I think the few times in my life that I’ve ever even eaten a scone I remember it to be very crumbly and dry.  Sort of like a brick.  Who would pay money for these things??  As far as I was concerned, I would rather have a muffin or croissant any day.

Then along comes Martha Stewart and her blueberry buttermilk scones.  I can’t say enough about these things.  They are spectacular!   So this is what a scone is supposed to taste like!   Ah ha!

The aroma while baking these is intoxicating.  The end product was slightly crumbly on the outside, soft and tender on the inside.  And that burst of blueberries adds a wonderful natural sweetness.  I love blueberries, they are sweet and delicious and are perfect to snack on.  Perfect size to just pop into your mouth.  It’s just an added bonus that they are very healthy and full of antioxidants.

After preparing the dough, I cut the scones a bit smaller (more narrow) than normal,  figuring it would be better on my waistline to eat smaller portions.  What a joke.  These were so good I ate TWO of the smaller scones.  See what I mean about the self control?  I baked off a few the first day reserving part of the dough in the fridge until the next day.  They came out just as yummy.  Also, leftover scones are delicious reheated in a toaster oven for a few minutes until warmed through.

I did make a few slight changes to the recipe.  I used whole wheat flour in place of cake flour and I used less sugar (as I usually do).  I used regular buttermilk, not low-fat.  Not sure they sell a low fat version where I shop.  Lastly, I added the lemon zest.

Here’s what you will need to make 10-12 scones….

Recipe

1 1/2 cups all purpose flour

1/2 cup whole wheat flour

1 1/2 tablespoon granulated sugar

2 1/2 tsp baking powder

3/4 tsp salt

4 ounces (1 stick) cold unsalted butter, cut into small pieces

1 heaping cup fresh blueberries

zest of one small lemon

1/2 cup buttermilk

1 large egg, plus 1 large egg lightly beaten for egg wash

1/2 teaspoon pure vanilla extract

fine sugar for sprinkling

Method

Preheat oven to 375 degrees.  Line a baking sheet with parchment paper.

Whisk together flours, granulated sugar, baking powder and salt in a large bowl.  Add butter and rub with your fingers until mixture has the texture of course meal.  Gently stir in blueberries.

In another bowl whisk together buttermilk, 1 egg , lemon zest and vanilla.  Drizzle over flour mixture and stir lightly with a fork until the dough comes together but a small amount of flour remains in bowl.  It’s important to not overwork the dough.

Turn out dough onto work surface and gently knead dough once or twice just to incorporate the flour.  Pat the dough into a 1-inch thick round.  Cut the round into approximately 10-12 wedges.  Transfer to baking sheet.

Brush the top of each scone with egg wash and sprinkle generously with sugar.  Bake until golden brown and cooked through, roughly 25 minutes.  Transfer scones to a wire rack to cool.

Just try to control yourself – you will be tempted to eat these piping hot out of the oven!  Use restraint until they are cool enough so you don’t burn your mouth.

Blueberry Buttermilk Scones
 
Print
Author: Feasts And Fotos
Ingredients
  • 1½ cups all purpose flour
  • ½ cup whole wheat flour
  • 1½ tablespoon granulated sugar
  • 2½ tsp baking powder
  • ¾ tsp salt
  • 4 ounces (1 stick) cold unsalted butter, cut into small pieces
  • 1 heaping cup fresh blueberries
  • zest of one small lemon
  • ½ cup buttermilk
  • 1 large egg, plus 1 large egg lightly beaten for egg wash
  • ½ teaspoon pure vanilla extract
  • fine sugar for sprinkling
Method
  1. Preheat oven to 375 degrees.  Line a baking sheet with parchment paper.
  2. Whisk together flours, granulated sugar, baking powder and salt in a large bowl.  Add butter and rub with your fingers until mixture has the texture of course meal.  Gently stir in blueberries.
  3. In another bowl whisk together buttermilk, 1 egg , lemon zest and vanilla.  Drizzle over flour mixture and stir lightly with a fork until the dough comes together but a small amount of flour remains in bowl.  It's important to not overwork the dough.
  4. Turn out dough onto work surface and gently knead dough once or twice just to incorporate the flour.  Pat the dough into a 1-inch thick round.  Cut the round into approximately 10-12 wedges.  Transfer to baking sheet.
  5. Brush the top of each scone with egg wash and sprinkle generously with sugar.  Bake until golden brown and cooked through, roughly 25 minutes.  Transfer scones to a wire rack to cool.
3.2.2802

Filed Under: Breakfast, Sweets Tagged With: blueberry, breakfast, buttermilk, dessert, scone, sweet

Banana Pecan Pancakes

May 27, 2009 by Susan

Pancakes1NEWR


Pancakes are such a treat for me in the mornings.  I rarely make them.  But when I do decide to make pancakes I go all out.  None of this ‘pancakes out of a box’ nonsense.  Making them from scratch isn’t all that difficult and the payoff is worth it.  These banana pecan pancakes are delicious, yes, but more importantly they aren’t heavy.  They don’t lay in your belly like led.  They are light.

Yes, it is a bit more time consuming to prepare the batter from scratch, I know.  But it’s not so bad when you realize that the batter will last in the fridge for up to 3 days!   If you are lucky enough to not be serving 6 people for breakfast, you will have leftover batter to enjoy over the next few days.  If you run out of bananas, don’t worry, these pancakes are delicious even without them.

I adapted this recipe from Tyler Florence, making just a few changes.  First, I decreased the amount of sugar by half.  I just don’t feel it needs 4 tablespoons – the bananas make these pancakes sweet enough.  Also, I added 1 tablespoon of chopped pecans.  I like the added texture it gives, having a tiny crunch every now and then.

Essential to the positive outcome of these pancakes is the maple syrup.  Please, treat yourself to some exceptional, pure maple syrup.  It really makes a difference.  I was lucky enough to get a large jug of pure Vermont Maple Syrup from my sister, so I’m putting it to good use on these delicious pancakes.

Here’s what you will need for approximately 6 servings…

Recipe

2 cups buttermilk

3 eggs

1 teaspoon pure vanilla extract

2 cups all-purpose flour

1  1/2 teaspoons baking powder

1 teaspoon baking soda

1 pinch salt

2 tablespoons sugar

1/2 cup pecans, toasted and finely ground (not chopped)

1 tbsp toasted pecans, chopped

1/2 stick unsalted butter, melted

3 bananas, peeled and sliced in 1/4-inch circles

Maple syrup (the good stuff!)

Method

In a large mixing bowl whisk the buttermilk, eggs and vanilla until well combined.  In a separate bowl mix the flour, baking powder, baking soda, salt and sugar.  Combine the wet ingredients with the dry and stir until the lumps are gone.  Fold in all the pecans and only 3/4 of the melted butter, whisk until batter is smooth.

Heat a griddle over medium low heat and brush with some melted butter to coat.  Using a ladle or small measuring cup pour out individual pancakes onto griddle.  Cook pancakes on the first side until they are just set, then carefully place sliced bananas on top.  I usually get 3-4 per pancake.  When tiny bubbles appear, flip pancakes, coating each pancake spot with more melted butter so the bananas won’t stick to the griddle.  Cook until golden.

Serve with some warm pure maple syrup.  Enjoy your morning treat!

Pancakes2


Banana Pecan Pancakes
 
Print
Author: Feasts And Fotos
Ingredients
  • 2 cups buttermilk
  • 3 eggs
  • 1 teaspoon pure vanilla extract
  • 2 cups all-purpose flour
  • 1  ½ teaspoons baking powder
  • 1 teaspoon baking soda
  • 1 pinch salt
  • 2 tablespoons sugar
  • ½ cup pecans, toasted and finely ground (not chopped)
  • 1 tbsp toasted pecans, chopped
  • ½ stick unsalted butter, melted
  • 3 bananas, peeled and sliced in ¼-inch circles
  • Maple syrup (the good stuff!)
Method
  1. In a large mixing bowl whisk the buttermilk, eggs and vanilla until well combined.  In a separate bowl mix the flour, baking powder, baking soda, salt and sugar.  Combine the wet ingredients with the dry and stir until the lumps are gone.  Fold in all the pecans and only 3/4 of the melted butter, whisk until batter is smooth.
  2. Heat a griddle over medium low heat and brush with some melted butter to coat.  Using a ladle or small measuring cup pour out individual pancakes onto griddle.  Cook pancakes on the first side until they are just set, then carefully place sliced bananas on top.  I usually get 3-4 per pancake.  When tiny bubbles appear, flip pancakes, coating each pancake spot with more melted butter so the bananas won't stick to the griddle.  Cook until golden.
3.2.2802

Filed Under: Breakfast Tagged With: banana, breakfast, maple, pancakes, pecan, syrup

Frittata

April 8, 2009 by Susan

A frittata is an open-faced Italian omelette traditionally filled with leftover meat and vegetables.  Growing up in an Italian household, we ate alot of these.  Frittatas are delicious served warm out of the oven, but also work well served at room temperature making it a good meal to serve any time of day.  It could be a wonderful breakfast, a great lunch or even a light dinner perhaps served with a side salad.  Extremely versatile.

There are infinite ingredient combinations for frittatas.   You can throw in whatever you have leftover from previous meals.  You can use various ingredients or use just one.  You can make an all veggie version, keeping things on the healthy side or you can be a little sinful and add some meat like bacon or sausage.

This combination is one of my favorites and I make it repeatedly.  I use broccoli, red potatoes and bacon.  If I have leftover mushrooms on hand, I put those in as well.

After the frittata comes out of the oven I allow it to come to room temperature.  I cut it into four large wedges and individually wrap them in saran wrap, storing in the fridge.  They will last up to 3-4 days.  Whenever I want to eat one I just pop it into the microwave for about one minute.  Easy!

Here’s what you will need to make one 10 inch frittata…

Recipe

5 whole eggs

3 egg whites

2 tbsp ricotta cheese

2 tbsp milk

6 slices of low sodium bacon

2 cups steamed broccoli, chopped

1 cup sliced mushrooms (optional)

one medium red potato

2 tbsp parsley, chopped

1 tbsp parmesano reggiano

salt & pepper

Method

Preheat oven to 350 degrees.

Cut potato in half lengthwise, put in a pot and cover with cold water.  Bring to a boil and cook until a knife inserted into the potato slides out easily, roughly 15 minutes.  Remove from pot and allow to cool.  Slice each potato half (widthwise) into thin half moon shapes. Steam broccoli until bright green and tender, about 10 minutes, chop.

In a large oven safe, non-stick skillet cook bacon slices until done, but not very crispy, turning occassionally.  Transfer to a paper towel lined plate to drain and cool.  Chop into 1 inch wide pieces.  Wipe out skillet leaving just a slight residue of bacon fat on the pan.  If you are using mushrooms add them to the pan now and saute until tender, 4-5 minutes.  To the pan add the potato slices, chopped broccoli and bacon.  Allow to cook together over a LOW flame, stirring occasionally, for 3-4 minutes.

In a large bowl add the eggs, egg whites, ricotta, milk, parsley, cheese and salt & pepper.  Whisk until combined and the ricotta is no longer in clumps.  Over a LOW flame, pour the egg mixture on top of the broccoli mixture and stir slowly to combine all ingredients.  You will slowly stir the mixture for about 1 minute slightly cooking the eggs.  Once you notice the egg mixture is thickening stop stirring and flatten down the ingredients gently with the back of the spatula.  Continue to cook over the low flame for about 5 minutes, or until you notice it firming up and the eggs are starting to pull away from the sides of the pan.  The center of the frittata will still be liquidy.

Transfer the skillet to the oven and cook for about 15 minutes or until the center of the frittata is no longer liquidy.  I then like to turn on the broiler and cook for about 1 minute, allowing the top to turn a light golden brown color.  The frittata will puff up slightly.  Remove from the oven and allow to cool.  As it cools it will de-puff, don’t worry, that’s normal.

**If you don’t have an oven safe skillet (yours has a plastic handle) wrap the handle completely with aluminum foil before putting it into the oven.


Frittata
 
Print
Author: Feasts And Fotos
Ingredients
  • 5 whole eggs
  • 3 egg whites
  • 2 tbsp ricotta cheese
  • 2 tbsp milk
  • 6 slices of low sodium bacon
  • 2 cups steamed broccoli, chopped
  • 1 cup sliced mushrooms (optional)
  • one medium red potato
  • 2 tbsp parsley, chopped
  • 1 tbsp parmesano reggiano
  • salt & pepper
Method
  1. Preheat oven to 350 degrees.
  2. Cut potato in half lengthwise, put in a pot and cover with cold water.  Bring to a boil and cook until a knife inserted into the potato slides out easily, roughly 15 minutes.  Remove from pot and allow to cool.  Slice each potato half (widthwise) into thin half moon shapes. Steam broccoli until bright green and tender, about 10 minutes, chop.
  3. In a large oven safe, non-stick skillet cook bacon slices until done, but not very crispy, turning occassionally.  Transfer to a paper towel lined plate to drain and cool.  Chop into 1 inch wide pieces.  Wipe out skillet leaving just a slight residue of bacon fat on the pan.  If you are using mushrooms add them to the pan now and saute until tender, 4-5 minutes.  To the pan add the potato slices, chopped broccoli and bacon.  Allow to cook together over a LOW flame, stirring occasionally, for 3-4 minutes.
  4. In a large bowl add the eggs, egg whites, ricotta, milk, parsley, cheese and salt & pepper.  Whisk until combined and the ricotta is no longer in clumps.  Over a LOW flame, pour the egg mixture on top of the broccoli mixture and stir slowly to combine all ingredients.  You will slowly stir the mixture for about 1 minute slightly cooking the eggs.  Once you notice the egg mixture is thickening stop stirring and flatten down the ingredients gently with the back of the spatula.  Continue to cook over the low flame for about 5 minutes, or until you notice it firming up and the eggs are starting to pull away from the sides of the pan.  The center of the frittata will still be liquidy.
  5. Transfer the skillet to the oven and cook for about 15 minutes or until the center of the frittata is no longer liquidy.  I then like to turn on the broiler and cook for about 1 minute, allowing the top to turn a light golden brown color.  The frittata will puff up slightly.  Remove from the oven and allow to cool.  As it cools it will de-puff, don't worry, that's normal.
  6. **If you don't have an oven safe skillet (yours has a plastic handle) wrap the handle completely with aluminum foil before putting it into the oven.
3.2.2802

Filed Under: Breakfast Tagged With: bacon, breakfast, broccoli, eggs, frittata, potato

Broccoli, Mushroom and Cheese Breakfast Strata

February 5, 2009 by Susan

stratasideresize

I have to be honest, for a long time I wasn’t exactly sure what a ‘strata’ was.  I’ve heard about it, read recipes for it, but just never delved in to find out what it was or actually try to make it, for that matter.  What a mistake that was!  Simply put, it’s a breakfast pie.

This vegetable strata was delicious.  But the best part is….you make make the entire dish ahead of time, like the day before, then just pop it into the oven in the morning.  How easy is that?!   I must admit I was quite proud of myself as I pulled this baby out of the oven, it looks gorgeous!  You will look like a superstar serving it.

It’s substantial and satisfying, hearty and savory.  It’s somewhat healthy, filled with veggies.  I decided to try a recipe from Ellie Krieger as my first foray into strata-land.   I didn’t want to clog every artery I have and push  my cholesterol level off the charts. I felt this version was a nice balance.  This would also be delicious with an addition of bacon or sausage, I might try that version next.

Here’s what you will need to serve 4 people….

Recipe

2 teaspoons olive oil

1/2 large onion, diced (about 1 cup)

2 garlic cloves, minced

1 1/2  cups sliced mushrooms

Cooking spray

1/2 whole wheat baguette, crusts removed, cubed (about 2 cups)

4 eggs plus 4 additional egg whites

1 cup lowfat milk

1/2 tablespoon Dijon mustard

1 medium head of broccoli, steamed, cooled and chopped

3 tablespoons grated Parmesan

1/2 cup part-skim mozzarella cheese

7.5 oz jar sun-dried tomatoes, packed in oil, drained, thinly sliced

1/2 tablespoon minced fresh thyme leaves

1/4 teaspoon salt

1/4 teaspoon freshly ground pepper

Method

Heat 1 teaspoon of the oil in a nonstick skillet over medium heat. Add the onions and saute until translucent and beginning to brown, about 4 minutes. Add the garlic and continue to cook for another 1 minute. Transfer the onion mixture to a medium bowl and allow to cool. Heat remaining teaspoon of oil in the skillet and saute the mushrooms until they release all of their water, about 6 to 7 minutes. Remove from heat and cool completely.

Spray an 8×8 baking dish with cooking spray. Arrange the bread cubes in a single layer in the bottom of the dish. In a large bowl, beat the eggs, egg whites, milk and mustard until incorporated. Add mushrooms, onion-garlic mixture, broccoli, Parmesan and mozzarella cheeses, sun-dried tomatoes, thyme, and salt and pepper and stir to incorporate. Pour mixture over bread, making sure liquid saturates bread. Cover with plastic wrap and refrigerate overnight, or at least 8 hours.

Preheat the oven to 350 degrees F.  Remove the plastic wrap from strata and bake for 60 to 75 minutes, or until the top forms a light brown crust.

Original recipe can be found here…

http://www.foodnetwork.com/recipes/ellie-krieger/broccoli-mushroom-and-cheese-breakfast-strata-recipe/index.html

Filed Under: Breakfast Tagged With: breakfast, broccoli, cheese, mushroom, strata, vegetables

Pumpkin Spice Bread

December 13, 2008 by Susan

PumpkinBreadSliceFinalR

Another loaf!  If you have read some of my past posts on here, you already know that I love making loaves.  I always make this one in the fall and winter.  I am aware that there are so many various recipes for pumpkin bread out there, it is difficult to pick which is the best.  I grew up eating my mom’s pumpkin bread, she bakes it in coffee cans and the final product is quite dense and much darker in color than the one I make.  Both are great, it’s really a personal choice.  I think I might like this pumpkin bread slightly better than the one I grew up eating.  I find this version lighter and more ‘cake’ like.  This pumpkin bread is outstanding served warm right out of the oven.  It is still wonderful if eaten at room temperature.

Here is what you will need to make one loaf…

Recipe

1 and 2/3 cups flour (I usually use 1 cup white flour and 2/3 cup whole wheat flour)

1 teaspoon baking soda

3/4 teaspoon ground cinnamon

1/4 teaspoon ground ginger

1/4 teaspoon ground cloves

1/4  teaspoon salt

1 and 1/3 cups sugar

1/3 cup canola oil

1 cup plus 1 and 1/2 tablespoons canned unsweetened pumpkin

1 large egg

Method

Preheat oven to 350 degrees.  Grease and flour a loaf pan (roughly 8×4).

Mix first six ingredients together in a bowl with a whisk until well combined.

Combine sugar, oil and pumpkin in the bowl of electric mixer.  Beat at medium speed until smooth.  Add egg, beating until well blended.  Gradually add dry ingredients, beating at a low speed until blended.  Transfer batter to loaf pan.

Bake for 1 hour and 5 minutes or until loaf is golden and a wooden pick inserted in the center comes out clean.  Let cool in pan on a wire rack for 15 minutes then remove from pan.

I just love that pumpkiny color!  I hope you enjoy this as much as I do.

This recipe is adapted from Cottage Living.


Pumpkin Spice Bread
 
Print
Author: Feasts And Fotos
Ingredients
  • 1 and ⅔ cups flour (I usually use 1 cup white flour and ⅔ cup whole wheat flour)
  • 1 teaspoon baking soda
  • ¾ teaspoon ground cinnamon
  • ¼ teaspoon ground ginger
  • ¼ teaspoon ground cloves
  • ¼  teaspoon salt
  • 1 and ⅓ cups sugar
  • ⅓ cup canola oil
  • 1 cup plus 1 and ½ tablespoons canned unsweetened pumpkin
  • 1 large egg
Method
  1. Preheat oven to 350 degrees.  Grease and flour a loaf pan (roughly 8x4).
  2. Mix first six ingredients together in a bowl with a whisk until well combined.
  3. Combine sugar, oil and pumpkin in the bowl of electric mixer.  Beat at medium speed until smooth.  Add egg, beating until well blended.  Gradually add dry ingredients, beating at a low speed until blended.  Transfer batter to loaf pan.
  4. Bake for 1 hour and 5 minutes or until loaf is golden and a wooden pick inserted in the center comes out clean.  Let cool in pan on a wire rack for 15 minutes then remove from pan.
3.2.2802

Filed Under: Breakfast, Sweets Tagged With: bread, breakfast, loaf, pumpkin, spice, sweets

Orange Cranberry Muffins

November 16, 2008 by Susan

OrangeCranberryMuffinFinalR

There is something so heartwarming about baking your own muffins in the morning.  I just love how the whole house smells while these babies are cooking in the oven.

These particular muffins are very easy to make.  They do not require any special equipment, nothing that needs to be plugged into an outlet.  You only need some bowls, a whisk and a spoon.  Can’t get much easier than that!

The orange definitely gives a nice zing to these muffins and I am glad I tried them.  Now, if you are one of those people that love a very spongy muffin, this one might not be for you.  It’s a touch on the more crumbly side, just a touch.  Personally, I don’t mind that.   I also love a muffin to have a slightly crunchy top.  I find the crunch of the top combined with the softer interior is a lovely combination.

I believe it is the healthy wheat germ that makes these muffins crumbly.  When you hear all the impressive health benefits of wheat germ you will feel happy these muffins include some.  Wheat germ is not a ‘germ’ (ha!) it is the kernel of wheat and is a rich source of protien, fiber, unsaturated fat, folic acid and most especially vitamin E.  Wheat germ also contains vitamin B complex which helps in coping with stress.  And we can ALL use some help with that these days!

I make a cranberry butter to slather over these slightly crumbly muffins.  It really takes them over the top.  And the cranberry butter couldn’t be easier to make.  I’ve detailed how to make it at the end of this post.

Here’s the recipe for 12 muffins, adapted from Cooking Light…

Recipe

1 1/2 cups flour (I used 1 cup white flour, 1/2 cup whole wheat flour)

1/2 cup wheat germ

1/2 cup dried cranberries

1 tsp baking powder

1/2 tsp baking soda

1/2 tsp ground cinnamon

1/4 tsp salt

1/8 tsp ground nutmeg

3/4 cup packed brown sugar

1/4 cup canola oil

1 tsp grated orange zest

1/2 cup fresh orange juice

2 large eggs

Method

Preheat oven to 375 degrees.

Combine flour and next 7 ingredients (through nutmeg) in a large bowl, stir with a whisk.  Make a well in the center of the mixture.

Combine brown sugar, oil, zest, juice and eggs, stir with a whisk.  Pour egg mixture into the well in the dry mixture, stirring until just combined.  Spoon batter into muffin cups.

Cranberry Butter:

Combine 1/2 stick of room temperature butter with roughly 4 tablespoons of cranberry preserves.  Mix until well combined.  If you prefer the cranberry butter to have a more cranberry flavor, then feel free to add more preserves.  Alternatively, use less if you choose.  Enjoy!


Orange Cranberry Muffins
 
Print
Author: Feasts And Fotos
Ingredients
  • 1½ cups flour (I used 1 cup white flour, ½ cup whole wheat flour)
  • ½ cup wheat germ
  • ½ cup dried cranberries
  • 1 tsp baking powder
  • ½ tsp baking soda
  • ½ tsp ground cinnamon
  • ¼ tsp salt
  • ⅛ tsp ground nutmeg
  • ¾ cup packed brown sugar
  • ¼ cup canola oil
  • 1 tsp grated orange zest
  • ½ cup fresh orange juice
  • 2 large eggs
Method
  1. Preheat oven to 375 degrees.
  2. Combine flour and next 7 ingredients (through nutmeg) in a large bowl, stir with a whisk.  Make a well in the center of the mixture.
  3. Combine brown sugar, oil, zest, juice and eggs, stir with a whisk.  Pour egg mixture into the well in the dry mixture, stirring until just combined.  Spoon batter into muffin cups.
  4. Cranberry Butter:
  5. Combine ½ stick of room temperature butter with roughly 4 tablespoons of cranberry preserves.  Mix until well combined.  If you prefer the cranberry butter to have a more cranberry flavor, then feel free to add more preserves.  Alternatively, use less if you choose.
3.2.2802

Filed Under: Breakfast Tagged With: cranberry, muffin, orange, wheat germ

Tuscan Baked Eggs

October 31, 2008 by Susan

TuscanEggsFinalR

I love going out for breakfast.  Since I live in NYC there are so many breakfast/brunch places to try.  And I mean SO many.  It’s endless.  One is better than the next.  Awhile back I met some friends for brunch in the West Village (my favorite area of the city) at a restaurant called August.  What a charming little place!  Very rustic, which is right up my alley.  Anyway, I ordered their baked eggs dish and loved it.  It was that dish that inspired this, and now I can have a little taste of rustic Tuscany at home anytime I choose.  There aren’t really any exact measurements for this, it’s pretty loose.  If you want more herbs, add them.  If you like alot of cheese, then indulge.  This is a great way to use up leftover tomato sauce.  I had some arrabiata sauce in the fridge that I used.

Here’s what you’ll need to serve one…

Recipe

eggs (2 per person)

tomato sauce (any kind you have on hand)

1/2 tsp chopped rosemary

1/2 tsp chopped thyme

shredded mozzarella cheese

parmigiano reggiano cheese

salt & pepper

rustic bread, toasted

*gratin dish

Method

Lightly butter the bottom of a gratin dish.  Spoon a few tablespoons of tomato sauce into the dish, covering the entire bottom with a layer of sauce.  With a spoon, make two small wells in the sauce for the eggs.  Gently crack the two eggs into those wells.  Add some salt & pepper.  Sprinkle the rosemary and thyme over the eggs and sauce, then the parmigiano reggiano, then lastly the shredded mozzarella.

Bake at 400 degrees for roughly 25-30 minutes, or until the eggs reach the consistency you prefer and the sauce and cheese are bubbling.  I like my eggs to still be a bit runny, this way when you break into them with the bread the yolks run into and mix with the sauce.  Like this…

TuscanEggswithBreadFinalR

Tuscan Baked Eggs
 
Print
Author: Feasts And Fotos
Ingredients
  • eggs (2 per person)
  • tomato sauce (any kind you have on hand)
  • ½ tsp chopped rosemary
  • ½ tsp chopped thyme
  • shredded mozzarella cheese
  • parmigiano reggiano cheese
  • salt & pepper
  • rustic bread, toasted
  • *gratin dish
Method
  1. Lightly butter the bottom of a gratin dish.  Spoon a few tablespoons of tomato sauce into the dish, covering the entire bottom with a layer of sauce.  With a spoon, make two small wells in the sauce for the eggs.  Gently crack the two eggs into those wells.  Add some salt & pepper.  Sprinkle the rosemary and thyme over the eggs and sauce, then the parmigiano reggiano, then lastly the shredded mozzarella.
  2. Bake at 400 degrees for roughly 25-30 minutes, or until the eggs reach the consistency you prefer and the sauce and cheese are bubbling.  I like my eggs to still be a bit runny, this way when you break into them with the bread the yolks run into and mix with the sauce.
3.2.2802

Filed Under: Breakfast Tagged With: baked, eggs

Quinoa Porridge

October 18, 2008 by Susan

QuinoaPorridgeFinalR

It’s gotten a bit chilly in New York in the past day or so.  It’s perfect weather for a nice hot breakfast to start the day.  I love oatmeal and have been having it for breakfast during the colder months for many years.  I just recently tried switching things up a bit and making my regular oatmeal (porridge) with quinoa instead.  And I have to tell you, I like it better!  And I like using the word porridge better now too!

As you might know quinoa is a gluten free amino-acid rich protein seed (not a grain although it is often referred to as one) that is native to South America.  The protein it supplies is a complete protein which means it contains all 9 essential amino acids.  It is close to one of the most complete foods in nature because it contains amino acids, enzymes, vitamins and minerals, fiber, antioxidants and phytonutrients.  Whew!  These guys pack a punch.

It’s a nice change from the plain old oatmeal and I prefer the texture of the quinoa version much better.  It is fluffy and has a slightly crunchy texture.  And here is something interesting…I have noticed that the quinoa version sustains me far longer than traditional oats do, and trust me, I have a very healthy appetite and am almost always hungry!

This combination of the walnuts, cranberries and raisins is my favorite.  I especially like the walnuts because I like having that crunch.  I find that I search out the walnuts with every spoonful.  You can certainly add any other nuts and dried fruits you love or some fresh ones like blueberries or chopped apples.  I even like adding a few slices of bananas sometimes.  There are many different variations you can try.

I love starting my day with this breakfast.  It’s warm and comforting, it fills me up and is very yummy.

Here’s what you need to serve one hungry person…

Recipe

1/2 cup uncooked quinoa

1/2 cup water

1 cup milk

1/4 tsp cinnamon

1 tbsp chopped walnuts

1 tbsp dried cranberries

1 tbsp raisins

1 tsp agave nectar (honey)

1 tsp plain yogurt (optional)

Method

Add quinoa, water, cinnamon and 1/2 cup of the milk in a pot and bring to a boil.  Reduce heat, cover and simmer for 10-15 minutes or until most of the water has been absorbed.  Add the remaining 1/2 cup of milk, walnuts, cranberries and raisins and allow to simmer for about 5 minutes or until it reaches your desired consistency (it will gradually get thicker).  Once it reaches the consistency you like, add the honey and the yogurt (yes, yogurt!) and stir to combine.  Adding some yogurt might seem odd to some of you, but trust me, it provides a lovely silky consistency.


Quinoa Porridge
 
Print
Author: Feasts And Fotos
Ingredients
  • ½ cup uncooked quinoa
  • ½ cup water
  • 1 cup milk
  • ¼ tsp cinnamon
  • 1 tbsp chopped walnuts
  • 1 tbsp dried cranberries
  • 1 tbsp raisins
  • 1 tsp agave nectar (honey)
  • 1 tsp plain yogurt (optional)
Method
  1. Add quinoa, water, cinnamon and ½ cup of the milk in a pot and bring to a boil.  Reduce heat, cover and simmer for 10-15 minutes or until most of the water has been absorbed.  Add the remaining ½ cup of milk, walnuts, cranberries and raisins and allow to simmer for about 5 minutes or until it reaches your desired consistency (it will gradually get thicker).  Once it reaches the consistency you like, add the honey and the yogurt (yes, yogurt!) and stir to combine.  Adding some yogurt might seem odd to some of you, but trust me, it provides a lovely silky consistency.
3.2.2802

Filed Under: Breakfast, Rice and Grains Tagged With: breakfast, porridge, Quinoa

Whole-Wheat Banana Nut Bread

October 2, 2008 by Susan

BananaBreadFinalR

I really enjoy making quick breads such as this one.  I find them extremely comforting and once they come out of the oven I always feel I’ve made something substantial.  This particular bread is quite healthy because it’s made with whole wheat flour as opposed to white flour.  The bananas provide a substantial and sustainable boost of energy and the walnuts are an excellent source of protein and are rich in fiber and antioxidants.  So there is absolutely no feeling guilty about enjoying this bread!  Just try not to eat the whole thing in one sitting…

The only planning in advance you need to do is buying the bananas and letting them sit on your counter for a few days until they are good and dark….very dark.  Over ripe.  I’m a bit picky with my bananas if I’m just peeling one and eating it.  It must be yellow, preferably with no spots at all.  But when you are making a banana bread, the blacker the better.  They become super sweet and moist.  And that keeps the bread very moist.

BananaBreadSlicedFinalR

A slice of this bread is great for breakfast or a snack anytime of day – and, honestly you don’t even have to toast it.  It’s perfect plain, however, if you are so inclined, feel free to toast up a slice and slather it with some cream cheese or butter (or not for those keeping things on the healthy side).  Either way, I promise you that your home with smell intoxicating while this is baking in the oven!

Here’s what you need to make one loaf…

Recipe

1 1/2 cups whole-wheat flour

1 teaspoon baking soda

1/2 teaspoon salt

1 stick unsalted butter, room temperature

3/4 cup sugar

2 large bananas, mashed, very ripe

2 eggs

1/2 cup chopped walnuts

Method

Preheat oven to 350 degrees.  Grease and flour a standard loaf pan (I use a Pyrex).

In a medium bowl stir together the flour, baking soda and salt.  Set aside.  In a large bowl beat together the butter and sugar until blended.  Beat in the banana, then beat in the eggs until completely mixed.  Add the flour mixture into the egg mixture in three additions, being careful to not over mix.  Stir in the walnuts with a spatula just until blended.

Spread the mixture into the loaf pan and bake for 60 minutes, or until a toothpick inserted in the center of the loaf comes out clean.  Cool in the pan for about 15 minutes, then turn onto a wire rack to cool completely.

This recipe is adapted from a Williams Sonoma cookbook.


Whole-Wheat Banana Nut Bread
 
Print
Author: Feasts And Fotos
Ingredients
  • 1½ cups whole-wheat flour
  • 1 teaspoon baking soda
  • ½ teaspoon salt
  • 1 stick unsalted butter, room temperature
  • ¾ cup sugar
  • 2 large bananas, mashed, very ripe
  • 2 eggs
  • ½ cup chopped walnuts
Method
  1. Preheat oven to 350 degrees.  Grease and flour a standard loaf pan (I use a Pyrex).
  2. In a medium bowl stir together the flour, baking soda and salt.  Set aside.  In a large bowl beat together the butter and sugar until blended.  Beat in the banana, then beat in the eggs until completely mixed.  Add the flour mixture into the egg mixture in three additions, being careful to not overmix.  Stir in the walnuts with a spatula just until blended.
  3. Spread the mixture into the loaf pan and bake for 60 minutes, or until a toothpick inserted in the center of the loaf comes out clean.  Cool in the pan for about 15 minutes, then turn onto a wire rack to cool completely.
3.2.2802

Filed Under: Breakfast, Sweets Tagged With: banana, quick bread, walnuts

  • « Previous Page
  • 1
  • 2
Hello and welcome to Feasts and Fotos!

Archives

Categories

Copyright © 2025 · Foodie Pro Theme by Shay Bocks · Built on the Genesis Framework · Powered by WordPress