FEASTS AND FOTOS

  • Home
  • About
  • Happenings
  • Contact
You are here: Home / Archives for Breakfast

Strawberry Jam

September 30, 2014 by Susan

StrawberryJamFinalR

I am very into making jam lately.  Not the jam that requires all the sterilizing and sealing.  Although I would like to try that one day, that day is not today.  Or anytime soon.  It just seems rather daunting to me and alot of work.  I am all about  refrigerator jam, which basically means making a smaller batch and storing it in the refrigerator for up to a month instead of sterilizing and storing it on a shelf for longer periods of time.

This method of making jam is perfect for me.  First, I don’t want or need to make 15 jars of the same jam right now. Second, making smaller batches allows me the freedom to experiment with different fruits and spices and not be so committed to having a large quantity of one flavor in my pantry.

This is a basic, delicious strawberry jam recipe I have been going back to again and again.  I really love it.  It tastes fresh, bright and slightly sweet.  Most importantly, it truly tastes like strawberries!  It is sad to say many jams and jellies don’t actually taste like the fruit they are supposedly made from, instead tasting very processed and sugary.  Why is there so much sugar added?  I don’t think it needs it which is why I only put 3/4 of a cup in mine.  Let the fruit shine.

If you make this strawberry jam just store it in the fridge and consume it within 1 month.  Give one away to a good friend or family and keep the rest for yourself.  Trust me, you won’t have a problem finishing it all in time.  You will want to slather this on everything!

Here’s what you will need to make about 3 small jars…

Recipe

5 cups strawberries, washed, hulled and cut in half

3/4 cup sugar

2 Tbsp lemon juice, plus a few squeezes more

*2 teaspoons

Method

In a large non-reactive bowl add the strawberries, sugar and 2 Tbsp of lemon juice.  Mix to combine well.  Cover with plastic wrap and refrigerate overnight.

Remove plastic wrap and stir strawberry mixture.  Transfer to a large non-reactive pot and place pot over a medium heat.  Cook for 5 minutes, stirring occasionally, until all the sugar has melted and mixture begins to foam.

Place 2 teaspoons in the freezer.

Increase the heat to high and bring to a rolling boil, stirring almost constantly until thick and shiny, approximately 15 minutes.  Once you notice the jam starting to thicken (about 10 minutes in) add a few squeezes of fresh lemon juice to the pot.  Literally, only about 6-8 drops.

Place a small drop of jam on the back of one of the spoons and place the spoon back into the freezer for about 30 seconds. Remove spoon and tilt it.  The jam should just barely move.  If the jam slides down off the spoon easily continue cooking the jam for a few more minutes and then test again.

Allow mixture to cool slightly.  With an immersion blender puree 1/2 of the mixture until smooth, leaving the remaining slightly chunky.  If you want your jam completely smooth with no chunks at all, puree it all.

Allow to cool completely and fill your jars!  Store in refrigerator for up to one month.


Strawberry Jam
 
Print
Author: Feasts And Fotos
Ingredients
  • 5 cups strawberries, washed, hulled and cut in half
  • ¾ cup sugar
  • 2 Tbsp lemon juice, plus a few squeezes more
  • *2 teaspoons
Method
  1. In a large non-reactive bowl add the strawberries, sugar and 2 Tbsp of lemon juice.  Mix to combine well.  Cover with plastic wrap and refrigerate overnight.
  2. Remove plastic wrap and stir strawberry mixture.  Transfer to a large non-reactive pot and place pot over a medium heat.  Cook for 5 minutes, stirring occasionally, until all the sugar has melted and mixture begins to foam.
  3. Place 2 teaspoons in the freezer.
  4. Increase the heat to high and bring to a rolling boil, stirring almost constantly until thick and shiny, approximately 15 minutes.  Once you notice the jam starting to thicken (about 10 minutes in) add a few squeezes of fresh lemon juice to the pot.  Literally, only about 6-8 drops.
  5. Place a small drop of jam on the back of one of the spoons and place the spoon back into the freezer for about 30 seconds. Remove spoon and tilt it.  The jam should just barely move.  If the jam slides down off the spoon easily continue cooking the jam for a few more minutes and then test again.
  6. Allow mixture to cool slightly.  With an immersion blender puree ½ of the mixture until smooth, leaving the remaining slightly chunky.  If you want your jam completely smooth with no chunks at all, puree it all.
  7. Allow to cool completely and fill your jars!  Store in refrigerator for up to one month.
3.2.2802

Filed Under: Breakfast, Sweets Tagged With: jam, low sugar, refrigerator, strawberry, sweet

Baked Oatmeal

January 20, 2014 by Susan

BakedOatmealR

I just realized this is my third ‘breakfast’ post in a row.  Seems I am on a breakfast kick lately.  I think there is something so comforting about having a hearty and warming breakfast on a cold, winter day.  Especially if it is snowing outside!

This baked oatmeal has become my absolute favorite way to prepare and eat oatmeal.  It is so easy to put together (no standing over a stove stirring!) and it tastes absolutely delicious.  I love how creamy it is and how the bananas sort of melt into the oats and give such a wonderful sweetness.  A natural sweetness. Aside from some maple syrup, there is no sugar added to this dish.  It is healthy and filling.

This recipe is husband and toddler approved!  My two year old always wants to eat this right out of my bowl.  After I realized how much she likes it, I now leave out the chopped walnuts, either omitting them completely (it still tastes great!) or toasting them separately and just sprinkling some over my own serving. (She is  not eating nuts yet). Sometimes instead of adding walnuts I will sprinkle wheat germ over the top of the dish before I bake it, as I did in this photo above.  Also, once each serving is put in the bowl I like to drizzle some extra maple syrup on top for a little indulgence.

The dish I use to bake this in (above) is small, about 7 inches square.  It is the perfect size for two people. I have doubled this recipe and used a larger baking dish so we could try having some leftovers and of course doubling the recipe just doubles the goodness.  However, I prefer this freshly baked.  The leftovers are fine (just add some water or milk and heat in the microwave) but not quite as amazing as eaten hot out of the oven.

To all you New Yorkers out there – I hear we are supposed to get a good amount of snow tomorrow. So, bake yourself some oatmeal and enjoy the beauty of the snow!

Here’s what you will need to serve 2 people…

Recipe

1 cup oats  (I use Scottish Style Porridge Oats)

1 cup blueberries

1 large banana, sliced thin

1 tsp cinnamon

1/4 tsp nutmeg

pinch of salt

1 tbsp pure maple syrup

1/3 cup of milk

handful of walnuts, chopped

wheat germ (optional)

flaxseed (optional)

maple syrup (for serving, optional)

Method

Preheat the oven to 375 degrees.

Place the oats in a medium bowl and add very hot water, just enough to cover the oats.  Allow to sit for 5-10 minutes.  The oats will absorb most of the water.

To the bowl of oats add the cinnamon, nutmeg, salt, milk, maple syrup, bananas and blueberries (flaxseed if you are adding it).  I like to hold back a few blueberries and banana slices and place on top.  Sprinkle the walnuts over the top.

Lightly butter the bottom of a small baking dish (about 7 inches square) and put the oat mixture into the baking dish, smoothing the top and distributing the ingredients evenly.  Add the remaining blueberries and bananas on top.

Bake for approximately 20-25 minutes until the edges are bubbling.

Recipe adapted from various sources.

Baked Oatmeal
 
Print
Author: Feasts And Fotos
Ingredients
  • 1 cup oats (I use Scottish Style Porridge Oats)
  • 1 cup blueberries
  • 1 large banana, sliced thin
  • 1 tsp cinnamon
  • ¼ tsp nutmeg
  • pinch of salt
  • 1 tbsp pure maple syrup
  • ⅓ cup of milk
  • handful of walnuts, chopped
  • wheat germ (optional)
  • flaxseed (optional)
  • maple syrup (for serving, optional)
Method
  1. Preheat the oven to 375 degrees.
  2. Place the oats in a medium bowl and add very hot water, just enough to cover the oats. Allow to sit for 5-10 minutes. The oats will absorb most of the water.
  3. To the bowl of oats add the cinnamon, nutmeg, salt, milk, maple syrup, bananas and blueberries (flaxseed if you are adding it). I like to hold back a few blueberries and banana slices and place on top. Sprinkle the walnuts over the top.
  4. Lightly butter the bottom of a small baking dish (about 7 inches square) and put the oat mixture into the baking dish, smoothing the top and distributing the ingredients evenly. Add the remaining blueberries and bananas on top.
  5. Bake for approximately 20-25 minutes until the edges are bubbling.
3.2.2802

Filed Under: Breakfast Tagged With: baked oatmeal, bananas, blueberries, breakfast, flaxseed, healthy, oatmeal, walnuts, wheat germ

Skillet Apple Pancake

November 3, 2013 by Susan

ApplePancakeR

I am finally back to trying some new recipes and blogging about them.  It turns out that moving, with a toddler around, is a tremendous undertaking.  We are finally somewhat settled and getting into a ‘new normal’.

A few weeks ago we went apple picking and came home with a big bag of delicious Jonagold apples.  My favorite apple is the Honeycrisp and was disappointed when I discovered they were already all picked and gone from the orchard.  I was told to try the Jonagolds, that they were very similar, if not better.  I was not disappointed, they were very good!

So what to do with all these apples??  I always wanted to try a large apple pancake.  I liked the idea of it, prepare everything and then just toss in the oven.  No flipping pancakes and keeping the first batch warm while making the next batches.  Also, the site of this apple pancake reminded me of a pie.  And who wouldn’t like a slice of pie for breakfast?

In my opinion, this apple pancake is a cross between a pancake and a pie.  The texture is not quite as light and fluffy as a pancake, but not as sweet and creamy as a pie.  Since it is not very sweet you don’t feel bad about having this for breakfast. Oh, and right out of the oven, this pancake is impressive.  It’s all puffed and golden.  It will deflate after a few minutes though, so serve this right out of the oven.

Don’t get me wrong, I still love regular pancakes.  But I think during the month of October every year, after apple picking, this will be my pancake of choice.

Here’s what you will need to make one 10 inch apple pancake…

Recipe

4 tbsp. unsalted butter

1/4 cup light brown sugar

2 medium apples, peeled, cored and sliced 1/8 inch thick

1/2 cup all-purpose flour

1/2 cup whole wheat flour

5 large eggs

1 cup milk

1/2 tsp vanilla

1/2 tsp cinnamon, plus a pinch

1/4 tsp nutmeg

1/8 tsp salt

confectioners sugar, for serving

Method

Preheat the oven to 400 degrees.  In a 10 inch cast iron skillet over medium heat, melt the butter and 3 tablespoons of the brown sugar.  Add the apple slices and the pinch of cinnamon and cook for 5-7 minutes, stirring occasionally.

In a medium bowl, whisk together the eggs, flour, milk, vanilla, cinnamon, nutmeg, salt and the remaining tablespoon of sugar.  Pour batter slowly over the cooked apple mixture.  Transfer the skillet to the oven and bake until golden brown, set in the center and puffed around the edges, about 15 – 20 minutes.  Dust with confectioners sugar and serve immediately.

Recipe adapted from various sources.

Skillet Apple Pancake
 
Print
Author: Feasts And Fotos
Ingredients
  • 4 tbsp. unsalted butter
  • ¼ cup light brown sugar
  • 2 medium apples, peeled, cored and sliced ⅛ inch thick
  • ½ cup all-purpose flour
  • ½ cup whole wheat flour
  • 5 large eggs
  • 1 cup milk
  • ½ tsp vanilla
  • ½ tsp cinnamon, plus a pinch
  • ¼ tsp nutmeg
  • ⅛ tsp salt confectioners sugar, for serving
Method
  1. Preheat the oven to 400 degrees. In a 10 inch cast iron skillet over medium heat, melt the butter and 3 tablespoons of the brown sugar. Add the apple slices and the pinch of cinnamon and cook for 5-7 minutes, stirring occasionally.
  2. In a medium bowl, whisk together the eggs, flour, milk, vanilla, cinnamon, nutmeg, salt and the remaining tablespoon of sugar. Pour batter slowly over the cooked apple mixture. Transfer the skillet to the oven and bake until golden brown, set in the center and puffed around the edges, about 15 - 20 minutes. Dust with confectioners sugar and serve immediately.
  3. Recipe adapted from various sources.
3.2.2802

Filed Under: Breakfast Tagged With: apple, apple picking, breakfast, cast iron skillet, pancake

Blueberry Buttermilk Pancakes

June 13, 2013 by Susan

PancakeCookingR

Sometimes it takes a fair amount of motivation to prepare a delicious breakfast in the morning.  I mean, you just woke up.  You are still somewhat groggy.  Who feels like doing a lot of preparation to eat at that hour? (Thanks to Ava that hour for us is 5:30am).  So much easier to just pour yourself a bowl of cereal.  And that’s pretty much what we do around here.  A lot.

But these pancakes?  These pancakes…the thought of them actually help me get out of bed.  Yup.  They are that good.  And even though they are prepared from scratch, they are quick and easy.  And did I mention they were delicious?  And fluffy!  See how fluffy they are?

Although this recipe is for blueberry pancakes don’t be afraid to omit the blueberries if you don’t have them on hand.  The pancakes are just as delicious plain.

Here’s what you will need to make about 10-12 pancakes…

Recipe

2 cups flour

2 tsp baking powder

1/2 tsp baking soda

1/2 tsp salt

1/4 tsp ground cinnamon

1 tbsp sugar

1 cup fresh blueberries

2 cups buttermilk

2 large eggs

grated zest of 1 lemon

Method

Whisk together the  flour, baking powder, baking soda, salt, cinnamon and sugar in a large bowl.

In a small bowl toss the blueberries with 2 tbsp of the flour mixture and set aside.

Mix together the buttermilk, eggs and lemon zest.  Make a well in the center of the remaining flour mixture and add the buttermilk mixture.  Stir together until just combined, leaving some small lumps in the batter.  Fold in the blueberries.

Allow the mixture stand 10 minutes.  You will actually see the mixture ‘grow’ a little bit!

Heat up your griddle or skillet.  Once heated LOWER the flame to medium/low.  Coat with some butter and ladle 1/4 cup – 1/3 cup batter per pancake, depending on how big you like your pancakes.  When small bubbles appear across the surface of the pancakes flip them and continue to cook on the other side.

Serve with your favorite maple syrup.  Enjoy your morning!

Recipe courtesy of Martha Stewart

Blueberry Buttermilk Pancakes
 
Print
Author: Feasts And Fotos
Ingredients
  • 2 cups flour
  • 2 tsp baking powder
  • ½ tsp baking soda
  • ½ tsp salt
  • ¼ tsp ground cinnamon
  • 1 tbsp sugar
  • 1 cup fresh blueberries
  • 2 cups buttermilk
  • 2 large eggs
  • grated zest of 1 lemon
Method
  1. Whisk together the flour, baking powder, baking soda, salt, cinnamon and sugar in a large bowl.
  2. In a small bowl toss the blueberries with 2 tbsp of the flour mixture and set aside.
  3. Mix together the buttermilk, eggs and lemon zest. Make a well in the center of the remaining flour mixture and add the buttermilk mixture. Stir together until just combined, leaving some small lumps in the batter. Fold in the blueberries.
  4. Allow the mixture stand 10 minutes. You will actually see the mixture 'grow' a little bit!
  5. Heat up your griddle or skillet. Once heated LOWER the flame to medium/low. Coat with some butter and ladle ¼ cup - ⅓ cup batter per pancake, depending on how big you like your pancakes. When small bubbles appear across the surface of the pancakes flip them and continue to cook on the other side.
  6. Serve with your favorite maple syrup. Enjoy your morning!
3.2.2802

Filed Under: Breakfast Tagged With: blueberry, breakfast, buttermilk, pancakes

Egg Muffins

October 12, 2012 by Susan

I am always on the lookout for delicious, individual breakfasts that I can make ahead of time and eat throughout the week.  These little egg muffins are such a great portable meal!  Most important, they are really delicious and very satisfying.  After these cool down I wrap each one in saran wrap and store in the fridge.  They hold up well for a few days and reheat in the microwave perfectly.  I don’t even think my husband heats his up, he just leaves it at room temperature for about an hour or so and then eats it.

I do love the flavor combinations in this particular recipe, however, I have switched things up as well.  Sometimes I use bacon instead of pancetta and fontina cheese instead of gruyere.  On occassion I throw in some mushrooms.  I always use spinach though…great way to get in some greens!  Really you can include anything you like, anything you have leftover.

By the way, don’t these egg muffins look pretty, all puffed up and gorgeous?  Well, they only look like this for about 26 seconds, then they deflate.  So if you want to impress someone be sure to show them your handy work the second you pull these out of the oven!

Here’s what you will need to make 4 muffins…


Recipe

1 tablespoon extra-virgin olive oil

4 ounces sliced pancetta (about 1/4 inch thick), diced into 1/2-inch pieces

2 shallots, chopped

1-2 slices country-style bread, cut into 1/2-inch cubes (about 2 cups)

7 large eggs, beaten, at room temperature

2 packed cups chopped spinach

1/2 cups grated gruyere (6 ounces)

1/3 cup milk, at room temperature

Method

Preheat the oven to 400 degrees.

Heat the oil over medium-high heat in a medium skillet. Add the pancetta and cook until lightly browned, about 5 minutes. Remove the pancetta using a slotted spoon, drain on paper towels and allow to cool slightly. Add the shallots and cook over medium-high heat until soft, about 3 minutes. Add the spinach and cook until just wilted, 1-2 minutes.

In a medium bowl, mix together the cooked pancetta, bread, eggs, gruyere, milk and shallot and spinach mixture until all the ingredients are moistened.

Spoon the mixture into the ramekins, filling each 3/4 full. Place the ramekins on a small baking sheet and bake until golden brown, about 25 – 35 minutes.

Allow time to cool before you turn them over and pop out the muffins.  Serve warm or at room temperature.

Recipe adapted from Giada


Egg Muffins
 
Print
Author: Feasts And Fotos
Ingredients
  • 1 tablespoon extra-virgin olive oil
  • 4 ounces sliced pancetta (about ¼ inch thick), diced into ½-inch pieces
  • 2 shallots, chopped
  • 1-2 slices country-style bread, cut into ½-inch cubes (about 2 cups)
  • 7 large eggs, beaten, at room temperature
  • 2 packed cups chopped spinach
  • ½ cups grated gruyere (6 ounces)
  • ⅓ cup milk, at room temperature
Method
  1. Preheat the oven to 400 degrees.
  2. Heat the oil over medium-high heat in a medium skillet. Add the pancetta and cook until lightly browned, about 5 minutes. Remove the pancetta using a slotted spoon, drain on paper towels and allow to cool slightly. Add the shallots and cook over medium-high heat until soft, about 3 minutes. Add the spinach and cook until just wilted, 1-2 minutes.
  3. In a medium bowl, mix together the cooked pancetta, bread, eggs, gruyere, milk and shallot and spinach mixture until all the ingredients are moistened.
  4. Spoon the mixture into the ramekins, filling each ¾ full. Place the ramekins on a small baking sheet and bake until golden brown, about 25 - 35 minutes.
  5. Allow time to cool before you turn them over and pop out the muffins.  Serve warm or at room temperature.
3.2.2802

Filed Under: Breakfast Tagged With: bacon, breakfast, egg, gruyere, muffins, pancetta, spinach

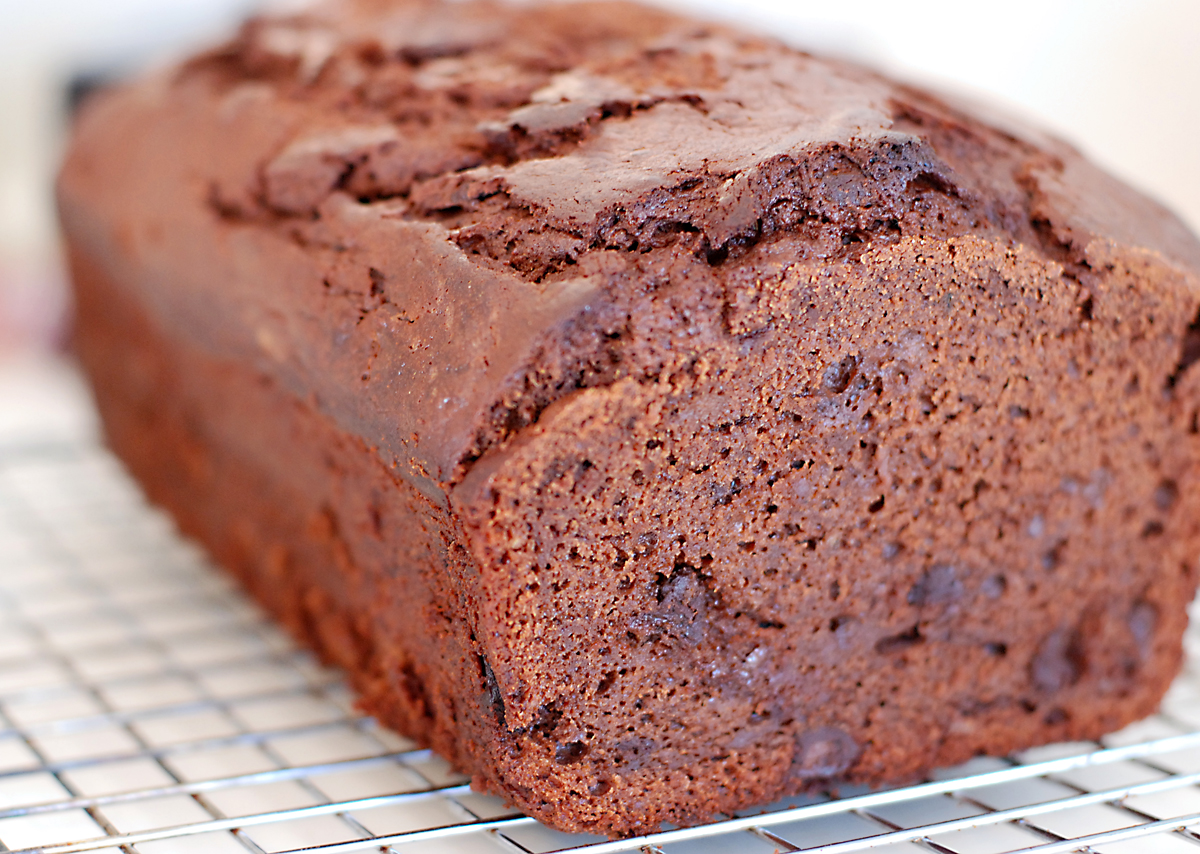
Coco-Nana Bread

February 17, 2012 by Susan

Life with a newborn has been challenging, to say the least. I barely have time to eat anything, let alone actually cook.  It has become essential that I have some type of bread/loaf such as this one on hand everyday so I can just slice a piece and eat it with one hand.  If not I would wither away to nothing, running on fumes.

I wanted something a bit different and this loaf fit the bill. Also, it had alot of chocolate in it, something I have grown frighteningly dependent upon lately.  Did I love this bread?  Not exactly.  But I did like it and it actually grew on me…I liked it more and more as the days went on. It is rich and dense yet very moist. And quite filling – like a meal.  And when you don’t have time to eat meals anymore you become thankful for a slice of chocolate banana bread that will fill you up and provide some comfort as well.

Here’s what you will need to make one loaf…

Recipe

2 cups all-purpose flour
1 cup unsweetened cocoa powder
1 1/2 tsp baking powder
1/2 tsp salt
1/4 tsp baking soda
1 stick unsalted butter, room temp
3/4 cup sugar
1/2 cup packed light brown sugar
2 large eggs, room temp
2 ripe bananas, mashed
3/4 cup buttermilk
3 ounces bittersweet chocolate, coarsely chopped
Preheat oven to 350. Butter a 9 x 5 inch loaf pan and place it on an insulated baking sheet or on two regular baking sheets stacked on top of the other. (This extra insulation will keep the bottom of the bread from over baking.)

Method

Sift together the flour, cocoa, baking powder, salt and baking soda.

Working with a stand mixer fitted with a paddle attachment beat the butter at medium speed for about a minute, until softened. Add the sugars and beat for 2 minutes more. Add the eggs one at a time, beating for a minute after each addition. At this point, the batter may look a little curdled — it’s okay. Reduce the mixer speed to low and mix in the mashed bananas. Add the dry ingredients in 3 additions, mixing only until they disappear into the batter. Still on low speed, add the buttermilk, mixing until it is incorporated. Stir in the chopped chocolate. Scrape the batter into the pan.

Bake for 30 minutes. Cover the bread loosely with a foil tent to keep the top from getting too dark, and continue to bake for another 45 to 65 minutes or until a thin knife inserted into the center comes out clean. Transfer the pan to a rack and cool for at least 20 minutes before running a knife around the edges of the bread and unmolding. Invert and cool to room temp right side up.

Cut yourself a nice thick slice and enjoy!

Recipe courtesy Dorie Greenspan

Filed Under: Breakfast, Sweets Tagged With: banana, bread, chocolate, loaf

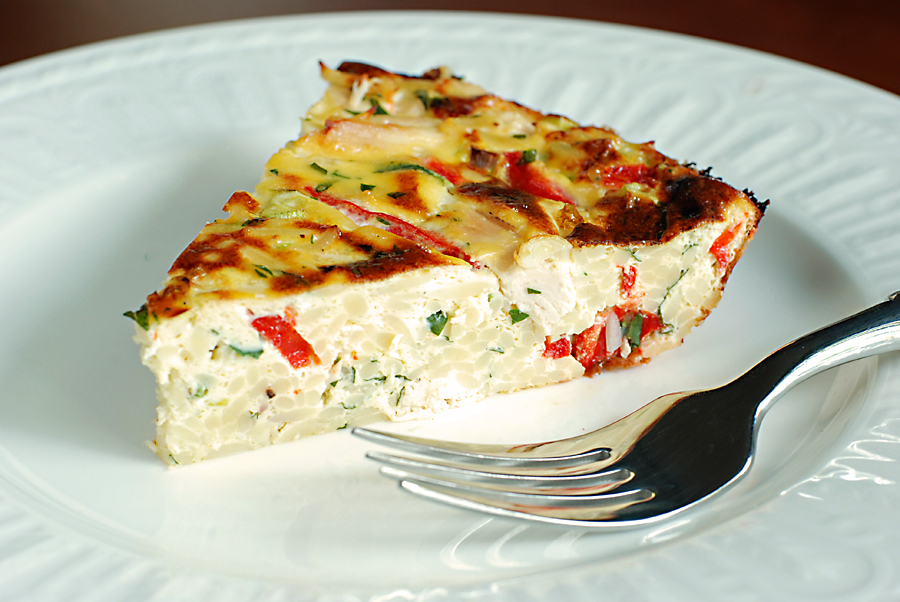
Chicken and Orzo Frittata

July 13, 2011 by Susan


I am finally back in the kitchen!  Let me just say that morning sickness is no joke.  Or shall I say all day sickness.  Yes, that’s more accurate.  All.  Day.  Sickness.

But that phase seems to be mostly over and I can now stand up long enough to prepare some food!  Yay!  Since I took a few months off I decided to ease my way back into the kitchen by preparing some yummy things that could be eaten any time of day, since I now eat all day long.  This frittata is perfect, it can be eaten for breakfast, lunch, a light dinner with a side salad, a snack, heated or at room temperature.  And it’s a very substantial frittata with the inclusion of chicken and pasta.  It is filling and satisfying…and delicious.

Here’s what you need to make one frittata…


Recipe

3/4 cup orzo pasta

6 eggs

1/3 cup whole milk ricotta

1/4 cup creme fraiche (optional)

2 cooked chicken breasts, cubed (about 2 cups)

4 scallions, chopped

1/4 cup chopped Italian flat-leaf parsley

1/3 cup (heaping) diced roasted red bell peppers

1 teaspoon salt

1/4 teaspoon freshly ground black pepper


Method

Preheat the oven to 375 degrees F.

Bring a small pot of salted water to a boil over high heat. Add the orzo and cook until tender but still firm to the bite, stirring occasionally, about 8 – 10 minutes. Drain pasta.

In a large bowl combine the eggs, ricotta, and creme fraiche (if using) and stir until the eggs are beaten and the ingredients are combined. Add the cooked orzo, chicken, scallions, parsley, red bell peppers, salt, and pepper. Stir to combine.

Pour the mixture into a 1 1/2-quart baking dish. Bake for 25 – 30 minutes or until firm to the touch and the center is no longer soft. Turn on the broiler. Place the pan under the broiler until golden on top, about 5 minutes. It is best to not leave the stove while doing this, things have a way of burning quickly under the broiler.  Remove from the oven and let set for 5-10 minutes.  Cut into wedges and serve.

Recipe courtesy Giada DeLaurentiis

Chicken and Orzo Frittata
 
Print
Author: Feasts And Fotos
Ingredients
  • ¾ cup orzo pasta
  • 6 eggs
  • ⅓ cup whole milk ricotta
  • ¼ cup creme fraiche (optional)
  • 2 cooked chicken breasts, cubed (about 2 cups)
  • 4 scallions, chopped
  • ¼ cup chopped Italian flat-leaf parsley
  • ⅓ cup (heaping) diced roasted red bell peppers
  • 1 teaspoon salt
  • ¼ teaspoon freshly ground black pepper
Method
  1. Preheat the oven to 375 degrees F.
  2. Bring a small pot of salted water to a boil over high heat. Add the orzo and cook until tender but still firm to the bite, stirring occasionally, about 8 - 10 minutes. Drain pasta.
  3. In a large bowl combine the eggs, ricotta, and creme fraiche (if using) and stir until the eggs are beaten and the ingredients are combined. Add the cooked orzo, chicken, scallions, parsley, red bell peppers, salt, and pepper. Stir to combine.
  4. Pour the mixture into a 1½-quart baking dish. Bake for 25 - 30 minutes or until firm to the touch and the center is no longer soft. Turn on the broiler. Place the pan under the broiler until golden on top, about 5 minutes. It is best to not leave the stove while doing this, things have a way of burning quickly under the broiler. Remove from the oven and let set for 5-10 minutes. Cut into wedges and serve.
3.2.2802

Filed Under: Breakfast, Main Dishes, Pasta Tagged With: breakfast, chicken, frittata, light dinner, lunch, orzo

Spiced Pear Jam

May 6, 2011 by Susan

PearJamR

Mother’s Day is this Sunday and I can’t think of a better way to sweeten your mom’s day than with this pear jam.   It is slightly sweet, a little spicy and best of all – it is homemade.  What mom wouldn’t love that?

Here’s what you need to make approximately three 70 ml jars…

Recipe

7 large, ripe Bartlett pears, peeled, cored and cut into 1/2 inch pieces

2 cups sugar

10 cardamom pods, lightly crushed

1/4 cup lemon juice

1 tbsp honey

Method

In a large glass bowl toss the pears with the sugar and lemon juice.  Cover and refrigerate overnight.

Transfer the pears and their liquid to a wide, heavy pot and bring to a boil.  Put the crushed cardamom in a tea ball and add it to the pot. Cook the pears over a high heat, stirring frequently, until the liquid starts to thicken and the pears become translucent, about 10 minutes.  Remove the pot from the heat.

Place a metal spoon in the freezer (you will use this to test if the jam is cooked to the correct thickness).

Transfer one-third of the pears to a food processor and puree until smooth.  Add the puree back to the pot.  Boil over moderately high heat, stirring until the jam is very thick, about 5-10 minutes.

To test the jam, removed the chilled spoon from the freezer and drop a small amount of the pear jam on the back of the spoon and place back in the freezer for 30 seconds.  Remove the spoon again and tilt the spoon.  The jam should be thick and run down the spoon slowly.  If it is too runny, continue cooking the jam for a few minutes more, then test again.

Remove the tea ball and stir in the honey.

Ladle the jam into your jars, allow to cool completely, then cover and refrigerate for up to 2 months.

Adapted from Food & Wine/Blue Chair Fruit

Spiced Pear Jam
 
Print
Author: Feasts And Fotos
Ingredients
  • 7 large, ripe Bartlett pears, peeled, cored and cut into ½ inch pieces
  • 2 cups sugar
  • 10 cardamom pods, lightly crushed
  • ¼ cup lemon juice
  • 1 tbsp honey
Method
  1. In a large glass bowl toss the pears with the sugar and lemon juice.  Cover and refrigerate overnight.
  2. Transfer the pears and their liquid to a wide, heavy pot and bring to a boil.  Put the crushed cardamom in a tea ball and add it to the pot. Cook the pears over a high heat, stirring frequently, until the liquid starts to thicken and the pears become translucent, about 10 minutes.  Remove the pot from the heat.
  3. Place a metal spoon in the freezer (you will use this to test if the jam is cooked to the correct thickness).
  4. Transfer one-third of the pears to a food processor and puree until smooth.  Add the puree back to the pot.  Boil over moderately high heat, stirring until the jam is very thick, about 5-10 minutes.
  5. To test the jam, removed the chilled spoon from the freezer and drop a small amount of the pear jam on the back of the spoon and place back in the freezer for 30 seconds.  Remove the spoon again and tilt the spoon.  The jam should be thick and run down the spoon slowly.  If it is too runny, continue cooking the jam for a few minutes more, then test again.
  6. Remove the tea ball and stir in the honey.
  7. Ladle the jam into your jars, allow to cool completely, then cover and refrigerate for up to 2 months.
3.2.2802

Filed Under: Breakfast, Sweets Tagged With: cardamom, jam, pear

Buckwheat Breakfast Bowl

March 1, 2011 by Susan

Along the crazy train of trying to conceive I found out that I have hypothyroidism and in addition was told to try to severely limit (aka eliminate) wheat from my diet (as well as dairy and sugar).  Ugh.  It has been painful, people.

I am completely astonished at how many unsuspecting foods contain wheat.  Soy sauce?  Come on now.  Not that I eat much soy sauce at all, but it’s just an example of a product that I would never think has something like wheat in it!

I already eat relatively healthy and very rarely eat any processed or packaged foods.  As a result I am not having such a hard time with wheat free dinners.  The same goes for lunches, I usually have something that was leftover from dinner earlier in the week or a big bowl of quinoa with chicken or kale.  Breakfasts, on the other hand, get me the most upset.  There are only a VERY few things that are acceptable to eat.  And that can get very boring.

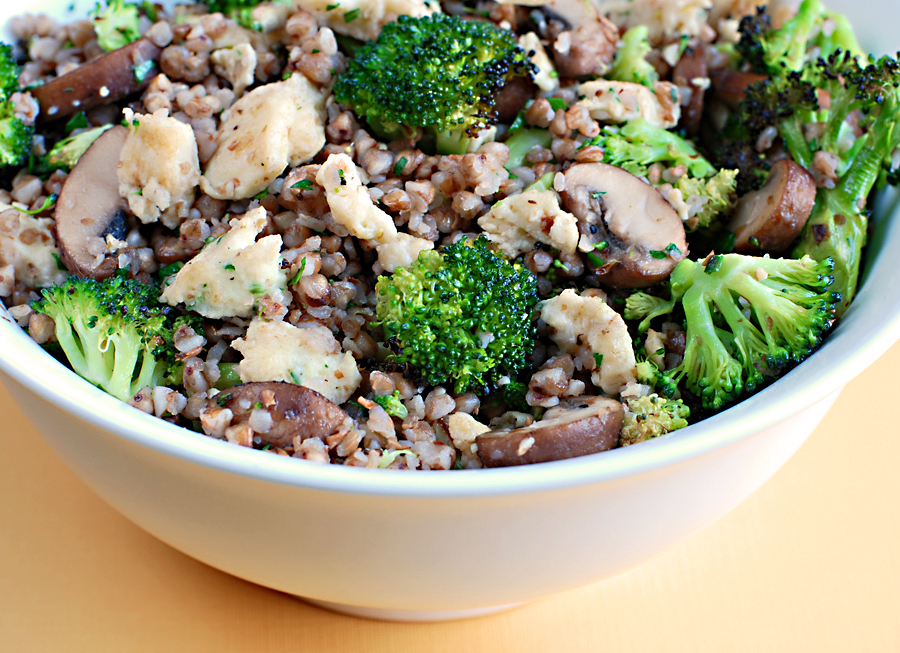
This past weekend I set out to create a type of ‘breakfast bowl’ containing something that would actually make me feel full.  One of the new grains I have tried cooking with is buckwheat (despite the name it does not contain wheat), which has a nutty flavor.  I have had it before in restaurants and liked it, so I thought it would be a great base for my breakfast bowl.  Then I basically chose a few of my favorite veggies and added eggs to it – voila!

Although this recipe does have a few seperate components going at the same time, this dish is not difficult to make and it tastes good.  Also, it holds up well in the fridge, so you really can get away with making a big batch of it to last you a few days.  Most importantly, you feel like you are eating something substantial and don’t feel as if you are sacrificing.  Which basically, you are.  Because all you can think about is having a big, fat muffin.

Here’s what you will need to serve 4…

Recipe

1 cup buckwheat

2 cups water

1 box cremini mushrooms, cleaned and sliced thick

1 small head of broccoli, cut into medium-sized florets

3 whole eggs

3 egg whites

2-3 tbsp chopped parsley

1-2 tsp truffle oil

salt & pepper

olive oil

Method

Preheat oven to 425 degrees.

Pour 2 cups of water into a saucepan and bring to boil.  Add 1/2 teaspoon of salt to the water and stir in buckwheat, reduce heat to a simmer, cover and cook approximately 7-10 minutes.

In the meantime, heat up a few tablespoons of oil in a large skillet.  Add the mushrooms and saute until softened, 5-6 minutes.  While the mushrooms are cooking lay the broccoli florets on a sheet pan and sprinkle with olive oil, salt & pepper.  Mix with your hands to coat all the broccoli.  Roast in the oven for 10-12 minutes, or until lightly browned, flipping once after 6 minutes or so.  Allow to cool for a few minutes, then roughly chop.

Now for the eggs – basically just scramble the eggs as you would do normally.  Once the eggs are cooked I like to roughly break up the eggs with the tip of my spatula right in the pan.

All that is left now is to assemble all the individual components.  Into the large skillet with the mushrooms add the truffle oil and stir to combine.  Add the buckwheat, broccoli and eggs, mixing well.  Finally, add the parsley.

Buckwheat Breakfast Bowl
 
Print
Author: Feasts And Fotos
Ingredients
  • 1 cup buckwheat
  • 2 cups water
  • 1 box cremini mushrooms, cleaned and sliced thick
  • 1 small head of broccoli, cut into medium-sized florets
  • 3 whole eggs
  • 3 egg whites
  • 2-3 tbsp chopped parsley
  • 1-2 tsp truffle oil
  • salt & pepper
  • olive oil
Method
  1. Preheat oven to 425 degrees.
  2. Pour 2 cups of water into a saucepan and bring to boil.  Add ½ teaspoon of salt to the water and stir in buckwheat, reduce heat to a simmer, cover and cook approximately 7-10 minutes.
  3. In the meantime, heat up a few tablespoons of oil in a large skillet.  Add the mushrooms and saute until softened, 5-6 minutes.  While the mushrooms are cooking lay the broccoli florets on a sheet pan and sprinkle with olive oil, salt & pepper.  Mix with your hands to coat all the broccoli.  Roast in the oven for 10-12 minutes, or until lightly browned, flipping once after 6 minutes or so.  Allow to cool for a few minutes, then roughly chop.
  4. Now for the eggs - basically just scramble the eggs as you would do normally.  Once the eggs are cooked I like to roughly break up the eggs with the tip of my spatula right in the pan.
  5. All that is left now is to assemble all the individual components.  Into the large skillet with the mushrooms add the truffle oil and stir to combine.  Add the buckwheat, broccoli and eggs, mixing well.  Finally, add the parsley.
3.2.2802

Filed Under: Breakfast, Rice and Grains Tagged With: breakfast, broccoli, buckwheat, eggs, healthy, mushrooms, wheat free

Pumpkin Walnut Muffins

November 4, 2010 by Susan

PumpkinMuffinFINALR

When the cold weather starts rolling in and fall is in the air I immediately start making baked items involving pumpkin.  It’s mandatory, isn’t it?

A few years back I posted my favorite pumpkin spice bread recipe, it’s my go-to pumpkin bread.  This year I made a few changes to that recipe and turned that delicious bread into adorable muffins.  I even bake them up in cupcake tins for a smaller portion size (pictured above).  I find that the muffin and/or cupcake shape is a bit more transportable than the loaf and who wouldn’t appreciate that?  Running out the door?  Just grab one and go.  And let’s face it, they are very cute.  Nothing makes me feel more like a kid again than eating cupcakes.  Spread some cream cheese frosting on top of these cuties and just try to not eat five of them.  In one sitting.

These muffins are very moist and the addition of the walnuts provides a wonderful crunch.  In my opinion they are terrific eaten as-is.  But if you so choose, feel free to slice open and slather on some butter.  Or top with some regular cream cheese.  Or better yet – spread that cream cheese frosting on top.

Go ahead, bring out that kid in you!

Here’s what you need to make approximately 12 cupcakes or 8 muffins…

Recipe

1 cup regular flour

2/3 cups whole wheat flour

1 teaspoon baking soda

3/4 teaspoon ground cinnamon

1/4 teaspoon ground ginger

1/4 teaspoon ground cloves

1/4  teaspoon salt

1 and 1/3 cups sugar

1/3 cup vegetable oil

1 cup plus 2 tablespoons canned unsweetened pumpkin

1/2 cup chopped walnuts, plus a few extra for topping

1 large egg, room temperature

Method

Preheat oven to 350 degrees.   Spray muffin tin or cupcake tin with cooking spray.  If using a cupcake tin, add your cupcake liners if you so choose.

Mix first seven ingredients together in a bowl with a whisk until well combined.

Combine sugar, oil and pumpkin in the bowl of electric mixer.  Beat at medium speed until smooth.  Add egg, beating until well blended.  Gradually add dry ingredients, beating at a low speed until blended.  Add chopped walnuts to the batter and gently fold in using a spatula or wooden spoon.  Transfer batter to tin.  If you want them to look extra special place a few broken pieces of walnuts on top of each.  Not only does this make them look great but it also lets people know there are walnuts inside!

Bake for approximately 20-35 minutes, depending on the size of your tin.  You want them to be golden on top, firm to the touch and a when you insert a wooden pick in the center it comes out clean.  Let cool in pan on a wire rack for 5 minutes then remove from pan and allow to cool slightly.

Dig in!


Pumpkin Walnut Muffins
 
Print
Author: Feasts And Fotos
Ingredients
  • 1 cup regular flour
  • ⅔ cups whole wheat flour
  • 1 teaspoon baking soda
  • ¾ teaspoon ground cinnamon
  • ¼ teaspoon ground ginger
  • ¼ teaspoon ground cloves
  • ¼  teaspoon salt
  • 1 and ⅓ cups sugar
  • ⅓ cup vegetable oil
  • 1 cup plus 2 tablespoons canned unsweetened pumpkin
  • ½ cup chopped walnuts, plus a few extra for topping
  • 1 large egg, room temperature
Method
  1. Preheat oven to 350 degrees.   Spray muffin tin or cupcake tin with cooking spray.  If using a cupcake tin, add your cupcake liners if you so choose.
  2. Mix first seven ingredients together in a bowl with a whisk until well combined.
  3. Combine sugar, oil and pumpkin in the bowl of electric mixer.  Beat at medium speed until smooth.  Add egg, beating until well blended.  Gradually add dry ingredients, beating at a low speed until blended.  Add chopped walnuts to the batter and gently fold in using a spatula or wooden spoon.  Transfer batter to tin.  If you want them to look extra special place a few broken pieces of walnuts on top of each.  Not only does this make them look great but it also lets people know there are walnuts inside!
  4. Bake for approximately 20-35 minutes, depending on the size of your tin.  You want them to be golden on top, firm to the touch and a when you insert a wooden pick in the center it comes out clean.  Let cool in pan on a wire rack for 5 minutes then remove from pan and allow to cool slightly.
3.2.2802

Filed Under: Breakfast, Sweets Tagged With: breakfast, dessert, muffins, pumpkin, walnut

  • 1
  • 2
  • Next Page »
Hello and welcome to Feasts and Fotos!

Archives

Categories

Copyright © 2025 · Foodie Pro Theme by Shay Bocks · Built on the Genesis Framework · Powered by WordPress