FEASTS AND FOTOS

  • Home
  • About
  • Happenings
  • Contact
You are here: Home / Archives for Susan

Beet Panzanella

March 31, 2009 by Susan

beetpanzanellaresize

I can hardly believe I am writing a food post about a salad.  I like salads, but I’ve never been a real lover of them, I can take ’em or leave ’em, if you know what I mean.  I was, however, so impressed with this salad that I had to post the recipe.  It is outstanding.

Panzanella is a bread salad and I make a delicious one in the spring/summer.  When I came across this ‘winter’ version, I was intrigued to give it a try.  The contrasting flavors really round out this salad, which truthfully can be a meal all on it’s own.  It’s sweet, savory, creamy and crunchy all at the same time and after making my own croutons I will never again buy them in a store.

The individual parts of this salad can be made ahead and stored separately, lasting well in the fridge for a few days.  If you have been reading my blog for any length of time, you know how much I love that!  This salad is slightly time consuming to make so getting several ‘uses’ out of it is a terrific payoff.  I keep the croutons in a separate zip lock bag in the fridge and they last a long time.  The beets and shallots are put in a different zip lock back, the dressing in a container…well, you get the idea.   Just assemble as needed.

Some advice regarding this salad that I must pass on.  The first is do not wear something white or of extreme value when making this salad.  The beets stain like nobody’s business.  The second is do not assemble this too far ahead of time, the croutons will get soggy and that is just not good.  The bread must be crunchy.  I would say you can let the salad sit for about 10-15 minutes before any soggy problems start.

I’ve adapted this recipe from Tyler Florence, making just a few small changes.  My version is below…

Recipe

2 bunches baby beets (or large beets cut into chunks)

4 shallots, peeled

Extra-virgin olive oil

2 sprigs thyme and oregano

4 slices pancetta, sliced into small pieces

1 log goat cheese, refrigerated

1 loaf whole wheat bread, cut into crouton-sized pieces

1/2 lemon, juiced

1/4 cup honey

2 tablespoons balsamic vinegar

1/2 orange, juiced

1 handful dates, chopped

1 large handful arugula

Salt & pepper to taste

Method

Preheat the oven to 350 degrees F.

Wash beets well, cut into chunks, then place on a long sheet of aluminum foil. Split shallots lengthwise and add to foil. Drizzle with extra virgin olive oil, thyme, and oregano leaves and season with salt and pepper. Fold foil into a packet and roast in oven until fork tender and nicely caramelized, about 40 – 50 minutes.

In saute pan, cook pancetta until crisp.

Toss the bread cubes with 1⁄4 cup oil until the bread is damp with the oil. Spread the bread on a baking sheet and bake until the bread begins to brown, about 10 minutes.

While the bread is baking, make the dressing. In a large mixing bowl, add the honey, lemon juice, orange juice, balsamic vinegar, 4 tablespoons oil, salt, pepper, and stir together. Add all the remaining ingredients except arugula and gently stir. Taste for seasoning. Remove beets and bread from oven and add to bowl. Stir together and season with salt and pepper. Add pancetta and arugula.  Divide onto individual plates and enjoy!


Beet Panzanella
 
Print
Author: Feasts And Fotos
Ingredients
  • 2 bunches baby beets (or large beets cut into chunks)
  • 4 shallots, peeled
  • Extra-virgin olive oil
  • 2 sprigs thyme and oregano
  • 4 slices pancetta, sliced into small pieces
  • 1 log goat cheese, refrigerated
  • 1 loaf whole wheat bread, cut into crouton-sized pieces
  • ½ lemon, juiced
  • ¼ cup honey
  • 2 tablespoons balsamic vinegar
  • ½ orange, juiced
  • 1 handful dates, chopped
  • 1 large handful arugula
  • Salt & pepper to taste
Method
  1. Preheat the oven to 350 degrees F.
  2. Wash beets well, cut into chunks, then place on a long sheet of aluminum foil. Split shallots lengthwise and add to foil. Drizzle with extra virgin olive oil, thyme, and oregano leaves and season with salt and pepper. Fold foil into a packet and roast in oven until fork tender and nicely caramelized, about 40 - 50 minutes.
  3. In saute pan, cook pancetta until crisp.
  4. Toss the bread cubes with 1⁄4 cup oil until the bread is damp with the oil. Spread the bread on a baking sheet and bake until the bread begins to brown, about 10 minutes.
  5. While the bread is baking, make the dressing. In a large mixing bowl, add the honey, lemon juice, orange juice, balsamic vinegar, 4 tablespoons oil, salt, pepper, and stir together. Add all the remaining ingredients except arugula and gently stir. Taste for seasoning. Remove beets and bread from oven and add to bowl. Stir together and season with salt and pepper. Add pancetta and arugula.
3.2.2802

Filed Under: Salads Tagged With: beet, croutons, goat cheese, panzanella, salad

Chicken Vegetable Couscous

March 19, 2009 by Susan

couscousforkresize

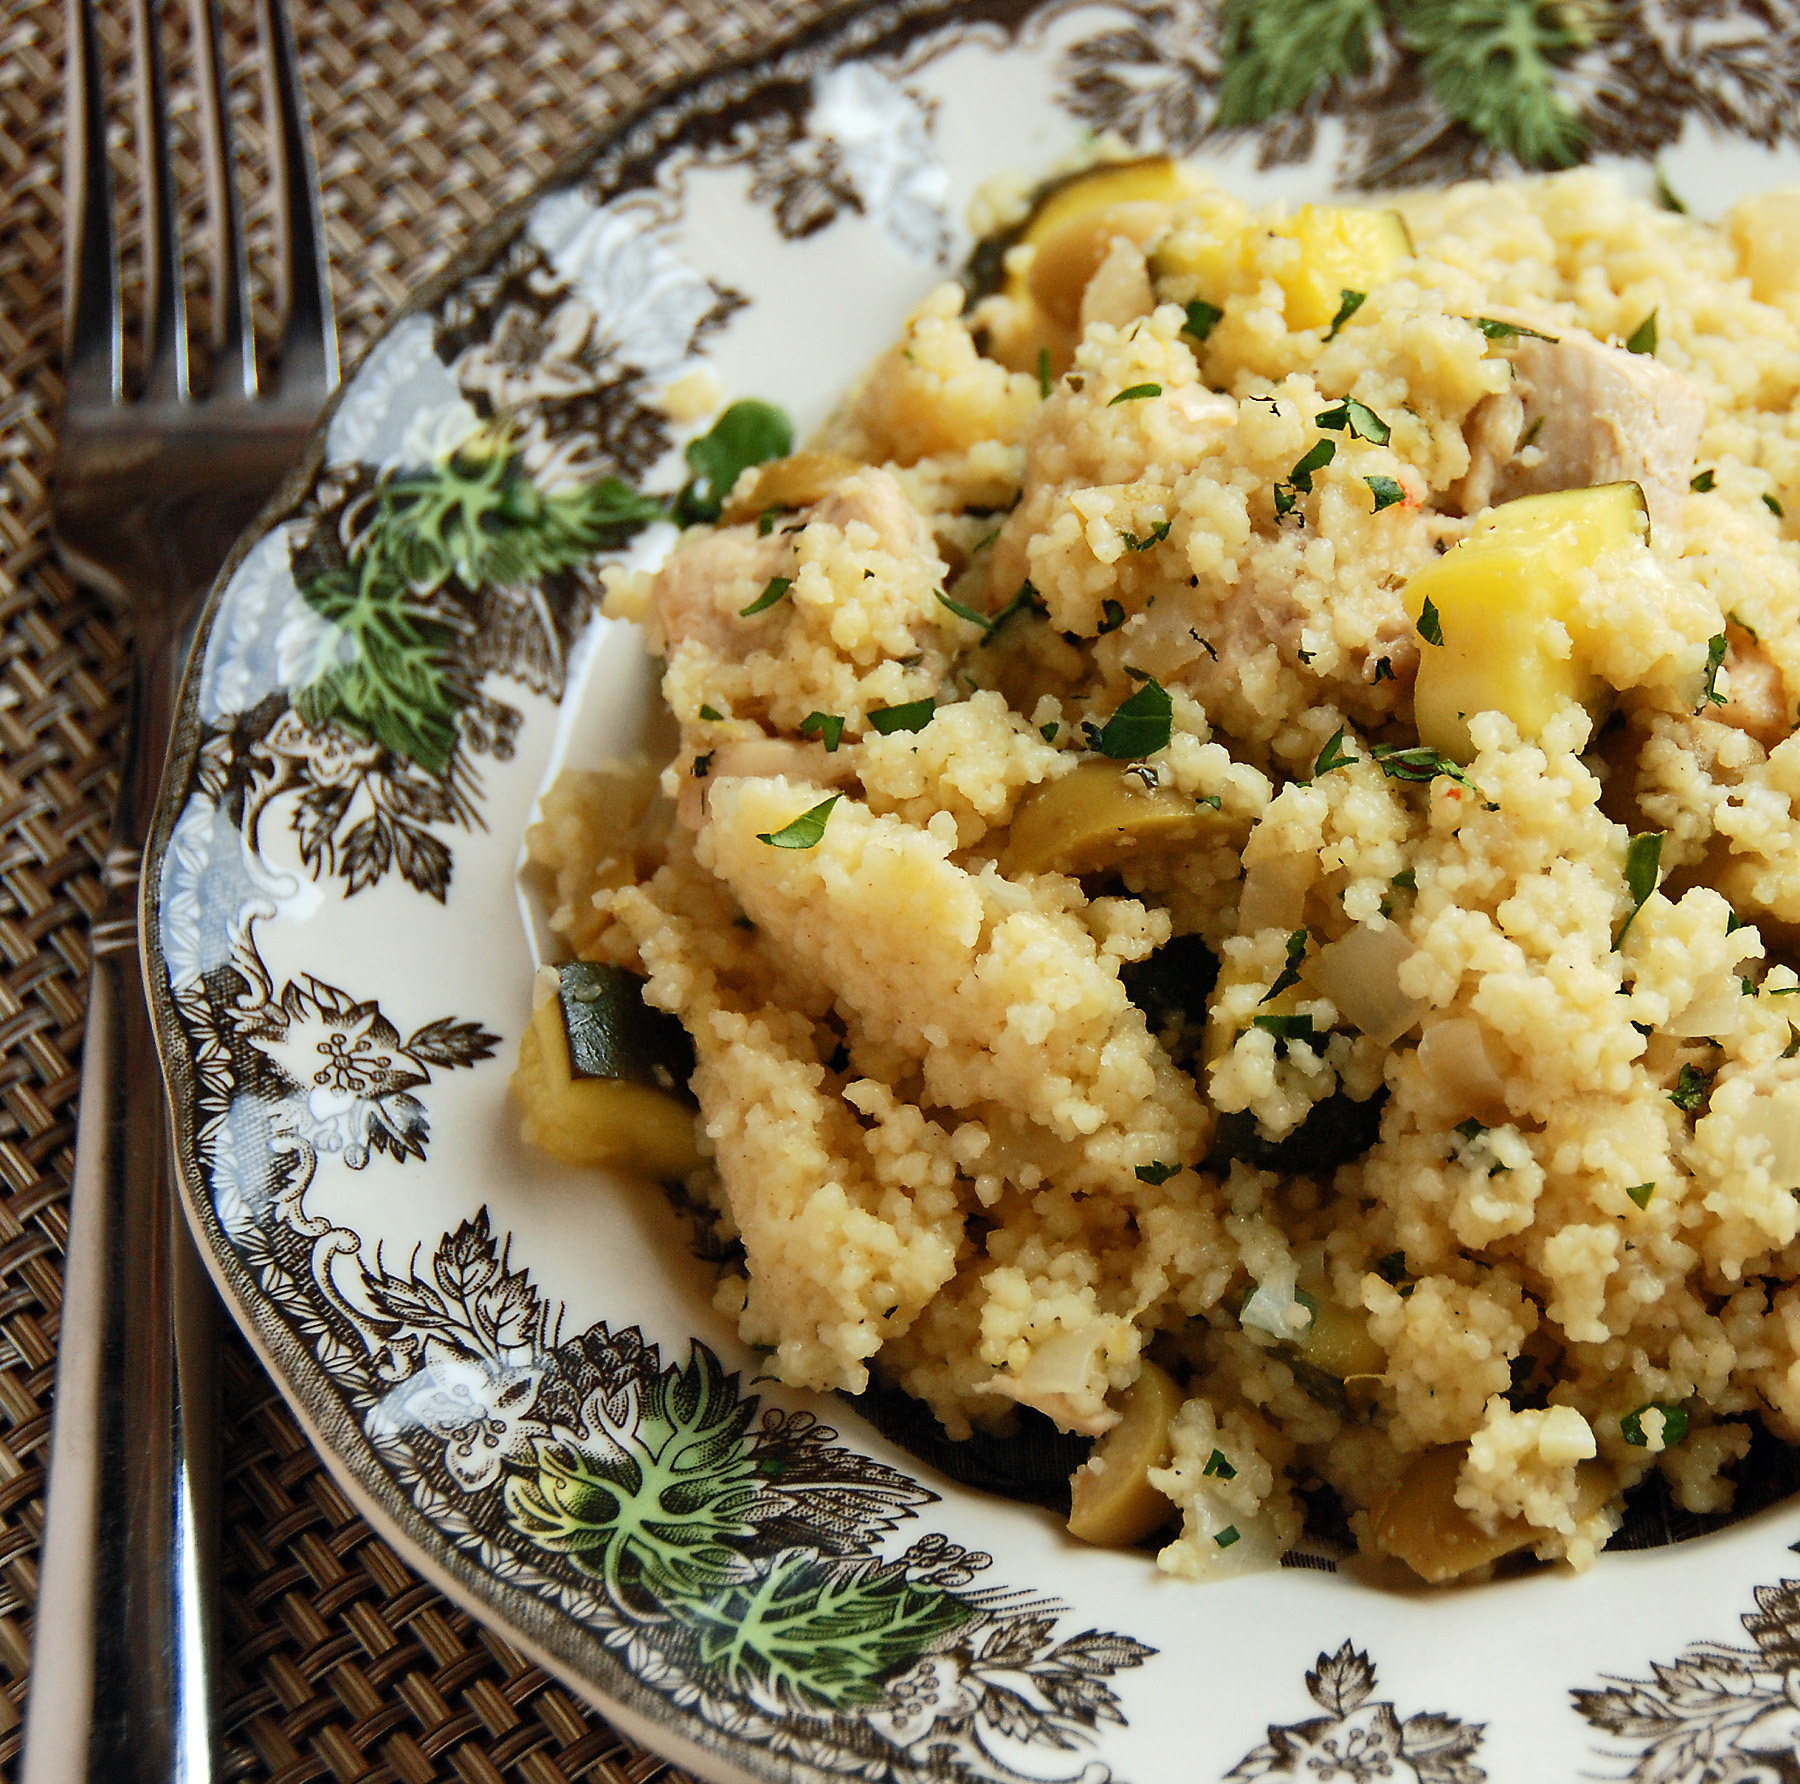
Quick and simple dishes that actually taste good are my favorite things to make.  If the dish stands up well to being left in the fridge for a few days, even better!  I discovered this recipe from the Rachael Ray magazine and only made a few small changes.  It’s a wonderful side dish, however, I eat it as my main meal, in a bowl, sitting in front of the TV…

I doubled the amount of zucchini as well as eliminating the fennel seeds (her recipe called for 1/2 tsp).  The other change I sometimes make is not sauteing the chicken in the pan – sometimes I have leftover oven roasted chicken that I shred up or cut into cubes and throw in.  Also note that I have made this dish with quinoa instead of couscous many times and it’s delicious.  Actually, I think I prefer it.  Just cook the quinoa separately (as directed on the box)  and add to the zucchini mixture for a gluten-free, protein packed version of this meal.

Here’s what you need to serve 4…

Recipe

2 tbsp olive oil

1 pound boneless chicken breasts, chopped (or leftover chicken)

1 onion

2 zucchini, chopped

2 cloves garlic, minced

2 tsp grated lemon zest

Juice of one lemon

1/2 tsp crushed red pepper

Pinch of cinnamon

1 cup green olives, chopped

Low sodium chicken stock (use amount as directed on couscous box)

One 10 oz box couscous (or 1 cup quinoa)

1/4 cup parsley, chopped

1/4 cup mint leaves, chopped

Salt & pepper

hot sauce (optional)

Method

Heat olive oil in a large skillet.   Add the chicken and cook until lightly browned, 3 minutes.  Add the onion, zucchini, garlic, lemon zest, red pepper and cinnamon.  Season with salt & pepper.  Cook for 3-5 minutes, then add the olives.  Cook for 3 more minutes.

Stir in the chicken stock and bring to a boil.  Stir in the couscous, cover the pan, turn off the heat and let stand for 5 minutes.  Fluff with a fork and then add the parsley, mint and lemon juice.  Toss to combine.  If you are so inclined, sprinkle some hot sauce on it and enjoy!


Chicken Vegetable Couscous
 
Print
Author: Feasts And Fotos
Ingredients
  • 2 tbsp olive oil
  • 1 pound boneless chicken breasts, chopped (or leftover chicken)
  • 1 onion
  • 2 zucchini, chopped
  • 2 cloves garlic, minced
  • 2 tsp grated lemon zest
  • Juice of one lemon
  • ½ tsp crushed red pepper
  • Pinch of cinnamon
  • 1 cup green olives, chopped
  • Low sodium chicken stock (use amount as directed on couscous box)
  • One 10 oz box couscous (or 1 cup quinoa)
  • ¼ cup parsley, chopped
  • ¼ cup mint leaves, chopped
  • Salt & pepper
  • hot sauce (optional)
Method
  1. Heat olive oil in a large skillet.   Add the chicken and cook until lightly browned, 3 minutes.  Add the onion, zucchini, garlic, lemon zest, red pepper and cinnamon.  Season with salt & pepper.  Cook for 3-5 minutes, then add the olives.  Cook for 3 more minutes.
  2. Stir in the chicken stock and bring to a boil.  Stir in the couscous, cover the pan, turn off the heat and let stand for 5 minutes.  Fluff with a fork and then add the parsley, mint and lemon juice.  Toss to combine.  If you are so inclined, sprinkle some hot sauce on it and enjoy!
3.2.2802

Filed Under: Main Dishes, Rice and Grains, Sides and Sauces Tagged With: chicken, couscous, green olives, Quinoa, zucchini

Salmon and Edamame Salad

March 9, 2009 by Susan

salmonsaladresize

I have been making this salmon salad for years, mostly in the summer.  Last week I got such a craving for not only some nicer weather, but this salmon dish.  I absolutely love it.

Salmon could be expensive these days.  Particularly the wild salmon, the kind that is supposed to be more healthy for us.  As it turns out, last week I found myself in Flushing, NY for the first time and discovered the many interesting and inexpensive markets there.  It’s a fascinating spot, once you walk out of the subway you literally feel as if you have been transported to China or Korea.  The markets carry wonderful produce as well as tons of fish!  The salmon, although not the wild variety, was calling out to me and I immediately thought I would use it in this salad.

This recipe is adapted from Ina Garten’s Salmon Salad.  The main change I made was swapping out the celery for edamame.  I’m sure the celery version is great, but I saw an opportunity to use edamame, a soybean, instead.    Edamame is a complete protein containing all of the amino acid building blocks.  It also provides an antioxidant boost from plant chemicals called isoflavones, is high in protein and fiber and is gluten free.  They are so easy to prepare because they are sold frozen, just like frozen corn.  All you need to do is defrost!  They are so delicious.

This dish is a sinch to make and holds up well in the fridge for a few days.  Actually, it gets better as it sits.  I find myself snacking on this by the spoonful when I have it on hand.  This salad is best served chilled, or at room temperature.  You can spoon some onto a mixed green salad, put some into endive spears as an appetizer or just eat it by the spoonful, as I usually do.

Treat yourself to a healthy, low-calorie snack for a change, one filled with healthy Omega 3’s, soy, protein and fiber.  You’ll feel a tiny bit better about the impending bikini season.  Maybe.  Ugh!

Here’s what you will need to serve 4…

Recipe 

1 pound cooked salmon, chilled (I  use fillets, no bones!)

1 cup frozen edamame, defrosted

1 tablespoon red onion, very small dice

2 tablespoons fresh dill, minced

1 heaping tablespoon capers, drained

1 1/2 tablespoons raspberry wine vinegar

1 1/2 tablespoons olive oil

salt & pepper to taste

Method

Cook the salmon.  (I usually just bake it in the oven at 375 for about 20 minutes).  Allow to cool completely.  Break up salmon into very large chunks, removing skin and of course any bones.  Place the salmon in a bowl.  Add the edamame, red onion, dill, capers, raspberry vinegar, olive oil, salt and pepper.  Mix well and serve chilled.


Salmon and Edamame Salad
 
Print
Author: Feasts And Fotos
Ingredients
  • 1 pound cooked salmon, chilled (I  use fillets, no bones!)
  • 1 cup frozen edamame, defrosted
  • 1 tablespoon red onion, very small dice
  • 2 tablespoons fresh dill, minced
  • 1 heaping tablespoon capers, drained
  • 1½ tablespoons raspberry wine vinegar
  • 1½ tablespoons olive oil
  • salt & pepper to taste
Method
  1. Cook the salmon.  (I usually just bake it in the oven at 375 for about 20 minutes).  Allow to cool completely.  Break up salmon into very large chunks, removing skin and of course any bones.  Place the salmon in a bowl.  Add the edamame, red onion, dill, capers, raspberry vinegar, olive oil, salt and pepper.  Mix well and serve chilled.
3.2.2802

Filed Under: Salads Tagged With: dill, edamame, gluten free, salad, salmon

White Bean and Escarole Soup

March 3, 2009 by Susan

BeanEscaroleSoupResize2AFinal

This soup is the perfect antidote to the cold and blustery weather we are having in New York.  It’s….blizzard-worthy.

I melded a few different white bean and escarole soup recipes and created this one and am very happy with the results.  It’s hearty and filling, however, it’s not thick and overwhelming.  It still maintains a thin consistancy.  The flavors are wonderful, the rosemary, sage and pancetta really do wonders to this soup, providing a delicious depth of flavor.  Whenever I have a parmesan rind leftover I dump it in the pot, however, it’s not mandatory for this soup.  If you don’t have it, don’t fret, just omit it.  This soup is relatively quick and easy to prepare yet tastes as if you have been slaving over it for hours.

Aside from those few slabs of pancetta I mentioned, this is a healthy soup.  The beans and escarole provide us with a healthy dose of folic acid, fiber, and vitamins A and K.  Escarole is a great, hearty green we can incorporate more into our diets, perhaps when we get tired of always grabbing swiss chard and kale.

You will have to skim the soup once or twice during the cooking time and you will need to take out the food processor to puree some of the beans but it is worth that small effort.  This soup really is very tasty, so make a big pot and keep it in the fridge so you can treat yourself to a big bowl of heaven once you come in from the snow.

Here’s what you will need to make a big pot…

Recipe 

2-3 thick slices pancetta (roughly 1/4 inch thick)

1 large onion, quartered

3 whole garlic cloves, smashed

1/2 teaspoon red pepper flakes

1 sprig sage

1 large sprig rosemary

3 cans cannellini beans, rinsed and drained

3 quarts low-sodium chicken stock

1 head of escarole, chopped

olive oil

salt & pepper

parmesan rind (optional)

Method

 In a large stock pot over medium heat add a few tablespoons of olive oil, pancetta, onions, sage, rosemary and red pepper flakes.  After 2-3 minutes, add the garlic.  Allow to cook for about 5 minutes, stirring the ingredients and turning the pancetta occasionally.  Remove the rosemary and sage.

Add the drained beans, chicken stock , cheese rind (not necessary) pepper and a pinch of salt (keep in mind the pancetta is salty), bring to a boil.  This is usually the first time I need to skim the soup to discard some of the fat that surfaces on the top, so go ahead and skim.  Reduce heat to a simmer and allow to cook for approximately 20 minutes.  Skim again if need be.

With a large slotted spoon remove the pancetta, onions, garlic and 3/4 of the beans, reserving in a bowl or tray.  Pull out the pancetta and set aside.  Remove some of the larger pieces of onions and discard.  Put all remaining onions, garlic and reserved beans in a food processor, add 2 tablespoons of olive oil, one ladle full of broth from the soup pot and salt & pepper.  Puree.  Add pureed bean mixture back to the pot and stir to combine.  Continue to simmer.

Meanwhile, chop up all the pancetta into a small dice and add them to the pot of soup.  Add chopped escarole  and allow to cook for an additional 5-10 minutes or until wilted.

Ladle into soup bowls and enjoy alone or with a chunky piece of toasted bread.


White Bean and Escarole Soup
 
Print
Author: Feasts And Fotos
Ingredients
  • 2-3 thick slices pancetta (roughly ¼ inch thick)
  • 1 large onion, quartered
  • 3 whole garlic cloves, smashed
  • ½ teaspoon red pepper flakes
  • 1 sprig sage
  • 1 large sprig rosemary
  • 3 cans cannellini beans, rinsed and drained
  • 3 quarts low-sodium chicken stock
  • 1 head of escarole, chopped
  • olive oil
  • salt & pepper
  • parmesan rind (optional)
Method
  1. In a large stock pot over medium heat add a few tablespoons of olive oil, pancetta, onions, sage, rosemary and red pepper flakes.  After 2-3 minutes, add the garlic.  Allow to cook for about 5 minutes, stirring the ingredients and turning the pancetta occasionally.  Remove the rosemary and sage.
  2. Add the drained beans, chicken stock , cheese rind (not necessary) pepper and a pinch of salt (keep in mind the pancetta is salty), bring to a boil.  This is usually the first time I need to skim the soup to discard some of the fat that surfaces on the top, so go ahead and skim.  Reduce heat to a simmer and allow to cook for approximately 20 minutes.  Skim again if need be.
  3. With a large slotted spoon remove the pancetta, onions, garlic and ¾ of the beans, reserving in a bowl or tray.  Pull out the pancetta and set aside.  Remove some of the larger pieces of onions and discard.  Put all remaining onions, garlic and reserved beans in a food processor, add 2 tablespoons of olive oil, one ladle full of broth from the soup pot and salt & pepper.  Puree.  Add pureed bean mixture back to the pot and stir to combine.  Continue to simmer.
  4. Meanwhile, chop up all the pancetta into a small dice and add them to the pot of soup.  Add chopped escarole  and allow to cook for an additional 5-10 minutes or until wilted.
  5. Ladle into soup bowls and enjoy alone or with a chunky piece of toasted bread.
3.2.2802

Filed Under: Soup Tagged With: beans, escarole, pancetta, soup, white

Sun-Dried Tomato Jam Crostini

February 24, 2009 by Susan

SundriedCrostiniResize2

I can sit down with a glass of wine and some appetizers and be the happiest woman on the planet.  I view it as sort of an extended happy hour at home.  If you are going to make a light meal out of it, as I love to do, you need to have a few appetizers that are on the substantial side.  One of the more substantial appetizers I always make now is this sun-dried tomato jam crostini.  I absolutely love it.  It’s earthy, tangy and sweet all at the same time.  Perfection.

I adapted this recipe from Giada, making but a few small changes.  The first being I cut back on the vinegar, some people mentioned the original version was a bit too ‘vinegary’.  Also, since I cut back on the vinegar, I also cut back on the sugar.  The last change I made is the addition of the smear of goat cheese on the crostini, I think the extra bit of creamyness really adds to it.  And I love goat cheese!

Aside from this appetizer being absolutely delicious the other aspect I really love is that it can be made ahead of time and kept in the fridge for up to one week.  It’s a huge time saver if you are having a party but also it’s wonderful to keep leftovers so you can treat yourself to a snack during the week.

Here’s what you will need….

Recipe

1 (8-ounce) jar sun-dried tomatoes packed in oil, drained and chopped, oil reserved

1 tablespoon olive oil

1/2 onion, thinly sliced

1 clove garlic, minced

1 tablespoon sugar

1/8 cup red wine vinegar

1 cup water

1/2 cup chicken broth

1 teaspoon chopped fresh thyme leaves

1/2 teaspoon salt

1/2 teaspoon freshly ground black pepper

1 baguette, cut into 3/4-inch slices

5 ounces goat cheese, room temperature

2 teaspoons chopped fresh thyme leaves

Method

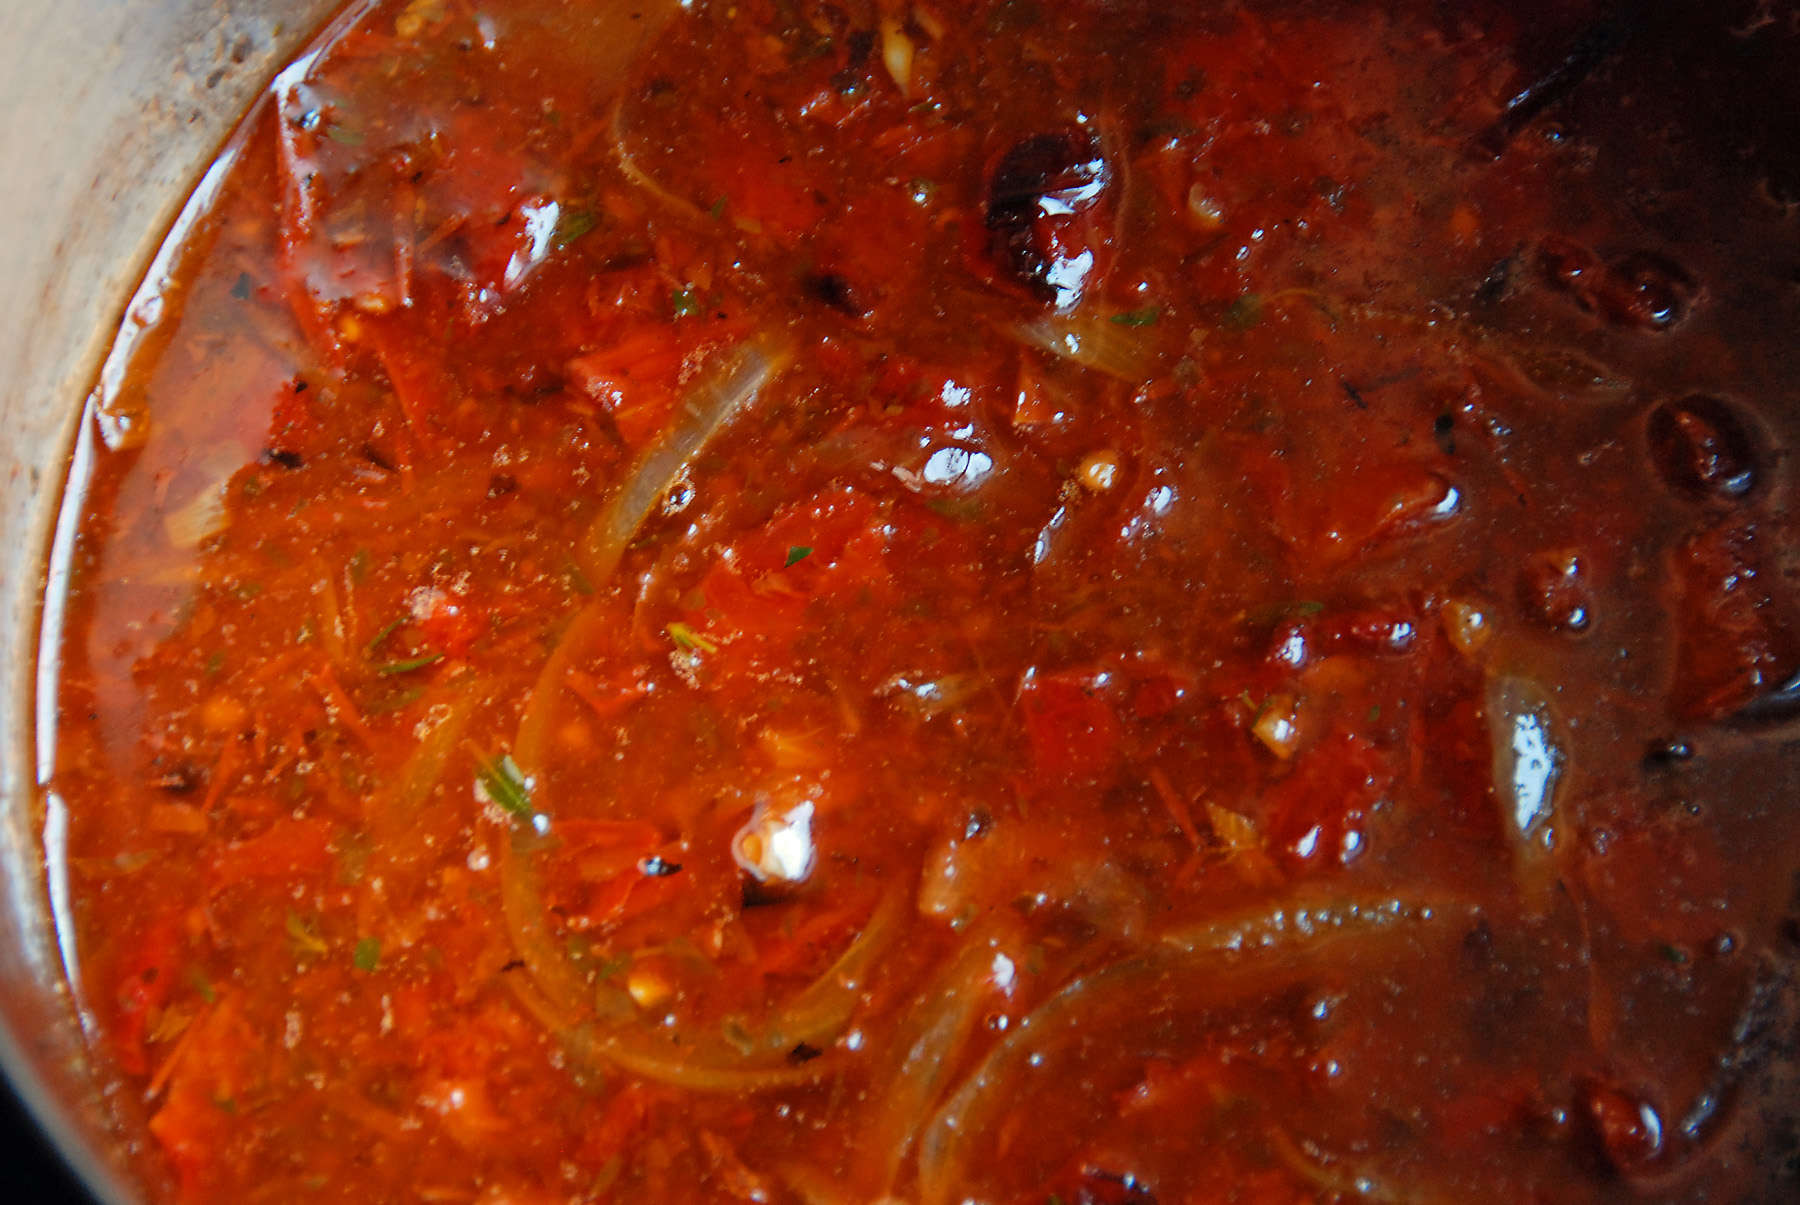
Place a medium saucepan over medium heat. Add the chopped sun-dried tomatoes, 1 tablespoon of the reserved sun-dried tomato oil, olive oil, onion, and garlic. Stir and cook until the onions are soft and beginning to brown at the edges, about 5 to 7 minutes. Add the sugar, vinegar, water, chicken broth, thyme, salt, and pepper.

The mixture will look like this….

sundriedliquidresize

Bring the liquid to a boil, reduce the heat, and simmer, covered, for 30 minutes. Remove the cover and continue simmering until most of the liquid is reduced and the mixture is the consistency of jam, about 30-40 more minutes. Remove from the heat and set aside.  (In Giada’s recipe she instructs to allow the jam to reduce for only 10-15 minutes more, which was not enough time at all.  If you keep the heat the same it will take more like 30 minutes to reduce.  You can turn up the heat, however, you will then need to stand around watching the mixture, stirring often.)

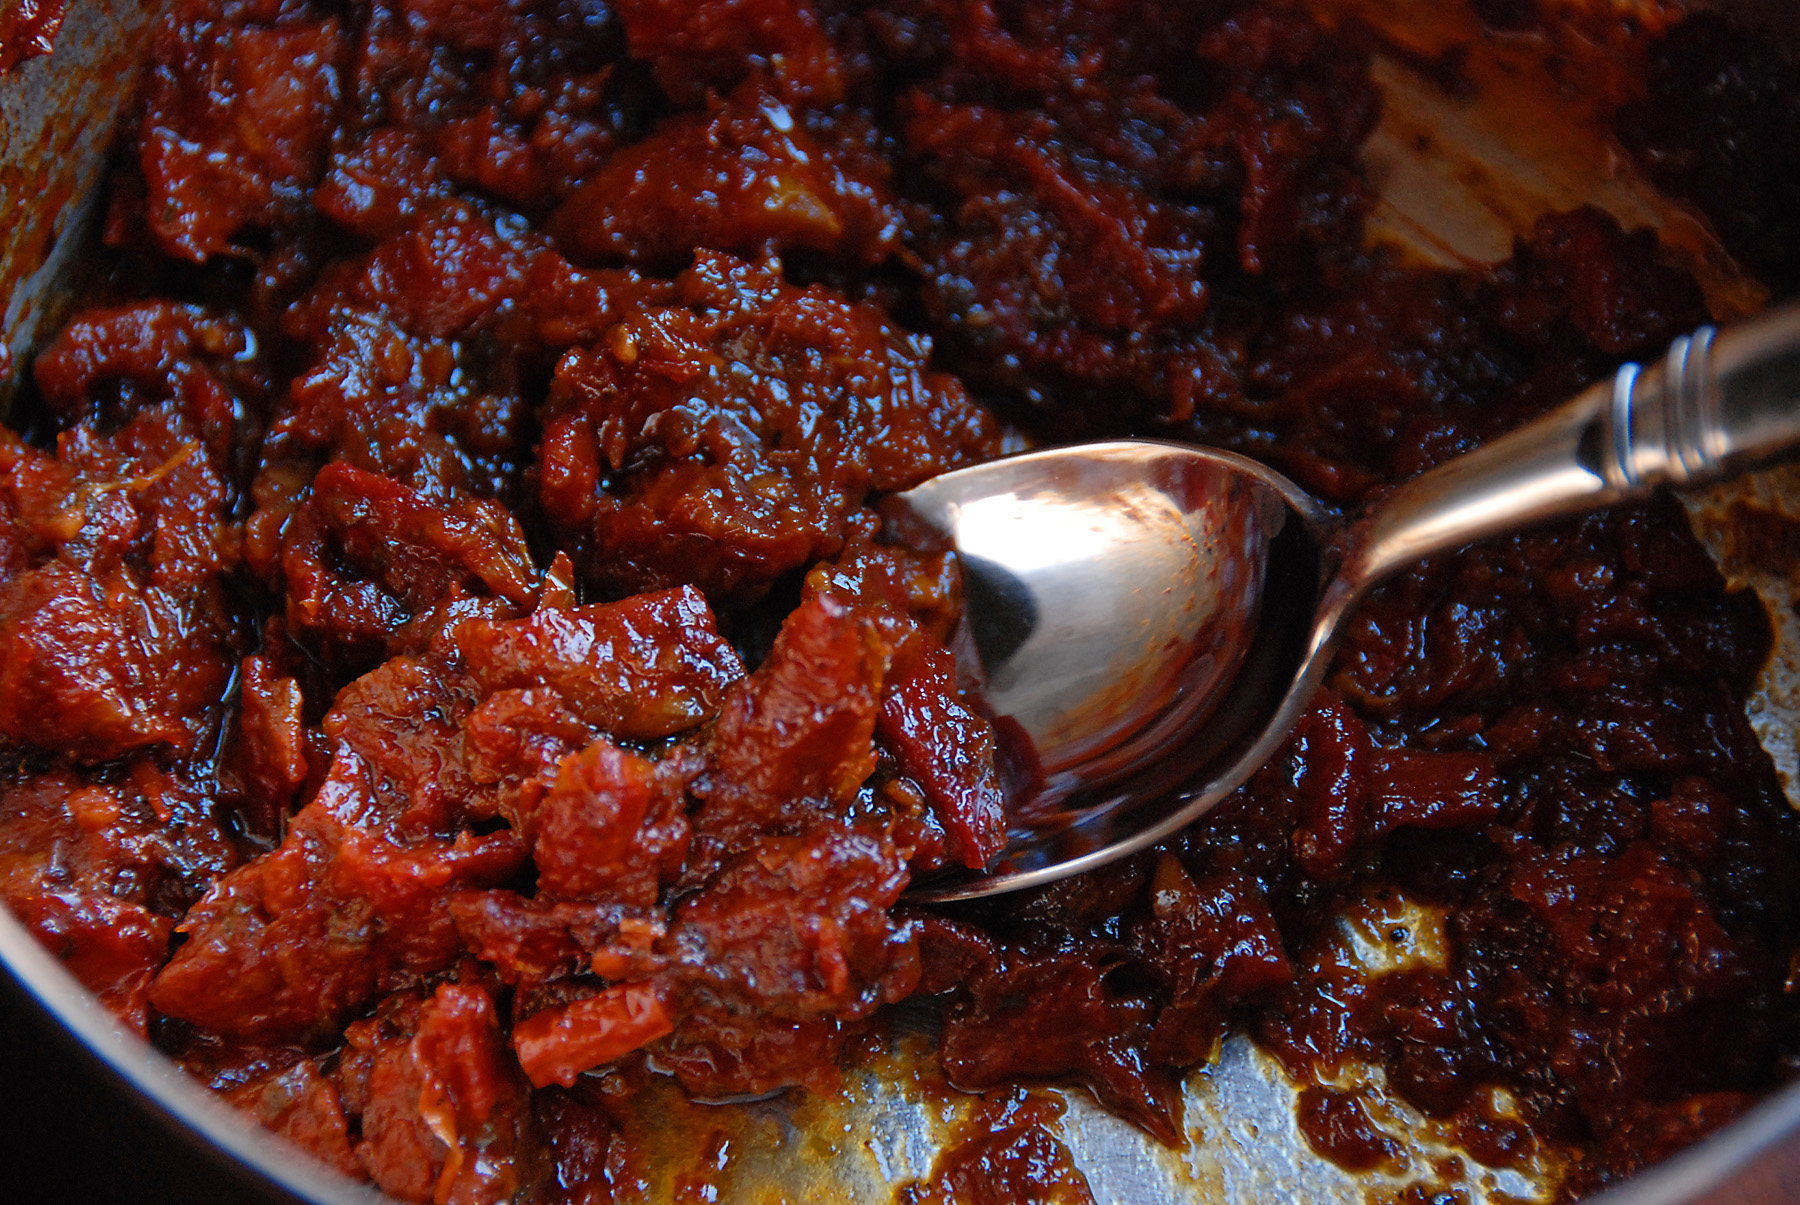
Amazingly enough, that liquid mixture turns into this…

sundriedjamresize

And that is the exact consistency you are looking for.  Jam-like.

As the jam is cooling, mix the chopped thyme into the room temperature goat cheese.  Toast up some crostini and once slightly cooled spread a thin layer of goat cheese on the crostini,  then top with some jam mixture.  Top that with a small dollop of goat cheese.  Enjoy!

Giada’s original recipe can be found here…

http://www.foodnetwork.com/recipes/giada-de-laurentiis/crostini-with-sun-dried-tomato-jam-recipe/index.html


Sun-Dried Tomato Jam Crostini
 
Print
Author: Feasts And Fotos
Ingredients
  • 1 (8-ounce) jar sun-dried tomatoes packed in oil, drained and chopped, oil reserved
  • 1 tablespoon olive oil
  • ½ onion, thinly sliced
  • 1 clove garlic, minced
  • 1 tablespoon sugar
  • ⅛ cup red wine vinegar
  • 1 cup water
  • ½ cup chicken broth
  • 1 teaspoon chopped fresh thyme leaves
  • ½ teaspoon salt
  • ½ teaspoon freshly ground black pepper
  • 1 baguette, cut into ¾-inch slices
  • 5 ounces goat cheese, room temperature
  • 2 teaspoons chopped fresh thyme leaves
Method
  1. Place a medium saucepan over medium heat. Add the chopped sun-dried tomatoes, 1 tablespoon of the reserved sun-dried tomato oil, olive oil, onion, and garlic. Stir and cook until the onions are soft and beginning to brown at the edges, about 5 to 7 minutes. Add the sugar, vinegar, water, chicken broth, thyme, salt, and pepper.
  2. Bring the liquid to a boil, reduce the heat, and simmer, covered, for 30 minutes. Remove the cover and continue simmering until most of the liquid is reduced and the mixture is the consistency of jam, about 30-40 more minutes. Remove from the heat and set aside. (In Giada's recipe she instructs to allow the jam to reduce for only 10-15 minutes more, which was not enough time at all. If you keep the heat the same it will take more like 30 minutes to reduce. You can turn up the heat, however, you will then need to stand around watching the mixture, stirring often.)
  3. As the jam is cooling, mix the chopped thyme into the room temperature goat cheese. Toast up some crostini and once slightly cooled spread a thin layer of goat cheese on the crostini, then top with some jam mixture. Top that with a small dollop of goat cheese.
3.2.2802

Filed Under: Appetizers Tagged With: crostini, goat cheese, jam, sundried tomato

Pecan Sables

February 13, 2009 by Susan

pecansableresize

Valentine’s Day is tomorrow!  As far as I’m concerned it’s an excellent reason/excuse to eat tons of chocolate…I’m a big fan of chocolate.  I will be making my chocolate cupcakes with peanut butter frosting, however, I also wanted to make a little something else, a non-chocolate cookie (shocking!) in the shape of a heart, especially for the occasion.

I knew I wanted to make a shortbread cookie, preferably with pecans.  After scouring Dorie Greenspan’s recipes I chose this one.  Dorie is pure genius, so I had a good feeling these would come out great.  I was quite happy with the result.  These cookies are crumbly and delicious, perfect with a glass of cold milk or a hot latte.

So go ahead…whip up a batch of these heart shaped goodies and share the love.

Here’s what you will need to make approximately 40 cookies…

Recipe

2 sticks unsalted butter, room temperature

1/2 cup sugar

1/2 cup confectioners’ sugar, sifted

1/2 teaspoon salt

2 large egg yolks, room temperature

1 1/2 cups flour

1/2 cup finely ground pecans

Decorating sugar

egg wash

Method 

In a stand mixer beat the butter at medium speed until smooth and very creamy.  Add sugars and salt and beat until well blended.  The mixture should be smooth and velvety, not fluffy and airy.  Add the pecans.  Reduce speed to low and beat in the egg yolks until incorporated.

Pour in the flour and pulse the mixer at low speed 5-7 times for a second or two each time.  (You can put a towel over the mixer to protect yourself from getting flour all over you).  Continue mixing at low speed for 20 seconds more, just until flour disappears into the dough.  The dough should be soft, moist and clumpy.

Scrape the dough onto a smooth work surface sprinkled with flour, gather into a ball and divide in half.  Flatten each half into a disk, wrap in plastic wrap and refrigerate for 3 hours or up to 3 days.

Center a rack in the oven and preheat to 350.  Line baking sheet with parchment.  Remove dough from refrigerator, remove from plastic, sprinkle with some flour and roll out to approximately 1/4 inch to 1/3 inch thick.  Use heart shape cutouts to form each cookie.

Whisk egg for egg wash.  Brush the top of each cookie with the egg wash and sprinkle generously with decorator’s sugar.  Place on baking sheet, one inch apart.

Bake for 10-12 minutes, rotating baking sheet at the midway point, until the edges are lightly golden and the tops of the cookies are slightly less golden.  Remove from oven, allow to sit for a minute, then transfer to a cooling rack.


Pecan Sables
 
Print
Author: Feasts And Fotos
Ingredients
  • 2 sticks unsalted butter, room temperature
  • ½ cup sugar
  • ½ cup confectioners' sugar, sifted
  • ½ teaspoon salt
  • 2 large egg yolks, room temperature
  • 1½ cups flour
  • ½ cup finely ground pecans
  • Decorating sugar
  • egg wash
Method
  1. In a stand mixer beat the butter at medium speed until smooth and very creamy.  Add sugars and salt and beat until well blended.  The mixture should be smooth and velvety, not fluffy and airy.  Add the pecans.  Reduce speed to low and beat in the egg yolks until incorporated.
  2. Pour in the flour and pulse the mixer at low speed 5-7 times for a second or two each time.  (You can put a towel over the mixer to protect yourself from getting flour all over you).  Continue mixing at low speed for 20 seconds more, just until flour disappears into the dough.  The dough should be soft, moist and clumpy.
  3. Scrape the dough onto a smooth work surface sprinkled with flour, gather into a ball and divide in half.  Flatten each half into a disk, wrap in plastic wrap and refrigerate for 3 hours or up to 3 days.
  4. Center a rack in the oven and preheat to 350.  Line baking sheet with parchment.  Remove dough from refrigerator, remove from plastic, sprinkle with some flour and roll out to approximately ¼ inch to ⅓ inch thick.  Use heart shape cutouts to form each cookie.
  5. Whisk egg for egg wash.  Brush the top of each cookie with the egg wash and sprinkle generously with decorator's sugar.  Place on baking sheet, one inch apart.
  6. Bake for 10-12 minutes, rotating baking sheet at the midway point, until the edges are lightly golden and the tops of the cookies are slightly less golden.  Remove from oven, allow to sit for a minute, then transfer to a cooling rack.
3.2.2802

Filed Under: Sweets Tagged With: cookies, pecan, sables, shortbread

Turkey and Artichoke Stuffed Shells

February 10, 2009 by Susan

shellsresize

I have been making these stuffed shells for the past few years, they are a permanant fixture in my recipe book.  I make them every year for my Mother’s Day dinner that I host for my family and everyone raves about them.  They aren’t your run-of-the-mill stuffed shells at all, they are stuffed with turkey and artichokes, which makes them not only delicious, but more hearty.  You have meat, vegetables and pasta all in one dish!

These shells are made extra special because they are served in an Arrabiata Sauce, providing a subtle kick to the dish.  The sauce is easy enough to make and if you have any leftovers you can serve it over some other pasta on a night you don’t really feel like cooking.

Another great aspect of these shells…you can prepare them a day ahead and keep them in the fridge until you are ready to bake them.  Also, you can freeze them.  Oh, and if that isn’t good enough, they get even better as leftovers.  I’ve had leftovers in the fridge for up to 3-4 days and they are even more delicious than the first day!

I got this recipe from Giada’s show years ago and only made a few slight changes.  My version is below.

Here’s what you will need to serve 6-8 people…

Recipe

1 (12-ounce) box jumbo pasta shells

3 tablespoons extra-virgin olive oil

1/2 large yellow onion, chopped (about 1 cup)

3 cloves garlic, chopped

1 pound ground turkey

1/2 teaspoon kosher salt, plus 1/2 teaspoon

1/4 teaspoon freshly ground black pepper, plus 1/4 teaspoon

1 teaspoon peperoncino (red pepper flakes)

1 (8 to 10-ounce) package frozen artichokes, thawed and coarsely chopped

1 – 2 (15-ounce) container(s) ricotta cheese

3/4 cup grated Parmesan

2 eggs, lightly beaten

1/4 cup (heaping) chopped fresh basil leaves

3 tablespoons chopped fresh flat-leaf parsley

1 1/2 cups shredded or grated mozzarella (about 5 ounces)

Method

Bring a large pot of salted water to a boil over high heat. Add the pasta and partially cook until tender but still very firm to the bite, about 4 to 5 minutes. Drain.

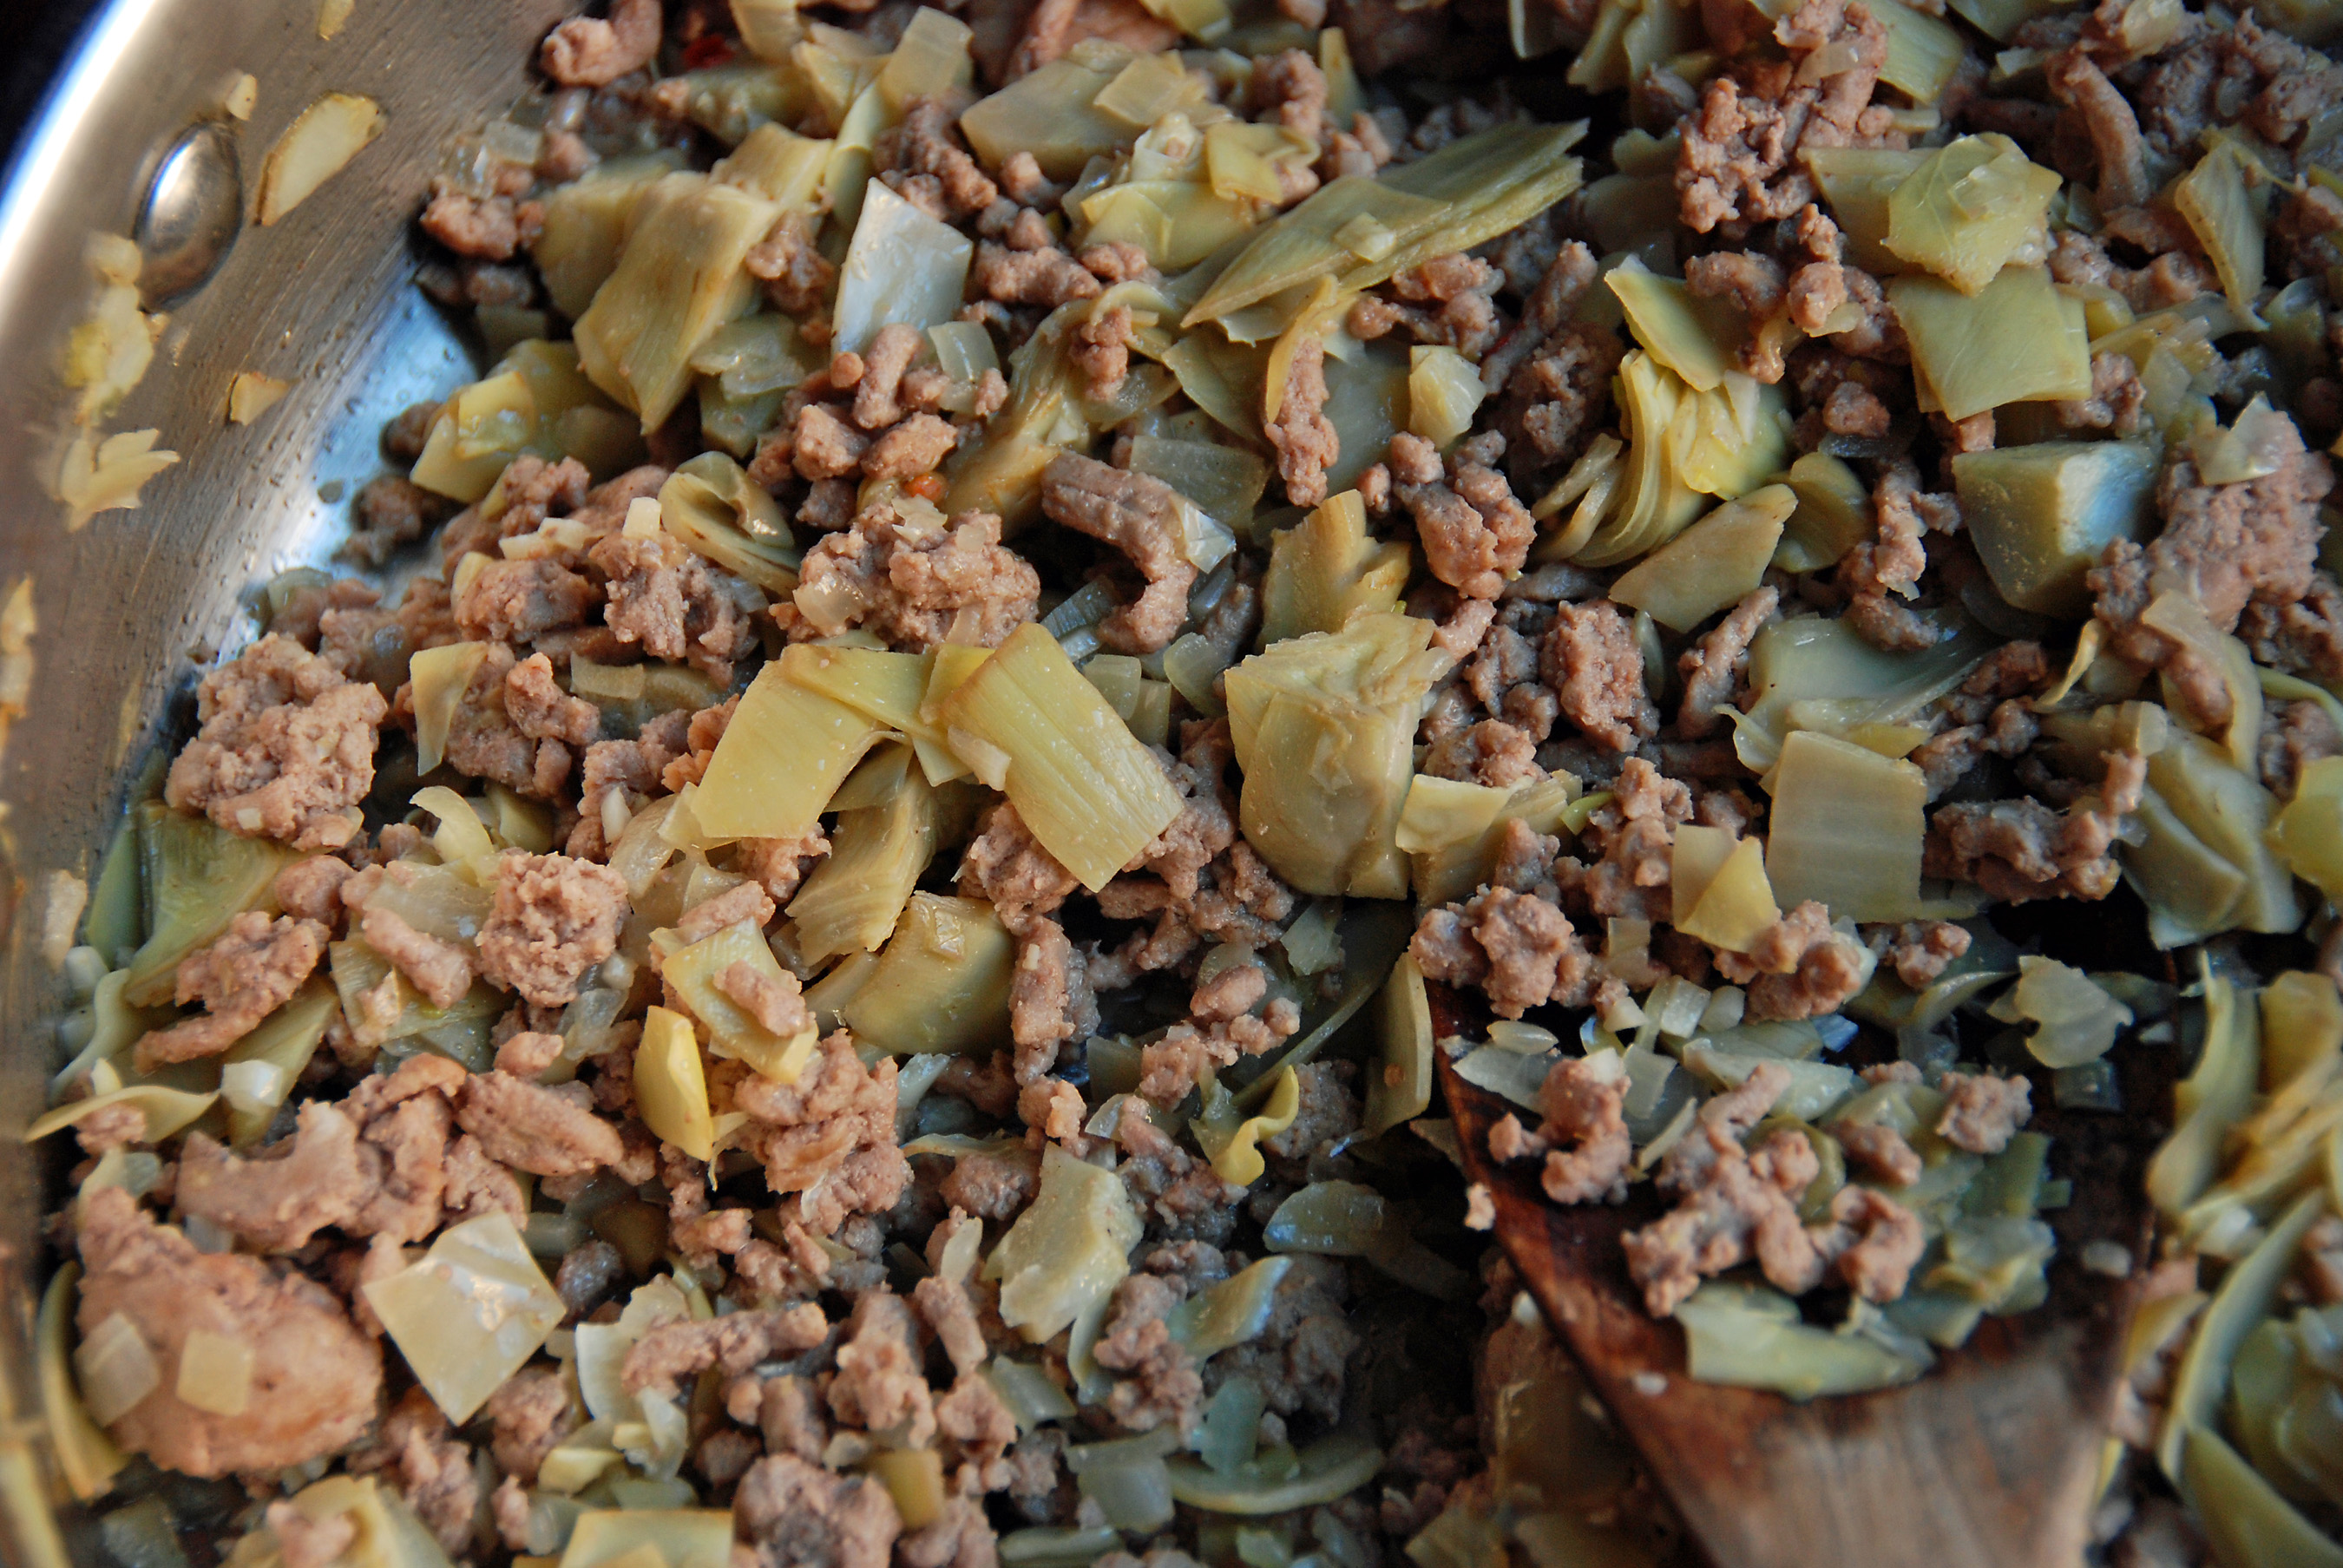
In a large skillet, heat the olive oil over medium-high heat. Add the onions and the garlic and cook until the onions are soft and starting to brown, about 3 minutes. Add the ground turkey, 1/2 teaspoon salt, 1/4 teaspoon black pepper and peperoncino and continue to cook, stirring occasionally, until the meat is slightly golden and cooked through. Add the artichoke hearts and stir to combine. Remove from heat and let cool.

shellsstep1resize

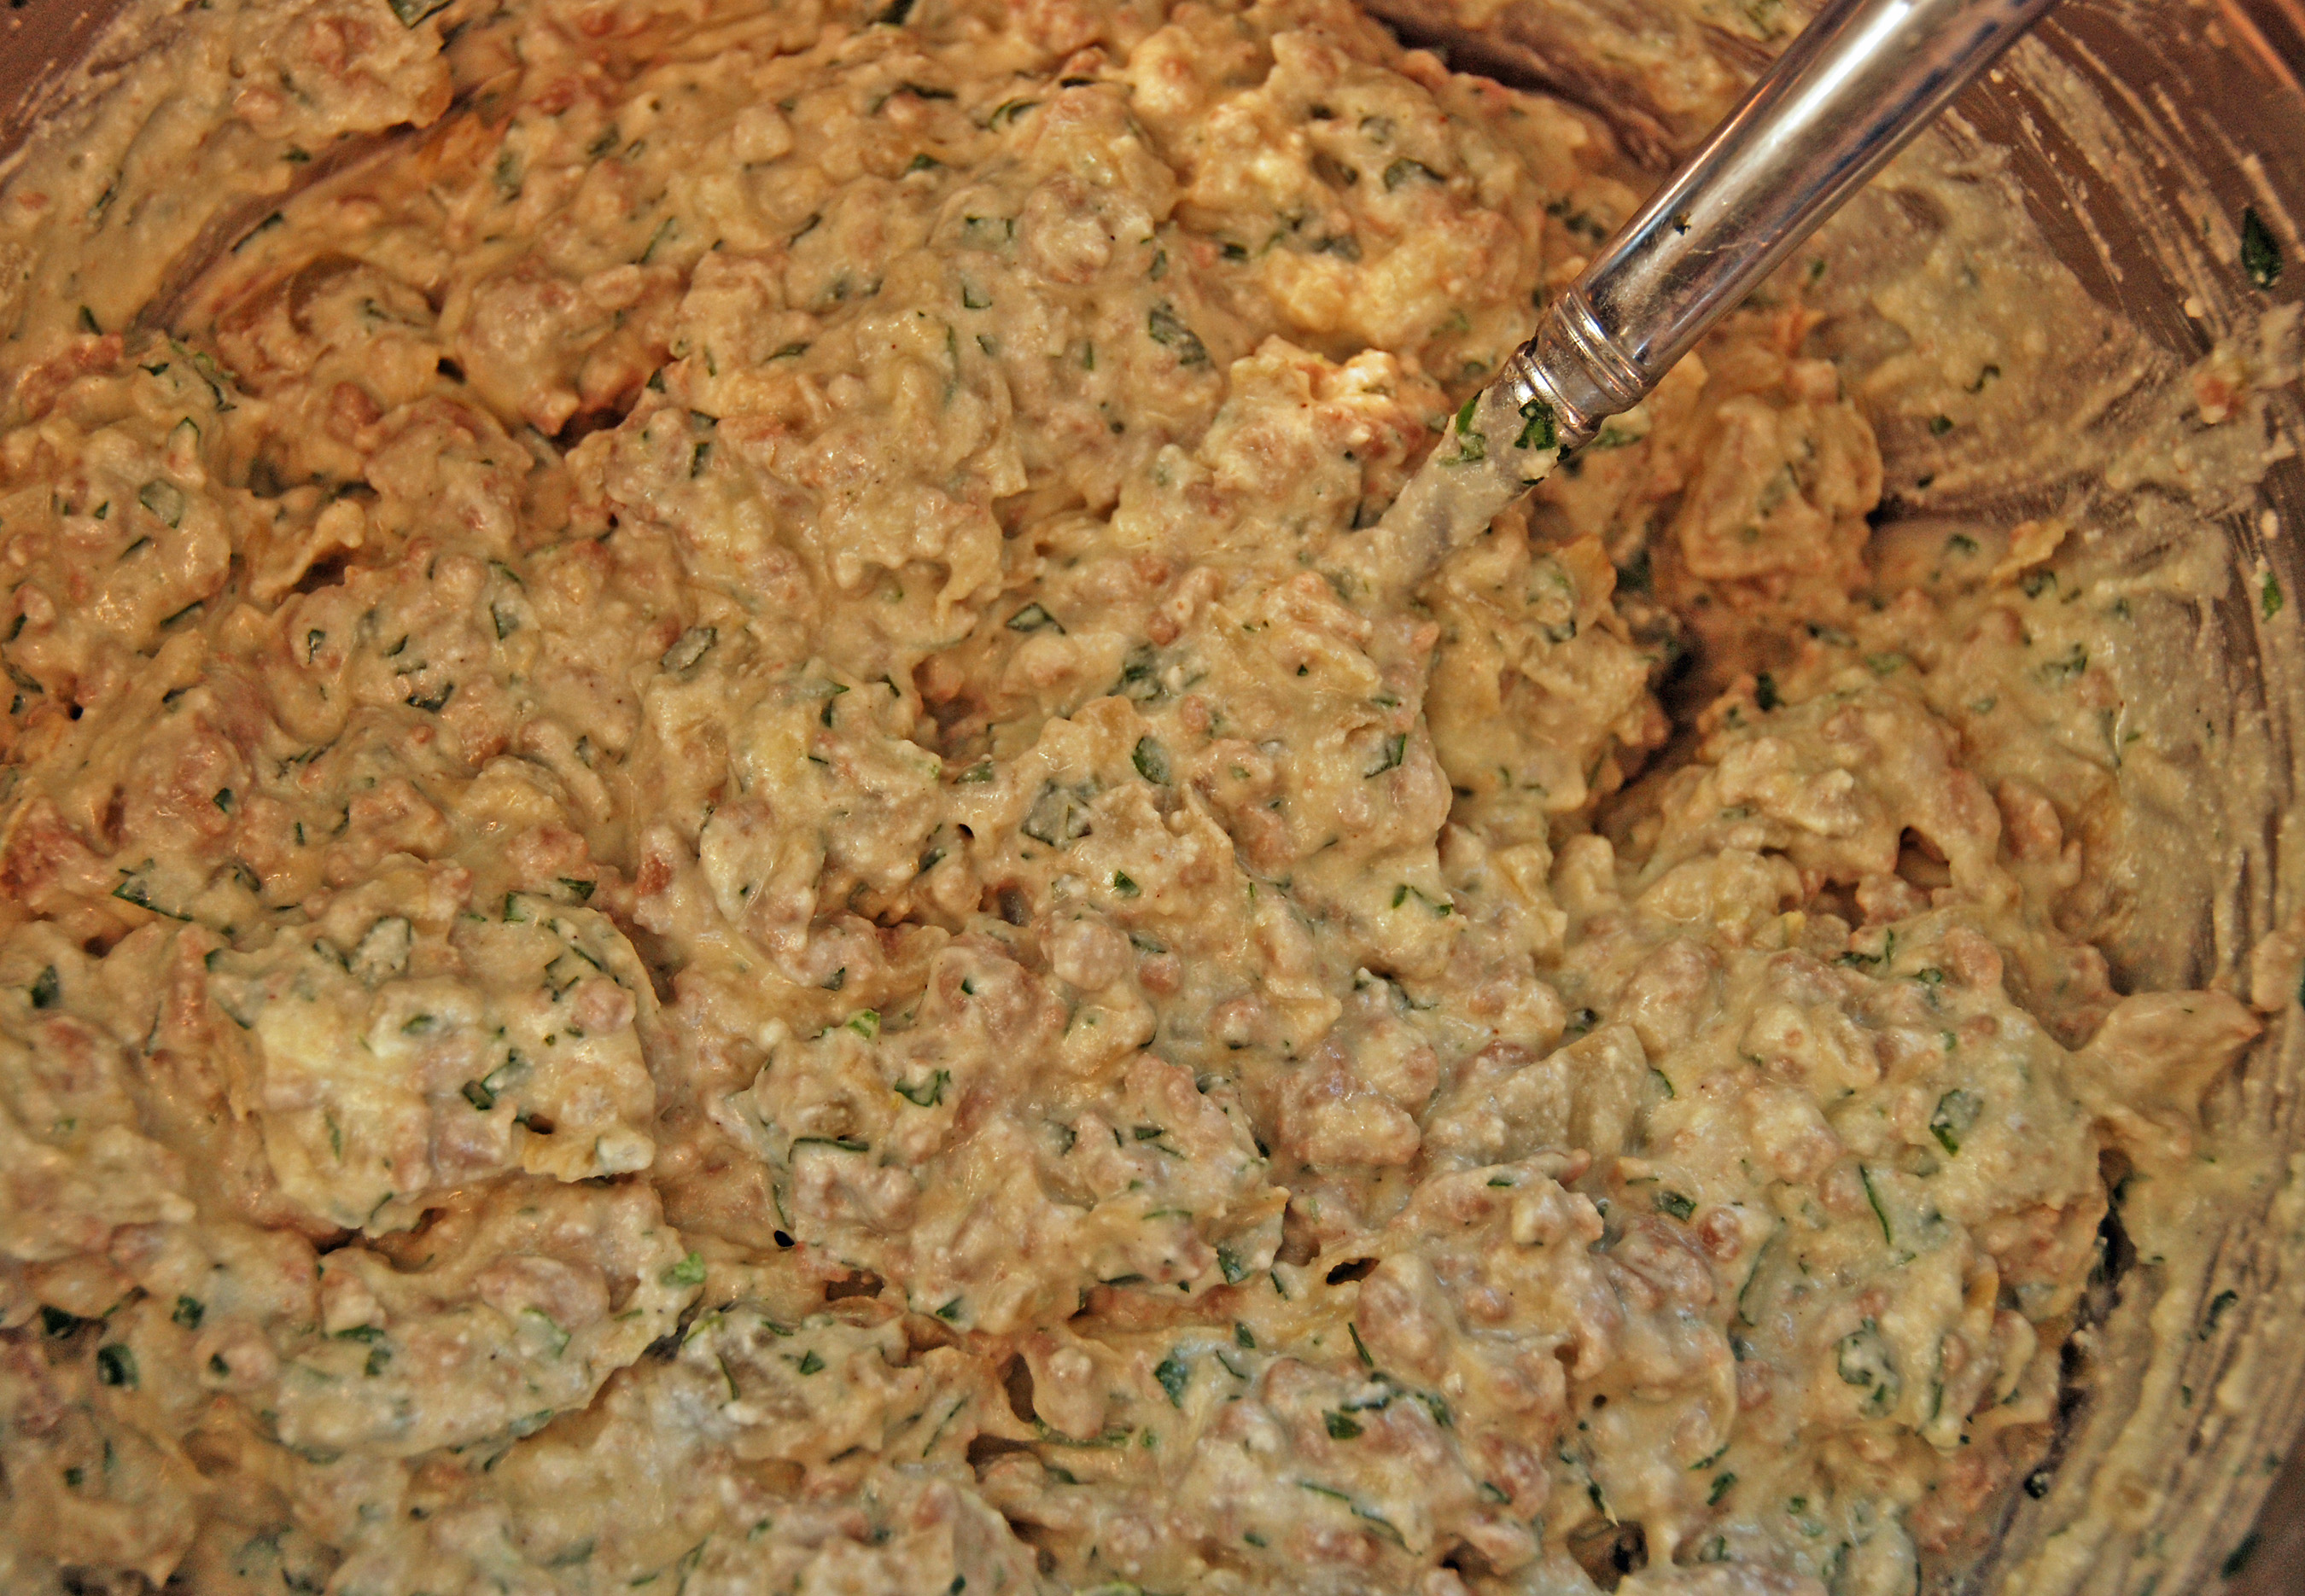
In a large bowl combine the cooled turkey mixture with one 15 oz container ricotta cheese, Parmesan cheese, eggs, basil, parsley, and the remaining salt and pepper. Stir to combine.

shellsstep2resize

Note:  If you want to make some extra shells you can add extra ricotta cheese to this mixture to bulk it up.  I usually make a box and a half of shells, so I add in about half of another container of ricotta.

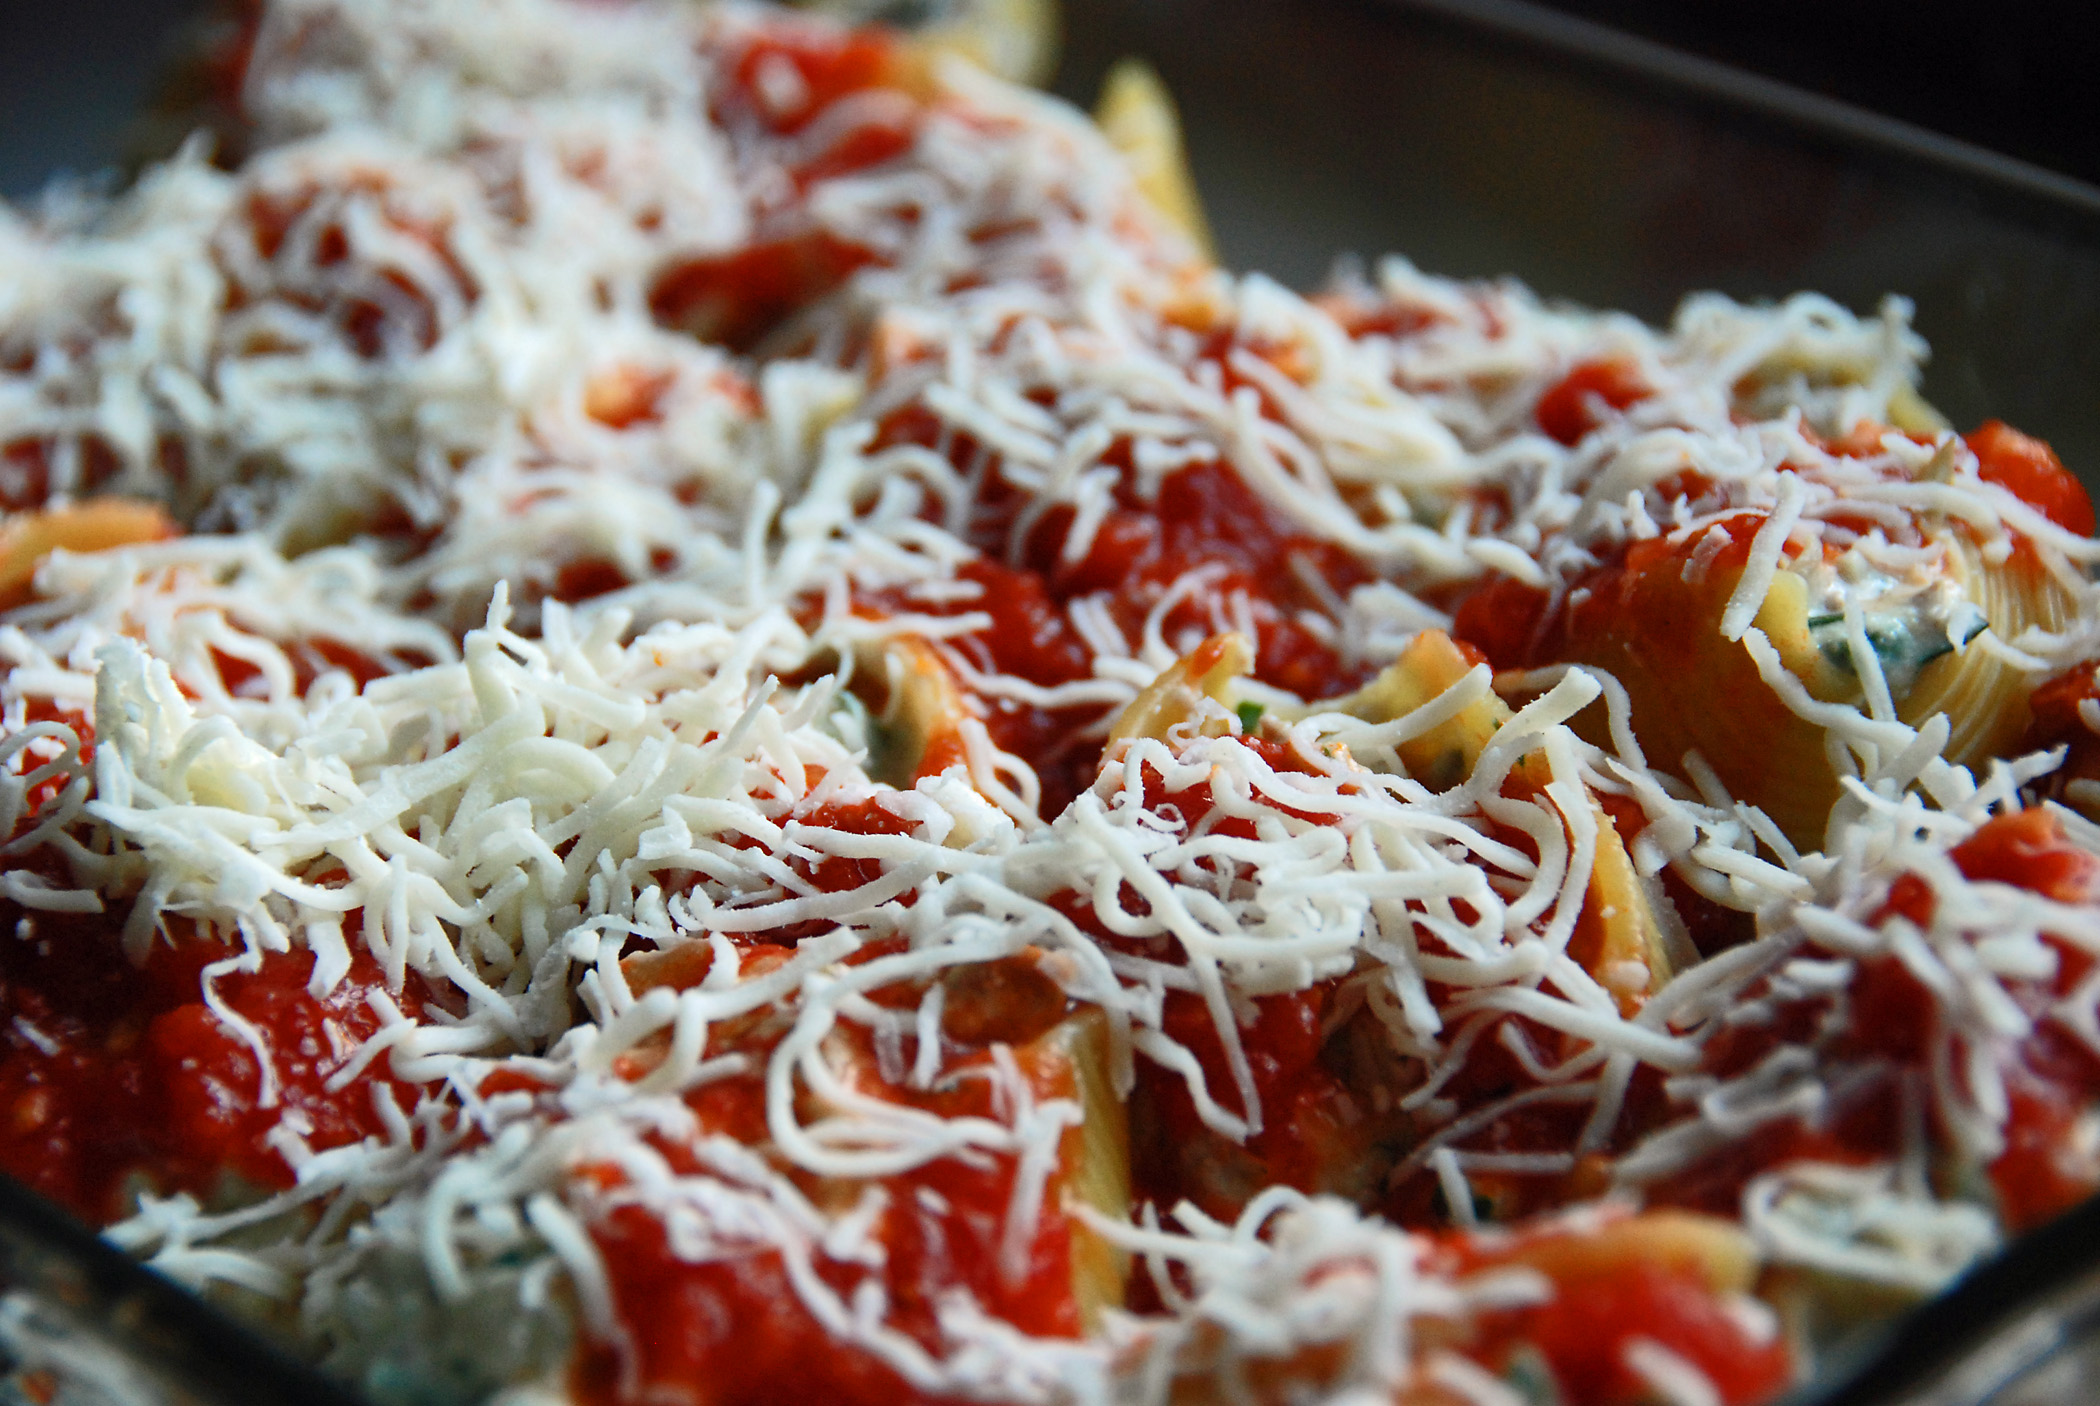
Now here comes the fun part…stuffing the shells!  Cover the bottom of a large baking dish with 1 cup of Arrabbiata sauce (recipe below). Take a shell in the palm of your hand and stuff it with a large spoonful of turkey and cheese mixture, about 2 tablespoons. Place the stuffed shell in the baking dish. Continue filling the shells until the baking dish is full. Drizzle Arrabbiata Sauce over the shells, top with the mozzarella.  As you will see I don’t glob on the mozzerella cheese, but that’s just me.  If you want to glob it on, go right ahead.

shellsrawresize

If freezing, cover tightly with plastic wrap and place in the freezer for 1 day and up to 1 month.

To bake, preheat the oven to 400 degrees F. Bake until the shells are warmed through and the cheese is beginning to brown and the sauce is bubbling away, about 20 minutes (60 minutes if shells are frozen.)

Arrabiata Sauce

2 tablespoons extra-virgin olive oil

8 ounces sliced pancetta (sliced thick), coarsely chopped

2 teaspoons crushed red pepper flakes

2 garlic cloves, minced

5 cups fresh marinara sauce

Heat the olive oil in a large soup pot over medium heat. Add the pancetta and saute until golden brown, about 5 minutes. Add the garlic  and red pepper flakes and saute until tender, about 1 minute. Add the marinara sauce and bring to a simmer. Remove from heat and let cool until ready to use.

Giada’s original recipe can be found here…

http://www.foodnetwork.com/recipes/giada-de-laurentiis/turkey-and-artichoke-stuffed-shells-with-arrabbiata-sauce-recipe/index.html


Turkey and Artichoke Stuffed Shells
 
Print
Author: Feasts And Fotos
Ingredients
  • 1 (12-ounce) box jumbo pasta shells
  • 3 tablespoons extra-virgin olive oil
  • ½ large yellow onion, chopped (about 1 cup)
  • 3 cloves garlic, chopped
  • 1 pound ground turkey
  • ½ teaspoon kosher salt, plus ½ teaspoon
  • ¼ teaspoon freshly ground black pepper, plus ¼ teaspoon
  • 1 teaspoon peperoncino (red pepper flakes)
  • 1 (8 to 10-ounce) package frozen artichokes, thawed and coarsely chopped
  • 1 - 2 (15-ounce) container(s) ricotta cheese
  • ¾ cup grated Parmesan
  • 2 eggs, lightly beaten
  • ¼ cup (heaping) chopped fresh basil leaves
  • 3 tablespoons chopped fresh flat-leaf parsley
  • 1½ cups shredded or grated mozzarella (about 5 ounces)
  • Arrabiata Sauce
  • 2 tablespoons extra-virgin olive oil
  • 8 ounces sliced pancetta (sliced thick), coarsely chopped
  • 2 teaspoons crushed red pepper flakes
  • 2 garlic cloves, minced
  • 5 cups fresh marinara sauce
Method
  1. Bring a large pot of salted water to a boil over high heat. Add the pasta and partially cook until tender but still very firm to the bite, about 4 to 5 minutes. Drain.
  2. In a large skillet, heat the olive oil over medium-high heat. Add the onions and the garlic and cook until the onions are soft and starting to brown, about 3 minutes. Add the ground turkey, ½ teaspoon salt, ¼ teaspoon black pepper and peperoncino and continue to cook, stirring occasionally, until the meat is slightly golden and cooked through. Add the artichoke hearts and stir to combine. Remove from heat and let cool.
  3. In a large bowl combine the cooled turkey mixture with one 15 oz container ricotta cheese, Parmesan cheese, eggs, basil, parsley, and the remaining salt and pepper. Stir to combine.
  4. Note: If you want to make some extra shells you can add extra ricotta cheese to this mixture to bulk it up. I usually make a box and a half of shells, so I add in about half of another container of ricotta.
  5. Cover the bottom of a large baking dish with 1 cup of Arrabbiata sauce (recipe below). Take a shell in the palm of your hand and stuff it with a large spoonful of turkey and cheese mixture, about 2 tablespoons. Place the stuffed shell in the baking dish. Continue filling the shells until the baking dish is full. Drizzle Arrabbiata Sauce over the shells, top with the mozzarella. As you will see I don't glob on the mozzerella cheese, but that's just me. If you want to glob it on, go right ahead.
  6. If freezing, cover tightly with plastic wrap and place in the freezer for 1 day and up to 1 month.
  7. To bake, preheat the oven to 400 degrees F. Bake until the shells are warmed through and the cheese is beginning to brown and the sauce is bubbling away, about 20 minutes (60 minutes if shells are frozen.)
  8. Arrabiata Sauce
  9. Heat the olive oil in a large soup pot over medium heat. Add the pancetta and saute until golden brown, about 5 minutes. Add the garlic and red pepper flakes and saute until tender, about 1 minute. Add the marinara sauce and bring to a simmer. Remove from heat and let cool until ready to use.
3.2.2802

Filed Under: Pasta Tagged With: artichoke, shells, stuffed, turkey

Broccoli, Mushroom and Cheese Breakfast Strata

February 5, 2009 by Susan

stratasideresize

I have to be honest, for a long time I wasn’t exactly sure what a ‘strata’ was.  I’ve heard about it, read recipes for it, but just never delved in to find out what it was or actually try to make it, for that matter.  What a mistake that was!  Simply put, it’s a breakfast pie.

This vegetable strata was delicious.  But the best part is….you make make the entire dish ahead of time, like the day before, then just pop it into the oven in the morning.  How easy is that?!   I must admit I was quite proud of myself as I pulled this baby out of the oven, it looks gorgeous!  You will look like a superstar serving it.

It’s substantial and satisfying, hearty and savory.  It’s somewhat healthy, filled with veggies.  I decided to try a recipe from Ellie Krieger as my first foray into strata-land.   I didn’t want to clog every artery I have and push  my cholesterol level off the charts. I felt this version was a nice balance.  This would also be delicious with an addition of bacon or sausage, I might try that version next.

Here’s what you will need to serve 4 people….

Recipe

2 teaspoons olive oil

1/2 large onion, diced (about 1 cup)

2 garlic cloves, minced

1 1/2  cups sliced mushrooms

Cooking spray

1/2 whole wheat baguette, crusts removed, cubed (about 2 cups)

4 eggs plus 4 additional egg whites

1 cup lowfat milk

1/2 tablespoon Dijon mustard

1 medium head of broccoli, steamed, cooled and chopped

3 tablespoons grated Parmesan

1/2 cup part-skim mozzarella cheese

7.5 oz jar sun-dried tomatoes, packed in oil, drained, thinly sliced

1/2 tablespoon minced fresh thyme leaves

1/4 teaspoon salt

1/4 teaspoon freshly ground pepper

Method

Heat 1 teaspoon of the oil in a nonstick skillet over medium heat. Add the onions and saute until translucent and beginning to brown, about 4 minutes. Add the garlic and continue to cook for another 1 minute. Transfer the onion mixture to a medium bowl and allow to cool. Heat remaining teaspoon of oil in the skillet and saute the mushrooms until they release all of their water, about 6 to 7 minutes. Remove from heat and cool completely.

Spray an 8×8 baking dish with cooking spray. Arrange the bread cubes in a single layer in the bottom of the dish. In a large bowl, beat the eggs, egg whites, milk and mustard until incorporated. Add mushrooms, onion-garlic mixture, broccoli, Parmesan and mozzarella cheeses, sun-dried tomatoes, thyme, and salt and pepper and stir to incorporate. Pour mixture over bread, making sure liquid saturates bread. Cover with plastic wrap and refrigerate overnight, or at least 8 hours.

Preheat the oven to 350 degrees F.  Remove the plastic wrap from strata and bake for 60 to 75 minutes, or until the top forms a light brown crust.

Original recipe can be found here…

http://www.foodnetwork.com/recipes/ellie-krieger/broccoli-mushroom-and-cheese-breakfast-strata-recipe/index.html

Filed Under: Breakfast Tagged With: breakfast, broccoli, cheese, mushroom, strata, vegetables

Smoked Salmon and Egg Salad Tartines

January 20, 2009 by Susan

EggSaladSalmonResizeFinalR

These little open faced sandwiches are one of my absolute favorite things.  I have been making them alot, serving them as appetizers when I have a dinner or get together.  Everyone just loves them.  If I ever have any leftovers (which doesn’t happen often) I enjoy them anytime of day – either as a breakfast or a light dinner.  It’s a fantastic spin on the classic egg salad.  I got this recipe from The Barefoot Contessa – I love just about everything she does.  I didn’t make any changes to this recipe basically because it’s perfect as it is.  I do, however, cook my eggs slightly different.  I’ve included my version below, but you can feel free to cook them as you wish.  Just be careful not to over cook them – you don’t want that greenish ring around the yokes!

The combination of flavors as well as textures is amazing.  I love the crunchy bread contrasting with the soft salmon and the almost creaminess of the egg salad.  Amazing!  The addition of the dill takes these over the top.

Here’s what you will need to serve 8 people…

Recipe

12 extra large eggs

1/3 cup mayonnaise

2 tsp whole-grain mustard

1 tbsp minced fresh dill, plus sprigs for garnish

1 tsp salt

1/2 tsp pepper

8 slices of good bread (whole wheat or 7 grain works well)

8 slices of smoked salmon (buy the best you can afford)

Method

Place eggs in a saucepan large enough to accommodate them in a single layer. Fill pan with cold water, covering eggs by 1 inch. Bring water to a boil over medium-high heat. Turn off heat, cover and allow to sit for 11 minutes.  Once cooked, transfer to a bowl of ice water and allow to sit for 1-2 minutes.  Crack and peel eggs.

Place eggs in the bowl of a food processor fitted with a steel blade.  Pulse about 10 times to break them up, do not puree.  Transfer chopped eggs to a bowl and add the mayonnaise, dill, salt & pepper.  Combine lightly with a fork.

Toast the bread.  Lay one slice of salmon on each piece of bread, spoon egg salad onto salmon, garnish with a sprig of dill.  Serve at room temperature.

Original recipe from The Barefoot Contessa can be found here…  http://www.foodnetwork.com/recipes/ina-garten/smoked-salmon-and-egg-salad-tartines-recipe/index.html


Smoked Salmon and Egg Salad Tartines
 
Print
Author: Feasts And Fotos
Ingredients
  • 12 extra large eggs
  • ⅓ cup mayonnaise
  • 2 tsp whole-grain mustard
  • 1 tbsp minced fresh dill, plus sprigs for garnish
  • 1 tsp salt
  • ½ tsp pepper
  • 8 slices of good bread (whole wheat or 7 grain works well)
  • 8 slices of smoked salmon (buy the best you can afford)
Method
  1. Place eggs in a saucepan large enough to accommodate them in a single layer. Fill pan with cold water, covering eggs by 1 inch. Bring water to a boil over medium-high heat. Turn off heat, cover and allow to sit for 11 minutes.  Once cooked, transfer to a bowl of ice water and allow to sit for 1-2 minutes.  Crack and peel eggs.
  2. Place eggs in the bowl of a food processor fitted with a steel blade.  Pulse about 10 times to break them up, do not puree.  Transfer chopped eggs to a bowl and add the mayonnaise, dill, salt & pepper.  Combine lightly with a fork.
  3. Toast the bread.  Lay one slice of salmon on each piece of bread, spoon egg salad onto salmon, garnish with a sprig of dill.  Serve at room temperature.
3.2.2802

Filed Under: Appetizers, Main Dishes, Salads Tagged With: egg, salad, salmon, smoked, tartine

Potato Fennel and Leek Soup

January 13, 2009 by Susan

PotatoFennelLeekSoupFinalR

Baby, it’s cold outside!  It was bound to happen sooner or later, I mean, it is winter.  I’m not exactly one of those ‘lovers of the cold weather’ types, I’m more of a lover of the spring and fall.  Seasons without extreme temperatures.  I am not an extremist, apparently!

On these frigid days it is great to come in out of the cold to a warm pot of soup bubbling away on the stove.  It soothes the soul.

This soup is quite easy to make and doesn’t take alot of time.  For something quick and easy the result is super delicious.  That’s a bonus in my book!

Here’s what you will need to serve approximately 6…

Recipe

3 tbsp butter

3 medium fennel, chopped (reserve some fronds)

1 large leek (white and pale green parts only) sliced thin

2-3 large russet potatoes, peeled – 2 inch chop (more potato = thicker soup)

5-6 cups chicken stock (low sodium)

Salt & Pepper to taste

Method

In a large stock pot melt the butter.  Once melted, add the fennel, fronds, leeks, salt & pepper.  Saute until soft, roughly 10 minutes.

Add the potatoes and the broth (which should cover all the ingredients) and bring to a boil.  Reduce heat slightly and allow to simmer for 15-20 minutes, partially covered.

Now it is time to puree the soup.  The easiest way to do this is with an immersion hand blender.  Just keep at it until it comes to a smooth consistency and most of the chunks of potatoes are gone.  I do like when there is one or two small chunks remaining.  If you don’t have an immersion blender things do get a bit more high-maintenance…you need to puree the liquid in batches in a food processor (or blender).  So, pour out a few ladles at a time and puree, being careful with the hot liquid.  Pour the pureed soup into a new pot.

Ladle into individual bowls and serve.  If you are having company over and you want to be all showy and stuff, you can put a piece of fennel frond in each bowl.


Potato Fennel and Leek Soup
 
Print
Author: Feasts And Fotos
Ingredients
  • 3 tbsp butter
  • 3 medium fennel, chopped (reserve some fronds)
  • 1 large leek (white and pale green parts only) sliced thin
  • 2-3 large russet potatoes, peeled - 2 inch chop (more potato = thicker soup)
  • 5-6 cups chicken stock (low sodium)
  • Salt & Pepper to taste
Method
  1. In a large stock pot melt the butter.  Once melted, add the fennel, fronds, leeks, salt & pepper.  Saute until soft, roughly 10 minutes.
  2. Add the potatoes and the broth (which should cover all the ingredients) and bring to a boil.  Reduce heat slightly and allow to simmer for 15-20 minutes, partially covered.
  3. Now it is time to puree the soup.  The easiest way to do this is with an immersion hand blender.  Just keep at it until it comes to a smooth consistency and most of the chunks of potatoes are gone.  I do like when there is one or two small chunks remaining.  If you don't have an immersion blender things do get a bit more high-maintenance...you need to puree the liquid in batches in a food processor (or blender).  So, pour out a few ladles at a time and puree, being careful with the hot liquid.  Pour the pureed soup into a new pot.
  4. Ladle into individual bowls and serve.  If you are having company over and you want to be all showy and stuff, you can put a piece of fennel frond in each bowl.
3.2.2802

Filed Under: Soup Tagged With: fennel, leek, potato, soup

  • « Previous Page
  • 1
  • …
  • 6
  • 7
  • 8
  • 9
  • 10
  • Next Page »
Hello and welcome to Feasts and Fotos!

Archives

Categories

Copyright © 2025 · Foodie Pro Theme by Shay Bocks · Built on the Genesis Framework · Powered by WordPress