FEASTS AND FOTOS

  • Home
  • About
  • Happenings
  • Contact
You are here: Home / Archives for Susan

Chicken and Orzo Frittata

July 13, 2011 by Susan


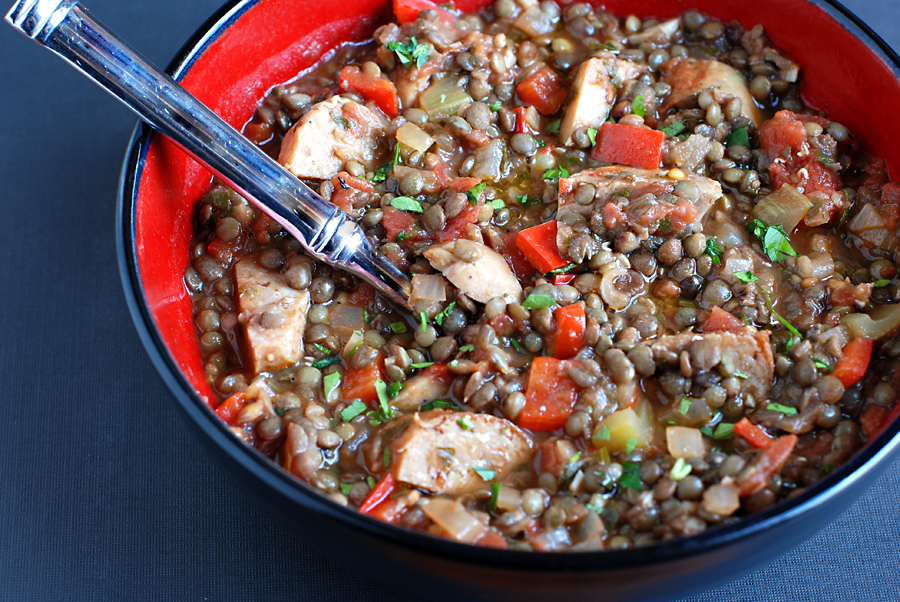
I am finally back in the kitchen!  Let me just say that morning sickness is no joke.  Or shall I say all day sickness.  Yes, that’s more accurate.  All.  Day.  Sickness.

But that phase seems to be mostly over and I can now stand up long enough to prepare some food!  Yay!  Since I took a few months off I decided to ease my way back into the kitchen by preparing some yummy things that could be eaten any time of day, since I now eat all day long.  This frittata is perfect, it can be eaten for breakfast, lunch, a light dinner with a side salad, a snack, heated or at room temperature.  And it’s a very substantial frittata with the inclusion of chicken and pasta.  It is filling and satisfying…and delicious.

Here’s what you need to make one frittata…


Recipe

3/4 cup orzo pasta

6 eggs

1/3 cup whole milk ricotta

1/4 cup creme fraiche (optional)

2 cooked chicken breasts, cubed (about 2 cups)

4 scallions, chopped

1/4 cup chopped Italian flat-leaf parsley

1/3 cup (heaping) diced roasted red bell peppers

1 teaspoon salt

1/4 teaspoon freshly ground black pepper


Method

Preheat the oven to 375 degrees F.

Bring a small pot of salted water to a boil over high heat. Add the orzo and cook until tender but still firm to the bite, stirring occasionally, about 8 – 10 minutes. Drain pasta.

In a large bowl combine the eggs, ricotta, and creme fraiche (if using) and stir until the eggs are beaten and the ingredients are combined. Add the cooked orzo, chicken, scallions, parsley, red bell peppers, salt, and pepper. Stir to combine.

Pour the mixture into a 1 1/2-quart baking dish. Bake for 25 – 30 minutes or until firm to the touch and the center is no longer soft. Turn on the broiler. Place the pan under the broiler until golden on top, about 5 minutes. It is best to not leave the stove while doing this, things have a way of burning quickly under the broiler.  Remove from the oven and let set for 5-10 minutes.  Cut into wedges and serve.

Recipe courtesy Giada DeLaurentiis

Chicken and Orzo Frittata
 
Print
Author: Feasts And Fotos
Ingredients
  • ¾ cup orzo pasta
  • 6 eggs
  • ⅓ cup whole milk ricotta
  • ¼ cup creme fraiche (optional)
  • 2 cooked chicken breasts, cubed (about 2 cups)
  • 4 scallions, chopped
  • ¼ cup chopped Italian flat-leaf parsley
  • ⅓ cup (heaping) diced roasted red bell peppers
  • 1 teaspoon salt
  • ¼ teaspoon freshly ground black pepper
Method
  1. Preheat the oven to 375 degrees F.
  2. Bring a small pot of salted water to a boil over high heat. Add the orzo and cook until tender but still firm to the bite, stirring occasionally, about 8 - 10 minutes. Drain pasta.
  3. In a large bowl combine the eggs, ricotta, and creme fraiche (if using) and stir until the eggs are beaten and the ingredients are combined. Add the cooked orzo, chicken, scallions, parsley, red bell peppers, salt, and pepper. Stir to combine.
  4. Pour the mixture into a 1½-quart baking dish. Bake for 25 - 30 minutes or until firm to the touch and the center is no longer soft. Turn on the broiler. Place the pan under the broiler until golden on top, about 5 minutes. It is best to not leave the stove while doing this, things have a way of burning quickly under the broiler. Remove from the oven and let set for 5-10 minutes. Cut into wedges and serve.
3.2.2802

Filed Under: Breakfast, Main Dishes, Pasta Tagged With: breakfast, chicken, frittata, light dinner, lunch, orzo

Spiced Pear Jam

May 6, 2011 by Susan

PearJamR

Mother’s Day is this Sunday and I can’t think of a better way to sweeten your mom’s day than with this pear jam.   It is slightly sweet, a little spicy and best of all – it is homemade.  What mom wouldn’t love that?

Here’s what you need to make approximately three 70 ml jars…

Recipe

7 large, ripe Bartlett pears, peeled, cored and cut into 1/2 inch pieces

2 cups sugar

10 cardamom pods, lightly crushed

1/4 cup lemon juice

1 tbsp honey

Method

In a large glass bowl toss the pears with the sugar and lemon juice.  Cover and refrigerate overnight.

Transfer the pears and their liquid to a wide, heavy pot and bring to a boil.  Put the crushed cardamom in a tea ball and add it to the pot. Cook the pears over a high heat, stirring frequently, until the liquid starts to thicken and the pears become translucent, about 10 minutes.  Remove the pot from the heat.

Place a metal spoon in the freezer (you will use this to test if the jam is cooked to the correct thickness).

Transfer one-third of the pears to a food processor and puree until smooth.  Add the puree back to the pot.  Boil over moderately high heat, stirring until the jam is very thick, about 5-10 minutes.

To test the jam, removed the chilled spoon from the freezer and drop a small amount of the pear jam on the back of the spoon and place back in the freezer for 30 seconds.  Remove the spoon again and tilt the spoon.  The jam should be thick and run down the spoon slowly.  If it is too runny, continue cooking the jam for a few minutes more, then test again.

Remove the tea ball and stir in the honey.

Ladle the jam into your jars, allow to cool completely, then cover and refrigerate for up to 2 months.

Adapted from Food & Wine/Blue Chair Fruit

Spiced Pear Jam
 
Print
Author: Feasts And Fotos
Ingredients
  • 7 large, ripe Bartlett pears, peeled, cored and cut into ½ inch pieces
  • 2 cups sugar
  • 10 cardamom pods, lightly crushed
  • ¼ cup lemon juice
  • 1 tbsp honey
Method
  1. In a large glass bowl toss the pears with the sugar and lemon juice.  Cover and refrigerate overnight.
  2. Transfer the pears and their liquid to a wide, heavy pot and bring to a boil.  Put the crushed cardamom in a tea ball and add it to the pot. Cook the pears over a high heat, stirring frequently, until the liquid starts to thicken and the pears become translucent, about 10 minutes.  Remove the pot from the heat.
  3. Place a metal spoon in the freezer (you will use this to test if the jam is cooked to the correct thickness).
  4. Transfer one-third of the pears to a food processor and puree until smooth.  Add the puree back to the pot.  Boil over moderately high heat, stirring until the jam is very thick, about 5-10 minutes.
  5. To test the jam, removed the chilled spoon from the freezer and drop a small amount of the pear jam on the back of the spoon and place back in the freezer for 30 seconds.  Remove the spoon again and tilt the spoon.  The jam should be thick and run down the spoon slowly.  If it is too runny, continue cooking the jam for a few minutes more, then test again.
  6. Remove the tea ball and stir in the honey.
  7. Ladle the jam into your jars, allow to cool completely, then cover and refrigerate for up to 2 months.
3.2.2802

Filed Under: Breakfast, Sweets Tagged With: cardamom, jam, pear

Lentil and Sausage Stew

March 25, 2011 by Susan

LentilSausageStew2RDespite the fact that it is technically spring, it is still cold outside!  When will this end?  Within a one week span one day was 70 degrees and gorgeous and another day it snowed.

Oiy.

Just when I thought the days of hot soups and stews were winding to an end I found myself standing over a pot of simmering lentil and sausage stew.  This stew has become one of our favorites this past winter.  Hearty and healthy, comforting and delicious.  I originally created this recipe using carrots instead of the red pepper that I used in this version.  I alternate depending on whichever I have on hand.  Also, using regular italian sausage is wonderful as well.  We use chicken in an effort to be a bit more healthy.  Both are equally yummy.

I prefer to use french lentils for this stew, they seem to hold their shape better.  But you can certainly use whichever type of lentils you have on hand, just be sure you don’t overcook them.

Here’s what you will need to serve 4…

Recipe

2 cups french lentils (1-15 oz bag), picked through and rinsed

5 cups water

4-6 large chicken sausage links

3 stalks celery, peeled and small diced

1 large onion, small diced

1 large red pepper, small diced (or carrots)

3 cloves garlic, minced

2 cloves garlic, peeled and left whole

1 tsp red pepper flakes

1 tbsp tomato paste

1 can whole peeled tomatoes, with their juice

2 cups low sodium chicken stock

2 large bay leaves

big pinch of dried thyme

1/2 bunch of fresh parsley, chopped

olive oil

salt & pepper to taste

Method

Turn the oven on to broil.

In a medium saucepan add the water, lentils, bay leaves and whole garlic cloves.  Bring to a boil, reduce heat to a simmer, cover and cook for approximately 30 minutes or until tender.

Meanwhile, in a large skillet heat a few tablespoons of olive oil.  Add onions, celery, red peppers (or carrots)  and red pepper flakes and saute for 10 minutes or until softened.  Add the tomato paste and stir into onion mixture for 2 minutes.  Add the minced garlic, salt & pepper and dried thyme and saute for 1 minute.

Crush the tomatoes with your hands (or an immersion blender) and add to the vegetables.  Add chicken stock as well.  Bring to a boil, reduce heat and simmer for 10-15 minutes.

Put your sausages on a sheet pan and place under the broiler for approximately 10 minutes, turning once during the cooking time.  Once cooked and nicely golden brown, remove from the oven and allow to cool a bit so you can handle them.  Once cooled slice them up.  I usually slice the sausage lengthwise, then cut each half into 1 inch chunks.

When the lentils have finished cooking add them and some of their cooking liquid to the pot with the veggies and tomato sauce.  At this time you can add the sausage to the pot as well.  Stir everything to combine and continue simmering over low heat for 10 minutes.  If you would like the stew more liquidy, add the remaining lentil liquid.

Turn off the heat and add alot of chopped parsley.  Mix well.

Feel free to sprinkle some parmigiano reggiano on top when serving.

Lentil and Sausage Stew
 
Print
Author: Feasts And Fotos
Ingredients
  • 2 cups french lentils (1-15 oz bag), picked through and rinsed
  • 5 cups water
  • 4-6 large chicken sausage links
  • 3 stalks celery, peeled and small diced
  • 1 large onion, small diced
  • 1 large red pepper, small diced (or carrots)
  • 3 cloves garlic, minced
  • 2 cloves garlic, peeled and left whole
  • 1 tsp red pepper flakes
  • 1 tbsp tomato paste
  • 1 can whole peeled tomatoes, with their juice
  • 2 cups low sodium chicken stock
  • 2 large bay leaves
  • big pinch of dried thyme
  • ½ bunch of fresh parsley, chopped
  • olive oil
  • salt & pepper to taste
Method
  1. Turn the oven on to broil.
  2. In a medium saucepan add the water, lentils, bay leaves and whole garlic cloves.  Bring to a boil, reduce heat to a simmer, cover and cook for approximately 30 minutes or until tender.
  3. Meanwhile, in a large skillet heat a few tablespoons of olive oil.  Add onions, celery, red peppers (or carrots)  and red pepper flakes and saute for 10 minutes or until softened.  Add the tomato paste and stir into onion mixture for 2 minutes.  Add the minced garlic, salt & pepper and dried thyme and saute for 1 minute.
  4. Crush the tomatoes with your hands (or an immersion blender) and add to the vegetables.  Add chicken stock as well.  Bring to a boil, reduce heat and simmer for 10-15 minutes.
  5. Put your sausages on a sheet pan and place under the broiler for approximately 10 minutes, turning once during the cooking time.  Once cooked and nicely golden brown, remove from the oven and allow to cool a bit so you can handle them.  Once cooled slice them up.  I usually slice the sausage lengthwise, then cut each half into 1 inch chunks.
  6. When the lentils have finished cooking add them and some of their cooking liquid to the pot with the veggies and tomato sauce.  At this time you can add the sausage to the pot as well.  Stir everything to combine and continue simmering over low heat for 10 minutes.  If you would like the stew more liquidy, add the remaining lentil liquid.
  7. Turn off the heat and add alot of chopped parsley.  Mix well.
  8. Feel free to sprinkle some parmigiano reggiano on top when serving.
3.2.2802

Filed Under: Soup Tagged With: gluten free, healthy, hearty, lentil, sausage, stew, wheat free

Buckwheat Breakfast Bowl

March 1, 2011 by Susan

Along the crazy train of trying to conceive I found out that I have hypothyroidism and in addition was told to try to severely limit (aka eliminate) wheat from my diet (as well as dairy and sugar).  Ugh.  It has been painful, people.

I am completely astonished at how many unsuspecting foods contain wheat.  Soy sauce?  Come on now.  Not that I eat much soy sauce at all, but it’s just an example of a product that I would never think has something like wheat in it!

I already eat relatively healthy and very rarely eat any processed or packaged foods.  As a result I am not having such a hard time with wheat free dinners.  The same goes for lunches, I usually have something that was leftover from dinner earlier in the week or a big bowl of quinoa with chicken or kale.  Breakfasts, on the other hand, get me the most upset.  There are only a VERY few things that are acceptable to eat.  And that can get very boring.

This past weekend I set out to create a type of ‘breakfast bowl’ containing something that would actually make me feel full.  One of the new grains I have tried cooking with is buckwheat (despite the name it does not contain wheat), which has a nutty flavor.  I have had it before in restaurants and liked it, so I thought it would be a great base for my breakfast bowl.  Then I basically chose a few of my favorite veggies and added eggs to it – voila!

Although this recipe does have a few seperate components going at the same time, this dish is not difficult to make and it tastes good.  Also, it holds up well in the fridge, so you really can get away with making a big batch of it to last you a few days.  Most importantly, you feel like you are eating something substantial and don’t feel as if you are sacrificing.  Which basically, you are.  Because all you can think about is having a big, fat muffin.

Here’s what you will need to serve 4…

Recipe

1 cup buckwheat

2 cups water

1 box cremini mushrooms, cleaned and sliced thick

1 small head of broccoli, cut into medium-sized florets

3 whole eggs

3 egg whites

2-3 tbsp chopped parsley

1-2 tsp truffle oil

salt & pepper

olive oil

Method

Preheat oven to 425 degrees.

Pour 2 cups of water into a saucepan and bring to boil.  Add 1/2 teaspoon of salt to the water and stir in buckwheat, reduce heat to a simmer, cover and cook approximately 7-10 minutes.

In the meantime, heat up a few tablespoons of oil in a large skillet.  Add the mushrooms and saute until softened, 5-6 minutes.  While the mushrooms are cooking lay the broccoli florets on a sheet pan and sprinkle with olive oil, salt & pepper.  Mix with your hands to coat all the broccoli.  Roast in the oven for 10-12 minutes, or until lightly browned, flipping once after 6 minutes or so.  Allow to cool for a few minutes, then roughly chop.

Now for the eggs – basically just scramble the eggs as you would do normally.  Once the eggs are cooked I like to roughly break up the eggs with the tip of my spatula right in the pan.

All that is left now is to assemble all the individual components.  Into the large skillet with the mushrooms add the truffle oil and stir to combine.  Add the buckwheat, broccoli and eggs, mixing well.  Finally, add the parsley.

Buckwheat Breakfast Bowl
 
Print
Author: Feasts And Fotos
Ingredients
  • 1 cup buckwheat
  • 2 cups water
  • 1 box cremini mushrooms, cleaned and sliced thick
  • 1 small head of broccoli, cut into medium-sized florets
  • 3 whole eggs
  • 3 egg whites
  • 2-3 tbsp chopped parsley
  • 1-2 tsp truffle oil
  • salt & pepper
  • olive oil
Method
  1. Preheat oven to 425 degrees.
  2. Pour 2 cups of water into a saucepan and bring to boil.  Add ½ teaspoon of salt to the water and stir in buckwheat, reduce heat to a simmer, cover and cook approximately 7-10 minutes.
  3. In the meantime, heat up a few tablespoons of oil in a large skillet.  Add the mushrooms and saute until softened, 5-6 minutes.  While the mushrooms are cooking lay the broccoli florets on a sheet pan and sprinkle with olive oil, salt & pepper.  Mix with your hands to coat all the broccoli.  Roast in the oven for 10-12 minutes, or until lightly browned, flipping once after 6 minutes or so.  Allow to cool for a few minutes, then roughly chop.
  4. Now for the eggs - basically just scramble the eggs as you would do normally.  Once the eggs are cooked I like to roughly break up the eggs with the tip of my spatula right in the pan.
  5. All that is left now is to assemble all the individual components.  Into the large skillet with the mushrooms add the truffle oil and stir to combine.  Add the buckwheat, broccoli and eggs, mixing well.  Finally, add the parsley.
3.2.2802

Filed Under: Breakfast, Rice and Grains Tagged With: breakfast, broccoli, buckwheat, eggs, healthy, mushrooms, wheat free

Mushroom Soup

January 18, 2011 by Susan

MushroomSoupR

I have become slightly obsessed with soups this winter.  Mainly because it has been absolutely freezing cold here in NYC over the past month.  And let’s not forget about the 3 snowstorms we have already had.  I am not a cold-weather-winter person.  At all.  Soups, however, make it all somewhat bearable.

In light of this obsession I have been scouring recipes for some interesting new soups to add to my repertoire.  I could not find one specific recipe that knocked me over, so I decided to create my own.  Ideally I like to pick a new soup each week and make a big pot of it.  I think having 5 excellent soups in the rotation would be ideal.  This mushroom soup is one of the five, for sure.

If you like mushrooms you will love this soup.  It is luscious and complex.  There is not one drop of cream in this soup so I hereby declare it healthy.  And if I can impress one thought upon you right now it would be this…do not skip the sherry!  And I wouldn’t skip the truffle oil either, come to think of it.  Without them this soup is just ok.  These two ingredients take this soup from average to outstanding.

Here’s what you will need to make a big pot that serves about 8-10…

Recipe

32 ounces of mushrooms, I use a mix of shiitake (sliced) and crimini (cut in half or quarters)

2 tbsp butter

2 tbsp olive oil

1 large onion, diced

1 large leek, white and light green part only, washed and sliced

6 cloves garlic, smashed

12-15 sprigs thyme, tied in a bundle

1 large Idaho potato, peeled and cut into 3/4 inch cubes

8 cups chicken stock

4 oz dry sherry

2 tsp white truffle oil

palmful of parsley leaves

salt & pepper

chopped parsley, for garnish

Method

In a large soup pot heat the olive oil and butter.  As the butter is melting add the bundle of thyme and stir it around in the butter and oil for a few seconds.  Add the onion, leek (wash really well, these suckers are very dirty!) and a pinch of salt & pepper.  Saute over medium heat for 5-6 minutes.  Add the mushrooms and garlic and cook for 8-10 minutes.

Next add the potato and chicken stock.  Bring to a boil, lower heat and simmer for one hour.  After 45 minutes of cooking add the parsley leaves, then allow to continue cooking for the remaining 15 minutes.  Remove thyme bundle.

Puree the mixture with an immersion blender (love this tool!) or in a blender or food processor until smooth.  As you can see from the photo above, I do not puree this soup into oblivion, I like the rusticity of a few small pieces of mushroom every now and again.  Those types of things don’t get me upset.

Once the mixture is pureed (to the consistency of your choosing) add the sherry and truffle oil and stir with a spoon to combine.  As I mentioned above, please don’t skip these last two ingredients.  Trust me.

Recipe inspired by various sources.

Mushroom Soup
 
Print
Author: Feasts And Fotos
Ingredients
  • 32 ounces of mushrooms, I use a mix of shiitake (sliced) and crimini (cut in half or quarters)
  • 2 tbsp butter
  • 2 tbsp olive oil
  • 1 large onion, diced
  • 1 large leek, white and light green part only, washed and sliced
  • 6 cloves garlic, smashed
  • 12-15 sprigs thyme, tied in a bundle
  • 1 large Idaho potato, peeled and cut into ¾ inch cubes
  • 8 cups chicken stock
  • 4 oz dry sherry
  • 2 tsp white truffle oil
  • palmful of parsley leaves
  • salt & pepper
  • chopped parsley, for garnish
Method
  1. In a large soup pot heat the olive oil and butter.  As the butter is melting add the bundle of thyme and stir it around in the butter and oil for a few seconds.  Add the onion, leek (wash really well, these suckers are very dirty!) and a pinch of salt & pepper.  Saute over medium heat for 5-6 minutes.  Add the mushrooms and garlic and cook for 8-10 minutes.
  2. Next add the potato and chicken stock.  Bring to a boil, lower heat and simmer for one hour.  After 45 minutes of cooking add the parsley leaves, then allow to continue cooking for the remaining 15 minutes.  Remove thyme bundle.
  3. Puree the mixture with an immersion blender (love this tool!) or in a blender or food processor until smooth.  As you can see from the photo above, I do not puree this soup into oblivion, I like the rusticity of a few small pieces of mushroom every now and again.  Those types of things don't get me upset.
  4. Once the mixture is pureed (to the consistency of your choosing) add the sherry and truffle oil and stir with a spoon to combine.  As I mentioned above, please don't skip these last two ingredients.  Trust me.
3.2.2802

Filed Under: Soup Tagged With: dinner, first course, healthy, lunch, mushroom, soup

Christmas Bark

December 30, 2010 by Susan

Bark2R

I love to make this Christmas Bark every year for the holidays.  It’s just so festive looking with the red cranberries and the green pistachios.  You can find that peppermint bark everywhere during the holidays, I prefer this version, it’s a little different, somewhat unexpected.  Plus, it makes me feel like I’m eating something kinda good for me, with the dark chocolate and nuts.  Kinda.

This treat is very easy to make which means there is still time to whip up a batch to bring as a hostess gift to your New Year’s Eve party.  You might want to double this recipe, you will want to keep some for yourself!

Happy New Year everyone!  

Here’s what you will need to make approximately 10 medium sized pieces…

Recipe 

4 oz semi-sweet chocolate

4 oz bittersweet chocolate 

2-3 oz white chocolate

dried cranberries (a handful)

pistachios, shelled and roughly chopped (a handful)

dried apricots, rough chopped (a handful)

Method

Line a large baking sheet with parchment paper.

Break up all the chocolate into small pieces and place approximately 3 oz of the semi-sweet chocolate and 3 oz of the bittersweet chocolate in a microwave safe bowl.  Keep the white chocolate separate for later use.  Microwave in 30 second increments, stirring with a spatula after each 30 seconds, until 90% melted.  Remove bowl from microwave and stir until all the chocolate has melted.

Immediately add the remaining semi-sweet and bittersweet chocolate pieces to the bowl and stir until melted.  This is my lazy man’s way of tempering chocolate.  I have absolutely no patience for dealing with a candy thermometer, etc.

Ok, your dark chocolate is done.  In another microwave safe bowl do the same process with the white chocolate.

While the white chocolate is melting pour the dark chocolate onto the parchment lined baking sheet.  With an offset spatula spread out the chocolate to an even thickness of your choice.  You can see from the above photo the thickness I prefer.

Next, take the melted white chocolate and drizzle it all over the dark chocolate with a spoon.  You can add as much or as little of the white chocolate as you want.  With the edge of a sharp knife, swirl the chocolate.  Next sprinkle the dried cranberries, pistachios and dried apricots all over the chocolate, all the way to the edges.  Again, you can add as much or as little as you want.  Ever so slightly press some of the larger pieces into the still liquid chocolate.

Place the baking tray into the fridge until the chocolate is firm, approximately 30 minutes, although this really depends on how thick you made your bark.  Once firm, with your hands, break  the chocolate into large chunks.

Store in refrigerator until just ready to eat.


Christmas Bark
 
Print
Author: Feasts And Fotos
Ingredients
  • 4 oz semi-sweet chocolate
  • 4 oz bittersweet chocolate
  • 2-3 oz white chocolate
  • dried cranberries (a handful)
  • pistachios, shelled and roughly chopped (a handful)
  • dried apricots, rough chopped (a handful)
Method
  1. Line a large baking sheet with parchment paper.
  2. Break up all the chocolate into small pieces and place approximately 3 oz of the semi-sweet chocolate and 3 oz of the bittersweet chocolate in a microwave safe bowl.  Keep the white chocolate separate for later use.  Microwave in 30 second increments, stirring with a spatula after each 30 seconds, until 90% melted.  Remove bowl from microwave and stir until all the chocolate has melted.
  3. Immediately add the remaining semi-sweet and bittersweet chocolate pieces to the bowl and stir until melted.  In another microwave safe bowl do the same process with the white chocolate.
  4. While the white chocolate is melting pour the dark chocolate onto the parchment lined baking sheet.  With an offset spatula spread out the chocolate to an even thickness of your choice.
  5. Next, take the melted white chocolate and drizzle it all over the dark chocolate with a spoon.  You can add as much or as little of the white chocolate as you want.  With the edge of a sharp knife, swirl the chocolate.  Next sprinkle the dried cranberries, pistachios and dried apricots all over the chocolate, all the way to the edges.  Again, you can add as much or as little as you want.  Ever so slightly press some of the larger pieces into the still liquid chocolate.
3.2.2802

Filed Under: Sweets Tagged With: bark, chocolate, christmas, dried fruit

Rugelach

December 20, 2010 by Susan

RugelachInTinR

It’s Christmas Cookie time!

These rugelach have made an appearance in my house every Christmas for the past 5 or so years.  I love them.  Everyone loves them.  They are made with…cream cheese dough.  What’s not to love?!

I will admit, these cookies are a labor of love.  Slightly time consuming and you need to exhibit a fair amount of patience, first allowing the dough to chill, gently rolling each little cookie up, then waiting for the rolled up cookies to chill for 30 minutes prior to baking.  In general I don’t have all that much patience, particularly if it involves waiting to eat cookies, but oh, is it worth it.  Trust me.  Just the smell of these baking will rock your world.

Here’s what you will need to make 4 dozen cookies…

Recipe

8 ounces cream cheese, at room temperature

1/2 pound unsalted butter, at room temperature

1/4 cup granulated sugar, plus 9 tablespoons

1/4 teaspoon kosher salt

1 teaspoon pure vanilla extract

2 cups all-purpose flour

1/4 cup light brown sugar, packed

1 1/2 teaspoons ground cinnamon

3/4 cup raisins

1 cup walnuts, finely chopped

1/2 cup apricot preserves, pureed in a food processor (I also love blackberry)

1 egg beaten with 1 tablespoon milk, for egg wash

Method

Preheat oven to 350 degrees.  Line a baking sheet with parchment paper.

Cream the cheese and butter in the bowl of an electric mixer fitted with the paddle attachment until light.  Add 1/4 cup granulated sugar, salt and vanilla.  With mixer on low add the flour and mix until just combined.  Dump the dough out onto a well floured board and roll it into a ball.  Cut the ball in quarters, flatten each quarter slightly then wrap each piece in plastic and refrigerate for at least one hour, up to a few days.

To make the filling:  combine 6 tablespoons of granulated sugar, brown sugar, 1/2 teaspoon cinnamon, raisins and walnuts.  (I always have some leftover filling at the end).

On a well floured board, roll each ball of dough into a 9 inch circle.  Spread the dough with about 2 tablespoons of preserves (all the way to the edge) and sprinkle with approximately 1/2 cup of the filling.  There should only be a thin layer of preserves to act as the ‘glue’.  Resist the temptation to put too much preserves or filling on the dough.  Press the filling lightly into the dough.  Cut the circle into 12 equal wedges, first cutting the whole circle in quarters, then each quarter into thirds.  At this point I look at each triangle and determine if any of them are a bit short on nuts or raisins.  If so, I just add what is needed.  Starting with the wide edge, roll up each wedge.  Place rolled up cookies, points tucked under, on baking sheet.  Chill for 30 minutes.

Brush each cookie with the egg wash.  Combine 3 tablespoons granulated sugar and 1 teaspoon cinnamon and sprinkle on the cookies.  Bake for 18 to 25 minutes or until lightly browned.  Place cookies on a wire rack to cool before devouring them.

Recipe courtesy of Ina Garten.

Rugelach
 
Print
Author: Feasts And Fotos
Ingredients
  • 8 ounces cream cheese, at room temperature
  • ½ pound unsalted butter, at room temperature
  • ¼ cup granulated sugar, plus 9 tablespoons
  • ¼ teaspoon kosher salt
  • 1 teaspoon pure vanilla extract
  • 2 cups all-purpose flour
  • ¼ cup light brown sugar, packed
  • 1½ teaspoons ground cinnamon
  • ¾ cup raisins
  • 1 cup walnuts, finely chopped
  • ½ cup apricot preserves, pureed in a food processor (I also love blackberry)
  • 1 egg beaten with 1 tablespoon milk, for egg wash
Method
  1. Preheat oven to 350 degrees.  Line a baking sheet with parchment paper.
  2. Cream the cheese and butter in the bowl of an electric mixer fitted with the paddle attachment until light.  Add ¼ cup granulated sugar, salt and vanilla.  With mixer on low add the flour and mix until just combined.  Dump the dough out onto a well floured board and roll it into a ball.  Cut the ball in quarters, flatten each quarter slightly then wrap each piece in plastic and refrigerate for at least one hour, up to a few days.
  3. To make the filling:  combine 6 tablespoons of granulated sugar, brown sugar, ½ teaspoon cinnamon, raisins and walnuts.  (I always have some leftover filling at the end).
  4. On a well floured board, roll each ball of dough into a 9 inch circle.  Spread the dough with about 2 tablespoons of preserves (all the way to the edge) and sprinkle with approximately ½ cup of the filling.  There should only be a thin layer of preserves to act as the 'glue'.  Resist the temptation to put too much preserves or filling on the dough.  Press the filling lightly into the dough.  Cut the circle into 12 equal wedges, first cutting the whole circle in quarters, then each quarter into thirds.  At this point I look at each triangle and determine if any of them are a bit short on nuts or raisins.  If so, I just add what is needed.  Starting with the wide edge, roll up each wedge.  Place rolled up cookies, points tucked under, on baking sheet.  Chill for 30 minutes.
  5. Brush each cookie with the egg wash.  Combine 3 tablespoons granulated sugar and 1 teaspoon cinnamon and sprinkle on the cookies.  Bake for 18 to 25 minutes or until lightly browned.  Place cookies on a wire rack to cool before devouring them.
3.2.2802

Filed Under: Sweets Tagged With: cookie, dessert, rugelach

Kale Chips

November 15, 2010 by Susan

Yes, kale chips.  Don’t be scared – they are delicious.  Seriously.

I know these have been around awhile, but I am just now getting on the bandwagon.  I’ve been busy lately.  Ya know…getting married, going on a dreamy honeymoon, redoing my kitchen.  New kitchen!  It is brand new and gorgeous I am no longer embarrassed to have dinner guests over.  So in they come!

These kale chips are an amazing treat to serve with appetizers.  The first thing everyone says upon seeing a huge bowl of these is, not surprisingly, “what is THAT?”  And once I respond “oh, those are kale chips, give them a try” I  see fear on their faces.  Fear.  But then they bravely give them a try and an onslaugh of questions begin.  KALE chips?  How did you do this?  I need the recipe.  How did you get them so crispy?  These are amazing.  How did you ever think of these?  Why haven’t I had these before? 

And the next thing you know the entire bowl is gone.

Interestingly enough, once baked these kale chips become very crispy yet extremely delicate.  Do not forcefully jam your hand into the bowl and grab a palmful of them.  They will practically disintegrate.  Instead, grab one at a time, gingerly, with respect.  And when you place it in your mouth you will notice them almost melting onto your tongue.   They are incredibly light, making it easy to eat 75 chips in one sitting.  But it’s kale!

In my personal opinion these chips are genius.  Turn a nutrient-dense dark green leafy vegetable into a crispy snack that you can actually feel zero guilt about eating?  Win-win people.  Not only will these be the topic of conversation at your next dinner party they will give your guest something interesting to look at with each bite.

Each chip is like a piece of art.

Here’s what you will need to make a large bowl of chips…

Recipe

1 large bunch of kale (with the curly tops)

1 tbsp extra virgin olive oil (approximately)

kosher salt

pinch of pepper

(garlic powder, cayenne pepper) optional alternatives

Method

Preheat your oven to 350 degrees.  Line 2 or 3 cookie sheets with parchment paper.

Remove kale leaves from their stems with a knife.  I basically just lay the kale leaf on its side, folding one side of the leaf over the other.  This leaves the stem on one edge.  With a knife simply cut out the stem.

Cut or rip the leaves into various sizes being sure to leave some of the larger leaves whole.  Wash and dry the leaves.

Lay kale chips on your tray.  On each tray you only want enough leaves so they can lay in one single layer. Drizzle with olive oil and sprinkle generously with salt.  I usually then add a small pinch of pepper.  (If you want to jazz them up with some extra spices, now is the time).  With your hands mix all the kale together making sure every leaf is sufficiently coated with olive oil.

Spread the leaves out into that single layer I was talking about, don’t overlap or overcrowd.  Bake in the oven for 11 minutes.

Allow kale to cool slightly then gently arrange in a bowl or on a platter.


Kale Chips
 
Print
Author: Feasts And Fotos
Ingredients
  • 1 large bunch of kale (with the curly tops)
  • 1 tbsp extra virgin olive oil (approximately)
  • kosher salt
  • pinch of pepper
  • (garlic powder, cayenne pepper) optional alternatives
Method
  1. Preheat your oven to 350 degrees.  Line 2 or 3 cookie sheets with parchment paper.
  2. Remove kale leaves from their stems with a knife.  I basically just lay the kale leaf on its side, folding one side of the leaf over the other.  This leaves the stem on one edge.  With a knife simply cut out the stem.
  3. Cut or rip the leaves into various sizes being sure to leave some of the larger leaves whole.  Wash and dry the leaves.
  4. Lay kale chips on your tray.  On each tray you only want enough leaves so they can lay in one single layer. Drizzle with olive oil and sprinkle generously with salt.  I usually then add a small pinch of pepper.  (If you want to jazz them up with some extra spices, now is the time).  With your hands mix all the kale together making sure every leaf is sufficiently coated with olive oil.
  5. Spread the leaves out into that single layer I was talking about, don't overlap or overcrowd.  Bake in the oven for 11 minutes.
3.2.2802

Filed Under: Appetizers, Snacks Tagged With: chips, greens, healthy, kale, snack

Pumpkin Walnut Muffins

November 4, 2010 by Susan

PumpkinMuffinFINALR

When the cold weather starts rolling in and fall is in the air I immediately start making baked items involving pumpkin.  It’s mandatory, isn’t it?

A few years back I posted my favorite pumpkin spice bread recipe, it’s my go-to pumpkin bread.  This year I made a few changes to that recipe and turned that delicious bread into adorable muffins.  I even bake them up in cupcake tins for a smaller portion size (pictured above).  I find that the muffin and/or cupcake shape is a bit more transportable than the loaf and who wouldn’t appreciate that?  Running out the door?  Just grab one and go.  And let’s face it, they are very cute.  Nothing makes me feel more like a kid again than eating cupcakes.  Spread some cream cheese frosting on top of these cuties and just try to not eat five of them.  In one sitting.

These muffins are very moist and the addition of the walnuts provides a wonderful crunch.  In my opinion they are terrific eaten as-is.  But if you so choose, feel free to slice open and slather on some butter.  Or top with some regular cream cheese.  Or better yet – spread that cream cheese frosting on top.

Go ahead, bring out that kid in you!

Here’s what you need to make approximately 12 cupcakes or 8 muffins…

Recipe

1 cup regular flour

2/3 cups whole wheat flour

1 teaspoon baking soda

3/4 teaspoon ground cinnamon

1/4 teaspoon ground ginger

1/4 teaspoon ground cloves

1/4  teaspoon salt

1 and 1/3 cups sugar

1/3 cup vegetable oil

1 cup plus 2 tablespoons canned unsweetened pumpkin

1/2 cup chopped walnuts, plus a few extra for topping

1 large egg, room temperature

Method

Preheat oven to 350 degrees.   Spray muffin tin or cupcake tin with cooking spray.  If using a cupcake tin, add your cupcake liners if you so choose.

Mix first seven ingredients together in a bowl with a whisk until well combined.

Combine sugar, oil and pumpkin in the bowl of electric mixer.  Beat at medium speed until smooth.  Add egg, beating until well blended.  Gradually add dry ingredients, beating at a low speed until blended.  Add chopped walnuts to the batter and gently fold in using a spatula or wooden spoon.  Transfer batter to tin.  If you want them to look extra special place a few broken pieces of walnuts on top of each.  Not only does this make them look great but it also lets people know there are walnuts inside!

Bake for approximately 20-35 minutes, depending on the size of your tin.  You want them to be golden on top, firm to the touch and a when you insert a wooden pick in the center it comes out clean.  Let cool in pan on a wire rack for 5 minutes then remove from pan and allow to cool slightly.

Dig in!


Pumpkin Walnut Muffins
 
Print
Author: Feasts And Fotos
Ingredients
  • 1 cup regular flour
  • ⅔ cups whole wheat flour
  • 1 teaspoon baking soda
  • ¾ teaspoon ground cinnamon
  • ¼ teaspoon ground ginger
  • ¼ teaspoon ground cloves
  • ¼  teaspoon salt
  • 1 and ⅓ cups sugar
  • ⅓ cup vegetable oil
  • 1 cup plus 2 tablespoons canned unsweetened pumpkin
  • ½ cup chopped walnuts, plus a few extra for topping
  • 1 large egg, room temperature
Method
  1. Preheat oven to 350 degrees.   Spray muffin tin or cupcake tin with cooking spray.  If using a cupcake tin, add your cupcake liners if you so choose.
  2. Mix first seven ingredients together in a bowl with a whisk until well combined.
  3. Combine sugar, oil and pumpkin in the bowl of electric mixer.  Beat at medium speed until smooth.  Add egg, beating until well blended.  Gradually add dry ingredients, beating at a low speed until blended.  Add chopped walnuts to the batter and gently fold in using a spatula or wooden spoon.  Transfer batter to tin.  If you want them to look extra special place a few broken pieces of walnuts on top of each.  Not only does this make them look great but it also lets people know there are walnuts inside!
  4. Bake for approximately 20-35 minutes, depending on the size of your tin.  You want them to be golden on top, firm to the touch and a when you insert a wooden pick in the center it comes out clean.  Let cool in pan on a wire rack for 5 minutes then remove from pan and allow to cool slightly.
3.2.2802

Filed Under: Breakfast, Sweets Tagged With: breakfast, dessert, muffins, pumpkin, walnut

Zucchini Salad

September 23, 2010 by Susan


Isn’t this pretty?  Considering we eat with our eyes first, this is a very good start.

The follow up…the flavor, does not disappoint.  It’s bright and refreshing making it a wonderful first course in the warmer months or a perfect side dish with something more hearty, like a steak.

One of the many reasons I love this salad is because, although I call it a salad, there are no leaves to be found!  So, it’s different from the norm and lord knows it’s important to keep things changing from one night to the next.  Another reason I love it – it’s so simple to make.  And I love simple, especially when it’s warm out.  There are just a few ingredients involved and you do not need to use a heat element.  Everything is raw.

You will, however, need a mandolin.  The key to this salad is to make the slices of zucchini paper-thin.  I suppose you could try slicing the zucchini by hand, but I’m sure that could make a person nuts.  Using a mandolin is quick and easy…just be careful of your fingers.  You don’t want to slice anything important off.

Here’s what you will need to serve 2 people…

Recipe

1 large zucchini

1 small leek, white and light green part only, sliced into paper-thin rounds

4-5 tbsp ricotta

1/2 lemon, juiced

1-2 tbsp extra virgin olive oil

1 tbsp parsley, finely chopped

1 tbsp dill, finely chopped

salt & pepper, to taste

Method

First, slice the leek into paper-thin rounds.  Put the rounds in a bowl filled with water, swish them around a bit and then let the leeks soak for a few minutes, allowing all the sand and dirt to fall to the bottom of the bowl.  Gently pull out the leeks, being careful not to stir up the dirt on the bottom.  Give them a final rinse and place on paper towels to dry.

Next, get out that mandolin and start slicing the zucchini into paper-thin rounds.  It helps to make a very straight first cut with the knife when you cut the stem off.  Place all the zucchini in an overlapping pattern on a pretty platter.

Sprinkle the zucchini rounds with the lemon juice, olive oil, salt & pepper.  Place a piece of plastic wrap over it and put in the fridge for at least 15 minutes.  I usually let mine sit for about 30 minutes, or until dinner is ready.

Just before serving, sprinkle the leeks over the zucchini, putting on as many or as little as you prefer.  Next, scatter around small dollops of ricotta cheese all over the zucchini, again using as much or as little as you like.  Finally, sprinkle the parsley and dill over the entire plate.  I also give it a final spritz of lemon juice just before serving.

Recipe adapted from Tyler Florence’s Zucchini Carpaccio


Zucchini Salad
 
Print
Author: Feasts And Fotos
Ingredients
  • 1 large zucchini
  • 1 small leek, white and light green part only, sliced into paper-thin rounds
  • 4-5 tbsp ricotta
  • ½ lemon, juiced
  • 1-2 tbsp extra virgin olive oil
  • 1 tbsp parsley, finely chopped
  • 1 tbsp dill, finely chopped
  • salt & pepper, to taste
Method
  1. First, slice the leek into paper-thin rounds.  Put the rounds in a bowl filled with water, swish them around a bit and then let the leeks soak for a few minutes, allowing all the sand and dirt to fall to the bottom of the bowl.  Gently pull out the leeks, being careful not to stir up the dirt on the bottom.  Give them a final rinse and place on paper towels to dry.
  2. Next, get out that mandolin and start slicing the zucchini into paper-thin rounds.  It helps to make a very straight first cut with the knife when you cut the stem off.  Place all the zucchini in an overlapping pattern on a pretty platter.
  3. Sprinkle the zucchini rounds with the lemon juice, olive oil, salt & pepper.  Place a piece of plastic wrap over it and put in the fridge for at least 15 minutes.  I usually let mine sit for about 30 minutes, or until dinner is ready.
  4. Just before serving, sprinkle the leeks over the zucchini, putting on as many or as little as you prefer.  Next, scatter around small dollops of ricotta cheese all over the zucchini, again using as much or as little as you like.  Finally, sprinkle the parsley and dill over the entire plate.  I also give it a final spritz of lemon juice just before serving.
3.2.2802

Filed Under: Salads Tagged With: healthy, leek, raw, ricotta, salad, side dish, vegetarian, zucchini

  • « Previous Page
  • 1
  • 2
  • 3
  • 4
  • 5
  • 6
  • …
  • 10
  • Next Page »
Hello and welcome to Feasts and Fotos!

Archives

Categories

Copyright © 2025 · Foodie Pro Theme by Shay Bocks · Built on the Genesis Framework · Powered by WordPress